CENTOS 7 安装 ORACLE 19C
1.版本选择
centos 8会在2021年底结束,centos 7 会持续支持至2024年
oracle 19c是Long Term,支持会到2026年
19c需要运行在linux7.5以上的系统,7.5以下可能会存在bug
故选择cento7.9+oracle19c。
2.磁盘规划
最优是数据,redo日志,归档日志分开存放在不同的磁盘:
/data:用于存放数据
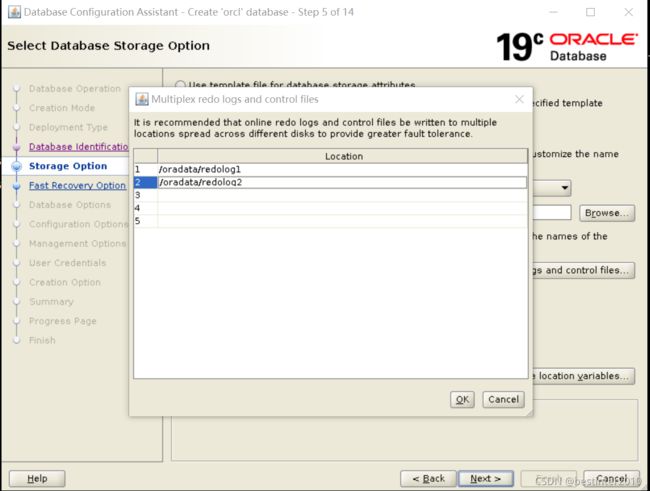
/redolog1:用于存放redolog
/redolog2:用于冗余存放redolog,防止redo损坏导致数据库故障
/archivelog1:用于存放归档日志
/archivelog2:用于冗余存放归档日志(归档日志的损坏并不会影响数据库运行,一般可以不进行冗余,如发现损坏,及时做好rman备份即可)
3.关闭防火墙
防火墙是一定要一定要关闭的
#systemctl stop firewalld.service
关闭操作系统自启动
#systemctl disable firewalld.service
检查关闭情况
systemctl status firewalld.service
4.关闭selinux
编辑/etc/selinux/config 文件
[root@localhost ~]# cat /etc/selinux/config

# This file controls the state of SELinux on the system.
# SELINUX= can take one of these three values:
#     enforcing - SELinux security policy is enforced.
#     permissive - SELinux prints warnings instead of enforcing.
#     disabled - No SELinux policy is loaded.
SELINUX=disabled
# SELINUXTYPE= can take one of three values:
#     targeted - Targeted processes are protected,
#     minimum - Modification of targeted policy. Only selected processes are protected.
#     mls - Multi Level Security protection.
SELINUXTYPE=targeted
5.关闭NUMA
官方建议在Linux Redhat7的环境中建议关闭NUMA,不然以后可能影响到数据库性能
[root@localhost ~]# grubby --default-kernel
/boot/vmlinuz-3.10.0-1160.el7.x86_64
[root@localhost ~]# grubby --info  /boot/vmlinuz-3.10.0-1160.el7.x86_64
index=0
kernel=/boot/vmlinuz-3.10.0-1160.el7.x86_64
args="ro rd.lvm.lv=centos/root rd.lvm.lv=centos/swap rhgb quiet LANG=en_US.UTF-8"
root=/dev/mapper/centos-root
initrd=/boot/initramfs-3.10.0-1160.el7.x86_64.img
title=CentOS Linux (3.10.0-1160.el7.x86_64) 7 (Core)
[root@localhost ~]# grubby --args=numa=off --update-kernel /boot/vmlinuz-3.10.0-1160.el7.x86_64
[root@localhost ~]# grubby --info  /boot/vmlinuz-3.10.0-1160.el7.x86_64
index=0
kernel=/boot/vmlinuz-3.10.0-1160.el7.x86_64
args="ro rd.lvm.lv=centos/root rd.lvm.lv=centos/swap rhgb quiet LANG=en_US.UTF-8 numa=off"
root=/dev/mapper/centos-root
initrd=/boot/initramfs-3.10.0-1160.el7.x86_64.img
title=CentOS Linux (3.10.0-1160.el7.x86_64) 7 (Core)

重启系统

[root@localhost ~]# grubby --info  /boot/vmlinuz-3.10.0-1160.el7.x86_64
index=0
kernel=/boot/vmlinuz-3.10.0-1160.el7.x86_64
args="ro rd.lvm.lv=centos/root rd.lvm.lv=centos/swap rhgb quiet LANG=en_US.UTF-8 numa=off"
root=/dev/mapper/centos-root
initrd=/boot/initramfs-3.10.0-1160.el7.x86_64.img
title=CentOS Linux (3.10.0-1160.el7.x86_64) 7 (Core)
[root@localhost ~]# grep -i numa /var/log/dmesg
[    0.000000] Command line: BOOT_IMAGE=/vmlinuz-3.10.0-1160.el7.x86_64 root=/dev/mapper/centos-root ro rd.lvm.lv=centos/root rd.lvm.lv=centos/swap rhgb quiet LANG=en_US.UTF-8 numa=off
[    0.000000] NUMA turned off
[    0.000000] Kernel command line: BOOT_IMAGE=/vmlinuz-3.10.0-1160.el7.x86_64 root=/dev/mapper/centos-root ro rd.lvm.lv=centos/root rd.lvm.lv=centos/swap rhgb quiet LANG=en_US.UTF-8 numa=off
[root@localhost ~]#
6.安装依赖包
yum install bc binutils compat-libcap1 compat-libstdc++33 elfutils-libelf elfutils-libelf-devel fontconfig-devel glibc glibc-devel ksh libaio libaio-devel libX11 libXau libXi libXtst libXrender libXrender-devel libgcc libstdc++ libstdc++-devel libxcb make smartmontools sysstat gcc-c++
手动上传compat-libstdc+±33-3.2.3安装
7.创建用户
/usr/sbin/groupadd  oinstall
/usr/sbin/groupadd  dba
/usr/sbin/groupadd  oper
/usr/sbin/useradd -g  oinstall -G dba,oper oracle
mkdir -p /u01/app/oracle/product/19.3.0/db_1
chown -R oracle:oinstall /u01/
chmod -R 775 /u01/


另外建立如下目录,挂载不同磁盘:
[oracle@localhost oradata]$ ls -rlt
total 0
drwxr-xr-x 2 oracle oinstall 6 Aug 31 15:30 data
drwxr-xr-x 2 oracle oinstall 6 Aug 31 15:30 redolog1
drwxr-xr-x 2 oracle oinstall 6 Aug 31 15:30 redolog2
drwxr-xr-x 2 oracle oinstall 6 Aug 31 15:31 archivelog1
8.修改内核参数
vim /etc/sysctl.conf
fs.aio-max-nr = 1048576
fs.file-max = 6815744
kernel.shmall = 1073741824
kernel.shmmax =  4398046511104
kernel.shmmni = 4096
kernel.sem = 250 32000 100 128
net.ipv4.ip_local_port_range = 9000 65500
net.core.rmem_default = 262144
net.core.rmem_max = 4194304
net.core.wmem_default = 262144
net.core.wmem_max = 1048576

修改完成后用 sysctl -p查看生效
9.修改认证模块
vim /etc/security/limits.conf
oracle soft nproc 131072
oracle hard nproc 131072
oracle soft nofile 131072
oracle hard nofile 131072
oracle soft core unlimited
oracle hard core unlimited
oracle soft memlock 50000000
oracle hard memlock 50000000
10.修改用户登录认证
vim /etc/pam.d/login
session required /lib64/security/pam_limits.so
session required pam_limits.so
11.设置环境变量
vim /etc/profile
#oracle
export ORACLE_HOME=/u01/app/oracle/product/19.3.0/db_1
export ORACLE_SID=orcl
if [ $USER = "oracle" ]; then
if [ $SHELL = "/bin/ksh" ]; then
ulimit -p 16384
ulimit -n 65536
else
ulimit -u 16384 -n 65536
fi
fi
12.设置oracle环境变量
vim /home/oracle/.bash_profile
export ORACLE_BASE=/u01/app/oracle
export ORACLE_HOME=$ORACLE_BASE/product/19.3.0/db_1
export ORACLE_SID=orcl
export ORACLE_TERM=xterm
export PATH=$ORACLE_HOME/bin:$ORACLE_HOME/OPatch:/usr/sbin:$PATH
export LD_LIBRARY_PATH=$ORACLE_HOME/lib:/lib:/usr/lib:$LD_LIBRARY_PATH
13.配置/etc/hosts
10.10.5.19 localhost(主机名)
14.使用oracle用户将安装包上传至ORACLE_HOME目录,并解压在该目录
[oracle@localhost ~]$ cd $ORACLE_HOME
[oracle@localhost db_1]$ ls
LINUX.X64_193000_db_home.zip
[oracle@localhost db_1]$ unzip LINUX.X64_193000_db_home.zip
15.开始安装
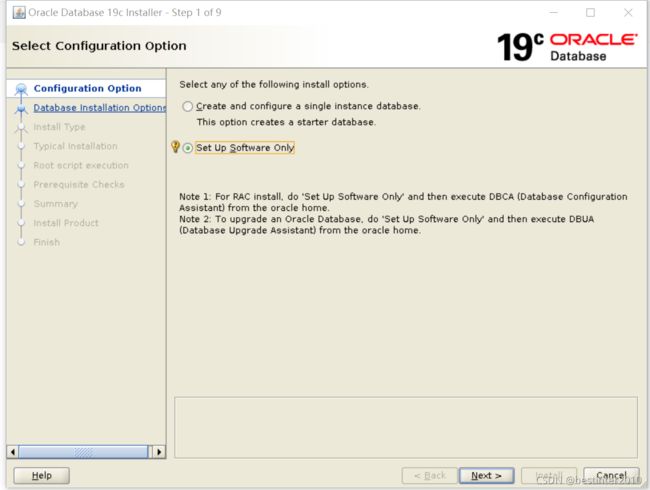
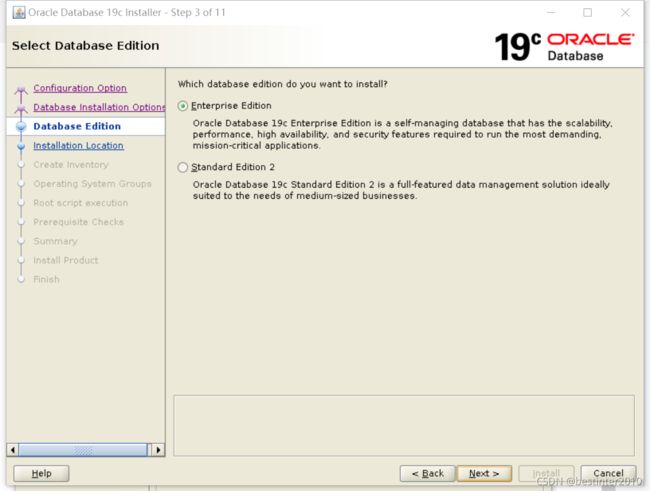
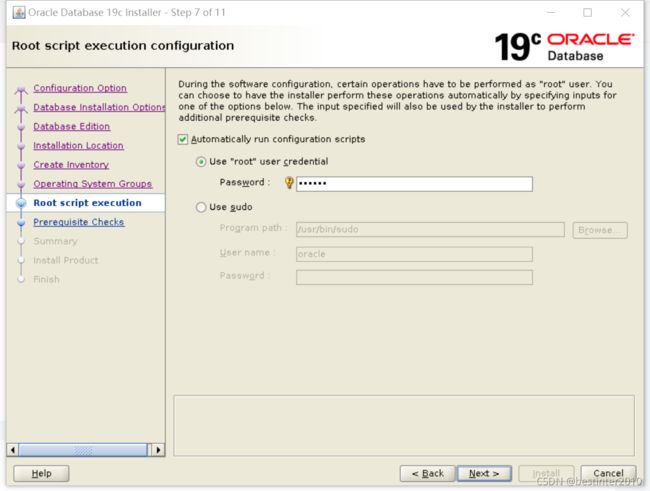
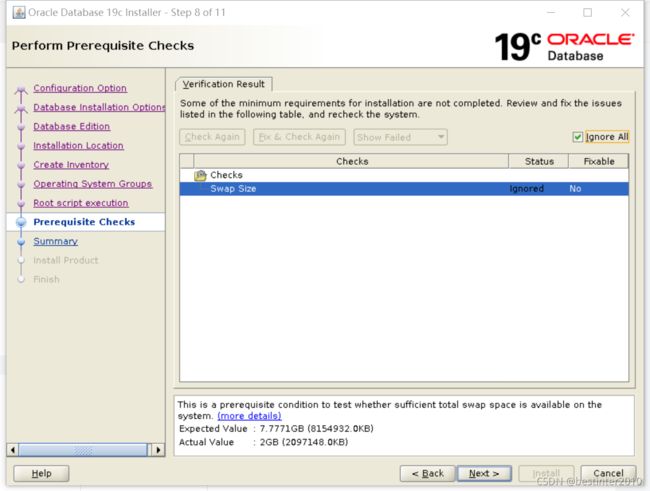
运行./runInstaller调出图像界面
然后开始安装
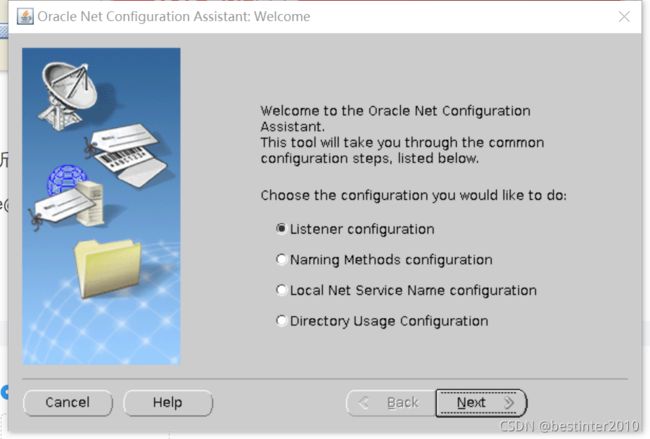
15.使用netca创建监听:
[oracle@localhost db_1]$ netca
一直点下一步直到创建完成
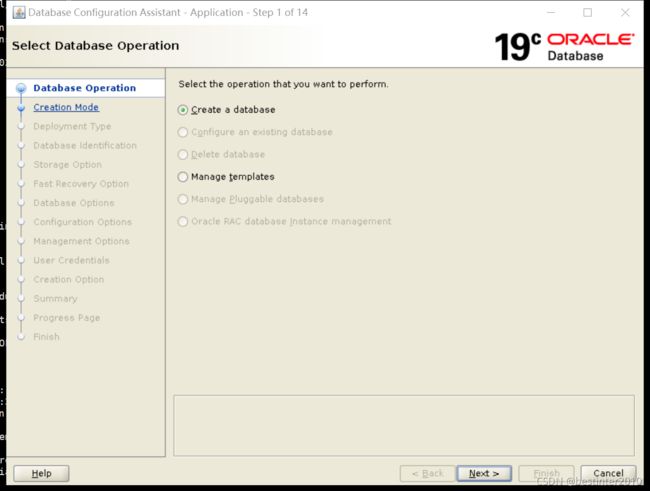
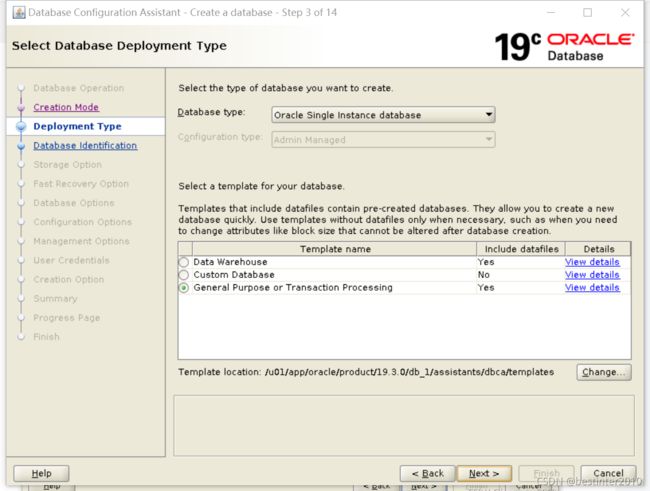
16.使用dbca建库
如无特殊要求,生产系统尽量不适用cdb
选择数据库目录
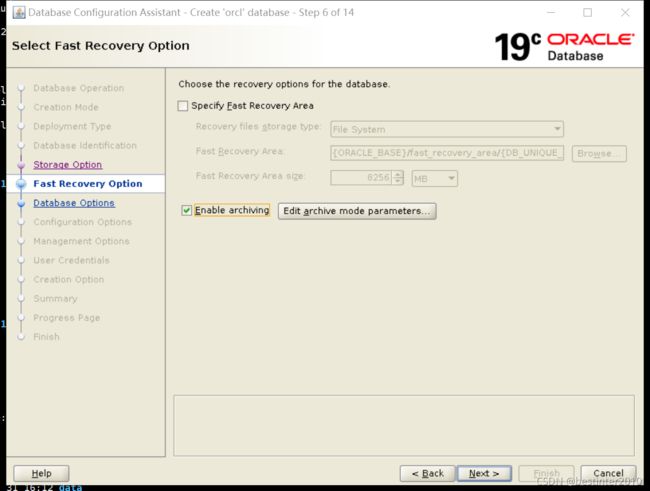
填写归档日志目录:
选择监听
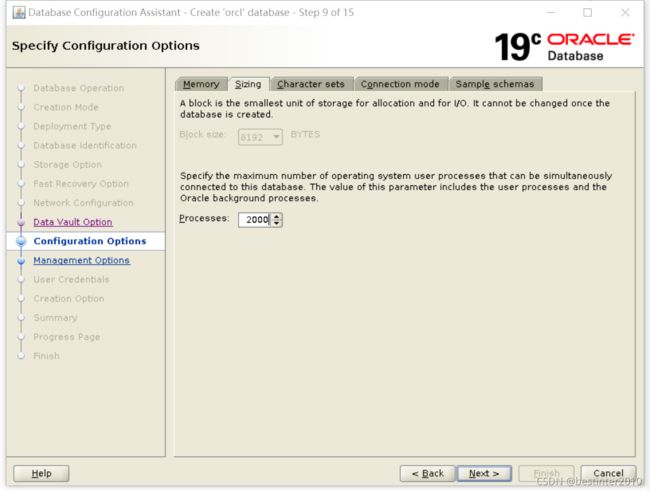
节点没有其它应用安装,可以使用总内存的70%
连接最大值,根据情况填写
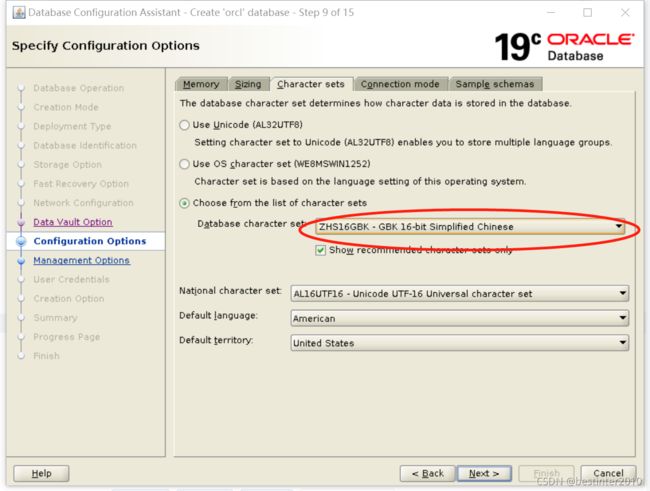
字符集根据情况选择,保持所有生产环境一致:
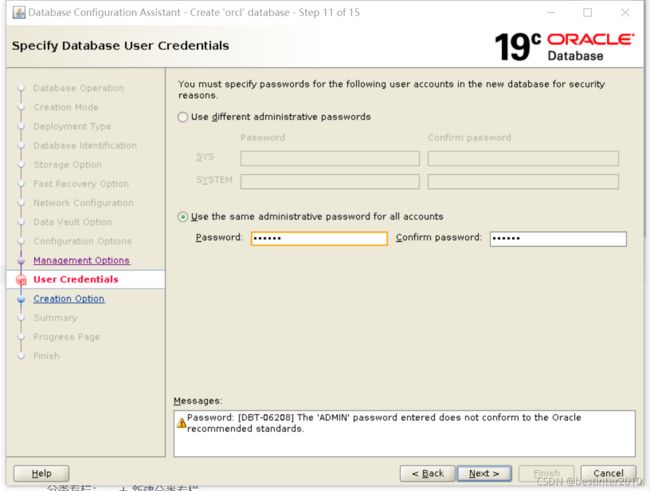
设置管理员用户密码:
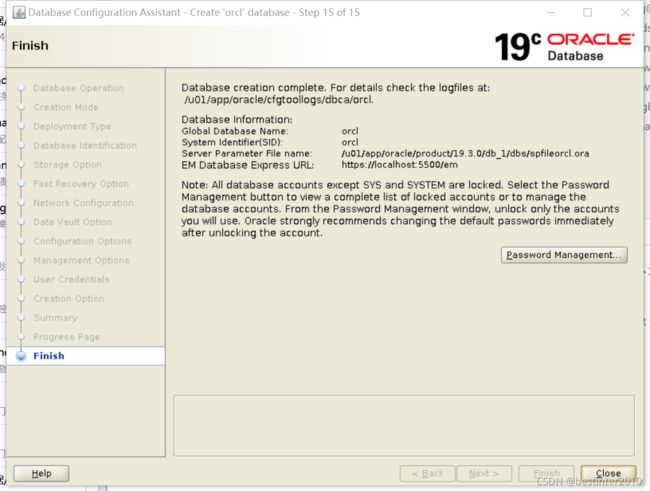
然后直接点击下一步开始创建数据库
至此安装完毕
