ESXI上新建虚拟机安装CentOS 7操作系统及初始化配置
1 前言
我的服务器都是安装了VMware的ESXI作为宿主机,并使用vCenter进行管理。我的实验都是在ESXI中建立虚拟机来完成的。其中虚拟机的操作系统我用的最多的就是CentOS 7. CentOS 7与Redhat完全兼容,所以我使用CentOS 7也可以学到企业中常用的Redhat系统的操作方法。
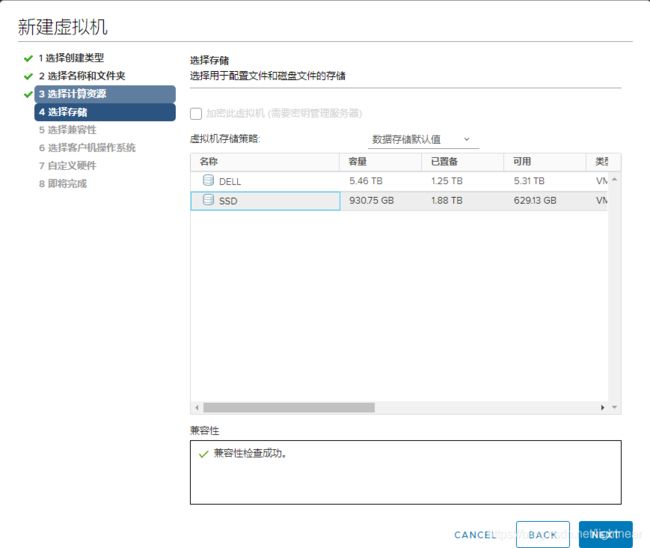
2 新建虚拟机
新建虚拟主机步骤较简单,按照提示一步一步操作即可
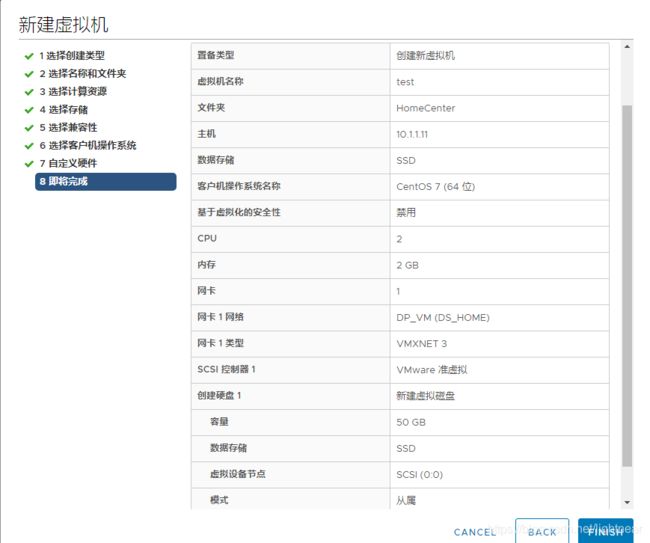
- 操作系统选择 Linux / CentOS7(64bit)
- CPU,内存,硬盘则根据实际的需要进行选择


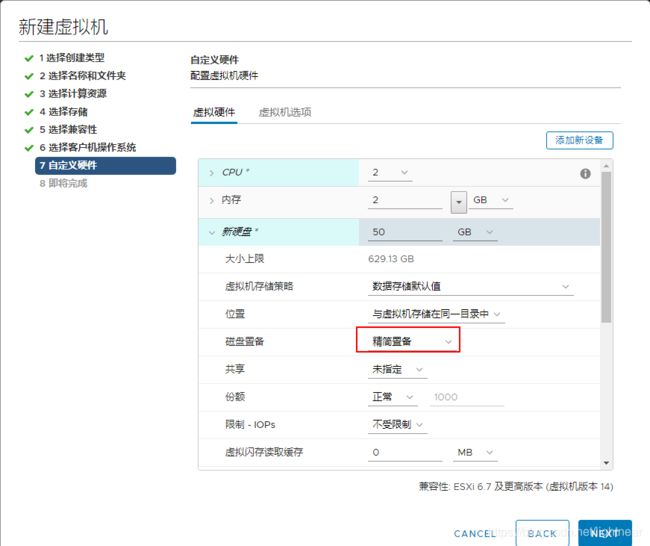
这里特别要说明的是硬盘的三种置备方式
(1)厚置备延迟置零(Thick Provision Lazy Zeroed):
默认的创建格式,创建磁盘时,直接从磁盘分配空间,但对磁盘保留数据不置零。所以当有I/O操作时,只需要做置零的操作。
磁盘性能较好,时间短,适合于做池模式的虚拟桌面。
(2)厚置备置零(Thick Provision Eager Zeroed):
创建群集功能的磁盘。创建磁盘时,直接从磁盘分配空间,并对磁盘保留数据置零。所以当有I/O操作时,不需要等待直接执行。
磁盘性能最好,时间长,适合于做跑运行繁重应用业务的虚拟机。
(3)精简置备(Thin Provision):
创建磁盘时,占用磁盘的空间大小根据实际使用量计算,即用多少分多少,提前不分配空间,对磁盘保留数据不置零,且最大不超过划分磁盘的大小。
所以当有I/O操作时,需要先分配空间,在将空间置零,才能执行I/O操作。当有频繁I/O操作时,磁盘性能会有所下降
I/O不频繁时,磁盘性能较好;I/O频繁时,磁盘性能较差。时间短,适合于对磁盘I/O不频繁的业务应用虚拟机。
我实验用的虚拟机,磁盘I/O不是太多,所以我选择精简置备,来节省磁盘空间。

3 安装CentOS 7操作系统
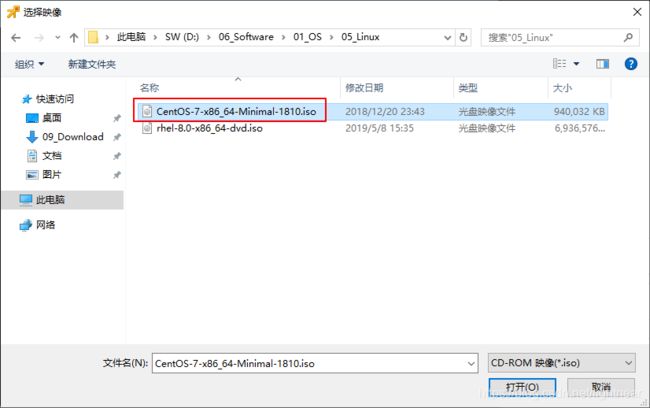
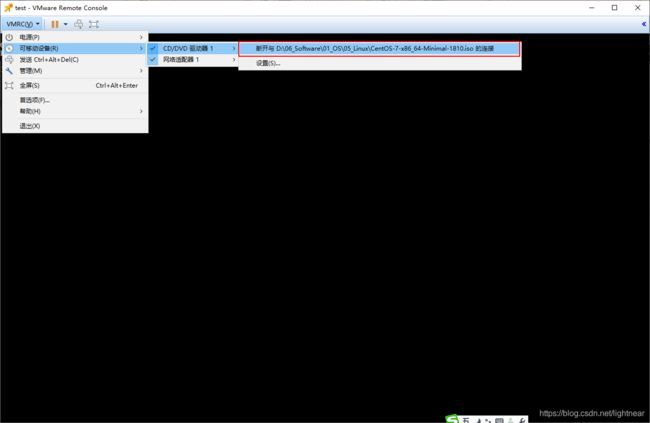
条件:安装好VMware Remote Console软件,使用此软件打开虚拟机画面,并挂载光盘到虚拟机的光驱里。

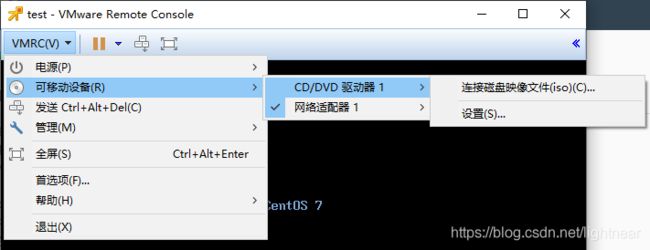

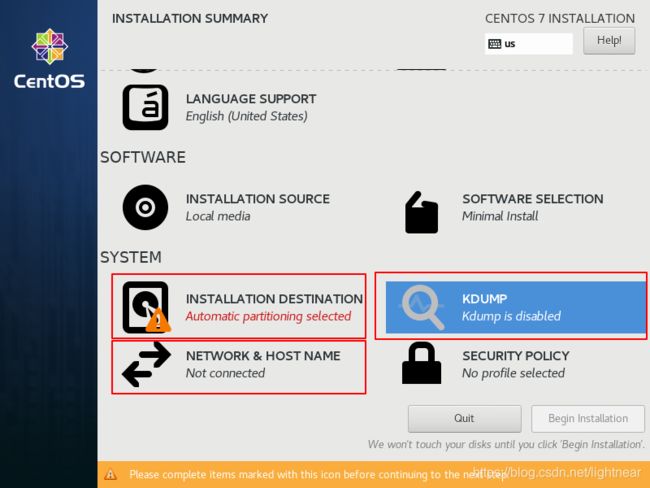
启动虚拟机,进入安装画面
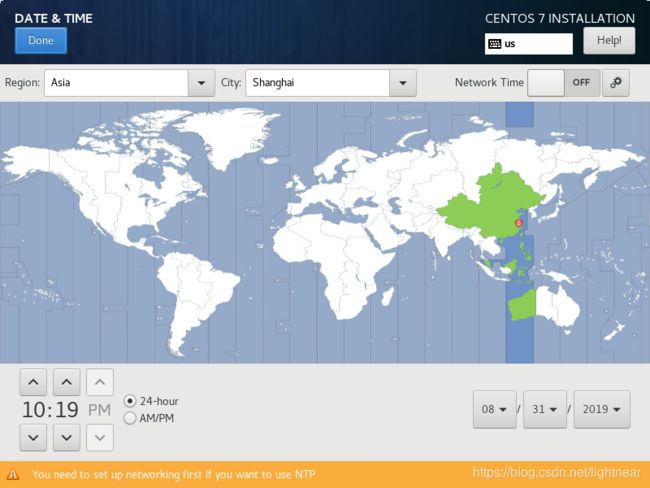
- Date & Time: 选择Asia/Shanghai时区,并且可以配置NTP时间同步
- Software Selection: 选择Minimal Install
- Installation Destination: 使用默认分区即可
- Kdump: Disabled
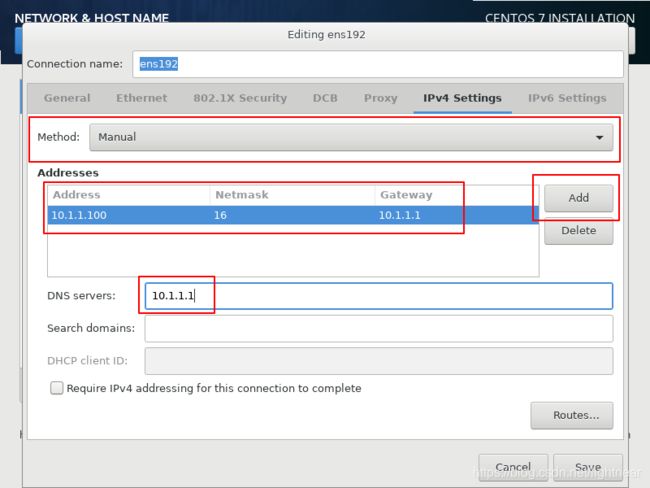
- Network & Hostname: 可以设置网络为DHCP或设置固定IP,并且可设定主机名


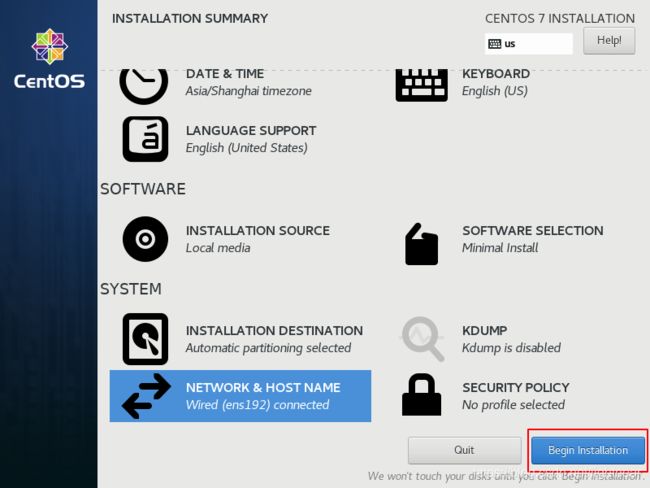


安装完成提示重启,请重启即可。

4 安装系统后的初始化配置
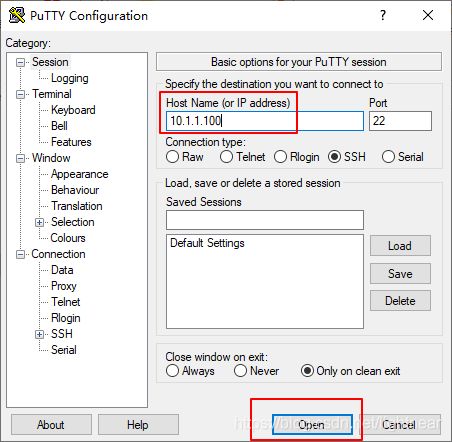
打开一个终端界面(Windows下可使用putty, xshell等工具),使用ssh root@主机IP,然后输入密码以登入系统


(1)配置YUM源为我自建的镜像源,并更新系统
cd /etc/yum.repos.d/ && mkdir bak && mv -f *.repo bak/
curl http://mirror.t.ifay.top/CentOS-Base.repo > /etc/yum.repos.d/CentOS-Base.repo
yum -y install epel-release
mv -f /etc/yum.repos.d/epel* /etc/yum.repos.d/bak
curl http://mirror.t.ifay.top/epel.repo > /etc/yum.repos.d/epel.repo
curl http://mirror.t.ifay.top/mariadb.repo > /etc/yum.repos.d/mariadb.repo
curl http://mirror.t.ifay.top/elastic.repo > /etc/yum.repos.d/elastic.repo
rpm -ivh http://mirror.t.ifay.top/zabbix/zabbix/4.0/rhel/7/x86_64/zabbix-release-4.0-1.el7.noarch.rpm
mv -f /etc/yum.repos.d/zabbix.repo /etc/yum.repos.d/bak
curl http://mirror.t.ifay.top/zabbix.repo > /etc/yum.repos.d/zabbix.repo
yum clean all && yum makecache
yum -y update
(2) 安装常用软件
yum -y install htop net-tools lrzsz bind-utils wget vim iftop unzip sudo ntpdate iotop git cifs-utils nfs-utils net-snmp-utils open-vm-tools
其中open-vm-tools是VMware虚拟机的工具软件,即vmware tools
(3) 关闭防火墙
因为我已经使用pfsense这个防火墙隔离了我的家庭网络和互联网,所以为了方便,我在内网的虚拟机选择关闭防火墙
systemctl stop firewalld.service
systemctl disable firewalld.service
(4) 关闭selinux
sed -i "s/SELINUX=enforcing/SELINUX=disabled/g" /etc/selinux/config
setenforce 0
(5) 设置时区及主机名
timedatectl set-local-rtc 1 && timedatectl set-timezone Asia/Shanghai
yum -y install chrony && systemctl start chronyd.service && systemctl enable chronyd.service
参考文章
Guest Operating System Installation Guide / CentOS 7
本文在我博客的链接地址:https://dataworld.fun/archives/350.html