ETL工具-pentaho企业实战部署
哈喽!大家好,我是【IT邦德】,江湖人称jeames007,10余年DBA及大数据工作经验
一位上进心十足的【大数据领域博主】!
中国DBA联盟(ACDU)成员,目前服务于工业互联网
擅长主流Oracle、MySQL、PG、高斯及GP 运维开发,备份恢复,安装迁移,性能优化、故障应急处理等。
✨ 如果有对【数据库】感兴趣的【小可爱】,欢迎关注【IT邦德】
❤️❤️❤️感谢各位大可爱小可爱!❤️❤️❤️
文章目录
- 前言
-
- 1.pentaho介绍
- 2.工具包
- 3.pentaho Server安装
-
- 3.1 JDk的安装
- 3.2 DB部署
- 3.3 Server安装
- 4.客户端部署
前言
pentaho在复杂ETL场景、数据中台、数据湖、物联网及AI平台构建中获得企业客户广泛青睐。1.pentaho介绍
Kettle是一个颇受认可的开源ETL工具,2006年被Pentaho收购,2015年又被Hitachi Vantara收购,正
式命名为PDI。 PDI EE(企业商用版)改进了PDI CE(开源社区版)在作业调度监控、系统安全机制、高可
用性架构、对接SAP、对接Hadoop、对接AI/ML、 自助式DI/BI等方面之不足,尤其是凭借着原厂兜底的专业
技术支持服务保障,近年来Pentaho EE作为日立数据Lumada战略的核心产品组件, 在复杂ETL场景、数据中台、数据湖、物联网及AI平台构建中获得企业客户广泛青睐。
官网:https://www.hitachivantara.com/en-us/home.html
GitHub:https://github.com/pentaho
2.工具包
下载地址
https://www.hitachivantara.com/en-us/products/dataops-software/data-integration-
analytics/pentaho-community-edition.html
工具包:
Server端:pentaho-server-ce-9.4.0.0-343.zip
客户端:pdi-ce-9.4.0.0-343.zip
驱动包:ojdbc8.jar
3.pentaho Server安装
3.1 JDk的安装
1.JDK下载
https://www.oracle.com/java/technologies/downloads/#java8-windows
2.JDK压缩包解压
tar -xvf jdk-8u361-linux-x64.tar.gz
3.环境变量导入
用vi /etc/profile进入编辑状态,加入下边这段配置
export JAVA_HOME=/mnt/jdk1.8.0_361
export PATH=$JAVA_HOME/bin:$PATH
export CLASSPATH=.:$JAVA_HOME/lib/dt.jar:$JAVA_HOME/lib/tools.jar
##环境变量生效
source /etc/profile
##确认安装是否成功
[root@test /root]# java -version
openjdk version "1.8.0_181"
OpenJDK Runtime Environment (build 1.8.0_181-b13)
OpenJDK 64-Bit Server VM (build 25.181-b13, mixed mode)
3.2 DB部署
1.Oracle部署
参考博客:https://jeames.blog.csdn.net/article/details/118666634
2.PG的部署
参考博客:https://jeames.blog.csdn.net/article/details/120052749
3.3 Server安装
1.Server安装包
pentaho-server-ce-9.4.0.0-343.zip

2.新增用户
[root@test ~]# useradd pentaho -d /home/pentaho
[root@test ~]# cd /mnt
[root@test /mnt]#ll
总用量 1402672
-rw-r--r-- 1 root 1436332475 2月 11 17:30 pentaho-server-ce-9.4.0.0-343.zip
[root@test /mnt]# cp pentaho-server-ce-9.4.0.0-343.zip /home/pentaho

3.解压安装包
[root@test ~]# passwd pentaho
[pentaho@test ~]# su - pentaho
[pentaho@pentaho /home/pentaho]# unzip pentaho-server-ce-9.4.0.0-343.zip
[pentaho@pentaho /home/pentaho]# ll
总用量 1402676
drwxr-xr-x 7 pentaho pentaho 4096 11月 9 00:52 pentaho-server
-rw-r--r-- 1 root root 1436332475 2月 11 17:30 pentaho-server-ce-9.4.0.0-
343.zip

4.导入元数据
4.1 Oracle数据源
[root@pentaho /home/pentaho]# cd /home/pentaho/pentaho-server/data/oracle12c
[root@pentaho /home/pentaho/pentaho-server/data/oracle12c]# ll
总用量 20
-rw-rw-r-- 1 pentaho pentaho 840 11月 8 19:06 alter_number_columns.sql
-rw-rw-r-- 1 pentaho pentaho 793 11月 8 19:06 create_jcr_ora.sql
-rw-rw-r-- 1 pentaho pentaho 6112 11月 8 19:06 create_quartz_ora.sql
-rw-rw-r-- 1 pentaho pentaho 715 11月 8 19:06 create_repository_ora.sql
[root@test /root]# cd /home/pentaho/pentaho-server/data/oracle12c
[root@test /home/pentaho/pentaho-server/data/oracle12c]# cp -rf * /home/oracle
[root@test /root]# cd /home/oracle
[root@test /home/oracle]# chown oracle:oinstall *.sql
[root@test /home/oracle]# chmod 775 *.sql
[root@test /root]# su - oracle
[oracle@test /home/oracle]# sqlplus / as sysdba
SQL*Plus: Release 19.0.0.0.0 - Production on Sun Feb 12 20:19:26 2023
Version 19.3.0.0.0
Copyright (c) 1982, 2019, Oracle. All rights reserved.
Connected to:
Oracle Database 19c Enterprise Edition Release 19.0.0.0.0 - Production
Version 19.3.0.0.0
SQL> show pdbs
CON_ID CON_NAME OPEN MODE RESTRICTED
---------- ------------------------------ ---------- ----------
2 PDB$SEED READ ONLY NO
3 ORCLPDB1 READ WRITE NO
## 开PDB库
SQL> alter pluggable database all open;
## 关闭PDB库
SQL> alter pluggable database all close;
SQL> select name,cdb from v$database;
## CDB切到PDB
SQL> alter session set container = ORCLPDB1;
## PDB切到CDB
SQL> conn / as sysdba
--导入源数据
注意:导入的时候记的要按顺序来哈,每个脚本执行后记得推退出重新进入,如果是19C的PDB数据库记得加 @
标识符
SQL> @create_jcr_ora.sql
SQL> @create_quartz_ora.sql
SQL> @create_repository_ora.sql
SQL> @alter_number_columns.sql

5.配置文件修改
--修改配置上传到服务器即可,可参考官网
https://help.hitachivantara.com/Documentation/Pentaho/9.4/Setup/Use_Oracle_as_Your
_Repository_Database_(Archive_installation)
Step 1: Set up Quartz on Oracle
pentaho-server/pentaho-solutions/system/quartz/quartz.properties
Step 2: Set Hibernate settings for Oracle
pentaho-server/pentaho-solutions/system/hibernate/hibernate-settings.xml
Step 3: Replace default version of audit log file with Oracle version
1.Locate the pentaho-server/pentaho-
solutions/system/dialects/oracle10g/audit_sql.xml file.
2.Copy it into the pentaho-server/pentaho-solutions/system directory.
Step 4: Modify Jackrabbit repository information for Oracle

6.Tomcat配置
--JDBC下载链接
https://help.hitachivantara.com/Documentation/Pentaho/9.4/Setup/JDBC_drivers_refer
ence
Step 1: Download driver and apply to the Pentaho Server
1.Download a JDBC Driver JAR from your database vendor or a third-party driver
developer.
2.Copy the JDBC driver JAR you just downloaded to the pentaho-server/tomcat/lib
folder.
3.Copy the hsqldb-2.3.2.jar file to pentaho-server/tomcat/lib if you want to
retain the sample provided by Pentaho.
Step 2: Modify JDBC Connection Information in the Tomcat XML file
1.Consult your database documentation to determine the JDBC class name and the
connection string for your Pentaho Repository database.
2.Navigate to the pentaho-server/tomcat/webapps/pentaho/META-INF directory and
open the context.xml file with any text editor.
3.Add the following code to the file if it does not already exist and replace XE
in the URL setting to reflect the name of your schema.

7.Server启动
[root@test ~]# su - pentaho
[pentaho@pentaho /home/pentaho]# cd pentaho-server
[pentaho@pentaho /home/pentaho/pentaho-server]# ll
总用量 64
drwxr-xr-x 10 pentaho pentaho 303 11月 9 00:52 data
-rw-rw-r-- 1 pentaho pentaho 1276 11月 8 19:06 Encr.bat
-rwxr-xr-x 1 pentaho pentaho 1233 11月 8 19:06 encr.sh
-rw-rw-r-- 1 pentaho pentaho 2252 11月 8 19:06 import-export.bat
-rwxr-xr-x 1 pentaho pentaho 2160 11月 8 19:06 import-export.sh
drwxrwxrwx 2 pentaho pentaho 45 11月 9 00:52 licenses
drwxr-xr-x 5 pentaho pentaho 57 11月 9 00:52 pentaho-solutions
-rw-rw-r-- 1 pentaho pentaho 1714 11月 8 19:06 promptuser.js
-rwxr-xr-x 1 pentaho pentaho 1856 11月 8 19:06 promptuser.sh
-rw-rw-r-- 1 pentaho pentaho 5092 11月 8 19:06 set-pentaho-env.bat
-rwxr-xr-x 1 pentaho pentaho 4634 11月 8 19:06 set-pentaho-env.sh
-rw-rw-r-- 1 pentaho pentaho 2906 11月 8 19:06 start-pentaho.bat
-rw-rw-r-- 1 pentaho pentaho 2100 11月 8 19:06 start-pentaho-debug.bat
-rwxr-xr-x 1 pentaho pentaho 2346 11月 8 19:06 start-pentaho-debug.sh
-rwxr-xr-x 1 pentaho pentaho 3174 11月 8 19:06 start-pentaho.sh
-rw-rw-r-- 1 pentaho pentaho 1633 11月 8 19:06 stop-pentaho.bat
-rwxr-xr-x 1 pentaho pentaho 1546 11月 8 19:06 stop-pentaho.sh
drwxr-xr-x 3 pentaho pentaho 27 11月 9 00:54 third-party-tools
drwxrwxrwx 10 pentaho pentaho 234 11月 8 19:06 tomcat
--启动体制脚本
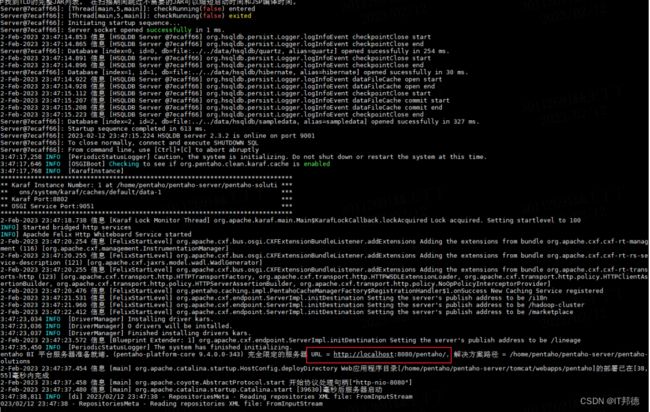
[pentaho@pentaho /home/pentaho/pentaho-server]# ./start-pentaho.sh
[pentaho@pentaho /home/pentaho/pentaho-server]# ./stop-pentaho.sh
--日志目录
/home/pentaho/pentaho-server/tomcat/logs
tail -f /home/pentaho/pentaho-server/tomcat/logs catalina.out
--网页用于管控任务调度
http://10.128.111.32:8080/pentaho/

8.首次登录后修改密码
用户名:admin 密码;password(初始密码)
4.客户端部署
1.解压客户端即可使用
2.配置连接信息
Connect-Repository Manager-Add
http://**.**.**:8080/pentaho
此处记得Display name不能用中文,不然登录后,Connect会看不到
3.用户信息清楚
C:\Users\30112691\.kettle,删除即可
4.数据库连接配置
注意:需要放ojdbc8.jar驱动到 pentaho\pdi-ce-9.4.0.0-343\data-integration\lib目录中。
(DESCRIPTION = (ADDRESS = (PROTOCOL = TCP)(HOST = 10.168.11.10)(PORT = 1521))
(CONNECT_DATA =(SERVER = DEDICATED)(SERVICE_NAME = ORCLPDB1)))
注意:如果保存job有报错,记得Spoon.bat中添加如下的字符集配置
"-Dfile.encoding=UTF-8"


