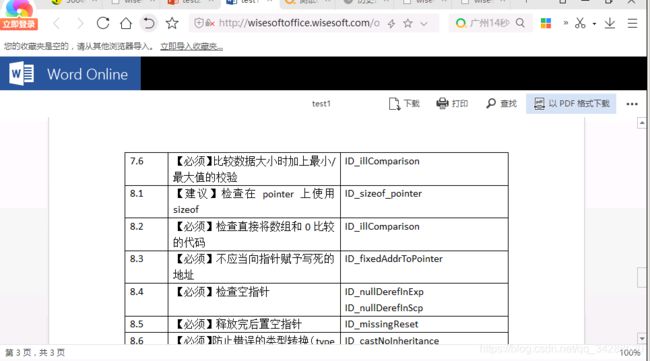
Office Online Server 在线编辑Office文档,安装部署
最近公司项目需求,需要搭建一个office预览编辑的服务,在网上找到了Office Online Server在线编辑office文档,以下把自己搭建过程记录
一、Office Online Server介绍
Office Online Server是 Office Web Apps Server 的升级版本,安装环境必须为两台Windows Server 2012 R2 或 Windows Server 2016服务器(注意,Windows Server 2016 需要 Office Online Server 2017 年 4 月或更高版本。)。一台做转换服务器(安装 Office OnlineServer 2016 软件,除此之外不能安装与office相关的其他程序),一台做域控服务器(转换服务器只有加在域下才能被访问,同时项目部署服务器只有加在域控服务器下才能访问转换服务器)。最好将Office Online Server部署在一台干净的服务器上,而且该服务器必须在域中。
注意事项:
请勿在运行 Office Online Server 的服务器上安装任何其他服务器应用程序。包括 Exchange Server、SharePoint Server、Skype for Business Server 和 SQL Server。如果服务器不足,则可以在这些服务器的其中一台的虚拟机上运行 Office Online Server。
不要在端口 80、443 或 809 上安装依赖 Web 服务器 (IIS) 角色的任何服务或角色,因为 Office Online Server 会定期删除这些端口上的 Web 应用程序。
不要安装任何版本的 Office。如果已经安装,在安装 Office Online Server 之前必须将其卸载。
不要在域控制器上安装 Office Online Server。它不会在包含 Active Directory 域服务 (AD DS) 的服务器上运行。
二、准备工作
Windows Server 2012 R2安装包

我的做法:由于自己先在本机调试,搭建一个demo,所以安装了一台虚拟机,在虚拟机上打开两台Windows Server 2012 R2

虚拟机安装教程:https://www.maxiaobang.com/4343.html
三、部署域控服务器
开启第一台虚拟机(192.168.126.128),并打开服务器管理器
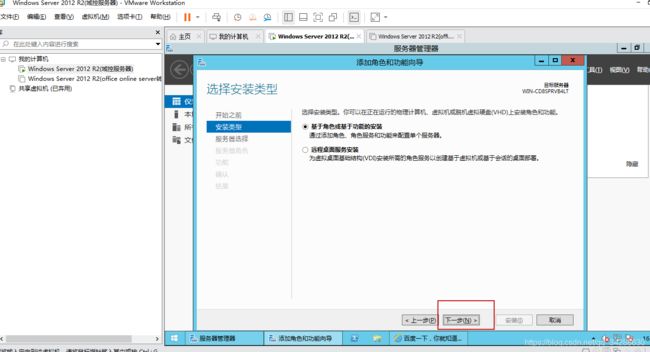
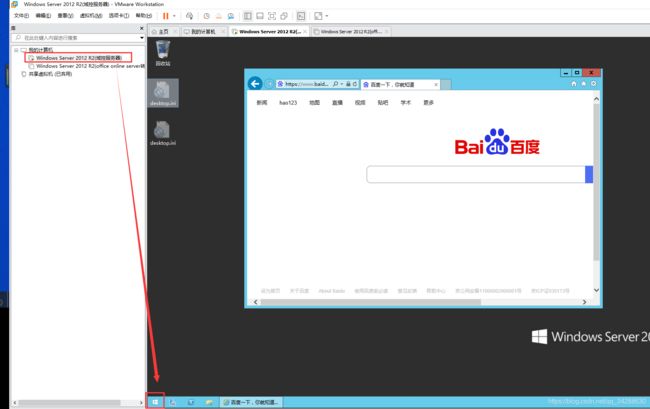
1、第一步
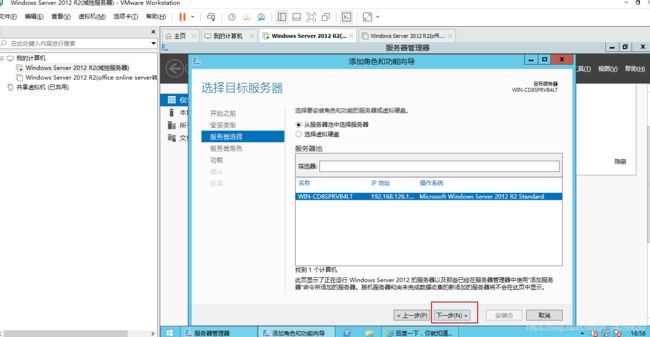
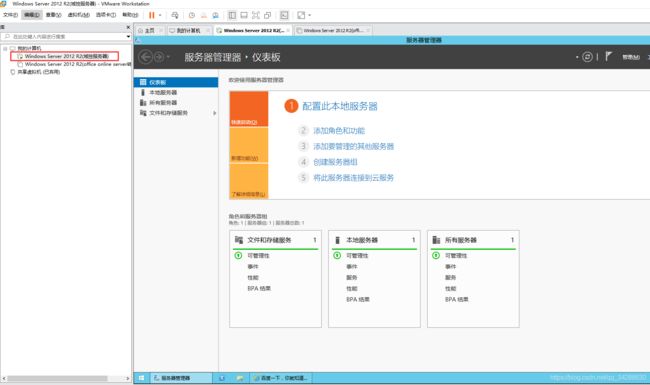
2、第二步
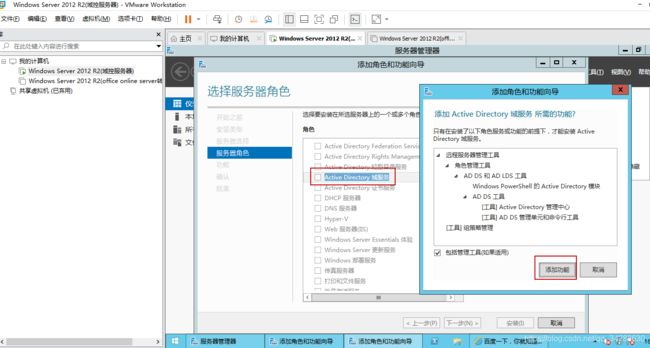
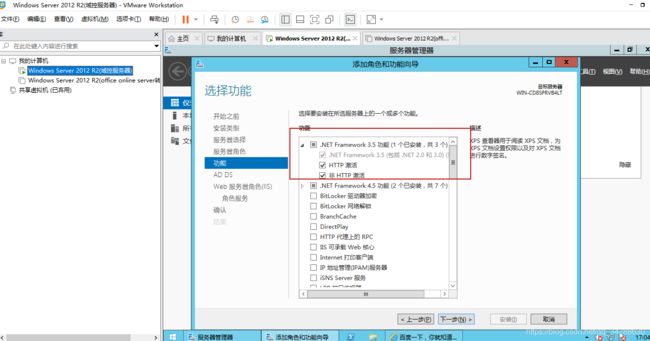
3、添加角色和功能
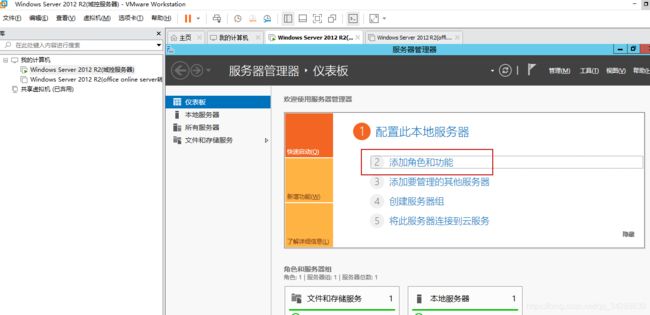
安装这一步会有可能出现以下问题:
提示:
请求添加或删除指定服务器上的功能失败。无法完成操作,因为指定的服务器需要重新启动。
解决方式:
1、右击我的电脑-属性,高级系统设置-高级-设置-高级-虚拟内存 更改。将虚拟内存分配提高4GB以上;
2、开始-服务-启动Remote Registy;
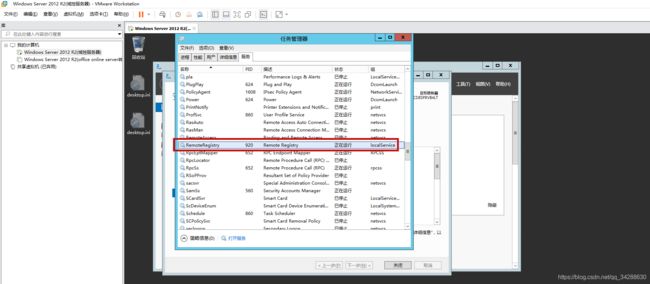
3、重启服务器再安装。
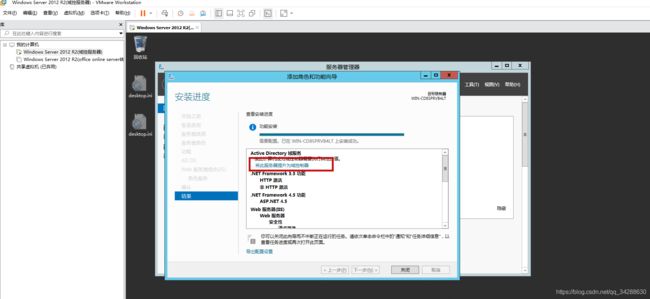

填写密码,下一步 ;密码:wisesoft

自动填写(NetBIOS),下一步;
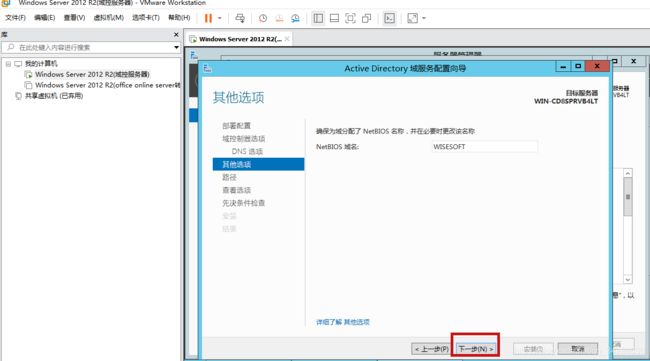

点击安装,安装完成后重启系统即可
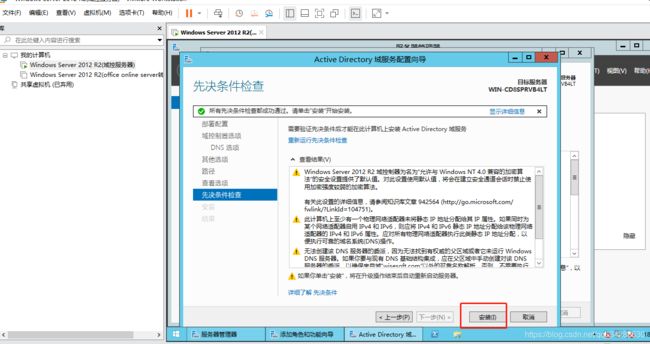
四、搭建Office Online Server转换服务器
开启第二台虚拟机(192.168.126.129)
将Office Online Server服务器加入域服务器
打开控制面板->网络和Internet->网络和共享中心,并点击更改适配器设置
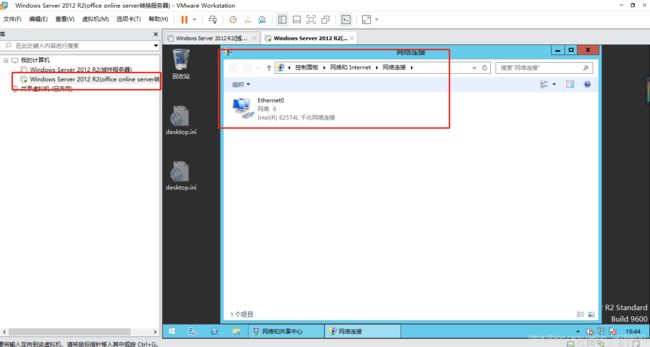
右击网络并打开属性,双击IPV4
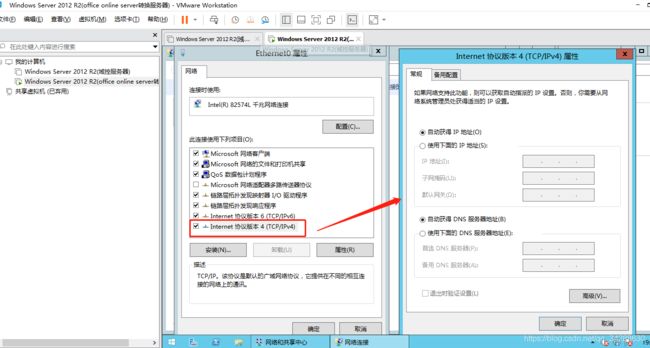
将DNS服务器配置为刚才配置好的域控服务器IP【192.168.126.128】

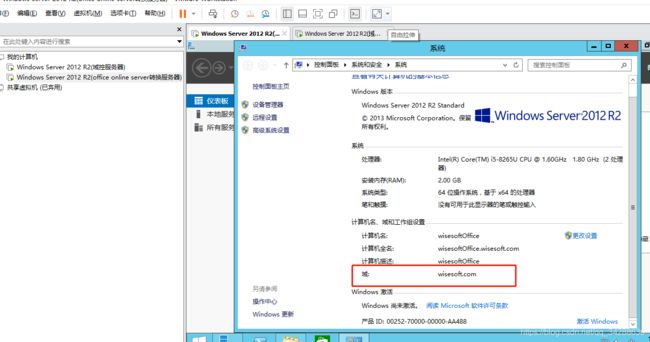
更改计算机名称加入域
右键电脑,点击属性,点击高级系统设置
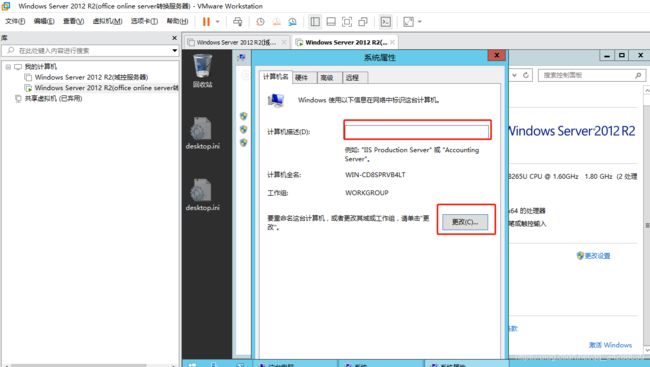
选择域,并输入之前域控服务器中配置的根域名

在上面这一步有可能会出现以下问题(如果没有请忽略)
Windows server 2012 R2 解决“无法完成域加入,原因是试图加入的域的SID与本计算机的SID相同。”
使用克隆的系统时,加域是出现如下问题。“无法完成域加入,原因是试图加入的域的SID与本计算机的SID相同。”
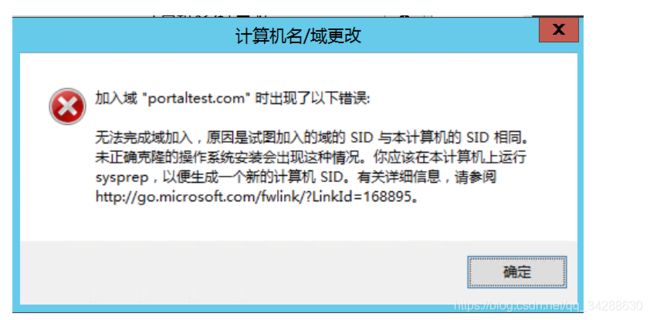
问题原因;
Windows使用SID来表示所有的安全对象(security principals)。安全对象包括主机,域计算机账户,用户和安全组。名字Name是用来代表SID的一个方法,可以允许用户改名儿无需更新ACL(access control list)。SID是一串数字代码包含了架构版本数字,一个48位的ID权威值,一个32位的子全位置或者RID值。权威值识别颁发出SID的代理,这个代理一般是windows 本地系统或者域。子权威值识别颁发权威的委派,RID则是Windows用来创建唯一SID用到的一个普通SID。
相同SID在单机使用过程中可能没有什么问题。但是在Windows内部,每个账号具有一个惟一的Security ID,可以在HKEY_LOCAL_MACHINE\SOFTWARE\Microsoft\Windows NT\CurrentVersion \ProfileList看到。
SID是用来识别账户的惟一标志,而不是通常以为的机器名\用户名。
而现有的克隆虚拟机是把整个安装好的系统分区直接克隆下来,这样多台机器就有了相同的SID,这样在你加入域的时候,会报错,工作不正常。
修改办法:打开克隆完的虚拟机:windows/System32/Sysprep/Sysprep.exe 勾选generalise选项即可。

输入域服务器管理员账号密码

zai
出现欢迎界面表示加入域成功

重启该虚拟机!
重启后,成功配置域环境
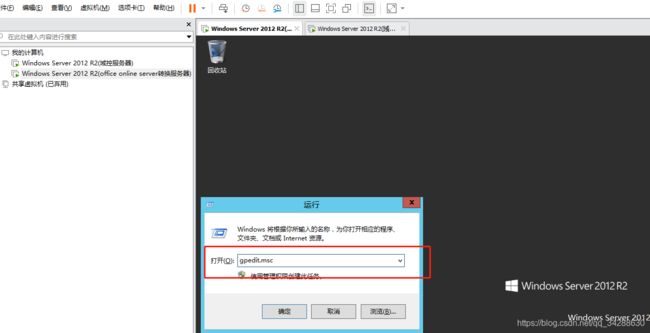
WIN+R,输入“gpedit.msc”
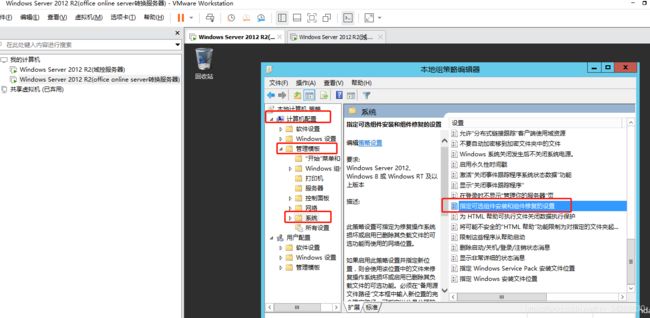
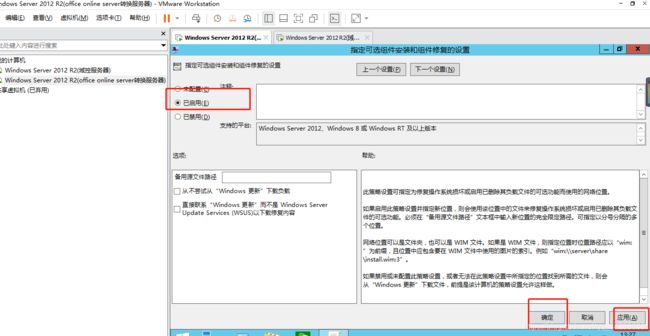
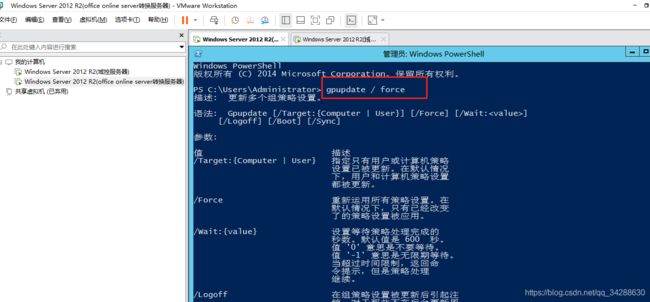
刷新组策略,打开“PowerShell”,输入“gpupdate / force”,刷新;
五、在域控服务器中添加服务器
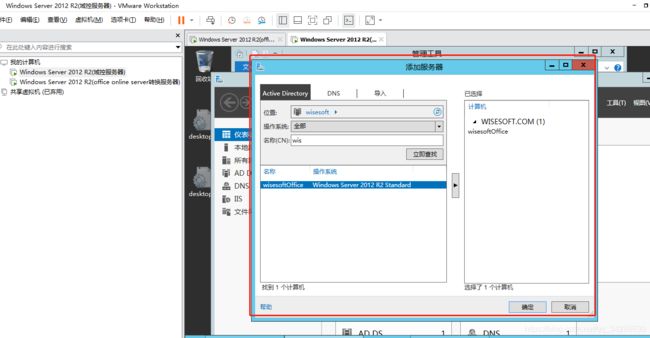
打开域控服务器,点击管理 > 添加服务器,输入转换服务器修改后的计算机名称,立即查找。将搜索到的服务器双击添加到右边,点击确定。

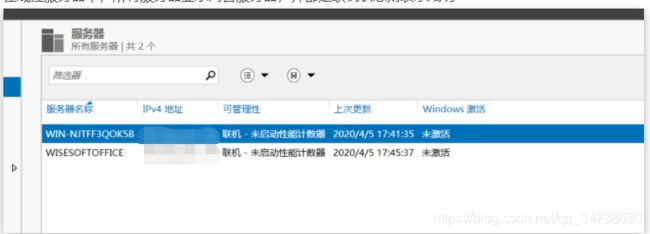
在域控服务器中,所有服务器显示两台服务器,并都是联机状态则表示成功
(不过我在自己服务器则这一步一台服务器没有连接成功,但是也可以)
六、在Office Online Server转换服务器上安装Office Online Serve
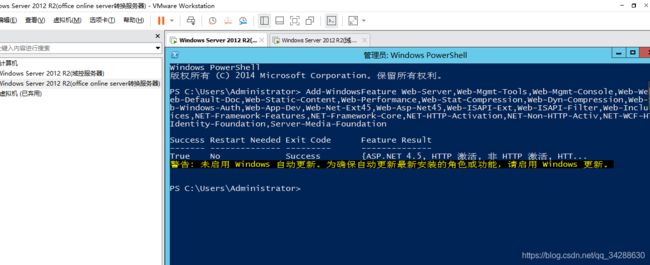
1、打开 Microsoft PowerShell 提示符,然后运行此命令示例来安装必需的角色和服务
如果是:Windows Server 2012 R2
Add-WindowsFeature Web-Server,Web-Mgmt-Tools,Web-Mgmt-Console,Web-WebServer,Web-Common-Http,Web-Default-Doc,Web-Static-Content,Web-Performance,Web-Stat-Compression,Web-Dyn-Compression,Web-Security,Web-Filtering,Web-Windows-Auth,Web-App-Dev,Web-Net-Ext45,Web-Asp-Net45,Web-ISAPI-Ext,Web-ISAPI-Filter,Web-Includes,InkandHandwritingServices,NET-Framework-Features,NET-Framework-Core,NET-HTTP-Activation,NET-Non-HTTP-Activ,NET-WCF-HTTP-Activation45,Windows-Identity-Foundation,Server-Media-Foundation
1、.NET Framework 4.5.2
https://download.csdn.net/download/qq_34288630/19794521
2、Visual C++ Redistributable Packages for Visual Studio 2013
https://download.csdn.net/download/qq_34288630/19794460
3、Visual C++ Redistributable for Visual Studio 2015
https://download.csdn.net/download/qq_34288630/19794502
4、Microsoft.IdentityModel.Extention.dll
https://download.csdn.net/download/qq_34288630/19794551
2.1、安装Microsoft .NET Framework4.5.2


2.2、安装Visual C++ Redistributable Packages for Visual Studio 2013
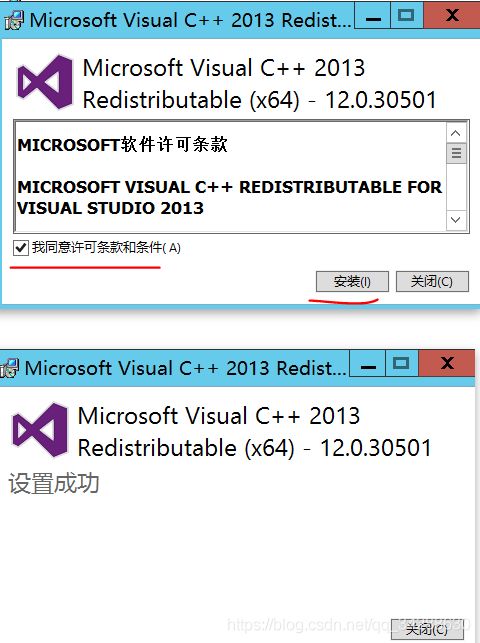
2.3、安装Visual C++ Redistributable for Visual Studio 2015
2.4、安装Microsoft.IdentityModel.Extention.dll

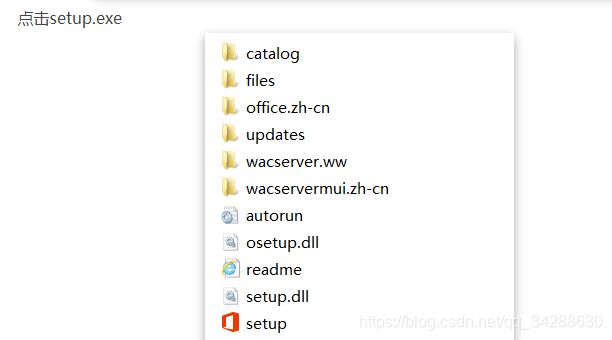
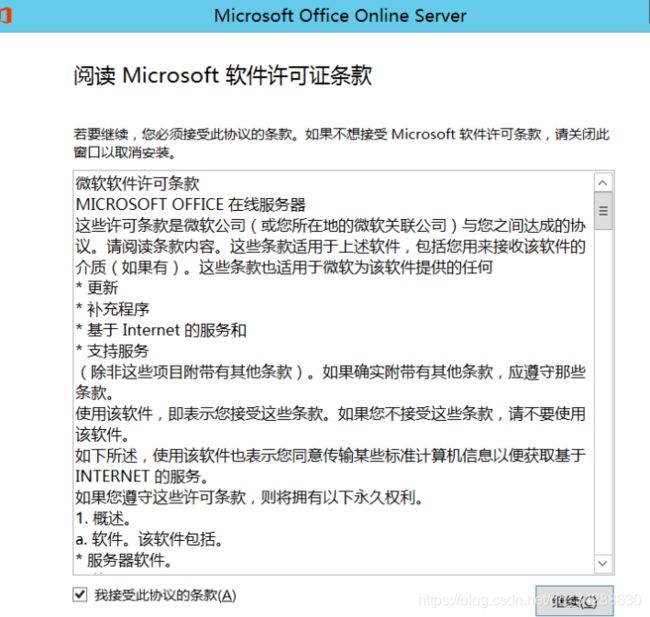
3、安装office online sevrer 2016
office online sevrer 2016安装包下载地址
安装中文语言包
下载地址
七、相关配置
1、配置Office Online Server
打开PowerShell,输入:
启动服务场
Import-Module OfficeWebApps
部署服务器场:
xxx.xxx.xxx.xx代表安装Office Online Server的服务器ip地址
New-OfficeWebAppsFarm -InternalURL “http://wisesoftOffice.wisesoft.com” -ExternalUrl “http://xxx.xxx.xxx.xx” -AllowHttp –EditingEnabled
备注:192.168.19.129为当前服务器的IP;http://wisesoftOffice.wisesoft.com 为Office Online Server服务器192.168.19.129中计算机全名称


注:如果输入命令报错,请重新启动电脑
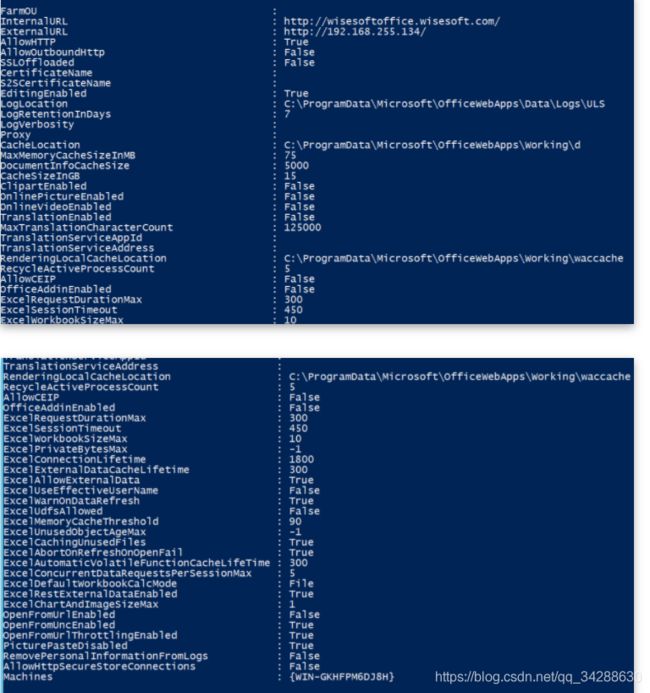
-InternalURL:
--内网浏览地址,http://xx.domin.com 其中 xx表示计算机名 domin.com 表示域名 也可以设置为对应的IP地址
一般是http://office主机名.AD域控地址

-ExternalURL:外网浏览地址

-AllowHttp: 允许80端口访问

-OpenFromUrlEnabled:允许通过url方式进行预览

-CacheLocation: 缓存文件存放路径 默认是C:\ProgramData\Microsoft\OfficeWebApps\Working\d

-CacheSizeInGB: 最大缓存文件大小 单位GB 默认为15GB
测试office online server是否安装部署成功
在office online 的浏览器中输入http://192.168.19.129/hosting/discovery或http://wisesoftOffice.wisesoft.com/hosting/discovery

输入http://192.168.19.129/op/generate.aspx或者http://wisesoftOffice.wisesoft.com/op/generate.aspx

注:若http://192.168.19.129/hosting/discovery 能登录,
http://192.168.19.129/op/generate.aspx显示“服务器错误”,
控制台输入Set-OfficeWebAppsFarm -OpenFromUrlEnabled:$true即可访问成功
当然这两个地址在域控服务器上面访问 也是ok 的


在第一个文本框中输入:远程服务器文件地址
点击Create Link在第二个文本中生成:在线预览地址,(因为文件时其它服务器的,没有文件操作权限,只能预览,无法编辑)
注意:****我在一台windows主机上安装了两台虚拟机:
一台:域转换服务器
两外一台:office onlie server服务器
其中我用的远程文件试windows主机上的文件,但是这个文件地址在office onlie server服务器上测试的时候不能用windows的ip,需要在host创建域名,通过域名去访问。
也就是下图圈主来的域名对应windows主机的ip。
注意:虚拟机内存一定要大,起初我用4G的,测试访问文件会报异常,无法访问,原因是内存溢出,因为文件转换还是很费内存的。
八、wopi代码部署实现在线编辑预览
springboot代码下载地址:
idea打开代码,打包jar,在域账号服务器运行
此时的访问office文件接口服务为
http://wisesoftoffice.wisesoft.com/we/wordeditorframe.aspx?&WOPISrc=http://192.168.192.228:8080/wopi/files/2.docx
其中http://192.168.192.228:8080/wopi/files/2.docx 就是wopi代码运行的接口服务,读取文件接口
package com.wisesoft.office.controller;

import com.fasterxml.jackson.databind.ObjectMapper;
import com.wisesoft.office.entity.FileInfo;
import org.apache.tomcat.util.codec.binary.Base64;
import org.slf4j.Logger;
import org.slf4j.LoggerFactory;
import org.springframework.beans.factory.annotation.Value;
import org.springframework.http.MediaType;
import org.springframework.web.bind.annotation.*;

import javax.servlet.http.HttpServletRequest;
import javax.servlet.http.HttpServletResponse;
import java.io.*;
import java.net.URLDecoder;
import java.security.MessageDigest;
import java.security.NoSuchAlgorithmException;

@RestController
@RequestMapping({"/wopi"})
public class OfficeServerController {
    Logger logger = LoggerFactory.getLogger(OfficeServerController.class);

    @Value("${file.path}")
    private String filePath;
    @GetMapping("/files/{name}")
    public void getFileInfo(HttpServletRequest request, HttpServletResponse response) {
        String uri = request.getRequestURI();
        FileInfo info = new FileInfo();

        try  {
            // 获取文件名, 防止中文文件名乱码
            String fileName = URLDecoder.decode(uri.substring(uri.indexOf("wopi/files/") + 11), "UTF-8");
            if (fileName != null && fileName.length() > 0) {
                File file = new File(filePath + fileName);
                if (file.exists()) {
                    info.setBaseFileName(file.getName());
                    info.setSize(file.length());
                    info.setOwnerId("admin");
                    info.setVersion(file.lastModified());
                    info.setSha256(getHash256(file));
                }
            }

            ObjectMapper mapper = new ObjectMapper();
            response.setContentType(MediaType.APPLICATION_JSON_UTF8_VALUE);
            response.getWriter().write(mapper.writeValueAsString(info));
        } catch (Exception e) {
            logger.error("getFileInfo failed, errMsg: {}", e.toString());
            e.printStackTrace();
        }
    }


    @GetMapping("/files/{name}/contents")
    public void getFile(@PathVariable String name, HttpServletResponse response) {
        // 文件的路径
        String path = filePath + name;
        File file = new File(path);
        String filename = file.getName();

        try (InputStream fis = new BufferedInputStream(new FileInputStream(path));
             OutputStream toClient = new BufferedOutputStream(response.getOutputStream())) {
            byte[] buffer = new byte[fis.available()];
            fis.read(buffer);
            // 清空response
            response.reset();

            // 设置response的Header
            response.addHeader("Content-Disposition", "attachment;filename=" +
                    new String(filename.getBytes("UTF-8"), "ISO-8859-1"));
            response.addHeader("Content-Length", String.valueOf(file.length()));

            response.setContentType(MediaType.APPLICATION_OCTET_STREAM_VALUE);
            toClient.write(buffer);
            toClient.flush();
        } catch (IOException e) {
            logger.error("getFile failed, errMsg: {}", e.toString());
            e.printStackTrace();
        }
    }

    @PostMapping("/files/{name}/contents")
    public void postFile(@PathVariable(name = "name") String name, @RequestBody byte[] content) {
        // 文件的路径
        String path = filePath + name;
        File file = new File(path);

        try (FileOutputStream fop = new FileOutputStream(file)) {
            fop.write(content);
            fop.flush();
        } catch (IOException e) {
            logger.error("postFile failed, errMsg: {}", e.toString());
            e.printStackTrace();
        }
    }

    public static String getHash256(File file) {
        String value = "";
        // 获取hash值
        try {
            byte[] buffer = new byte[1024];
            int numRead;
            InputStream fis = new FileInputStream(file);
            //如果想使用SHA-1或SHA-256,则传入SHA-1,SHA-256
            MessageDigest complete = MessageDigest.getInstance("SHA-256");
            do {
                //从文件读到buffer
                numRead = fis.read(buffer);
                if (numRead > 0) {
                    //用读到的字节进行MD5的计算,第二个参数是偏移量
                    complete.update(buffer, 0, numRead);
                }
            } while (numRead != -1);

            fis.close();
            value = new String(Base64.encodeBase64(complete.digest()));
        } catch (NoSuchAlgorithmException e) {
            e.printStackTrace();
        } catch (FileNotFoundException e) {
            e.printStackTrace();
        } catch (IOException e) {
            e.printStackTrace();
        }
        return value;
    }
}
九、如何外部网络访问office编辑预览服务
虚拟机:一台域控、一台office server
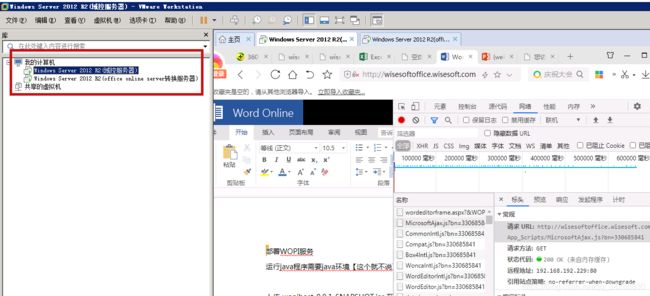
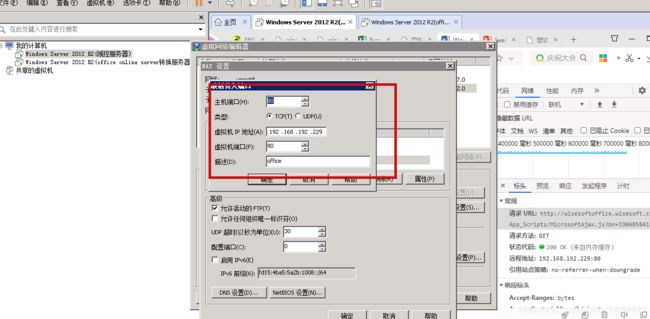
1、虚拟机端口映射,将officeserver服务器的80端口映射到主机的80端口
注意:保证主机的端口80没被占用


