seata 搭建
1.安装环境:
seata:1.4.1
nacos:1.4.0
jdk: 1.8 +
maven: 3.6.3
2.搭建nacos ,路径: /usr/local/
安装之前先安装JDKhttps://blog.csdn.net/weixin_41478499/article/details/115179358
MAVENhttps://blog.csdn.net/weixin_41478499/article/details/115180251
下载nacos
[root@dxm31 nacos]# wget https://github.com/alibaba/nacos/releases/download/1.4.0/nacos-server-1.4.0.tar.gz
解压
[root@localhost local]# tar -zxvf nacos-server-1.4.0.tar.gz
解压完成删除安装包
[root@localhost local]# rm nacos-server-1.4.0.tar.gz
rm:是否删除普通文件 "nacos-server-1.4.0.tar.gz"?y
3.启动nacos服务
standalone代表着单机模式运行,非集群模式
[root@localhost local]# sh /usr/local/nacos/bin/startup.sh -m standalone
/usr/local/java/jdk1.8.0_281/bin/java  -Xms512m -Xmx512m -Xmn256m -Dnacos.standalone=true -Dnacos.member.list= -Djava.ext.dirs=/usr/local/java/jdk1.8.0_281/jre/lib/ext:/usr/local/java/jdk1.8.0_281/lib/ext -Xloggc:/usr/local/nacos/logs/nacos_gc.log -verbose:gc -XX:+PrintGCDetails -XX:+PrintGCDateStamps -XX:+PrintGCTimeStamps -XX:+UseGCLogFileRotation -XX:NumberOfGCLogFiles=10 -XX:GCLogFileSize=100M -Dloader.path=/usr/local/nacos/plugins/health,/usr/local/nacos/plugins/cmdb -Dnacos.home=/usr/local/nacos -jar /usr/local/nacos/target/nacos-server.jar  --spring.config.location=file:/usr/local/nacos/conf/,classpath:/,classpath:/config/,file:./,file:./config/ --logging.config=/usr/local/nacos/conf/nacos-logback.xml --server.max-http-header-size=524288
nacos is starting with standalone
nacos is starting,you can check the /usr/local/nacos/logs/start.out
关闭nacos服务
shutdown.sh
4.查看进程及端口监听
[root@localhost local]# ps aux |grep nacos
root      22838 29.1 56.4 2861856 524892 pts/1  Sl   17:16   1:13 /usr/local/java/jdk1.8.0_281/bin/java -Xms512m -Xmx512m -Xmn256m -Dnacos.standalone=true -Dnacos.member.list= -Djava.ext.dirs=/usr/local/java/jdk1.8.0_281/jre/lib/ext:/usr/local/java/jdk1.8.0_281/lib/ext -Xloggc:/usr/local/nacos/logs/nacos_gc.log -verbose:gc -XX:+PrintGCDetails -XX:+PrintGCDateStamps -XX:+PrintGCTimeStamps -XX:+UseGCLogFileRotation -XX:NumberOfGCLogFiles=10 -XX:GCLogFileSize=100M -Dloader.path=/usr/local/nacos/plugins/health,/usr/local/nacos/plugins/cmdb -Dnacos.home=/usr/local/nacos -jar /usr/local/nacos/target/nacos-server.jar --spring.config.location=file:/usr/local/nacos/conf/,classpath:/,classpath:/config/,file:./,file:./config/ --logging.config=/usr/local/nacos/conf/nacos-logback.xml --server.max-http-header-size=524288 nacos.nacos
root      23134  0.0  0.1 112724   984 pts/1    R+   17:20   0:00 grep --color=auto nacos
[root@localhost local]# netstat -ntlp | grep 8848
tcp6       0      0 :::8848                 :::*                    LISTEN      22838/java
5.浏览器访问
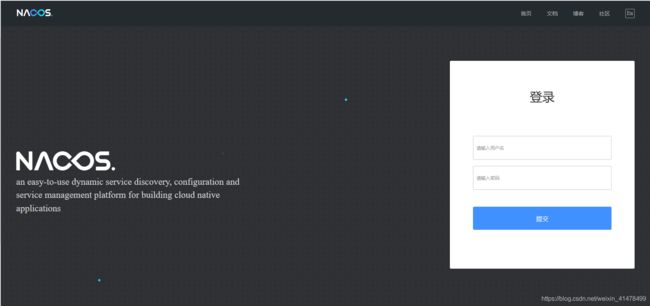
http://ip:8848/nacos/#/login 默认账号密码都是nacos
6.搭建seata
官方文档:https://seata.io/zh-cn/docs/ops/deploy-guide-beginner.html
下载seata:https://github.com/seata/seata/releases
源码里包含里很多配置文件会用到
[root@localhost local]# wget https://github.com/seata/seata/releases/download/v1.4.1/seata-server-1.4.1.tar.gz
解压
[root@localhost local]# tar -xvf seata-server-1.4.1.tar.gz
7.配置为高可用redis模式参数并提交至配置中心/也可用db模式.配置store.mode切换
创建文件 ,位置随意自己,参照参数:https://seata.io/zh-cn/docs/user/configurations.html
vi /usr/local/seata/config.txt
配置内容如下,只配置所需内容即可;这里贴出db / redis
service.vgroupMapping.my_test_tx_group=default
store.mode=redis
store.db.datasource=druid
store.db.dbType=mysql
store.db.driverClassName=com.mysql.jdbc.Driver
store.db.url=jdbc:mysql://127.0.0.1:3306/seata?useUnicode=true
store.db.user=username
store.db.password=password
store.db.minConn=5
store.db.maxConn=30
store.db.globalTable=global_table
store.db.branchTable=branch_table
store.db.queryLimit=100
store.db.lockTable=lock_table
store.db.maxWait=5000
store.redis.mode=single
store.redis.single.host=122.152.195.7
store.redis.single.port=6379
store.redis.maxConn=10
store.redis.minConn=1
store.redis.maxTotal=100
store.redis.database=0
store.redis.password=jixiang
store.redis.queryLimit=100
将配置内容上传至nacos服务,新建文件夹nacos
文件位置:
[root@localhost conf]# vi /usr/local/seata/nacos/nacos-config.sh
配置内容
opyright 1999-2019 Seata.io Group.
#
# Licensed under the Apache License, Version 2.0 (the "License");
# you may not use this file except in compliance with the License.
# You may obtain a copy of the License at、
#
#      http://www.apache.org/licenses/LICENSE-2.0
#
# Unless required by applicable law or agreed to in writing, software
# distributed under the License is distributed on an "AS IS" BASIS,
# WITHOUT WARRANTIES OR CONDITIONS OF ANY KIND, either express or implied.
# See the License for the specific language governing permissions and
# limitations under the License.

while getopts ":h:p:g:t:u:w:" opt
do
  case $opt in
  h)
    host=$OPTARG
    ;;
  p)
    port=$OPTARG
    ;;
  g)
    group=$OPTARG
    ;;
  t)
    tenant=$OPTARG
    ;;
  u)
    username=$OPTARG
    ;;
  w)
    password=$OPTARG
    ;;
  ?)
    echo " USAGE OPTION: $0 [-h host] [-p port] [-g group] [-t tenant] [-u username] [-w password] "
    exit 1
    ;;
  esac
done

urlencode() {
  for ((i=0; i < ${#1}; i++))
  do
    char="${1:$i:1}"
    case $char in
    [a-zA-Z0-9.~_-]) printf $char ;;
    *) printf '%%%02X' "'$char" ;;
    esac
  done
}

if [[ -z ${host} ]]; then
    host=localhost
fi
if [[ -z ${port} ]]; then
    port=8848
fi
if [[ -z ${group} ]]; then
    group="SEATA_GROUP"
fi
if [[ -z ${tenant} ]]; then
    tenant=""
fi
if [[ -z ${username} ]]; then
    username=""
fi
if [[ -z ${password} ]]; then
    password=""
fi

nacosAddr=$host:$port
contentType="content-type:application/json;charset=UTF-8"

echo "set nacosAddr=$nacosAddr"
echo "set group=$group"

failCount=0
tempLog=$(mktemp -u)
function addConfig() {
  curl -X POST -H "${contentType}" "http://$nacosAddr/nacos/v1/cs/configs?dataId=$(urlencode $1)&group=$group&content=$(urlencode $2)&tenant=$tenant&username=$username&password=$password" >"${tempLog}" 2>/dev/null
  if [[ -z $(cat "${tempLog}") ]]; then
    echo " Please check the cluster status. "
    exit 1
  fi
  if [[ $(cat "${tempLog}") =~ "true" ]]; then
    echo "Set $1=$2 successfully "
  else
    echo "Set $1=$2 failure "
    (( failCount++ ))
  fi
}

count=0
for line in $(cat $(dirname "$PWD")/config.txt | sed s/[[:space:]]//g); do
  (( count++ ))
        key=${line%%=*}
    value=${line#*=}
        addConfig "${key}" "${value}"
done

echo "========================================================================="
echo " Complete initialization parameters,  total-count:$count ,  failure-count:$failCount "
echo "========================================================================="

if [[ ${failCount} -eq 0 ]]; then
        echo " Init nacos config finished, please start seata-server. "
else
        echo " init nacos config fail. "
fi
上传操作
[root@localhost seata]# cd /usr/local/seata/nacos/
[root@localhost nacos]# bash nacos-config.sh -h ip -p 8848 -g SEATA_GROUP -u nacos -w nacos
nacos-config.sh:行2: opyright: 未找到命令
set nacosAddr=192.168.92.128:8848
set group=SEATA_GROUP
Set service.vgroupMapping.my_test_tx_group=default successfully
Set store.mode=redis successfully
Set store.redis.mode=single successfully
Set store.redis.single.host=122.152.195.7 successfully
Set store.redis.single.port=6379 successfully
Set store.redis.maxConn=10 successfully
Set store.redis.minConn=1 successfully
Set store.redis.maxTotal=100 successfully
Set store.redis.database=0 successfully
Set store.redis.password=jixiang successfully
Set store.redis.queryLimit=100 successfully
=========================================================================
 Complete initialization parameters,  total-count:11 ,  failure-count:0
=========================================================================
 Init nacos config finished, please start seata-server.
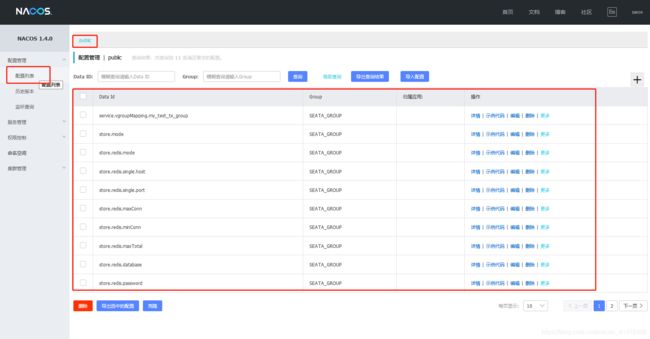
查看nacos是否上传成功
这里使用的是public默认的命名空间,也可自己新建.若要上传到自己新建的命名空间则上传操作需做微调,t后面跟着命名空间ID,此id可自定义否则自动生成.下面配置registry.conf时namespace参数若用public则不填,否则天对应命名空间ID
bash nacos-config.sh -h 192.168.92.129 -p 8848 -g SEATA_GROUP -t c3c73e9b-c32d-408c-83f6-09861e4072de -u nacos -w nacos
查看自建命名空间
8.修改seata的两个配置文件 file.conf 和 registry.conf
vi /usr/local/seata/conf/file.conf
9.file.conf 可以只保留自己需要的.这里我选用的是redis / 也可以选择db,配置的话自行填写
## transaction log store, only used in seata-server
store {
  ## store mode: file、db、redis
  #设置存储模式,也就是设置事务日志存储位置
  mode = "redis"
  ## database store property
  db {
    ## the implement of javax.sql.DataSource, such as DruidDataSource(druid)/BasicDataSource(dbcp)/HikariDataSource(hikari) etc.
    datasource = "druid"
    ## mysql/oracle/postgresql/h2/oceanbase etc.
    dbType = "mysql"
    driverClassName = "com.mysql.jdbc.Driver"
    url = "jdbc:mysql://127.0.0.1:3306/seata"
    user = "mysql"
    password = "mysql"
    minConn = 5
    maxConn = 100
    globalTable = "global_table"
    branchTable = "branch_table"
    lockTable = "lock_table"
    queryLimit = 100
    maxWait = 5000
  }

  ## redis store property
  redis {
    host = "127.0.0.1"
    port = "6379"
    password = "password"
    database = "0"
    minConn = 1
    maxConn = 10
    maxTotal = 100
    queryLimit = 100
  }

}
10.registry.conf
这里选用nacos作为服务中心,需要注意namespace的值在nacos
registry {
  # file 、nacos 、eureka、redis、zk、consul、etcd3、sofa
  type = "nacos"
  loadBalance = "RandomLoadBalance"
  loadBalanceVirtualNodes = 10

  nacos {
    application = "seata-server"
    serverAddr = "127.0.0.1:8848"
    //不同的命名空间,分组不能一样.
    group = "SEATA_GROUP"
    namespace = ""
    cluster = "default"
    username = "nacos"
    password = "nacos"
  }
}

config {
  # file、nacos 、apollo、zk、consul、etcd3
  type = "nacos"

  nacos {
    serverAddr = "127.0.0.1:8848"
    namespace = ""
    group = "SEATA_GROUP"
    username = "nacos"
    password = "nacos"
  }
}
11.启动seata
[root@localhost conf]# sh /usr/local/seata/bin/seata-server.sh -h 127.0.0.1 -p 8091
成功会有如下片段
01:56:42.912  INFO --- [                     main] io.seata.config.FileConfiguration        : The file name of the operation is registry
01:56:42.916  INFO --- [                     main] io.seata.config.FileConfiguration        : The configuration file used is /usr/local/seata/conf/registry.conf
01:56:43.744  INFO --- [                     main] i.s.s.storage.redis.JedisPooledFactory   : initialization of the build redis connection pool is complete
01:56:43.921  INFO --- [                     main] i.s.core.rpc.netty.NettyServerBootstrap  : Server started, listen port: 8091
查看nacos服务列表,发现注册上了seata服务
12.高可用Seata-server搭建
重新启动一台linux将6.8.9.10.11操作重新做一遍即可,启动ip为本机ip.可以看到实例数是2个
注解即开启全局事务.
	/**
     *  1.开启全局事务需要在具体的方法上加注解
     * 	@GlobalTransactional(rollbackFor = Exception.class)
     *  2.业务流程为2个不同的库修改数据
     */
	@Override
    @GlobalTransactional(rollbackFor = Exception.class)
    public void update(JSONObject param) {
    	//修改库1表字段值
        accountDao.updateNum(id,num);
        //修改库2表字段值
        userDao.updateUserMoney(id,money);
		//异常逻辑
        int i = 1/0;
    }
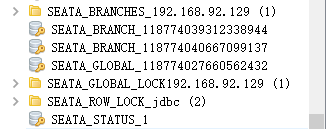
查看redis
:
看控制台日志
若没异常可正常提交
可以停掉其中一个seata服务,发现也是可以正常回滚和提交


