Golang - 操作Redis
Golang - 操作Redis
go-redis是Golang语言连接、操作Redis服务的客户端,几乎包含了对Redis的所有操作,具体如下:
- 简单易用 兼容多种Redis部署架构,可用于Redis服务器、Redis群集、Redis Sentinel,甚至Redis服务器环
- go-redis 支持所有的redis指令,跟使用原生的redis-cli 客户端没有任何区别
- go-redis 支持管道、事务、发布/订阅、Lua脚本、模拟、分布式锁等
安装客户端
初始化项目
# 1. 创建项目目录
mkdir go-redis-example
# 2. 进入项目目录
cd go-redis-example
# 3. 初始化项目
go mod init github.com/my/repo

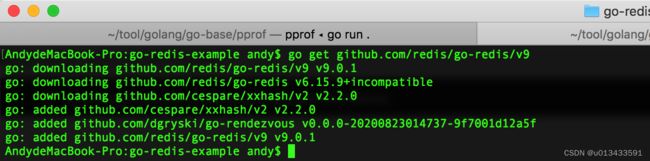
安装客户端
// 截止目前为止 v9的版本尚不稳定 属于beta版本
go get github.com/redis/go-redis/v9
操作代码
package main

import (
	"context"
  "fmt"
	"github.com/redis/go-redis/v9"
)

func main() {
	ctx := context.Background()

	rdb := redis.NewClient(&redis.Options{
		Addr:	  "localhost:6379",
		Password: "", // no password set
		DB:		  0,  // use default DB
	})

	err := rdb.Set(ctx, "key", "value", 0).Err()
	if err != nil {
		panic(err)
	}

	val, err := rdb.Get(ctx, "key").Result()
	if err != nil {
		panic(err)
	}
	fmt.Println("key", val)

	val2, err := rdb.Get(ctx, "key2").Result()
	if err == redis.Nil {
		fmt.Println("key2 does not exist")
	} else if err != nil {
		panic(err)
	} else {
		fmt.Println("key2", val2)
	}
	// Output: key value
	// key2 does not exist
}
代码测试
启动Redis
# 执行以下命令 启动redis
redis-server
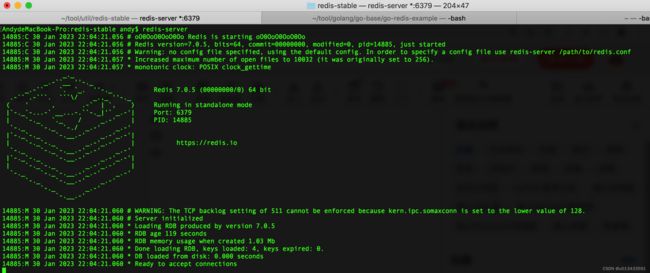
如上图,本地使用Redis 7服务器进行测试,Redis的安装方式 请参考官网。
测试结果
// 运行应用程序
go run .

高级用法
连接Cluster集群
import "github.com/redis/go-redis/v9"

rdb := redis.NewClusterClient(&redis.ClusterOptions{
    Addrs: []string{":7000", ":7001", ":7002", ":7003", ":7004", ":7005"},

    // To route commands by latency or randomly, enable one of the following.
    //RouteByLatency: true,
    //RouteRandomly: true,
})
连接Sentinel架构
import "github.com/redis/go-redis/v9"

rdb := redis.NewFailoverClient(&redis.FailoverOptions{
    MasterName:    "master-name",
    SentinelAddrs: []string{":9126", ":9127", ":9128"},
})
从v8开始,开发者可以使用实验性NewFailoverClusterClient将只读命令路由到从属节点:
import "github.com/redis/go-redis/v9"

rdb := redis.NewFailoverClusterClient(&redis.FailoverOptions{
    MasterName:    "master-name",
    SentinelAddrs: []string{":9126", ":9127", ":9128"},

    // To route commands by latency or randomly, enable one of the following.
    //RouteByLatency: true,
    //RouteRandomly: true,
})
发布订阅
- 发布消息
err := rdb.Publish(ctx, "mychannel1", "payload").Err()
if err != nil {
	panic(err)
}
- 订阅消息
// There is no error because go-redis automatically reconnects on error.
pubsub := rdb.Subscribe(ctx, "mychannel1")

// Close the subscription when we are done.
defer pubsub.Close()

for {
	msg, err := pubsub.ReceiveMessage(ctx)
	if err != nil {
		panic(err)
	}

	fmt.Println(msg.Channel, msg.Payload)
}
pipeline操作
- 方式一
pipe := rdb.Pipeline()

incr := pipe.Incr(ctx, "pipeline_counter")
pipe.Expire(ctx, "pipeline_counter", time.Hour)

cmds, err := pipe.Exec(ctx)
if err != nil {
	panic(err)
}

// The value is available only after Exec is called.
fmt.Println(incr.Val())
- 方式二
var incr *redis.IntCmd

cmds, err := rdb.Pipelined(ctx, func(pipe redis.Pipeliner) error {
	incr = pipe.Incr(ctx, "pipelined_counter")
	pipe.Expire(ctx, "pipelined_counter", time.Hour)
	return nil
})
if err != nil {
	panic(err)
}

// The value is available only after the pipeline is executed.
fmt.Println(incr.Val())
通过pipelline获取直接结果
cmds, err := rdb.Pipelined(ctx, func(pipe redis.Pipeliner) error {
	for i := 0; i < 100; i++ {
		pipe.Get(ctx, fmt.Sprintf("key%d", i))
	}
	return nil
})
if err != nil {
	panic(err)
}

for _, cmd := range cmds {
    fmt.Println(cmd.(*redis.StringCmd).Val())
}