Spring启动流程详细概述
上篇博客我们对Spring的大概流程进行了一个阐述
Spring源码流程剖析
这篇博客主要讲Spring的启动流程
首先开始debug,进入构造方法
   public ClassPathXmlApplicationContext(String[] configLocations, boolean refresh, @Nullable ApplicationContext parent) throws BeansException {
        super(parent);
        this.setConfigLocations(configLocations);
        if (refresh) {
            this.refresh();
        }

    }
刚开始,调用父类的构造方法
我们进去一探究竟,一直往里面走会看到这个类
  public AbstractApplicationContext() {
        this.logger = LogFactory.getLog(this.getClass());
        this.id = ObjectUtils.identityToString(this);
        this.displayName = ObjectUtils.identityToString(this);
        this.beanFactoryPostProcessors = new ArrayList();
        this.active = new AtomicBoolean();
        this.closed = new AtomicBoolean();
        this.startupShutdownMonitor = new Object();
        this.applicationStartup = ApplicationStartup.DEFAULT;
        this.applicationListeners = new LinkedHashSet();
        this.resourcePatternResolver = this.getResourcePatternResolver();
    }
我们可以看到,这个类起的作用便是对一系列属性值的初始化以及赋值操作,我们逐行来看
this.logger = LogFactory.getLog(this.getClass());
日志的初始化
this.id = ObjectUtils.identityToString(this);
容器创建时,系统会为其分配一个id。这个id我们之前见到过,在对beanFactory进行refresh的时候
    protected final void refreshBeanFactory() throws BeansException {
        if (this.hasBeanFactory()) {
            this.destroyBeans();
            this.closeBeanFactory();
        }

        try {
            DefaultListableBeanFactory beanFactory = this.createBeanFactory();
            beanFactory.setSerializationId(this.getId());//注意这行!!!!
            this.customizeBeanFactory(beanFactory);
            this.loadBeanDefinitions(beanFactory);
            this.beanFactory = beanFactory;
        } catch (IOException var2) {
            throw new ApplicationContextException("I/O error parsing bean definition source for " + this.getDisplayName(), var2);
        }
    }
这个getId()取得的便是此时设立的id值
下面进行展示名称的设置,这个不是重点
this.displayName = ObjectUtils.identityToString(this);
然后设置了用来对Bean工厂进行增强的集合,可以看到,目前还为空
this.beanFactoryPostProcessors = new ArrayList();
这是对激活关闭状态标志位的初始化
  this.active = new AtomicBoolean();
        this.closed = new AtomicBoolean();
下面是一个锁的同步器,用来使得刷新(refresh)和销毁(destory)不会被中断
this.startupShutdownMonitor = new Object();
注意看下面这个,资源模式解析器
this.resourcePatternResolver = this.getResourcePatternResolver();
,点进去
里面的实现是比较复杂的,总体来说是对xml 文件的一个解析
里面有一个点值得注意
private PathMatcher pathMatcher = new AntPathMatcher();
这个类用来对ant风格表达式的替换。资源模式解析器继承树顶端是 一个ResourceLoader
public interface ResourceLoader {
    String CLASSPATH_URL_PREFIX = "classpath:";

    Resource getResource(String var1);

    @Nullable
    ClassLoader getClassLoader();
}
那么,我们这个super(parent)就算是介绍完了,总体上来看就是对属性值的一些设置和初始化
继续回到构造方法
   public ClassPathXmlApplicationContext(String[] configLocations, boolean refresh, @Nullable ApplicationContext parent) throws BeansException {
        super(parent);
        this.setConfigLocations(configLocations);
        if (refresh) {
            this.refresh();
        }

    }
下一个方法
this.setConfigLocations(configLocations);
  public void setConfigLocations(@Nullable String... locations) {
        if (locations != null) {
            Assert.noNullElements(locations, "Config locations must not be null");
            this.configLocations = new String[locations.length];

            for(int i = 0; i < locations.length; ++i) {
                this.configLocations[i] = this.resolvePath(locations[i]).trim();
            }
        } else {
            this.configLocations = null;
        }

    }
核心的解析步骤为
this.configLocations[i] = this.resolvePath(locations[i]).trim();
点进去
protected String resolvePath(String path) {
        return this.getEnvironment().resolveRequiredPlaceholders(path);
    }
首先,是一个getEnvironment(),我们之所以进行这个操作,是因为截止到目前,一切环境属性都还没有设置,因此我们先对环境属性进行一些设置,点进去
this.environment = this.createEnvironment();
再点
  protected ConfigurableEnvironment createEnvironment() {
        return new StandardEnvironment();
    }
需要注意,它返回的这个StandardEnvironment是没有构造方法的,也就是说它是一个无参的默认构造方法,因此要一探究竟我们只能去它父类构造方法里瞅瞅
  public AbstractEnvironment() {
        this(new MutablePropertySources());
    }

    protected AbstractEnvironment(MutablePropertySources propertySources) {
        this.logger = LogFactory.getLog(this.getClass());
        this.activeProfiles = new LinkedHashSet();
        this.defaultProfiles = new LinkedHashSet(this.getReservedDefaultProfiles());
        this.propertySources = propertySources;
        this.propertyResolver = this.createPropertyResolver(propertySources);
        this.customizePropertySources(propertySources);
    }
因此,它的父类会执行一个叫做 this.customizePropertySources(propertySources);的方法
而这个方法是在子类内部实现的
 protected void customizePropertySources(MutablePropertySources propertySources) {
        propertySources.addLast(new PropertiesPropertySource("systemProperties", this.getSystemProperties()));
        propertySources.addLast(new SystemEnvironmentPropertySource("systemEnvironment", this.getSystemEnvironment()));
它对当前的系统属性以及系统环境进行了设置
在SpringBoot的源代码中,它还在这个方法里添加了另外两个属性,这点我们后续再聊
因此,我们将大量的环境属性加载进来了
我们继续回到这个代码
protected String resolvePath(String path) {
        return this.getEnvironment().resolveRequiredPlaceholders(path);
    }
加载完环境属性后,resolveRequiredPlaceholders(path)实际上完成的是对$符的替换
点进去
 public String resolveRequiredPlaceholders(String text) throws IllegalArgumentException {
        return this.propertyResolver.resolveRequiredPlaceholders(text);
    }
注意里面的
  private String doResolvePlaceholders(String text, PropertyPlaceholderHelper helper) {
        return helper.replacePlaceholders(text, this::getPropertyAsRawString);
    }
点进去 ,就来到了核心代码
    protected String parseStringValue(String value, PropertyPlaceholderHelper.PlaceholderResolver placeholderResolver, @Nullable Set<String> visitedPlaceholders) {
        int startIndex = value.indexOf(this.placeholderPrefix);
        if (startIndex == -1) {
            return value;
        } else {
            StringBuilder result = new StringBuilder(value);

            while(startIndex != -1) {
                int endIndex = this.findPlaceholderEndIndex(result, startIndex);
                if (endIndex != -1) {
                    String placeholder = result.substring(startIndex + this.placeholderPrefix.length(), endIndex);
                    String originalPlaceholder = placeholder;
                    if (visitedPlaceholders == null) {
                        visitedPlaceholders = new HashSet(4);
                    }

                    if (!((Set)visitedPlaceholders).add(placeholder)) {
                        throw new IllegalArgumentException("Circular placeholder reference '" + placeholder + "' in property definitions");
                    }

                    placeholder = this.parseStringValue(placeholder, placeholderResolver, (Set)visitedPlaceholders);
                    String propVal = placeholderResolver.resolvePlaceholder(placeholder);
                    if (propVal == null && this.valueSeparator != null) {
                        int separatorIndex = placeholder.indexOf(this.valueSeparator);
                        if (separatorIndex != -1) {
                            String actualPlaceholder = placeholder.substring(0, separatorIndex);
                            String defaultValue = placeholder.substring(separatorIndex + this.valueSeparator.length());
                            propVal = placeholderResolver.resolvePlaceholder(actualPlaceholder);
                            if (propVal == null) {
                                propVal = defaultValue;
                            }
                        }
                    }

                    if (propVal != null) {
                        propVal = this.parseStringValue(propVal, placeholderResolver, (Set)visitedPlaceholders);
                        result.replace(startIndex, endIndex + this.placeholderSuffix.length(), propVal);
                        if (logger.isTraceEnabled()) {
                            logger.trace("Resolved placeholder '" + placeholder + "'");
                        }

                        startIndex = result.indexOf(this.placeholderPrefix, startIndex + propVal.length());
                    } else {
                        if (!this.ignoreUnresolvablePlaceholders) {
                            throw new IllegalArgumentException("Could not resolve placeholder '" + placeholder + "' in value \"" + value + "\"");
                        }

                        startIndex = result.indexOf(this.placeholderPrefix, endIndex + this.placeholderSuffix.length());
                    }

                    ((Set)visitedPlaceholders).remove(originalPlaceholder);
                } else {
                    startIndex = -1;
                }
            }

            return result.toString();
        }
    }
注意看这行代码
placeholder = this.parseStringValue(placeholder, placeholderResolver, (Set)visitedPlaceholders);
它是对方法的一个递归调用,用来处理${}里面内嵌${} 的情况
里面还有这样一个方法
String propVal = placeholderResolver.resolvePlaceholder(placeholder);
点击去
    protected <T> T getProperty(String key, Class<T> targetValueType, boolean resolveNestedPlaceholders) {
        if (this.propertySources != null) {
            Iterator var4 = this.propertySources.iterator();

            while(var4.hasNext()) {
                PropertySource<?> propertySource = (PropertySource)var4.next();
                if (this.logger.isTraceEnabled()) {
                    this.logger.trace("Searching for key '" + key + "' in PropertySource '" + propertySource.getName() + "'");
                }

                Object value = propertySource.getProperty(key);
                if (value != null) {
                    if (resolveNestedPlaceholders && value instanceof String) {
                        value = this.resolveNestedPlaceholders((String)value);
                    }

                    this.logKeyFound(key, propertySource, value);
                    return this.convertValueIfNecessary(value, targetValueType);
                }
            }
        }

        if (this.logger.isTraceEnabled()) {
            this.logger.trace("Could not find key '" + key + "' in any property source");
        }

        return null;
    }
这个方法以${}内部的字符串为key,在Map 中不断查找是否存在value,这个键值对在getEnvironment方法中已被加入
这个setConfigLocations方法也差不多介绍完了,主要完成的是对环境属性的设置,以及入口函数构造方法中xml 文件名称里面${}里面值的替换
下面将要进入refresh
    public void refresh() throws BeansException, IllegalStateException {
        synchronized(this.startupShutdownMonitor) {
            StartupStep contextRefresh = this.applicationStartup.start("spring.context.refresh");
            this.prepareRefresh();
            ConfigurableListableBeanFactory beanFactory = this.obtainFreshBeanFactory();
            this.prepareBeanFactory(beanFactory);

            try {
                this.postProcessBeanFactory(beanFactory);
                StartupStep beanPostProcess = this.applicationStartup.start("spring.context.beans.post-process");
                this.invokeBeanFactoryPostProcessors(beanFactory);
                this.registerBeanPostProcessors(beanFactory);
                beanPostProcess.end();
                this.initMessageSource();
                this.initApplicationEventMulticaster();
                this.onRefresh();
                this.registerListeners();
                this.finishBeanFactoryInitialization(beanFactory);
                this.finishRefresh();
            } catch (BeansException var10) {
                if (this.logger.isWarnEnabled()) {
                    this.logger.warn("Exception encountered during context initialization - cancelling refresh attempt: " + var10);
                }

                this.destroyBeans();
                this.cancelRefresh(var10);
                throw var10;
            } finally {
                this.resetCommonCaches();
                contextRefresh.end();
            }

        }
    }
首先是`this.prepareRefresh();
    protected void prepareRefresh() {
        this.startupDate = System.currentTimeMillis();
        this.closed.set(false);
        this.active.set(true);
        if (this.logger.isDebugEnabled()) {
            if (this.logger.isTraceEnabled()) {
                this.logger.trace("Refreshing " + this);
            } else {
                this.logger.debug("Refreshing " + this.getDisplayName());
            }
        }

        this.initPropertySources();
        this.getEnvironment().validateRequiredProperties();
        if (this.earlyApplicationListeners == null) {
            this.earlyApplicationListeners = new LinkedHashSet(this.applicationListeners);
        } else {
            this.applicationListeners.clear();
            this.applicationListeners.addAll(this.earlyApplicationListeners);
        }

        this.earlyApplicationEvents = new LinkedHashSet();
    }
this.initPropertySources();
该方法内部为空,留给子类实现或以后扩展
this.getEnvironment().validateRequiredProperties();
该方法用来对环境属性的合法性进行校验。比如,你可以通过在initPropertySources()自己设置属性类,但如果你设置的属性并非当前系统环境所拥有的,就会抛出异常
它里面有这样一个方法
   public void validateRequiredProperties() {
        MissingRequiredPropertiesException ex = new MissingRequiredPropertiesException();
        Iterator var2 = this.requiredProperties.iterator();

        while(var2.hasNext()) {
            String key = (String)var2.next();
            if (this.getProperty(key) == null) {
                ex.addMissingRequiredProperty(key);
            }
        }

        if (!ex.getMissingRequiredProperties().isEmpty()) {
            throw ex;
        }
    }
将你设置的属性作为key,如果获取不到对应value,就会抛出一个MissingRequiredPropertiesException异常
   if (this.earlyApplicationListeners == null) {
            this.earlyApplicationListeners = new LinkedHashSet(this.applicationListeners);
        } else {
            this.applicationListeners.clear();
            this.applicationListeners.addAll(this.earlyApplicationListeners);
        }
用来设置当前监听器集合。在Spring中,该集合目前为空,但在SpringBoot中,监听器集合在这一步时已经不再是空了
下一个方法
ConfigurableListableBeanFactory beanFactory = this.obtainFreshBeanFactory();
点进去
 protected ConfigurableListableBeanFactory obtainFreshBeanFactory() {
        this.refreshBeanFactory();
        return this.getBeanFactory();
    }
点进refreshBeanFactory
  protected final void refreshBeanFactory() throws BeansException {
        if (this.hasBeanFactory()) {
            this.destroyBeans();
            this.closeBeanFactory();
        }

        try {
            DefaultListableBeanFactory beanFactory = this.createBeanFactory();
            beanFactory.setSerializationId(this.getId());
            this.customizeBeanFactory(beanFactory);
            this.loadBeanDefinitions(beanFactory);
            this.beanFactory = beanFactory;
        } catch (IOException var2) {
            throw new ApplicationContextException("I/O error parsing bean definition source for " + this.getDisplayName(), var2);
        }
    }
来看里面的第一个方法
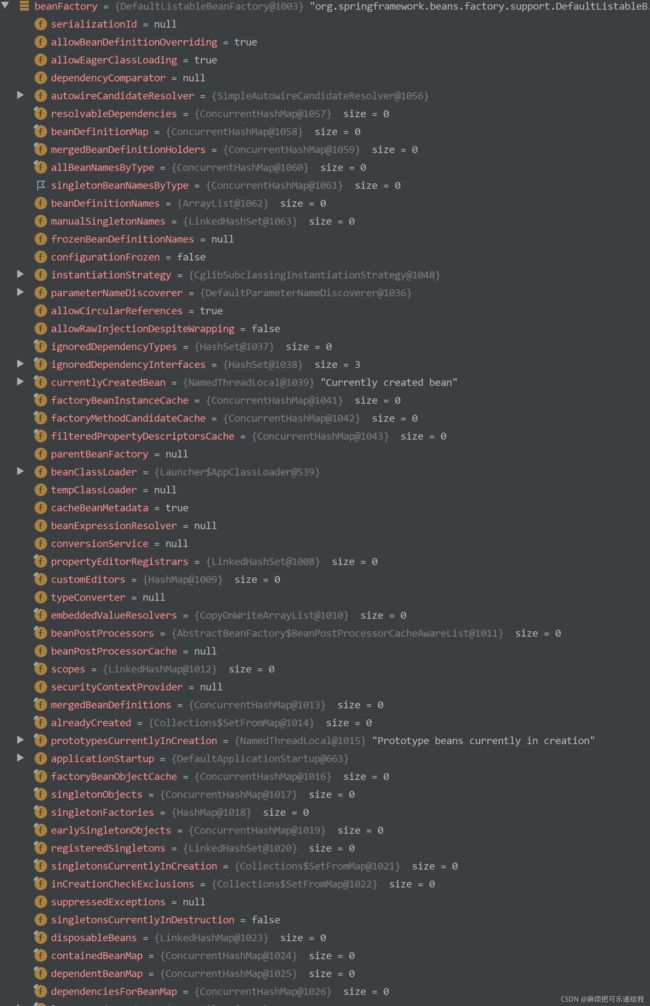
DefaultListableBeanFactory beanFactory = this.createBeanFactory();
这个方法内部非常简单,仅仅完成对beanFactory一些属性值的设置
完成这个方法后,会在beanFactory中设置一系列的属性值及初始化对象
下一个
beanFactory.setSerializationId(this.getId());
这个设置bean工厂的序列化id,没什么好说的
下一个
this.customizeBeanFactory(beanFactory);
   protected void customizeBeanFactory(DefaultListableBeanFactory beanFactory) {
        if (this.allowBeanDefinitionOverriding != null) {
            beanFactory.setAllowBeanDefinitionOverriding(this.allowBeanDefinitionOverriding);
        }

        if (this.allowCircularReferences != null) {
            beanFactory.setAllowCircularReferences(this.allowCircularReferences);
        }

    }
定制化bean工厂
我们可以通过自行重写这个方法达到控制beanFactory属性的目的
我们来看一下这两个属性值
setAllowBeanDefinitionOverriding
允许bean覆盖
关于这个,它涉及到两个标签:lookup-method 和 replaced-method
lookup-method
replaced-method
下一个方法
this.loadBeanDefinitions(beanFactory);
这个方法里面十分复杂,一层套一层
可以看到,目前的参数是beanFactory
点进去
 protected void loadBeanDefinitions(DefaultListableBeanFactory beanFactory) throws BeansException, IOException {
        XmlBeanDefinitionReader beanDefinitionReader = new XmlBeanDefinitionReader(beanFactory);
        beanDefinitionReader.setEnvironment(this.getEnvironment());
        beanDefinitionReader.setResourceLoader(this);
        beanDefinitionReader.setEntityResolver(new ResourceEntityResolver(this));
        this.initBeanDefinitionReader(beanDefinitionReader);
        this.loadBeanDefinitions(beanDefinitionReader);
    }
可以看到,它先是创建了一个beanDefinationReader,然后对这个reader进行了一系列属性值的设置,最后调用了它的重载方法,只不过此时的参数是reader
点进去
 protected void loadBeanDefinitions(XmlBeanDefinitionReader reader) throws BeansException, IOException {
        Resource[] configResources = this.getConfigResources();
        if (configResources != null) {
            reader.loadBeanDefinitions(configResources);
        }

        String[] configLocations = this.getConfigLocations();
        if (configLocations != null) {
            reader.loadBeanDefinitions(configLocations);
        }

    }
这次又变成了一个Resource[]的重载方法
点进去
    public int loadBeanDefinitions(Resource... resources) throws BeanDefinitionStoreException {
        Assert.notNull(resources, "Resource array must not be null");
        int count = 0;
        Resource[] var3 = resources;
        int var4 = resources.length;

        for(int var5 = 0; var5 < var4; ++var5) {
            Resource resource = var3[var5];
            count += this.loadBeanDefinitions((Resource)resource);
        }

        return count;
    }
这次又变成了一个Resource的重载方法
点进去

```java
 public int loadBeanDefinitions(Resource resource) throws BeanDefinitionStoreException {
        return this.loadBeanDefinitions(new EncodedResource(resource));
    }
可以看到,这次的参数变成了EncodedResource
点进去
    public int loadBeanDefinitions(EncodedResource encodedResource) throws BeanDefinitionStoreException {
        Assert.notNull(encodedResource, "EncodedResource must not be null");
        if (this.logger.isTraceEnabled()) {
            this.logger.trace("Loading XML bean definitions from " + encodedResource);
        }

        Set<EncodedResource> currentResources = (Set)this.resourcesCurrentlyBeingLoaded.get();
        if (!currentResources.add(encodedResource)) {
            throw new BeanDefinitionStoreException("Detected cyclic loading of " + encodedResource + " - check your import definitions!");
        } else {
            int var6;
            try {
                InputStream inputStream = encodedResource.getResource().getInputStream();
                Throwable var4 = null;

                try {
                    InputSource inputSource = new InputSource(inputStream);
                    if (encodedResource.getEncoding() != null) {
                        inputSource.setEncoding(encodedResource.getEncoding());
                    }

                    var6 = this.doLoadBeanDefinitions(inputSource, encodedResource.getResource());
                } catch (Throwable var24) {
                    var4 = var24;
                    throw var24;
                } finally {
                    if (inputStream != null) {
                        if (var4 != null) {
                            try {
                                inputStream.close();
                            } catch (Throwable var23) {
                                var4.addSuppressed(var23);
                            }
                        } else {
                            inputStream.close();
                        }
                    }

                }
            } catch (IOException var26) {
                throw new BeanDefinitionStoreException("IOException parsing XML document from " + encodedResource.getResource(), var26);
            } finally {
                currentResources.remove(encodedResource);
                if (currentResources.isEmpty()) {
                    this.resourcesCurrentlyBeingLoaded.remove();
                }

            }

            return var6;
        }
    }
注意看这行
var6 = this.doLoadBeanDefinitions(inputSource, encodedResource.getResource());
里面执行的就是对xml文件标签的详细解释工作