第五回:如何使用ListView Widget
文章目录
- 概念介绍
- 使用方法
- 示例代码
我们在上一章回中介绍了Container Widget,本章回中将介绍 ListView这种Widget,闲话休提,让我们一起Talk Flutter吧。
概念介绍
ListView就是一个滚动的列表,它可以看作是在Column的基础上添加了滚动功能,主要用来显示多条内容,当被显示的内容大于屏幕高度时就让内容在屏幕中滚动显示。
使用方法
- 创建列表中的单条列表;通常使用ListTitle表示,我们只需要创建一个ListTitle类的对象就可以;
- 把单条列表添加到ListView中,通常使用chirldern成员变量来控制;
- 使用scrollDirection成员变量来控制列表的滚动方向,默认是垂直滚动;
示例代码
介绍完使用方法后,我们通过具体的代码来演示ListView的用法;
    ListTile listItem(IconData icon, String content) {
      return ListTile(
        leading: Icon(
          icon,
          color: Colors.blue,
        ),
        title: Text(
          content,
          style: const TextStyle(
            color: Colors.black,
            fontSize: 22,
          ),
        ),
      );
    };

    Widget listEx = ListView(
      scrollDirection: Axis.vertical,
      children: [
        listItem(Icons.face, "One"),
        listItem(Icons.face, "One"),
        listItem(Icons.face, "One"),
        listItem(Icons.phone, "One"),
        listItem(Icons.cabin, "One"),
        listItem(Icons.cable, "One"),
      ],
    );
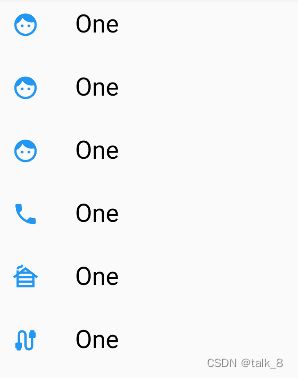
在上面的代码中,我们先创建了一个ListTitle类,类中包含一个图标和一个文本,也就是说ListView每一条项目中都会显示一个图标和一个文本;然后我们把ListTitle类通过children成员(或者叫命名参数)添加到ListView中。列表的显示方向是垂直,也可以设置为水平,代码中的垂直可以省略,因为默认值就是垂直。最后把ListView这个widget放到app中来运行,下面是示例代码:
void main() {
runApp(HelloApp());
}
class HelloApp extends StatelessWidget {
const HelloApp({Key? key}) : super(key: key);
Widget build(BuildContext context) {
//详细代码参考上面的内容
ListTile listItem(IconData icon, String content) {};
Widget listEx = ListView();
return MaterialApp(
title: 'Flutter Demo',
theme: ThemeData(primaryColor: Colors.blue),
// home: const StatefulAppEx(),
home: Scaffold(
appBar: AppBar(
title: const Text("Title of Hello App"),
),
// body: Column(
// children: [
// wechatBottom,
// listEx,
// ],
// )
body: listEx,
)
);
}
注意:上面代码中注释掉的代码无法运行,需要把ListView单独放在body中才可以运行。因为ListView是Column的扩展,所以无法把它嵌套在Column中。
编译并且运行上面的程序可以得到以下效果,运行效果中的图标使用SDK中自带图标,文字都一样,大家可以自行修改。

看官们,关于ListView Widget的内容就介绍到这里,欢迎大家在评论区交流与讨论!