029 Linux shell脚本与自动化
目录:
- 一:脚本编写规则变量定义
- 二:判断语句
- 三:循环语句与case语句应用
-
- 3.1:for , while
- 3.2: case
- 3.3:函数
- 3.4:nginx的自启动
一:脚本编写规则变量定义
linux的脚本可以理解为windows的批处理,能够实现自动的完成一些动作,从而减少人力的输出
小案例:
	上午9点,要求设定eth0网卡ip:192.168.1.1/24	192.168.1.254
	下午2点,要求设定eth0网卡ip:172.16.1.1/24 172.16.1.254
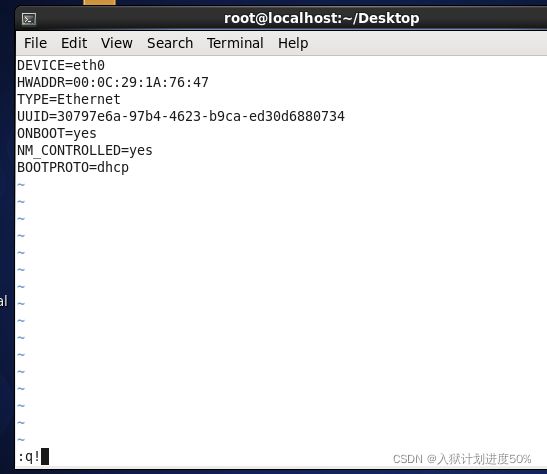
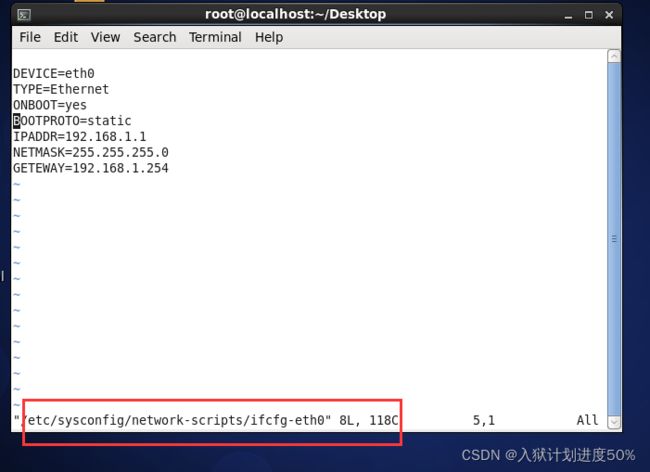
先打开配置文件:
vim /etc/sysconfig/network-script/ifcfg-eth0
cd /root/Desktop
vim fixipl.sh
写入如下内容:
#!bin/bash
echo "" > /etc/sysconfig/network-scripts/ifcfg-eth0
echo "DEVICE=eth0" >> /etc/sysconfig/network-scripts/ifcfg-eth0
echo "TYPE=Ethernet" >> /etc/sysconfig/network-scripts/ifcfg-eth0
echo "ONBOOT=yes" >> /etc/sysconfig/network-scripts/ifcfg-eth0
echo "BOOTPROTO=static" >> /etc/sysconfig/network-scripts/ifcfg-eth0
echo "IPADDR=192.168.1.1" >> /etc/sysconfig/network-scripts/ifcfg-eth0
echo "NETMASK=255.255.255.0" >> /etc/sysconfig/network-scripts/ifcfg-eth0
echo "GETEWAY=192.168.1.254" >> /etc/sysconfig/network-scripts/ifcfg-eth0
ifdown eth0
ifup eth0
保存退出,
ll fixipl.sh
-rw-r--r--. 1 root root 566 Jan 17 18:39 fixipl.sh

赋予执行权限:
chmod +x fixipl.sh

sh fixipl.sh
./fixipl.sh
报错

那是因为fixipl.sh的第一行bin前面漏写了一个斜杠。应该写成
#!/bin/bash
那为什么sh 的方式却可以运行呢? 塞翁失马焉知非福,下面就来看看./与sh运行脚本的区别
./与sh 的区别:
	linux ./a.sh 命令 与sh a.sh的区别为:可执行属性不同、执行方式不同、兼容性不同。
	一、可执行属性不同
		1、./a.sh 命令: ./a.sh 命令的文件必须具有可执行属性。
		2、sh a.sh命令:sh a.sh命令的文件不必具有可执行属性。
	二、执行方式不同
		1、./a.sh 命令:./a.sh 命令使用脚本中第一行所指定的命令来解释和执行文件。
		2、sh a.sh命令:sh a.sh命令使用shell工具的SH脚本直接解释和执行文件。
	三、兼容性不同
		1、 ./a.sh 命令: ./a.sh 命令的兼容性比sh a.sh命令更好,不受限于shell工具。
		2、sh a.sh命令:sh a.sh命令的兼容性比 ./a.sh 命令更差,受限于shell工具。
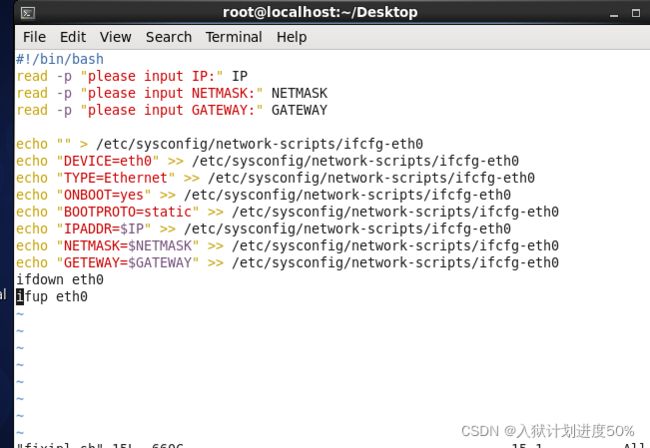
如果需求改变下,公司随机给你指定IP,
10.1.1.1/24
101.1.254
请输入ip地址:
请输入子网掩码:
请输入网关:
那我们可以用交互的方式来手动输入IP
二:判断语句
if 条件
	then 条件成立 子语句
else
	子语句
fi
例子,判断主机是否存活
#!/bin/bash
read -p "please input IP:" IP
if `ping -c2 -i0.2 -W2 $IP &> /dev/null`		# -c:ping两次   -i:每0.2秒间隔	-W:timeout,最高延时   /dev/null:linux的黑洞
then echo "$IP is up"
else echo "$IP is down"
fi

既然说到了&> 那就顺便看下类似的:
在linux中,&和&&, |和|| ,&> 与 >的区别
	& 	表示任务在后台执行,如要在后台运行
			[root@localhost local]# java -jar test.jar > log.txt &
			运行 test.jar程序 ,并且置于后台执行,执行的日志重定向 到当前默认的log.txt文件中
	&& 	表示前一条命令执行成功时,才执行后一条命令
	| 	表示管道,上一条命令的输出,作为下一条命令参数(输入)
	|| 	表示上一条命令执行失败后,才执行下一条命令,
	>	符号是指:将正常信息重定向
			如: find / -name “*.txt” > /tmp/log.txt
			在跟目录下根据名字来查找*.tx输入的日志放置/tmp/log.txt文件中
	&>	可以将错误信息或者普通信息都重定向输出
三:循环语句与case语句应用
3.1:for , while
循环语句for while
for根据取值列表循环
while根据条件进行循环
显示1 - 10,皮了一下,哈哈哈,发现只有两个点号才可以
[root@localhost network-scripts]# echo {1....10}
{1....10}
[root@localhost network-scripts]# echo {1...10}
{1...10}
[root@localhost network-scripts]# echo {1..10}
1 2 3 4 5 6 7 8 9 10
[root@localhost network-scripts]# echo {1.10}
{1.10}
for 变量 in 取值列表
do
	子语句
done

while 条件
do
	子语句
done
run.sh:
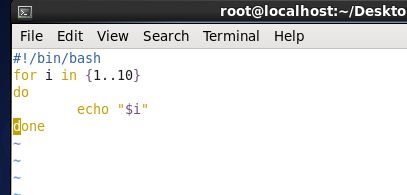
run2.sh:
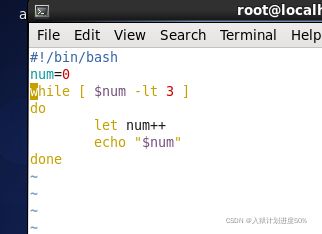
run3.sh:
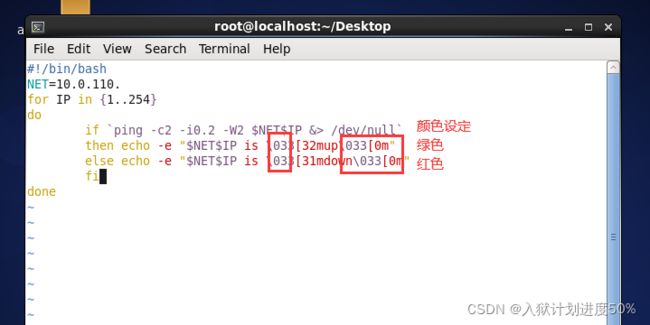
运行结果图:

3.2: case
case 变量 in
模式1)
	子语句
	;;
模式2)
	子语句
	;;
*)
	子语句
esac
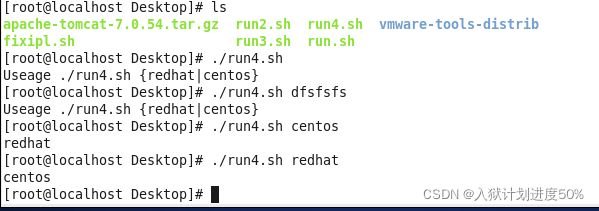
案例:run4.sh:
case $1 in
redhat)
        echo centos
        ;;
centos)
        echo redhat
        ;;
*)
        echo "Useage $0 {redhat|centos}"
esac
$# 是传给脚本的参数个数
$0 是脚本本身的名字
$1 是传递给该shell脚本的第一个参数
$2 是传递给该shell脚本的第二个参数
$@ 是传给脚本的所有参数的列表
$* 是以一个单字符串显示所有向脚本传递的参数,与位置变量不同,参数可超过9个
$$ 是脚本运行的当前进程ID号
$? 是显示最后命令的退出状态,0表示没有错误,其他表示有错误
3.3:函数
函数
	将一部分代码存储到一个变量中
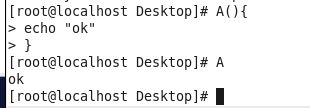
	设计一个函数名字为A,运行A的时候屏幕输出ok
redhat(){
        echo centos
        return 0
}
centos(){
        echo redhat
        return 0
}


case $1 in
redhat)
        redhat
        ;;
centos)
        centos
        ;;
*)
        echo "Useage $0 {redhat|centos}"
esac

接下来可以去看看centos自带的函数脚本是怎么写的
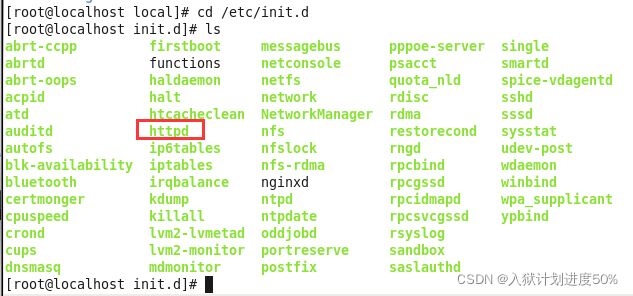
比如:service httpd start
[root@localhost Desktop]# find /etc -name httpd			查找etc目录下的名字为httpd的文件
/etc/httpd
/etc/rc.d/init.d/httpd
/etc/logrotate.d/httpd
/etc/sysconfig/httpd
我们进入/etc/rc.d/init.d目录下,打开httpd文件。
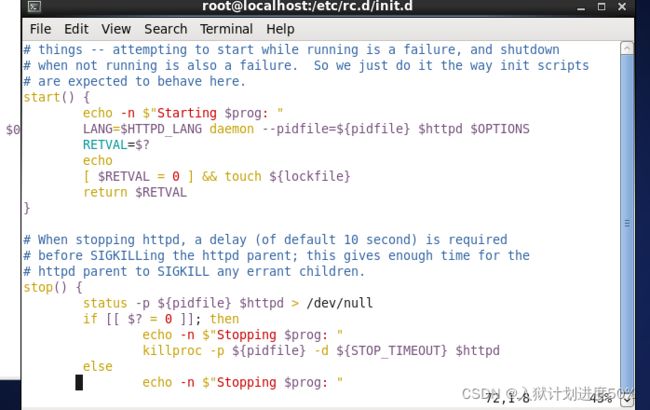
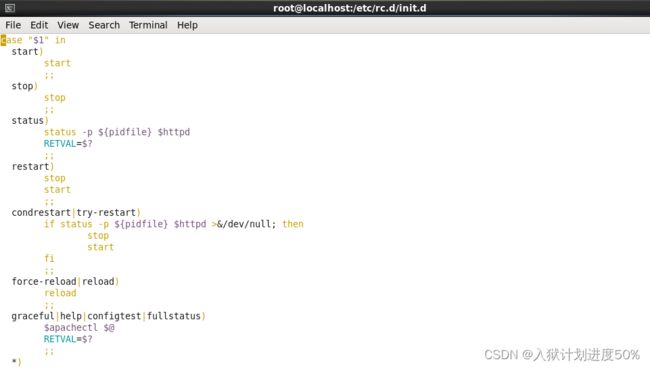
是不是眼熟。
再回想前两章 也就是027 LAMP(apache)与LNMP(nginx)安全配置 里面有说到nginx
3.4:nginx的自启动
cd /usr/local/nginx_server/sbin
那么怎么做成启动脚本呢?
cd /etc/init.d
vim nginxd
#!/bin/bash
nginx=/usr/local/nginx_server/sbin/nginx
start(){
        $nginx
        echo "nginx starting... [OK]"
}
stop(){
        $nginx -s stop
        echo "nginx stoping... [OK]"
}
status(){
        if `ss -antpl | grep nginx &> /dev/null`
        then echo "nginx starting... [OK]"
        else echo "nginx stoping... [OK]"
        fi
}

case $1 in
        start)
                start
                ;;
        stop)
                stop
                ;;
        status)
                status
                ;;
        restart)
                stop
                start
                ;;
          *)
                  echo "Useage $0{start|stop|status|restart}"
esac
保存退出,
chmod +x nginxd
验证结果:
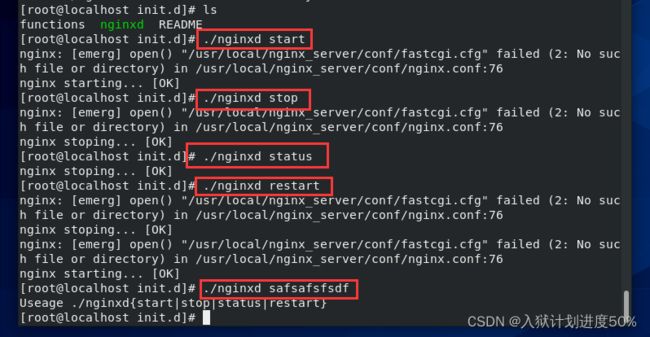
启动脚本是写好了,那么怎么能够自启动呢?
先熟悉一条命令:chkconfig
[root@localhost local]# chkconfig --list httpd
httpd          	0:off	1:off	2:off	3:off	4:off	5:off	6:off
上述命令可以看出,httpd在5(图形界面5,也就是开机级别)是处于关闭状态的,
那么nginx呢?
[root@localhost local]# chkconfig --list nginx
error reading information on service nginx: No such file or directory
vim httpd
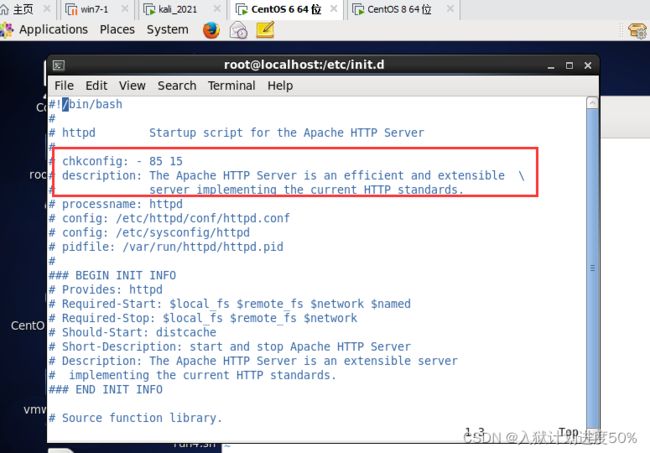
复制这两行到/etc/init.d/nginxd并修改。
chkconfig: 345 85 15 (这个比较有意思,345代表在设置在那个level中是on的,如果一个都不想on,那就写一个横线"-",比如:chkconfig: - 85 15。后面两个数字当然代表S和K的默认排序号啦)
都在/etc/rc(0~6).d 中的S85tomcat K15tomcat
自己可以任意修改,description文件说明,也可以自定义
chkconfig --list nginxd
chkconfig --add nginxd
chkconfig --level 5 nginxd on 			把off改成on
重启reboot进行验证
/etc/init.d/nginxd status
ss -antpl | grep 80
