使用Jcrop实现图片上传、剪裁和保存(ASP.NET)
前段时间项目中使用到了Jcrop剪裁用户头像,费了不少的力气,今天我就做个Demo当作备忘,只是做个演示,细节方面暂不考虑哦。
一、首先新建数据库PhotoDataBase,新建数据表Photo_tb,结构如下:

一、下载Jcrop包:http://deepliquid.com/content/Jcrop.html,里面包含了JS文件和几个Demo,你可以打开看看效果和它们的代码。
三、打开VS 2008,新建一个Web项目,名称自取。然后把Jcrop的三个JS和CSS文件拷贝到项目中,最终解决方案列表如下:

四、新建Default.aspx,其代码如下:
    <%

    @ Page Language

    =

    "

    C#

    "

     AutoEventWireup

    =

    "

    true

    "

     CodeFile

    =

    "

    Default.aspx.cs

    "

     Inherits

    =

    "

    Default

    "


    %>


    <!

    DOCTYPE html PUBLIC "-//W3C//DTD XHTML 1.0 Transitional//EN" "http://www.w3.org/TR/xhtml1/DTD/xhtml1-transitional.dtd"

    >


    <

    html

    xmlns

    ="http://www.w3.org/1999/xhtml"

    >


    <

    head

    runat

    ="server"

    >


    <

    title

    ></

    title

    >


    <

    script

    src

    ="JS/jquery.min.js"

     type

    ="text/javascript"

    ></

    script

    >


    <

    script

    src

    ="JS/jquery.Jcrop.js"

     type

    ="text/javascript"

    ></

    script

    >


    <

    link

    href

    ="CSS/jquery.Jcrop.css"

     rel

    ="stylesheet"

     type

    ="text/css"


    />


    <

    link

    href

    ="CSS/demos.css"

     rel

    ="stylesheet"

     type

    ="text/css"


    />


    <

    script

    language

    ="Javascript"

    >


    //

     Our simple event handler, called from onChange and onSelect


    //

     event handlers, as per the Jcrop invocation above


    function

     showCoords(c) {
 jQuery(

    '

    #x

    '

    ).val(c.x);
 jQuery(

    '

    #y

    '

    ).val(c.y);
 jQuery(

    '

    #x2

    '

    ).val(c.x2);
 jQuery(

    '

    #y2

    '

    ).val(c.y2);
 jQuery(

    '

    #w

    '

    ).val(c.w);
 jQuery(

    '

    #h

    '

    ).val(c.h);
 };

 $(

    function

    () {
 $(

    "

    #UploadPhoto

    "

    ).change(

    function

    () {


    var

     location

    =


    "

    file:///

    "


    +

     $(

    "

    #UploadPhoto

    "

    ).val();


    var

     type

    =

     location.substr(location.lastIndexOf(

    "

    .

    "

    )).toLowerCase();


    if

     (type

    ==


    "

    .jpg

    "


    ||

     type

    ==


    "

    .gif

    "


    ||

     type

    ==


    "

    .jpeg

    "


    ||

     type

    ==


    "

    .bmp

    "

    ) {


    var

     image

    =


    new

     Image();
 image.dynsrc

    =

     location;


    if

     (image.fileSize

    /


    1024


    >


    1000

    ) { alert(

    "

    照片请不要大于1000KB

    "

    ); }


    else

     {
 $(

    "

    #cropbox

    "

    ).attr(

    "

    src

    "

    , location);
 jQuery(

    '

    #cropbox

    '

    ).Jcrop({
 onChange: showCoords,
 onSelect: showCoords
 });
 }
 }


    else

     {
 alert(

    "

    图片格式不对!

    "

    );

 }
 })
 });


    </

    script

    >


    </

    head

    >


    <

    body

    >


    <

    div

    id

    ="outer"

    >


    <

    div

    class

    ="jcExample"

    >


    <

    div

    class

    ="article"

    >


    <

    h1

    >


 Jcrop图片剪裁Demo

    </

    h1

    >


    <!--

     This is the image we're attaching Jcrop to

    -->


    <

    img

    src

    ='<%=(!string.IsNullOrEmpty(PhotoPath))?PhotoPath:"picture.aspx"%

    >

    ' id="cropbox" style="width:600px;height:400px" />


    <!--

     This is the form that our event handler fills

    -->


    <

    form

    runat

    ="server"

    >


    <

    label

    >


 X1


    <

    input

    type

    ="text"

     size

    ="4"

     id

    ="x"

     name

    ="x"


    /></

    label

    >


    <

    label

    >


 Y1


    <

    input

    type

    ="text"

     size

    ="4"

     id

    ="y"

     name

    ="y"


    /></

    label

    >


    <

    label

    >


 X2


    <

    input

    type

    ="text"

     size

    ="4"

     id

    ="x2"

     name

    ="x2"


    /></

    label

    >


    <

    label

    >


 Y2


    <

    input

    type

    ="text"

     size

    ="4"

     id

    ="y2"

     name

    ="y2"


    /></

    label

    >


    <

    label

    >


 W


    <

    input

    type

    ="text"

     size

    ="4"

     id

    ="w"

     name

    ="w"


    /></

    label

    >


    <

    label

    >


 H


    <

    input

    type

    ="text"

     size

    ="4"

     id

    ="h"

     name

    ="h"


    /></

    label

    >


    <

    div

    >


    <

    br

    />


    <

    input

    type

    ="file"

     id

    ="UploadPhoto"

     name

    ="UploadPhoto"


    />


    <

    asp:Button

    ID

    ="Button1"

     runat

    ="server"

     Text

    ="确认剪裁并保存"


 onclick

    ="Button1_Click"


    />


    </

    div

    >


    </

    form

    >


    </

    div

    >


    </

    div

    >


    </

    div

    >


    </

    body

    >


    </

    html

    >
注意: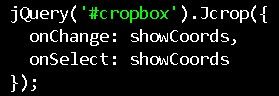 是重点,如果在页面加载的时候就绑定这个事件的话,使用上传控件上传图片的时候,不能改变图片的显示。JCrop还有其他的一些设置,您可以查阅相关文档。
六、Default页面后台代码如下:
    using

     System;


    using

     System.Configuration;


    using

     System.Data;


    using

     System.Data.SqlClient;


    using

     System.Drawing;


    using

     System.Drawing.Drawing2D;


    using

     System.IO;


    using

     System.Web.UI;


    public


    partial


    class

     Default : Page
{


    public


    string

     PhotoPath;


    protected


    void

     Page_Load(

    object

     sender, EventArgs e)
 {
 PhotoPath

    =

     Server.MapPath(

    "

    Images/default.jpg

    "

    );
 }


    protected


    void

     Button1_Click(

    object

     sender, EventArgs e)
 {


    int

     x

    =


    int

    .Parse(Request[

    "

    x

    "

    ]);


    int

     y

    =


    int

    .Parse(Request[

    "

    y

    "

    ]);


    int

     w

    =


    int

    .Parse(Request[

    "

    w

    "

    ]);


    int

     h

    =


    int

    .Parse(Request[

    "

    h

    "

    ]);


    string

     filename

    =

     Request[

    "

    UploadPhoto

    "

    ];


    byte

    [] image

    =

     CropImage(filename, w, h, x, y);


    if

     (image

    !=


    null

    )
 PhotoPath

    =


    ""

    ;
 }


    private


    byte

    [] CropImage(

    string

     originaImgPath,

    int

     width,

    int

     height,

    int

     x,

    int

     y)
 {


    byte

    [] CropImage

    =

     Crop(originaImgPath, width, height, x, y);


    if

     (

    !

    SaveToDatabase(CropImage))
 {
 Response.Write(

    "

    图像保存失败!

    "

    );
 }


    return

     CropImage;
 }


    ///


    <summary>


    ///

     剪裁图像


    ///


    </summary>


    ///


    <param name="Img"></param>


    ///


    <param name="Width"></param>


    ///


    <param name="Height"></param>


    ///


    <param name="X"></param>


    ///


    <param name="Y"></param>


    ///


    <returns></returns>


    private


    byte

    [] Crop(

    string

     Img,

    int

     Width,

    int

     Height,

    int

     X,

    int

     Y)
 {


    try


 {


    using

     (var OriginalImage

    =


    new

     Bitmap(Img))
 {


    using

     (var bmp

    =


    new

     Bitmap(Width, Height, OriginalImage.PixelFormat))
 {
 bmp.SetResolution(OriginalImage.HorizontalResolution, OriginalImage.VerticalResolution);


    using

     (Graphics Graphic

    =

     Graphics.FromImage(bmp))
 {
 Graphic.SmoothingMode

    =

     SmoothingMode.AntiAlias;
 Graphic.InterpolationMode

    =

     InterpolationMode.HighQualityBicubic;
 Graphic.PixelOffsetMode

    =

     PixelOffsetMode.HighQuality;
 Graphic.DrawImage(OriginalImage,

    new

     Rectangle(

    0

    ,

    0

    , Width, Height), X, Y, Width, Height,
 GraphicsUnit.Pixel);
 var ms

    =


    new

     MemoryStream();
 bmp.Save(ms, OriginalImage.RawFormat);


    return

     ms.GetBuffer();
 }
 }
 }
 }


    catch

     (Exception Ex)
 {


    throw

     (Ex);
 }
 }


    ///


    <summary>


    ///

     保存图像到数据库


    ///


    </summary>


    ///


    <param name="image"></param>


    ///


    <returns></returns>


    private


    bool

     SaveToDatabase(

    byte

    [] image)
 {
 var conn

    =


    new

     SqlConnection(ConfigurationManager.ConnectionStrings[

    "

    connectionstring

    "

    ].ToString());


    if

     (conn.State

    ==

     ConnectionState.Closed)
 conn.Open();
 var cmd

    =


    new

     SqlCommand(

    "

    insert into Photo values(@imagevalue)

    "

    , conn);
 cmd.Parameters.AddWithValue(

    "

    @imagevalue

    "

    , image);


    if

     (cmd.ExecuteNonQuery()

    >


    0

    )


    return


    true

    ;


    return


    false

    ;
 }
}
七、新建一个picture.aspx页面用于输出从数据库中读取的image字段的值,就像我们使用验证码的效果一样,通过一个链接就可以输出图片了。
其页面代码如下:
    using

     System;


    using

     System.Collections.Generic;


    using

     System.Configuration;


    using

     System.Data;


    using

     System.Data.SqlClient;


    using

     System.Linq;


    using

     System.Web;


    using

     System.Web.UI;


    using

     System.Web.UI.WebControls;


    public


    partial


    class

     picture : System.Web.UI.Page
{


    protected


    void

     Page_Load(

    object

     sender, EventArgs e)
 {


    if

     (

    !

    IsPostBack)
 {
 var conn

    =


    new

     SqlConnection(ConfigurationManager.ConnectionStrings[

    "

    connectionstring

    "

    ].ToString());


    if

     (conn.State

    ==

     ConnectionState.Closed)
 conn.Open();


    using

     ( var cmd

    =


    new

     SqlCommand(

    "

    select top 1 photo from Photo order by id desc

    "

    , conn))
 {
 var getreader

    =

     cmd.ExecuteReader();


    if

     (getreader

    !=


    null


    &&

     getreader.HasRows)
 {


    //

    读取数据


    while

     (getreader.Read())
 {
 Response.ContentType

    =


    "

    image/Jpeg

    "

    ;
 var image

    =

     (

    byte

    []) getreader[

    0

    ];
 Response.BinaryWrite(image);
 Response.End();
 }
 }
 }

 }


 }
}
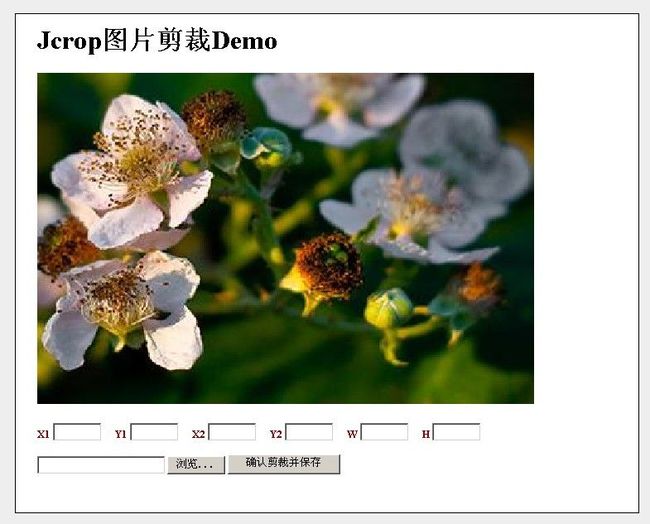
八、运行效果如下:

九、最终提供Demo源码下载