Linux下搭建Oracle11g RAC(6)----安装Grid Infrastructure
从此步骤开始,我们正式安装Grid软件:
① 以grid用户登录图形界面,执行/home/grid/grid/runInstaller,进入OUI的图形安装界面:
② 进入OUI安装界面后,选择第3项,跳过软件更新,Next:
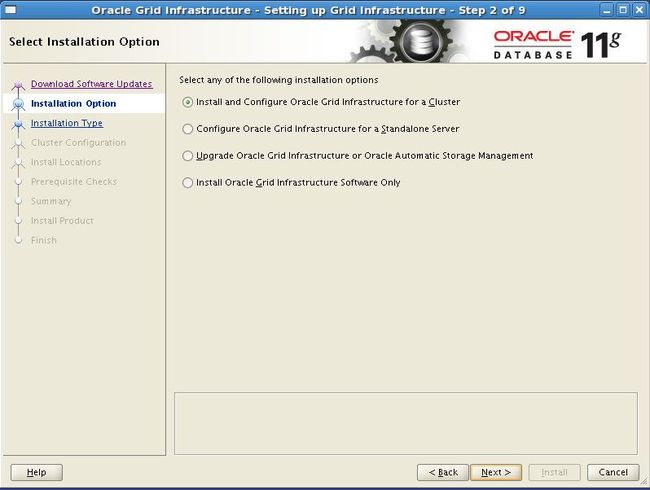
③ 选择集群的Grid Infrastructure,Next:
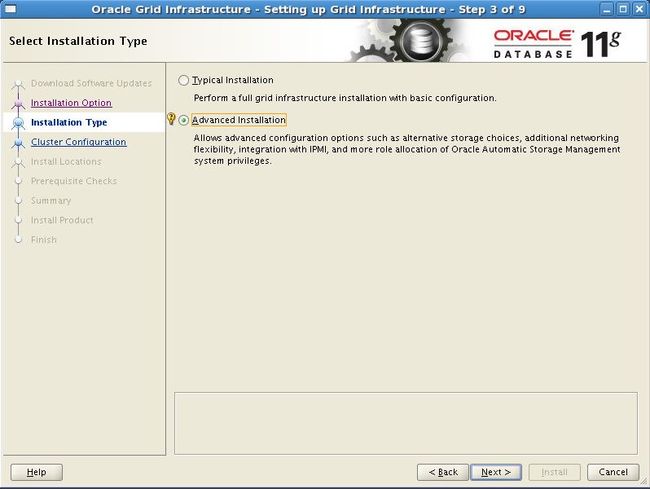
④ 选择 advanced Installation,Next:
⑤ 语言选择默认,English,Next:
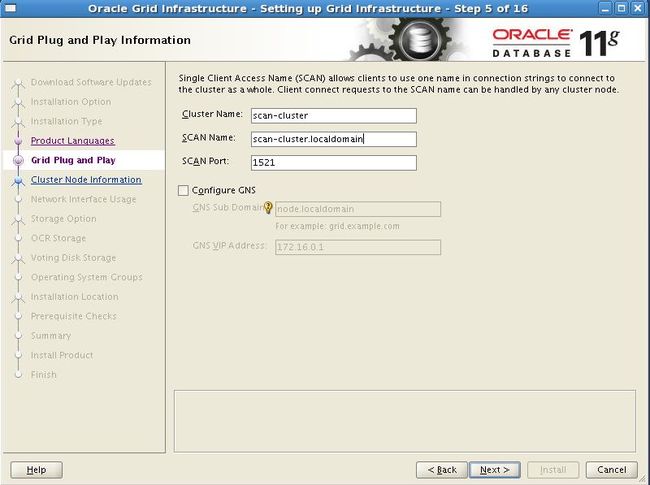
⑥ 去掉Configure GNS选项,按照之前表格输入Cluster Name:scan-cluster,SCAN Name:scan-cluster.localdomain。Next:
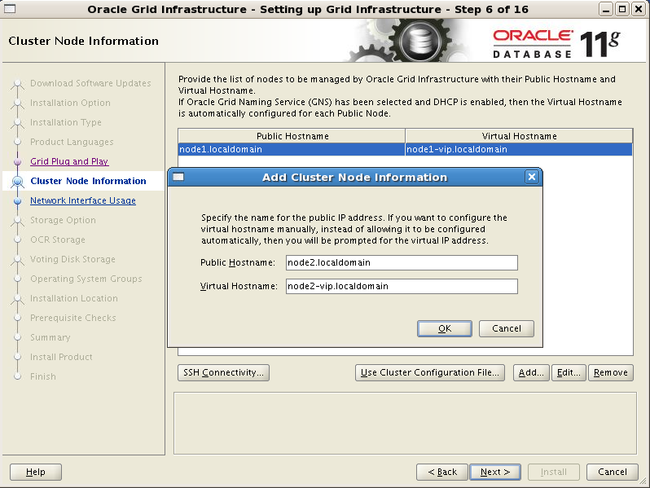
⑦ 单击Add,添加第2个节点,Next:
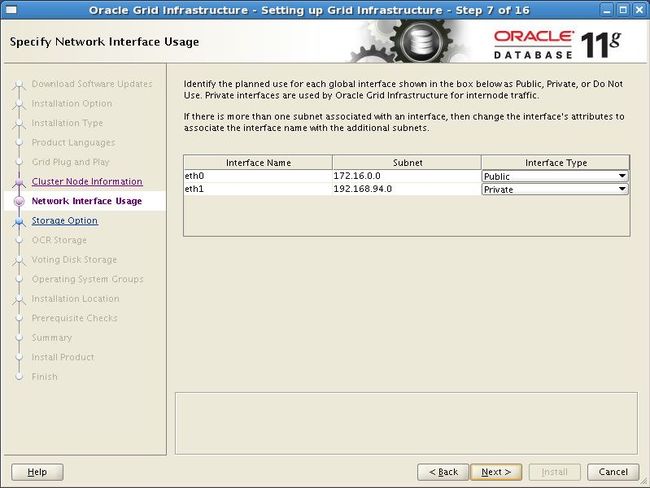
⑧ 确认网络接口,Next:
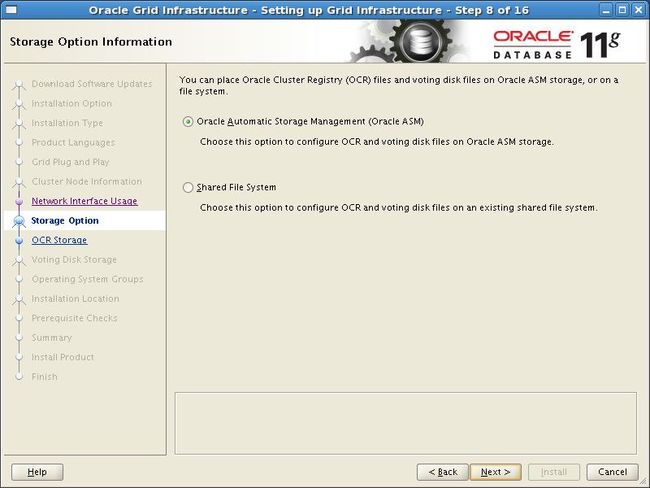
⑨ 选择ASM,作为存储,Next:
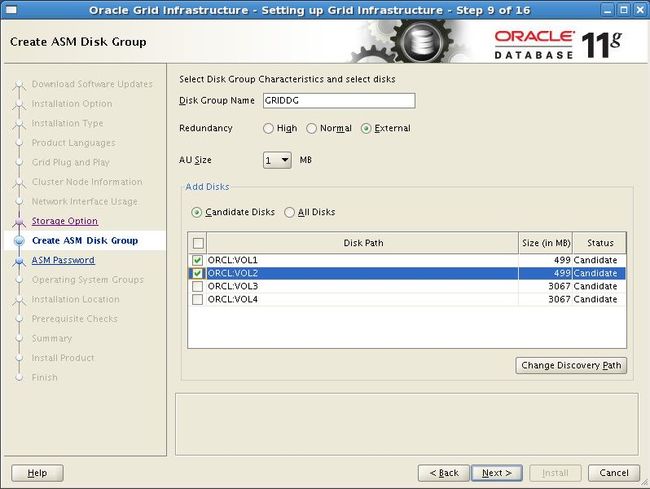
⑩ 输入ASM磁盘组名,这里命名为GRIDDG,冗余策略选择External外部,AU大小选择默认1M,ASM磁盘选择VOL1,VOL2。Next:
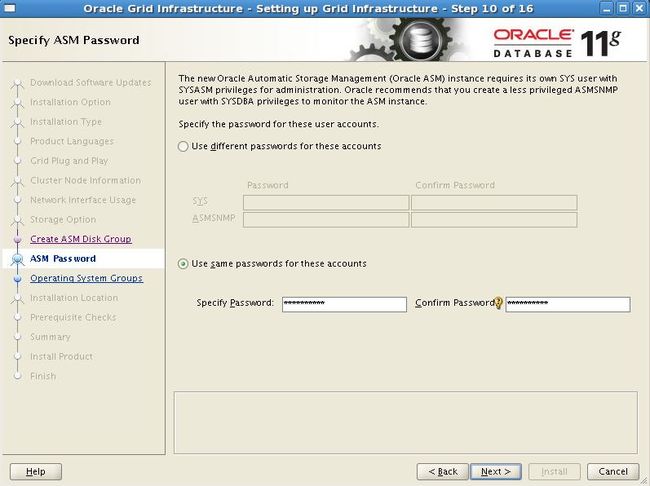
⑪ 选择给ASM的SYS、ASMSNMP用户配置为相同的口令,并输入口令,Next:
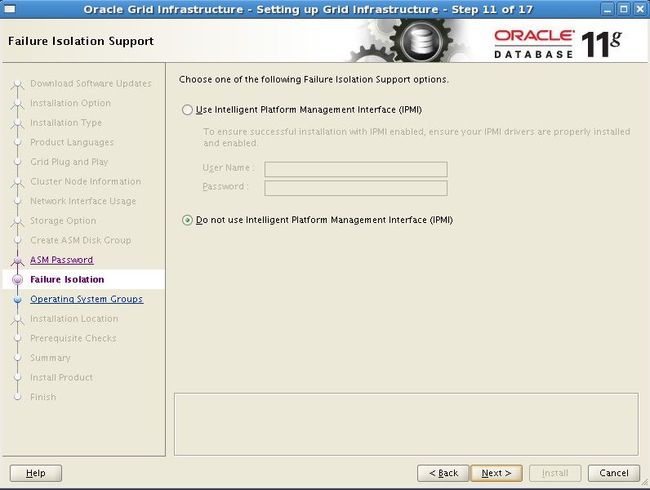
⑫ 选择不使用IPMI,Next:
⑬ 给ASM指定不同的组,Next:
⑭ 选择GRID软件的安装路径,其中ORACLE_BASE,ORACLE_HOME均选择之前已经配置好的,可参照配置信息。这里需要注意GRID软件的ORACLE_HOME不能是ORACLE_BASE的子目录。
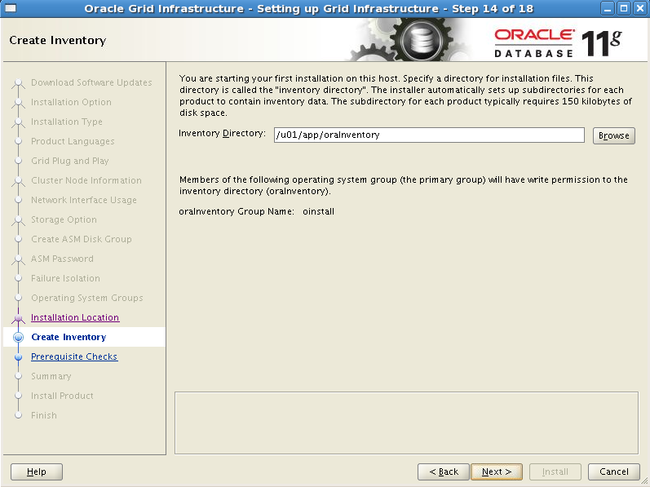
⑮ 选择默认的Inventory,Next:
⑯ 检查出现告警,提示在所有节点上缺失cvuqdisk-1.0.9-1软件包。
可以选择忽略,直接进入下一步安装。也可以从grid安装文件的rpm目录下获取该RPM包,然后进行安装。
node1:
| [root@node1 rpm]# pwd /home/grid/grid/rpm [root@node1 rpm]# ll total 12 -rwxr-xr-x 1 root root 8551 Sep 22 2011 cvuqdisk-1.0.9-1.rpm [root@node1 rpm]# rpm -ivh cvuqdisk-1.0.9-1.rpm Preparing… ########################################### [100%] Using default group oinstall to install package 1:cvuqdisk ########################################### [100%] [root@node1 rpm]# |
node2:
| [root@node2 ~]# ll total 96 -rw——- 1 root root 1371 Apr 20 14:48 anaconda-ks.cfg drwxr-xr-x 2 root root 4096 Apr 26 11:20 asm_rpm -rwxr-xr-x 1 root root 8551 Apr 27 09:27 cvuqdisk-1.0.9-1.rpm -rw-r–r– 1 root root 51256 Apr 20 14:48 install.log -rw-r–r– 1 root root 4077 Apr 20 14:48 install.log.syslog drwxr-xr-x 2 root root 4096 Apr 24 10:45 shell [root@node2 ~]# export CVUQDISK_GRP=oinstall [root@node2 ~]# rpm -ivh cvuqdisk-1.0.9-1.rpm Preparing… ########################################### [100%] 1:cvuqdisk ########################################### [100%] [root@node2 ~]# |
在所有节点上安装完cvuqdisk-1.0.9-1软件后,重新执行预检查,不再有警告信息。
⑰ 进入安装GRID安装之前的概要信息,Install进行安装:
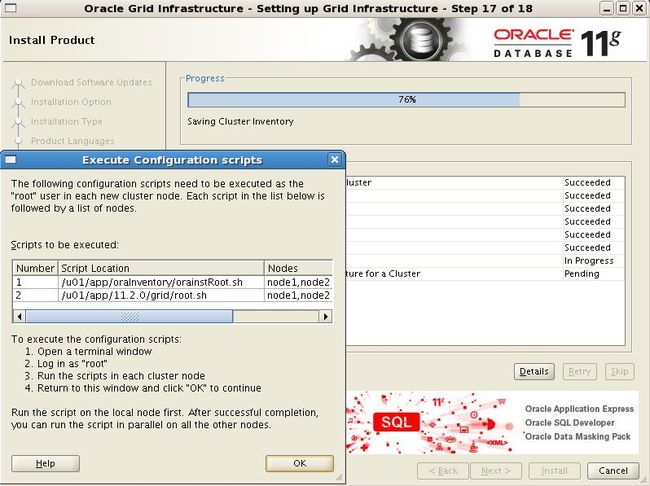
⑱ 根据提示以root用户分别在两个节点上执行脚本:
执行/u01/app/oraInventory/orainstRoot.sh脚本:
node1:
| [root@node1 ~]# /u01/app/oraInventory/orainstRoot.sh Changing permissions of /u01/app/oraInventory. Adding read,write permissions for group. Removing read,write,execute permissions for world.
Changing groupname of /u01/app/oraInventory to oinstall. The execution of the script is complete. [root@node1 ~]# |
node2:
| [root@node2 ~]# /u01/app/oraInventory/orainstRoot.sh Changing permissions of /u01/app/oraInventory. Adding read,write permissions for group. Removing read,write,execute permissions for world.
Changing groupname of /u01/app/oraInventory to oinstall. The execution of the script is complete. [root@node2 ~]# |
执行/u01/app/11.2.0/grid/root.sh脚本:
node1:
| [root@node1 ~]# /u01/app/11.2.0/grid/root root.sh rootupgrade.sh [root@node1 ~]# /u01/app/11.2.0/grid/root.sh Performing root user operation for Oracle 11g
The following environment variables are set as: ORACLE_OWNER= grid ORACLE_HOME= /u01/app/11.2.0/grid
Enter the full pathname of the local bin directory: [/usr/local/bin]: Copying dbhome to /usr/local/bin … Copying oraenv to /usr/local/bin … Copying coraenv to /usr/local/bin …
Creating /etc/oratab file… Entries will be added to the /etc/oratab file as needed by Database Configuration Assistant when a database is created Finished running generic part of root script. Now product-specific root actions will be performed. Using configuration parameter file: /u01/app/11.2.0/grid/crs/install/crsconfig_params Creating trace directory OLR initialization - successful root wallet root wallet cert root cert export peer wallet profile reader wallet pa wallet peer wallet keys pa wallet keys peer cert request pa cert request peer cert pa cert peer root cert TP profile reader root cert TP pa root cert TP peer pa cert TP pa peer cert TP profile reader pa cert TP profile reader peer cert TP peer user cert pa user cert Adding Clusterware entries to inittab CRS-2672: Attempting to start 'ora.mdnsd' on 'node1' CRS-2676: Start of 'ora.mdnsd' on 'node1' succeeded CRS-2672: Attempting to start 'ora.gpnpd' on 'node1' CRS-2676: Start of 'ora.gpnpd' on 'node1' succeeded CRS-2672: Attempting to start 'ora.cssdmonitor' on 'node1' CRS-2672: Attempting to start 'ora.gipcd' on 'node1' CRS-2676: Start of 'ora.gipcd' on 'node1' succeeded CRS-2676: Start of 'ora.cssdmonitor' on 'node1' succeeded CRS-2672: Attempting to start 'ora.cssd' on 'node1' CRS-2672: Attempting to start 'ora.diskmon' on 'node1' CRS-2676: Start of 'ora.diskmon' on 'node1' succeeded CRS-2676: Start of 'ora.cssd' on 'node1' succeeded
ASM created and started successfully.
Disk Group GRIDDG created successfully.
clscfg: -install mode specified Successfully accumulated necessary OCR keys. Creating OCR keys for user 'root', privgrp 'root'.. Operation successful. CRS-4256: Updating the profile Successful addition of voting disk 9516d145c0254f9ebf50064a6a916182. Successfully replaced voting disk group with +GRIDDG. CRS-4256: Updating the profile CRS-4266: Voting file(s) successfully replaced ## STATE File Universal Id File Name Disk group – —– —————– ——— ——— 1. ONLINE 9516d145c0254f9ebf50064a6a916182 (ORCL:VOL1) [GRIDDG] Located 1 voting disk(s). CRS-2672: Attempting to start 'ora.asm' on 'node1' CRS-2676: Start of 'ora.asm' on 'node1' succeeded CRS-2672: Attempting to start 'ora.GRIDDG.dg' on 'node1' CRS-2676: Start of 'ora.GRIDDG.dg' on 'node1' succeeded CRS-2672: Attempting to start 'ora.registry.acfs' on 'node1' CRS-2676: Start of 'ora.registry.acfs' on 'node1' succeeded Configure Oracle Grid Infrastructure for a Cluster … succeeded [root@node1 ~]# |
node2:
| [root@node2 ~]# /u01/app/11.2.0/grid/root.sh Performing root user operation for Oracle 11g
The following environment variables are set as: ORACLE_OWNER= grid ORACLE_HOME= /u01/app/11.2.0/grid
Enter the full pathname of the local bin directory: [/usr/local/bin]: Copying dbhome to /usr/local/bin … Copying oraenv to /usr/local/bin … Copying coraenv to /usr/local/bin …
Creating /etc/oratab file… Entries will be added to the /etc/oratab file as needed by Database Configuration Assistant when a database is created Finished running generic part of root script. Now product-specific root actions will be performed. Using configuration parameter file: /u01/app/11.2.0/grid/crs/install/crsconfig_params Creating trace directory OLR initialization - successful Adding Clusterware entries to inittab CRS-4402: The CSS daemon was started in exclusive mode but found an active CSS daemon on node node1, number 1, and is terminating An active cluster was found during exclusive startup, restarting to join the cluster Configure Oracle Grid Infrastructure for a Cluster … succeeded [root@node2 ~]# |
此时,集群件相关的服务已经启动。当然,ASM实例也将在两个节点上启动。
| [root@node1 ~]# su - grid node1-> crs_stat -t Name Type Target State Host ———————————————————— ora.GRIDDG.dg ora….up.type ONLINE ONLINE node1 ora….N1.lsnr ora….er.type ONLINE ONLINE node1 ora.asm ora.asm.type ONLINE ONLINE node1 ora.cvu ora.cvu.type ONLINE ONLINE node1 ora.gsd ora.gsd.type OFFLINE OFFLINE ora….network ora….rk.type ONLINE ONLINE node1 ora….SM1.asm application ONLINE ONLINE node1 ora.node1.gsd application OFFLINE OFFLINE ora.node1.ons application ONLINE ONLINE node1 ora.node1.vip ora….t1.type ONLINE ONLINE node1 ora….SM2.asm application ONLINE ONLINE node2 ora.node2.gsd application OFFLINE OFFLINE ora.node2.ons application ONLINE ONLINE node2 ora.node2.vip ora….t1.type ONLINE ONLINE node2 ora.oc4j ora.oc4j.type ONLINE ONLINE node1 ora.ons ora.ons.type ONLINE ONLINE node1 ora….ry.acfs ora….fs.type ONLINE ONLINE node1 ora.scan1.vip ora….ip.type ONLINE ONLINE node1 node1-> |
⑲ 执行完上述脚本之后,单击OK,Next,进入下一步。
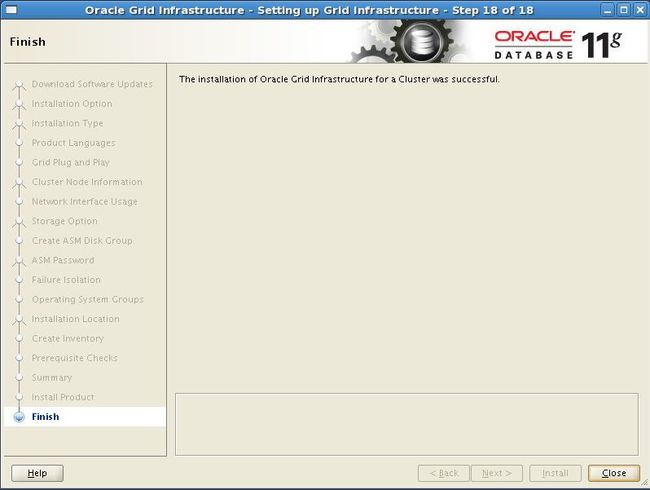
⑳ 最后,单击close,完成GRID软件在双节点上的安装。
至此,GRID集群件安装成功!!!


