Android---快速拨话程序(涵盖appWidget、Tab、联系人、多线程、自定义ListView使用)
快速拨话程序是之前学习android appWidget(窗口小部件)时在eoe找下载的一个appWidget程序,
它主要是在桌面上产生一个联系人的widget,点击可以直接拨打电话。因为感觉缺少点内容,不是
那么完美,所以现在有时间了就将它完善完善,添加了读取联系人图像,ListView的数据源采用重
写BaseAdapter进行绑定,并且添加了一个多线程加载联系人信息等。而这个apk主要围绕的内容也
是这几方面Android下的AppWidget、Tab的使用、多线程(AsyncTask)的使用,联系人的读取
、自定义ListView使用。也许这些方面讲得不深,就需要各位看官自己多多学习使用了。
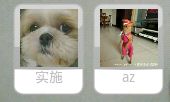
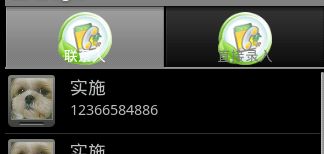
效果图:


(1)Tab:选项卡,在同一个界面中,选择不同的选项卡,呈现不同界面布局。这里添加选项卡一方
面是读取系统中的联系人列表、另一方面允许用户自行输入一个昵称和电话号码而产生一个快捷拨话
Widget。android中的Tab,一个TabSpec表示一个选项卡,而所有的TabSpec都由TabHost管理。
TabHost载入基本的xml布局文件。R.layout.main:最外层是框架布局,尔后是两个TapSpec的LinearLayout布局
 代码
代码
      <

      FrameLayout

      android:id

      ="@+id/FrameLayout01"


android:layout_width

      ="fill_parent"

       android:layout_height

      ="fill_parent"


xmlns:android

      ="http://schemas.android.com/apk/res/android"

      >


      <

      LinearLayout

      android:id

      ="@+id/listPhone"


android:layout_width

      ="fill_parent"

       android:layout_height

      ="wrap_content"

      >


      <

      ListView

      android:id

      ="@+id/lvphone"


 android:layout_width

      ="fill_parent"

       android:layout_height

      ="wrap_content"

      ></

      ListView

      ></

      LinearLayout

      >


      <

      LinearLayout

      android:id

      ="@+id/inputPhone"


android:layout_width

      ="wrap_content"

       android:layout_height

      ="wrap_content"


android:orientation

      ="vertical"

      >


      <

      TextView

      android:text

      ="姓名"


 android:layout_width

      ="wrap_content"


 android:layout_height

      ="wrap_content"

      ></

      TextView

      >


      <

      EditText

      android:id

      ="@+id/etname"


 android:layout_width

      ="200px"


 android:layout_height

      ="wrap_content"


 android:hint

      ="请输入联系人姓名"

      ></

      EditText

      >


      <

      TextView

      android:text

      ="电话号码"


 android:layout_width

      ="wrap_content"


 android:layout_height

      ="wrap_content"

      ></

      TextView

      >


      <

      EditText

      android:id

      ="@+id/etphone"


 android:layout_width

      ="200px"


 android:layout_height

      ="wrap_content"


 android:phoneNumber

      ="true"


 android:hint

      ="请输入电话号码"

      ></

      EditText

      >


      <

      Button

      android:id

      ="@+id/btnadd"


 android:layout_width

      ="wrap_content"

       android:layout_height

      ="wrap_content"


 android:text

      =" 保 存 "

      ></

      Button

      >


      <

      ImageView

      android:id

      ="@+id/imgshow"


android:layout_width

      ="wrap_content"

       android:layout_height

      ="wrap_content"

      ></

      ImageView

      >


      </

      LinearLayout

      >


      </

      FrameLayout

      >
Activity中载入Tab:
 代码
代码
       tabhost

      =

      this

      .getTabHost();
 LayoutInflater.from(

      this

      ).inflate(R.layout.main, tabhost.getTabContentView(),

      true

      );

 TabSpec spec1

      =

      tabhost.newTabSpec(

      "

      listPhone

      "

      );


      //

      setIndicator设置了TabSpec显示的标题、图标


       spec1.setIndicator(

      "

      联系人

      "

      ,

      this

      .getResources().getDrawable(R.drawable.icon));


      //

      R.id.listPhone是R.layout.main布局文件中的一个LinearLayout布局


       spec1.setContent(R.id.listPhone);

 TabSpec spec2

      =

      tabhost.newTabSpec(

      "

      inputPhone

      "

      );
 spec2.setIndicator(

      "

      直接录入

      "

      ,

      this

      .getResources().getDrawable(R.drawable.icon));
 spec2.setContent(R.id.inputPhone);

 tabhost.addTab(spec1);
 tabhost.addTab(spec2);
 setContentView(tabhost);
(2)AppWidget:android的AppWidget使用也是配置比较多,首先是显示在桌面上的布局appwidget.xml,很简
单只有一个ImageView和TextView用来显示联系人的图标和昵称;其次是AppWidget配置xml,新建xml选择
AppWidget Provider会自动产生一个文件在res/xml中,它包含了Widget在桌面的大小(74*单元格-2),
单位dip,Widget自动更新的周期(android:updatePeriodMillis),添加Widget时假如要先进入一个界面进行配置,
这个就指定了配置Activity是谁(android:configure="com.android.cbin.Main");最后就是在manifest.xml中
关于AppWidget的配置了桌面Widget布局xml:
 代码
代码
      <?

      xml version="1.0" encoding="utf-8"

      ?>


      <

      LinearLayout


      xmlns:android

      ="http://schemas.android.com/apk/res/android"


 android:layout_width

      ="wrap_content"


 android:layout_height

      ="wrap_content"

       android:orientation

      ="vertical"


 android:id

      ="@+id/widLinear"

       android:focusable

      ="true"

       android:focusableInTouchMode

      ="true"


 android:clickable

      ="true"

       android:clipChildren

      ="true"

       android:background

      ="@drawable/shortcallbg"

      >


      <

      ImageView

      android:layout_width

      ="70px"

       android:layout_height

      ="58px"


android:id

      ="@+id/img"


android:layout_gravity

      ="center"


android:layout_marginTop

      ="10dip"


android:layout_marginLeft

      ="1px"

       android:layout_marginRight

      ="1px"


android:focusable

      ="true"

       android:clickable

      ="true"

      ></

      ImageView

      >


      <

      TextView

      android:layout_width

      ="wrap_content"

       android:layout_height

      ="wrap_content"


android:singleLine

      ="false"

       android:id

      ="@+id/txtname"


android:layout_gravity

      ="center"


android:gravity

      ="center"

       android:layout_marginBottom

      ="2px"

      ></

      TextView

      >


      </

      LinearLayout

      >
AppWidget配置xml:
 代码
代码
      <?

      xml version="1.0" encoding="utf-8"

      ?>


      <

      appwidget-provider


      xmlns:android

      ="http://schemas.android.com/apk/res/android"


 android:minWidth

      ="72dip"

       android:updatePeriodMillis

      ="0"

       android:minHeight

      ="72dip"


 android:configure

      ="com.android.cbin.Main"

      >


      </

      appwidget-provider

      >
manifest.xml中AppWidget配置信息:
 代码
代码
      <?

      xml version="1.0" encoding="utf-8"

      ?>


      <

      manifest

      xmlns:android

      ="http://schemas.android.com/apk/res/android"


 package

      ="com.android.cbin"


 android:versionCode

      ="1"


 android:versionName

      ="1.0"

      >


      <

      application

      android:icon

      ="@drawable/icon"

       android:label

      ="@string/app_name"

      >


      <

      activity

      android:name

      =".Main"


 android:label

      ="@string/app_name"

      >


      <

      intent-filter

      >


      <

      action

      android:name

      ="android.appwidget.action.APPWIDGET_CONFIGURE"

      ></

      action

      >


      </

      intent-filter

      >


      </

      activity

      >


      <

      receiver

      android:name

      ="CallWidget"

      >


      <

      intent-filter

      >


      <

      action

      android:name

      ="android.appwidget.action.APPWIDGET_UPDATE"

      ></

      action

      >


      </

      intent-filter

      >


      <

      meta-data

      android:name

      ="android.appwidget.provider"

       android:resource

      ="@xml/callwidget"

      ></

      meta-data

      >


      </

      receiver

      >


      </

      application

      >


      <

      uses-sdk

      android:minSdkVersion

      ="7"


      />


      <

      uses-permission

      android:name

      ="android.permission.CALL_PHONE"

      ></

      uses-permission

      >


      <

      uses-permission

      android:name

      ="android.permission.READ_CONTACTS"

      ></

      uses-permission

      >


      </

      manifest

      >
(3)联系人信息的读取:包括电话号码和姓名还有相片ID
 代码
代码
      public

       List

      <

      Map

      <

      String,Object

      >>

       getData(){
 list

      =

      new

       ArrayList

      <

      Map

      <

      String,Object

      >>

      ();
 Map

      <

      String,Object

      >

       map;

 ContentResolver resolver

      =

      this

      .getContentResolver();
 Cursor cursor

      =

      resolver.query(ContactsContract.Contacts.CONTENT_URI,

      null


 ,

      null

      ,

      null

      ,

      null

      );


      while

      (cursor.moveToNext()){


      int

       cname

      =

      cursor.getColumnIndex(PhoneLookup.DISPLAY_NAME);
 String name

      =

      cursor.getString(cname);

      //

      获得联系人姓名


      int

       cpid

      =

      cursor.getColumnIndex(PhoneLookup.PHOTO_ID);
 String photoid

      =

      cursor.getString(cpid);


      int

       cid

      =

      cursor.getColumnIndex(PhoneLookup._ID);
 String id

      =

      cursor.getString(cid);

      //

      获得联系人ID


      //

      联系人是否有电话号码


      int

       has_p_n

      =

      cursor.getColumnIndex(ContactsContract.Contacts.HAS_PHONE_NUMBER);


      int

       phoneCount

      =

      cursor.getInt(has_p_n);


      if

      (phoneCount

      >

      0

      ){
 Cursor numbers

      =

      resolver.query(ContactsContract.CommonDataKinds.Phone.CONTENT_URI,


      null

      , ContactsContract.CommonDataKinds.Phone.CONTACT_ID

      +

      "

      =

      "

      +

      id,

      null

      ,

      null

      );
 String number

      =

      ""

      ;


      while

      (numbers.moveToNext()){


      int

       cnumber

      =

      numbers.getColumnIndex(ContactsContract.CommonDataKinds.Phone.NUMBER);
 number

      =

      numbers.getString(cnumber);
 map

      =

      new

       HashMap

      <

      String, Object

      >

      ();
 map.put(

      "

      name

      "

      , name);
 map.put(

      "

      phone

      "

      , number);
 map.put(

      "

      photo

      "

      , photoid);
 list.add(map);
 }
 numbers.close();
 }
 }
 cursor.close();


      return

       list;
 }
通过联系人PhotoID得到一个Bitmap对象
 代码
代码
      //

      获取联系人图片


      public


      static

       Bitmap getPhoto(Context ct,Object photo_id){
 Bitmap bmp

      =

      BitmapFactory.decodeResource(ct.getResources(),
 R.drawable.ic_contact_picture);


      if

      (photo_id

      !=

      ""


      &&

       photo_id

      !=

      null

      ){
 String[] projection

      =


      new

       String[]{ContactsContract.Data.DATA15};
 String selection

      =


      "

      ContactsContract.Data._ID =

      "

      +

      photo_id.toString() ;
 Cursor cur

      =

       ct.getContentResolver().query(ContactsContract.Data.CONTENT_URI, projection, selection,

      null

      ,

      null

      );


      if

      (cur

      !=

      null

      ){
 cur.moveToFirst();


      byte

      [] contactIcon

      =


      null

      ;
 contactIcon

      =

      cur.getBlob(cur.getColumnIndex(ContactsContract.Data.DATA15));


      if

      (contactIcon

      !=

      null

      ){
 bmp

      =

      BitmapFactory.decodeByteArray(contactIcon,

      0

      , contactIcon.length);
 }
 }
 }


      return

       bmp;
 }
(4)自定义ListView:因为是自定义ListView所以我们必须重写ListView的数据源对象BaseAdapter。添加一个与Item相对于的控件类ViewHolder,添加一个构造函数,传入Context和List数据,Context对象用于获得LayouInfalter(加载ListView的单个Item对象).重写其中的
getCount()、getItem()、getItemId()、getView()四个方法;
 代码
代码
      public


      class

       MyAdapter

      extends

       BaseAdapter {


      private

       Context context;


      private

       List

      <

      Map

      <

      String,Object

      >>

       list;


      private

       LayoutInflater mInflater;


      public

       MyAdapter(Context ct,List

      <

      Map

      <

      String,Object

      >>

       lt){
 context

      =

      ct;
 list

      =

      lt;
 mInflater

      =

      LayoutInflater.from(context);
 }


      public


      final


      class

       ViewHolder{


      public

       ImageView image;


      public

       TextView tvname;


      public

       TextView tvphone;


      public

       QuickContactBadge qcbimg;
 }
 @Override


      public


      int

       getCount() {


      //

       TODO Auto-generated method stub


      //

      返回List的size


      if

      (list

      !=

      null

      ){


      return

       list.size();
 }

      else

      {


      return


      0

      ;
 }
 }

 @Override


      public

       Object getItem(

      int

       position) {


      //

       TODO Auto-generated method stub


      if

      (list

      !=

      null

      ){


      //

      返回某个位置的Map<String,Object>


      return

       list.get(position);
 }

      else

      {


      return


      null

      ;
 }
 }

 @Override


      public


      long

       getItemId(

      int

       position) {


      //

       TODO Auto-generated method stub


      //

      返回当前位置


      return

       position;
 }

 @Override


      public

       View getView(

      int

       position, View convertView, ViewGroup parent) {


      //

       TODO Auto-generated method stub


      //

      返回某个位置的View


       ViewHolder holder

      =

      null

      ;


      if

      (convertView

      ==

      null

      ){
 holder

      =

      new

       ViewHolder();
 convertView

      =

      mInflater.inflate(R.layout.listitem,

      null

      );
 holder.qcbimg

      =

      (QuickContactBadge) convertView.findViewById(R.id.qubimg);
 holder.tvname

      =

      (TextView)convertView.findViewById(R.id.txtname);
 holder.tvphone

      =

      (TextView)convertView.findViewById(R.id.txtphone);
 convertView.setTag(holder);
 }

      else

      {
 holder

      =

      (ViewHolder) convertView.getTag();
 }

 holder.tvname.setText(list.get(position).get(

      "

      name

      "

      ).toString());
 holder.tvphone.setText(list.get(position).get(

      "

      phone

      "

      ).toString());
 holder.qcbimg.setImageBitmap(Main.getPhoto(context,list.get(position).get(

      "

      photo

      "

      )));


      return

       convertView;
 }
}
(5)多线程加载联系人信息:因为加载联系人信息可能是一个比较耗时的操作,所以用到了AsyncTask
 代码
代码
      private


      class

       LoadAnysTack

      extends

       AsyncTask

      <

      String,Void,BaseAdapter

      >

      {

 @Override


      protected

       BaseAdapter doInBackground(String... arg0) {


      //

       TODO Auto-generated method stub


       BaseAdapter adapter

      =

      new

       MyAdapter(Main.

      this

      ,getData());


      return

       adapter;
 }


      protected


      void

       onPostExecute(BaseAdapter ada){
 lview.setAdapter(ada);
 dialog.dismiss();
 }
 }
调用AsyncTask
     new

      LoadAnysTack().execute(

     ""

     );