环境安装
参见官网:
https://reactnative.dev/docs/environment-setup
https://reactnative.cn/docs/environment-setup
Notes:
- 针对依赖Node核心的包,RN没有进行处理,需要借助rn-nodeify处理,e.g. https://github.com/mvayngrib/react-native-crypto
- 针对Java依赖的版本问题,可以借助jetifier自动解决大部分的版本差异
针对Java依赖版本问题,可以通过patch-package打补丁
- 打出的补丁会包含很多无用的部分,可以选择性删除
打出的补丁可能二次修改,e.g.https://github.com/browserify/pbkdf2/blob/master/lib/default-encoding.js
- 源码中
global.process && global.process.version,安装后global.process && global."v16.13.0",patches/pbkdf2+3.1.2.patch需要二次修改
- 源码中
项目创建
npx react-native@latest init rnProject
Notes:项目名称只支持驼峰,不支持连字符。
项目运行
npm run android
- 往模拟器或真机安装APK:包运行所需要的资源。
- 引用原生依赖,需要重新运行该命令。
--mode=release临时打包,输出路径android\app\build\outputs\apk\release
npm run start
- 运行
Metro打包JS代码,启动热更新,在模拟器或真机实时查看改动。 --reset-cache清除Metro缓存,重新编译JS代码。
清除运行缓存
"./gradlew" clean- 切换到
android目录下,在命令行执行该命令,可清除gradle缓存。
- 切换到
npx react-native start --reset-cache- 清除Metro缓存,重新编译JS代码
- 应用场景:环境报错、开发者工具出现问题
页面适配
方案一:
// src/utils/px2dp.js
import { Dimensions, PixelRatio, StyleSheet } from 'react-native';
const windowWidth = Dimensions.get('window').width;

const px2dp = function (px) {
  if (!isNaN(px)) {
    return (windowWidth / 1080) * px / PixelRatio.get()
  } else {
    return 0
  }
}
export default px2dp
// entry.js
import px2dp from '../utils/px2dp';
StyleSheet.create({
  pageTitle: {
    fontSize: px2dp(64),
    lineHeight: px2dp(85),
    paddingLeft: px2dp(100),
    paddingRight: px2dp(100),
    marginTop: px2dp(80),
  },
})
方案二:
import React from 'react';
import {
  StyleSheet,
  Text,
  Dimensions,
  PixelRatio,
  View,
} from 'react-native';
const { width: layoutWidth, height: layoutHeight } = Dimensions.get('window') // 获取到设备pd
const ratio = PixelRatio.get() // 像素密度
const pixelWidth = PixelRatio.getPixelSizeForLayoutSize(layoutWidth) // pd转px
const pixelHeight = PixelRatio.getPixelSizeForLayoutSize(layoutHeight) // pd转px
const designWidth = 950 // 设计图尺寸

/**
 * 设备以px展示,以1/ratio缩放,通过translateX、translateY重置transform原点
 * | 设计图 | 设备 |
 * | 20px | x |
 * | 950px | pixelWidth |
 * 同等占比:x = 20 * pixelWidth / 950
 * ============================================
 * 结合缩放比例:
 * scale = pixelWidth / (designWidth * ratio)
 * 其余组件可按设计图设置像素即可
*/
const styles = StyleSheet.create({
  adapter: {
    width: pixelWidth,
    height: pixelHeight,
    transform: [
      {
        translateX: -pixelWidth * 0.5,
      },
      {
        translateY: -pixelHeight * 0.5
      },
      {
        scale: pixelWidth / (ratio * designWidth)
      },
      {
        translateX: pixelWidth * 0.5,
      },
      {
        translateY: pixelHeight * 0.5
      }
    ]
  },
  fullscreen: {
    width: designWidth,
    height:90,
    backgroundColor: 'red'
  },
  halfscreen: {
    width: designWidth / 2,
    height:90,
    backgroundColor: 'green'
  },
  quaterscreen: {
    width: designWidth / 4,
    height:90,
    backgroundColor: 'blue'
  }
});

function App(): JSX.Element {
  return (


        1


        2


        3


  );
}

export default App;
结构&样式
原生组件:
https://reactnative.dev/docs/components-and-apis
只有特定的组件才有交互样式与事件,如
Button、TouchableHighlight、TouchableOpacity,其余组件无法绑定onPress事件- 一般不选用
Button,而使用自定义Button组件,因为原生Button样式不好调节
- 一般不选用
- 不支持svg,需要借助第三方库,e.g.
react-native-svg和react-native-svg-transformer - 结构搭建:将HTML的标签用法完全忘记,重新根据文档学习使用方法。
样式:
https://reactnative.dev/docs/image-style-props
- 只能使用组件规范的样式,否则不起作用
lineHeight不能使文字居中,请使用justifyContent- 针对
Text组件,需要单独定义相关样式,不会继承父级非Text组件Text样式,e.g.不会从父级继承color - 不支持渐变色、投影等效果,需要借助第三方库,e.g.
react-native-linear-gradient、react-native-shadow-2
Notes:第三方库的安装,需要重新启动项目,否则,会报模块找不到。
嵌套ScrollView
flatlist嵌套在scrollView无法滚动,父子级都需要设置nestedScrollEnabled属性scrollView必须设定一个高度,否则会使用默认高度,并非由内容撑开。- 注意
style与contentContainerStyle的区别 scrollView高度设定:专设View组件包裹,scrollView高度设置为flex:1
- 注意
代码调试
react-native-debugger的使用
连接
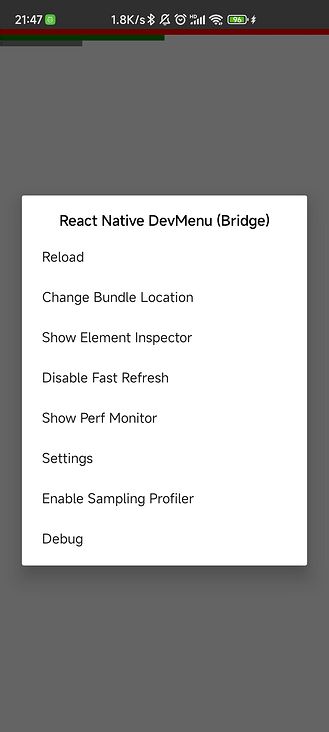
react-native-debugger,需要应用程序开启Debug模式- 真机:摇一摇手机,出现操作面板,选择
Debug
- 真机:摇一摇手机,出现操作面板,选择
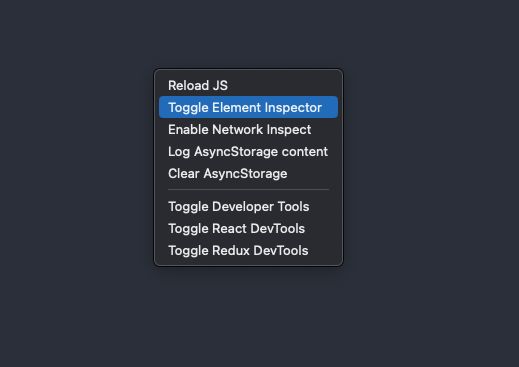
模拟器:模拟器聚焦后,使用
Ctrl + m打开操作面板- 双击
r是reload
- 双击
使用
react-native-debugger时,如果发出网络请求,可能会在Network面板发现没有request发起,请求(成功/失败)回调没有执行。- 使用
react-native-debugger时,如果发现Components面板始终空白,使用npx react-native start --reset-cache清除缓存启动项目 react-native-debugger的使用,需要同版本的react-devtools和react-devtools-core作为开发依赖。
当前实例获取
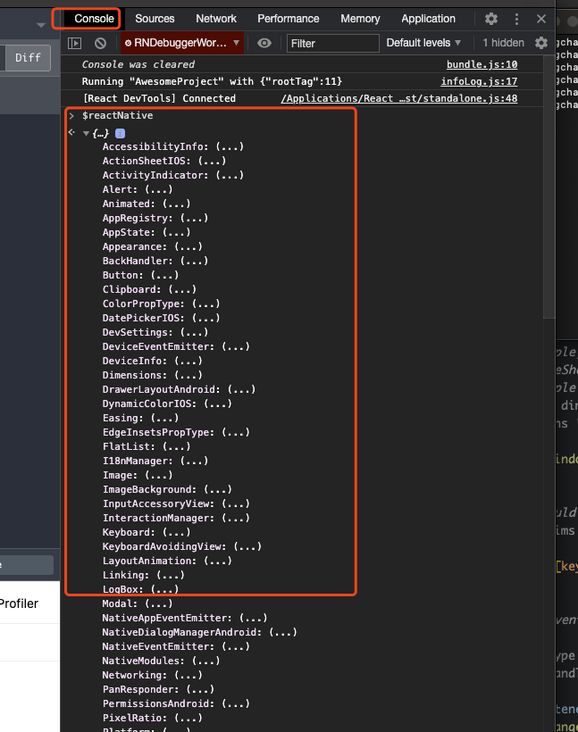
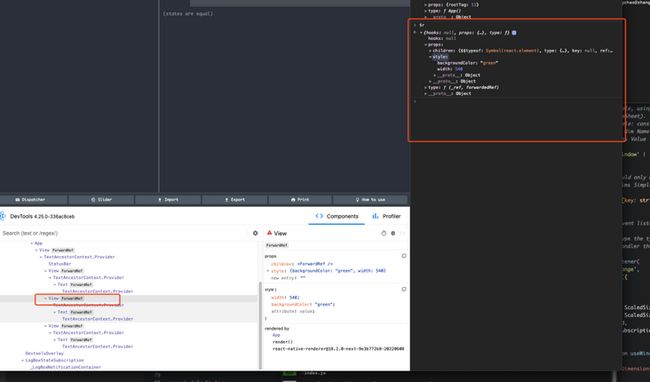
类同Chrome开发者工具,在RN任意调试工具的Console面板:
- 通过
$reactNative等同于import $reactNative from "react-native",可以使用react-native库中的方法。
- 通过
$r可以获取当前选中节点实例
多种调试工具切换
在模拟器中开启debug后,调试每次都会自动默认打开debugger-ui页面,如何关闭:
- 在启动项目
npm run start的命令行中使用shift + d切换到模拟器并打开调试面板,此时点击debug面板选项不再自动调起debugger-ui页面。 - 通过取消选中小勾号来解决它
Maintain Priority - 避免直接在模拟器中通过
Ctrl + M唤起面板,选择debug,这样会默认调起debugger-ui
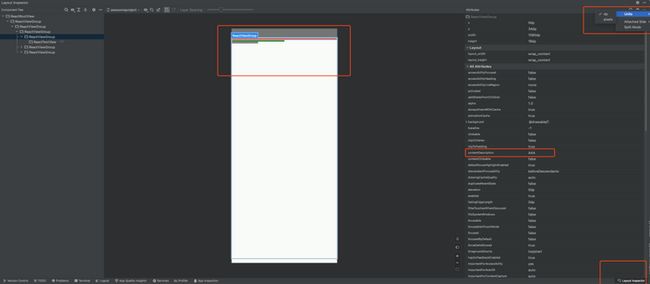
UI审查
开启Android Studio:
- 通过右下角的
Layout Inspector,选择模拟器或真机。
- 点击结构,可以查看组件属性
- 可以通过该面板的右上角设置,切换单位。
- 可以通过给组件赋值
testID、aria-label,进行组件识别。
日志查看
开启Android Studio:
- 通过下方的
logcat可以设备日志,可用于分析应用程序崩溃原因。 - 可进行日志筛选,e.g.
package:com.awesomeproject level:error
外部字体
https://www.jianshu.com/p/6000eb97d53b
- 不像H5一样,针对不同的
font-weight设置@`font-face`
@font-face { font-family: "Sans"; font-weight: 100; src: url("../assets/fonts/Thin.otf");}
@font-face { font-family: "Sans"; font-weight: 200; src: url("../assets/fonts/Light.otf");}
@font-face { font-family: "Sans"; font-weight: 400; src: url("../assets/fonts/Normal.otf");}只能通过字体文件名设置不同的fontFamily:
// font-weight:100
f100: {
  fontFamily: 'Thin' // 字体文件名
}
// font-weight:200
f200: {
  fontFamily: 'Light' // 字体文件名
}
// font-weight:300
f300: {
  fontFamily: 'Normal' // 字体文件名
}
动画
toValue只能定义整型,如果动画需要其他类型的值,需要使用interpolate- 无法对svg中的circle使用transform定义动画,只能通过View或其他元素包裹,实现旋转动画
- 如果页面内有大量运算,==
Animated会被阻塞,因为Animated是在JS线程运行,而非UI线程(https://stackoverflow.com/questions/56980044/how-to-prevent-setinterval-in-react-native-from-blocking-running-animation)
  const animationRef = useRef({
    strokeDashoffset: new Animated.Value(240),
    rotateZ: new Animated.Value(1)
  })
  useEffect(() => {
    const animationDef = () => {
      Animated.loop(
        Animated.sequence([
          Animated.parallel([
            Animated.timing(
              animationRef.current.strokeDashoffset,
              {
                toValue: 240,
                useNativeDriver: true,
                duration: 900
              }
            ),
            Animated.timing(
              animationRef.current.rotateZ,
              {
                toValue: 2,
                useNativeDriver: true,
                duration: 900
              }
            ),
          ]),
          Animated.parallel([
            Animated.timing(
              animationRef.current.strokeDashoffset,
              {
                toValue: 200,
                useNativeDriver: true,
                duration: 100
              }
            ),
            Animated.timing(
              animationRef.current.rotateZ,
              {
                toValue: 3,
                useNativeDriver: true,
                duration: 100
              }
            ),
          ]),
          Animated.parallel([
            Animated.timing(
              animationRef.current.strokeDashoffset,
              {
                toValue: 200,
                useNativeDriver: true,
                duration: 900
              }
            ),
            Animated.timing(
              animationRef.current.rotateZ,
              {
                toValue: 4,
                useNativeDriver: true,
                duration: 900
              }
            ),
          ]),
          Animated.parallel([
            Animated.timing(
              animationRef.current.strokeDashoffset,
              {
                toValue: 240,
                useNativeDriver: true,
                duration: 100
              }
            ),
            Animated.timing(
              animationRef.current.rotateZ,
              {
                toValue: 5,
                useNativeDriver: true,
                duration: 100
              }
            ),
          ])
        ])
      ).start()
    }
    animationDef()
  }, [animationRef])
  const rotateZ = animationRef.current.rotateZ.interpolate({
    inputRange: [1, 2, 3, 4, 5],
    outputRange: ['-100deg', '-424deg', '-500deg', '-784deg', '-820deg'],
  })
常用第三方库
项目需要重启才可以,否则会报模块找不到
渐变色
import LinearGradient from 'react-native-linear-gradient';
支持svg
"react-native-svg": "^13.9.0","react-native-svg-transformer": "^1.0.0",
- 全局样式变量
"react-native-extended-stylesheet": "^0.12.0",
- 毛玻璃
@react-native-community/blur —— 只能有一个子节点,多个子节点需要包裹
- 投影
yarn add react-native-shadow-2 —— 包裹唯一子节点不能使用margin,会导致Shadow不对齐,如果需要设置margin,使用View包裹Shadow元素
第三方库使用带来的问题
UseEffect vs. UseFocusEffect
使用react-native-navigation在同一路由栈中切换页面,页面没有销毁,所以,useEffect的清除回调不会被触发,需要考虑使用[useFocusEffect](https://reactnavigation.org/docs/bottom-tab-navigator)替代useEffect。
环境变量设置
使用react-native-dotenv或其他第三方库设置环境变量,会出现报错:Property left of AssignmentExpression expected node to be of a type ["LVal"] but instead got "StringLiteral" 。
需要修改rn-nodeify自动生成的shim.js文件,给process.env换一种赋值方式:
const isDev = typeof __DEV__ === 'boolean' && __DEV__
const env = process.env || {}
env['NODE_ENV'] = isDev ? 'development' : 'production'
process.env = env
if (typeof localStorage !== 'undefined') {
  localStorage.debug = isDev ? '*' : ''
}报错:ReferenceError: Property 'TextEncoder' doesn't exist, js engine: hermes
https://github.com/hapijs/joi/issues/2141
android.support.annotation包不存在的错误
jetifier可一键解决
- 错误发生在你将你的Android应用程序迁移到使用
androidx库时 import当你使用androidx,你需要更新你的Android源代码,用androidx.annotation包替换所有android.support.annotation包的语句。
https://www.qiniu.com/qfans/qnso-40380519【推荐】
react-native-webview错误: 无法将类 FileProvider中的构造器 FileProvider应用到给定类型;
https://github.com/react-native-webview/react-native-webview/issues/2978
将版本由12.2降级到12.1即可
react-native-webview Android postMessage 不工作
在安卓环境下,通过postmessage通信,需要使用document监听,ios下通过window监听。
https://github.com/react-native-webview/react-native-webview/issues/356
疑难杂症
- 如何同时运行模拟器和真机how to run react-native app on simulator and real device at the same time
https://stackoverflow.com/questions/51336123/how-can-i-run-two-react-native-applications
- 调试工具
flipper的React Devtools面板始终无法连接到应用程序
进行一下端口映射即可:adb reverse tcp:8097 tcp:8097
