RabbitMQ集群架构模式
搭建Mirror镜像集群:
4369是erlang的发现端口
5672是rabbitmq的通信端口
15672是rabbitmq的可视化控制台的端口号
25672是erlang底层发送消息和分配消息的底层端口
firewall-cmd --zone=public --add-port=4369/tcp --permanentfirewall-cmd --zone=public --add-port=5672/tcp --permanent
firewall-cmd --zone=public --add-port=15672/tcp --permanent
firewall-cmd --zone=public --add-port=25672/tcp --permanentfirewall-cmd --reload
find / -name *.cookie 查询到该文件里面是一串字符,我们要让多台机子的该文件的字符一致
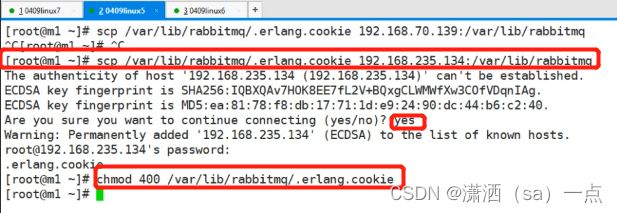
所以下面我们要进行远程拷贝
scp /var/lib/rabbitmq/.erlang.cookie 192.168.70.182:/var/lib/rabbitmq进行权限设置
chmod 400 /var/lib/rabbitmq/.erlang.cookie 注意分别在两台机子上实现
分别启动两台服务器的rabbit
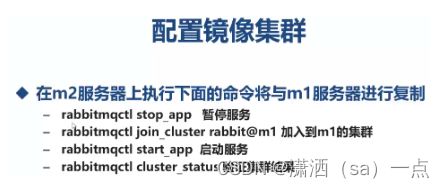
我们要在从机上配置我这里选择了第二台进行配置暂停从机的rabbit的服务
rabbitmqctl stop_app把从机加入到主机上
rabbitmqctl join_cluster rabbit@m1启动从机的服务
rabbitmqctl start_app
最后检验结果
rabbitmqctl cluster_status
会出现如下结果:
[{no des,[{disc,[rabbit@m1,rabbit@m2]}]},
{running_nodes,[rabbit@m1,rabbit@m2]},
{cluster_name,<<"rabbit@m1">>},
{partitions,[]},
{alarms,[{rabbit@m1,[]},{rabbit@m2,[]}]}]
第一台的操作会复制到第二台服务》
Haproxy负载均衡:
yum install haproxy 进行安装HA代理服务器
rpm -ql haproxy 查看安装文件,主要查看目录结构
启动 haproxy服务命令 haproxy
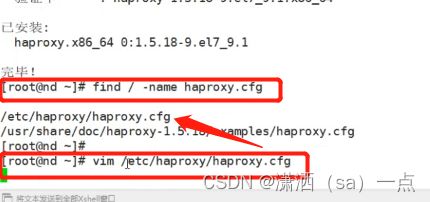
然后查找ha的配置文件
find / -name haproxy.cfg
会出现如下两个文件
/etc/haproxy/haproxy.cfg
/usr/share/doc/haproxy-1.5.18/examples/haproxy.cfg
使用vim对 /etc/haproxy/haproxy.cfg进行编辑
#对MQ集群进行监听
listen rabbitmq_cluster
bind 0.0.0.0:5672
option tcplog
mode tcp
option clitcpka
timeout connect 1s
timeout client 10s
timeout server 10s
balance roundrobin
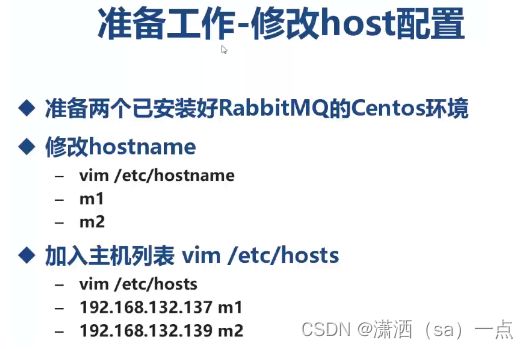
server node1 192.168.132.137:5672 check inter 5s rise 2 fall 3
server node2 192.168.132.139:5672 check inter 5s rise 2 fall 3#开启haproxy监控服务
listen http_front
bind 0.0.0.0:1080
stats refresh 30s
stats uri /haproxy?stats
stats auth admin:adminhaproxy
配置完成之后启动
haproxy -f /etc/haproxy/haproxy.cfg
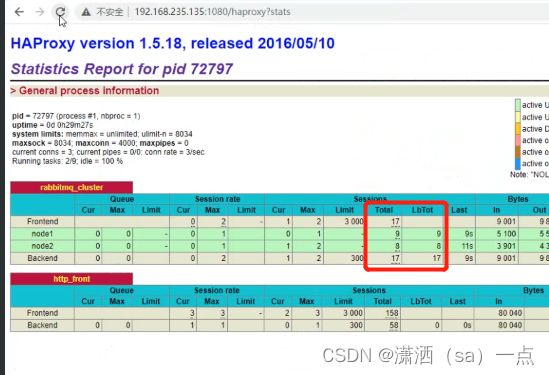
通过火狐浏览器进行检验操作
http://localhost:1080/haproxy?stats
最后可以查看haproxy的暴露的端口
本机访问:
public class Consumer {
    //一般情况先启动消费端
    public static void main(String[] args) throws IOException, TimeoutException {

        Connection connection = RabbitUtils.getConnection();
        Channel channel = connection.createChannel();

        channel.queueDeclare(RabbitContent.QEUEU_HELLO,false,false,false,null);

        //开始接受消息
        //参数2为是否自动签收,如果为true表示自动如果为false表示不自动
        //channel.basicConsume(RabbitContent.QEUEU_HELLO, false, new MyConsumer(channel));
        channel.basicConsume(RabbitContent.QEUEU_HELLO, false, new DefaultConsumer(channel){
            @Override
            public void handleDelivery(String consumerTag, Envelope envelope, AMQP.BasicProperties properties, byte[] body) throws IOException {
                String msg = new String(body);
                System.out.println("接受到消息:" + msg);
                //最后我么要做签收操作,目录是我们收到了消息就要把队列中的消息删除
                channel.basicAck(envelope.getDeliveryTag(),false);
            }
        });

    }
}
producer.java:
public class Producer {
    public static void main(String[] args) throws IOException, TimeoutException {
        //创建物理连接
        Connection connection = RabbitUtils.getConnection();
        //创建虚拟连接
        Channel channel = connection.createChannel();
        //通过Channel来进行数据的传输操作
        //我这里要向mq发送消息
        channel.queueDeclare(RabbitContent.QEUEU_HELLO,false, false, false,null);
        String str = "NBANBANBA";
        channel.basicPublish("", RabbitContent.QEUEU_HELLO, null, str.getBytes());
        System.out.println("消息发送成功");
        channel.close();
        connection.close();
    }
}


