科研画图工具Plot常用方法总结
一、Matplotlib的基本使用
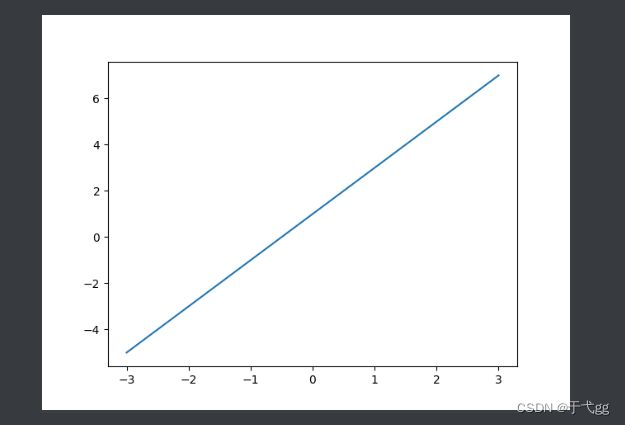
x = np.linspace(-1,1,50)  # 将X轴划分到-1到1之间
y = 2 * x + 1
plt.plot(x,y)
plt.show()
Result:
二、Matplotlib的进阶使用
x = np.linspace(-3,3,50)
y1 = 2*x + 1
y2 = x**2

plt.figure()  #figure是指一个图像,一个figure后面跟的是一个绘制图像的内容
plt.plot(x,y1)
plt.figure(num=3,figsize=(8,5))  # num代表figure3,figsize表示设置长宽为(8,3)的图
plt.plot(x,y2)
plt.plot(x,y1,color='red',linewidth=1.0,linestyle='--')  # 将两个线放在一起
#设置坐标轴
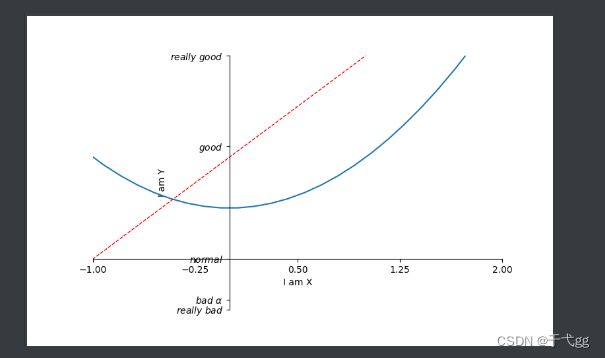
plt.xlim((-1,2))
plt.ylim((-2,3))
plt.xlabel('I am X')    # x 轴描述
plt.ylabel('I am Y')    # y 轴描述
new_ticks = np.linspace(-1,2,5)  # 范围设置为-1 - 2 ,间隔为分为5段
plt.xticks(new_ticks)  # 引用到横坐标
plt.yticks([-2,-1.8,-1,1.22,3],[r'$really\ bad$',r'$bad\ \alpha$',r'$normal$',r'$good$',r'$really\ good$'])  # -2对应really bad,-1.8对应bad    r$  $ 是代表改变坐标轴的数学符号
ax = plt.gca()  #获得图片的周围边框
ax.spines['right'].set_color('none')  # 将右边框消失
ax.spines['top'].set_color('none')    # 上边框消失
ax.xaxis.set_ticks_position('bottom')  # 用上边框代替x轴
ax.yaxis.set_ticks_position('left')     #用左边框代替y轴
ax.spines['bottom'].set_position(('data',-1))  #将底边框放入到-1位置上
ax.spines['left'].set_position(('data',0))  #将左边框放入到0位置上
plt.show()
Result:
三、Legengd图例
x = np.linspace(-3,3,50)
y1 = 2*x + 1
y2 = x**2
plt.figure(num=3,figsize=(8,5))  # num代表figure3,figsize表示设置长宽为(8,3)的图
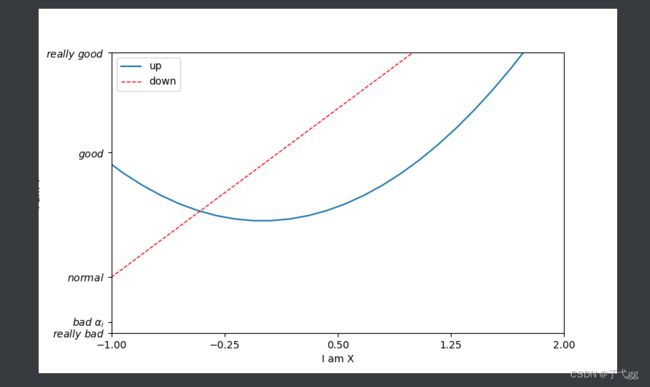
plt.plot(x,y2,label='up')  #线的名字叫up
plt.plot(x,y1,color='red',linewidth=1.0,linestyle='--',label='down')  # 将两个线放在一起
#设置坐标轴
plt.xlim((-1,2))
plt.ylim((-2,3))
plt.xlabel('I am X')    # x 轴描述
plt.ylabel('I am Y')    # y 轴描述
new_ticks = np.linspace(-1,2,5)  # 范围设置为-1 - 2 ,间隔为分为5段
plt.xticks(new_ticks)  # 引用到横坐标
plt.yticks([-2,-1.8,-1,1.22,3],[r'$really\ bad$',r'$bad\ \alpha_i$',r'$normal$',r'$good$',r'$really\ good$'])  #alpha_i 中的i是下标
#打上注明legend图例
plt.legend(handles=[],labels=[],loc='best')  #loc代表系统会自动找一个好的位置放图例说明  , lables代表声明名字线 , handle是放你的目标线,方便操作用的
plt.show()
四、Annotation标注
x = np.linspace(-3,3,50)
y = 2*x + 1
plt.figure(num=1,figsize=(8,5),)
plt.plot(x,y,)

ax = plt.gca()
ax.spines['right'].set_color('none')
ax.spines['top'].set_color('none')
ax.xaxis.set_ticks_position('bottom')
ax.spines['bottom'].set_position(('data',0))
ax.yaxis.set_ticks_position('left')
ax.spines['left'].set_position(('data',0))

x0 = 1
y0 = 2*x0 + 1
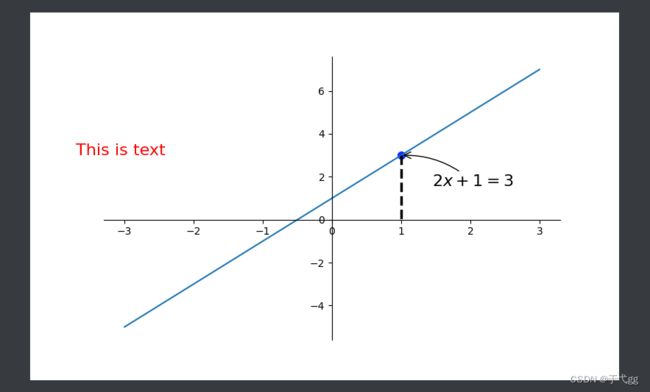
plt.scatter(x0,y0,s=50,color='b')
plt.plot([x0,x0],[y0,0],'k--',lw=2.5)  # k-- 代表黑色虚线  lw代表线的宽度

#method1
#  #xy表示坐标  xytext 表示基于目标点的右边30,往下30的位置放text内容 , arrowprops是指向的线
plt.annotate(r'$2x+1=%s$'%y0,xy=(x0,y0),xycoords='data',xytext=(+30,-30),textcoords='offset points',fontsize=16,arrowprops=dict(arrowstyle='->',connectionstyle='arc3,rad=.2'))
#定义text
plt.text(-3.7,3,'This is text',fontdict={'size':16,'color':'r'})
plt.show()
Result:
五、Subplot多合一显示
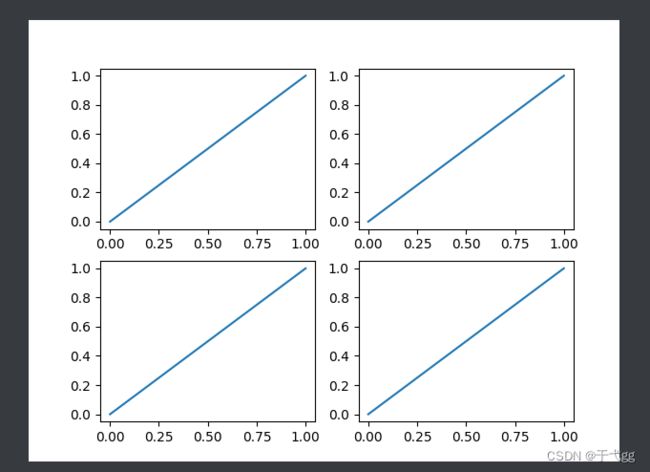
plt.figure()
plt.subplot(2,2,1)  # 2行2列的第一个位置放
plt.plot([0,1],[0,1])
plt.subplot(2,2,2)  # 2行2列的第二个位置放
plt.plot([0,1],[0,1])
plt.subplot(2,2,3)  # 2行2列的第三个位置放
plt.plot([0,1],[0,1])
plt.subplot(2,2,4)  # 2行2列的第四个位置放
plt.plot([0,1],[0,1])
plt.show()
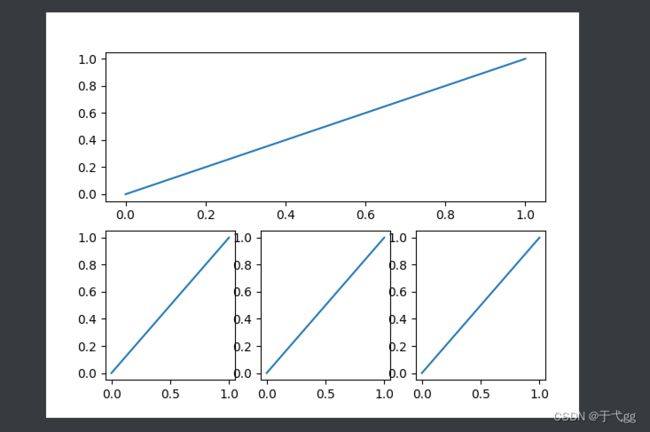
plt.figure()
plt.subplot(2,1,1)  # 2行2列的第一个位置放
plt.plot([0,1],[0,1])
plt.subplot(2,3,4)  # 2行2列的第二个位置放
plt.plot([0,1],[0,1])
plt.subplot(2,3,5)  # 2行2列的第三个位置放
plt.plot([0,1],[0,1])
plt.subplot(2,3,6)  # 2行2列的第四个位置放
plt.plot([0,1],[0,1])
plt.show()
六、Subplots多图合一
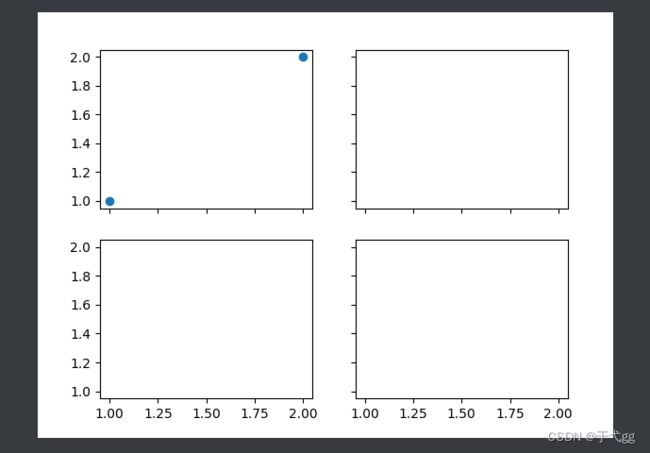
f,((ax11,ax12),(ax21,ax22))=plt.subplots(2,2,sharex=True,sharey=True) # 第三个参数和第四个参数是共享值
ax11.scatter([1,2],[1,2])
plt.show()
Result:
七、subplot2grid多图合一
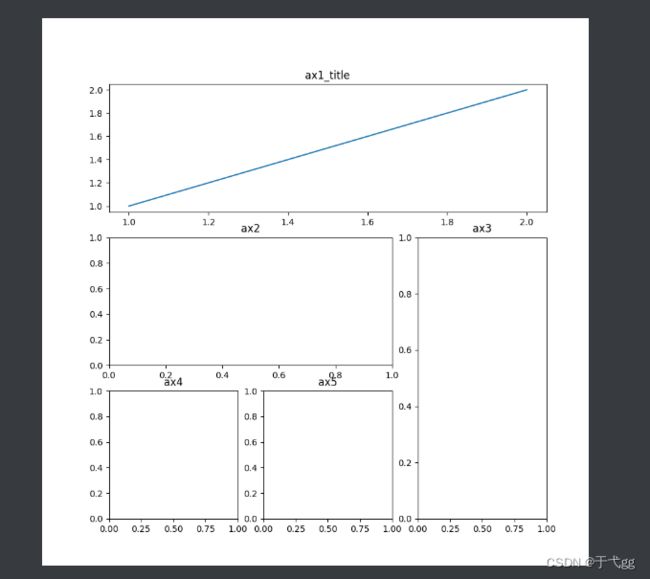
plt.figure(figsize=(9,9))
#第一个参数是三行三列声明,第二个参数,从什么时候开始,第三个参数,跨度
ax1 = plt.subplot2grid((3,3),(0,0),colspan=3,rowspan=1)
ax1.plot([1,2],[1,2])
ax1.set_title('ax1_title')
#第二个图
ax2 = plt.subplot2grid((3,3),(1,0),colspan=2)
ax2.set_title('ax2')
#第三个图
ax3 = plt.subplot2grid((3,3),(1,2),rowspan=2)
ax3.set_title('ax3')
#第四个图
ax4 = plt.subplot2grid((3,3),(2,0))
ax4.set_title('ax4')
#第五个图
ax5 = plt.subplot2grid((3,3),(2,1))
ax5.set_title('ax5')
plt.show()
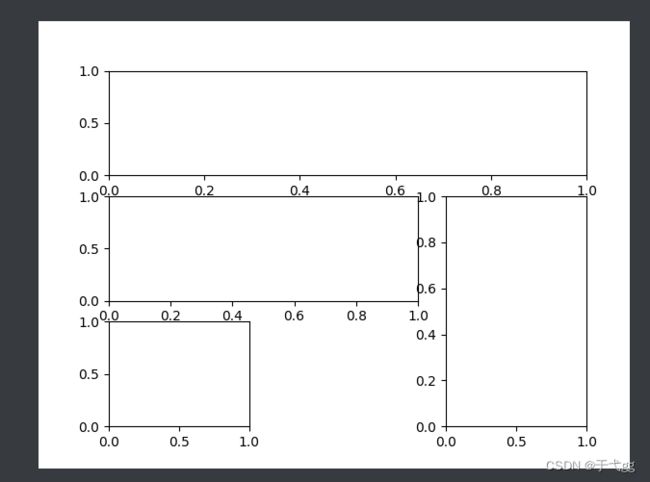
八、GridSpec多图合一
plt.figure()
gs = gridspec.GridSpec(3,3)
ax1 = plt.subplot(gs[0,:])
ax2 = plt.subplot(gs[1,:2])
ax3 = plt.subplot(gs[1:,2])
ax4 = plt.subplot(gs[-1,0])
ax5 = plt.subplot(gs[-1,-2])
plt.show()
Result:
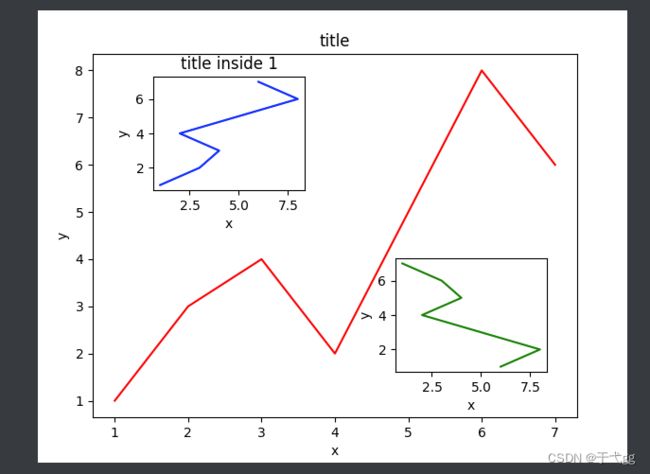
九、画中画
fig = plt.figure()
x = [1,2,3,4,5,6,7]
y = [1,3,4,2,5,8,6]
#下面是占的百分比
#总图
left,bottom,width,height =0.1,0.1,0.8,0.8
ax1 = fig.add_axes([left,bottom,width,height])
ax1.plot(x,y,'r')
ax1.set_xlabel('x')
ax1.set_ylabel('y')
ax1.set_title('title')
#图1
left,bottom,width,height =0.2,0.6,0.25,0.25
ax2 = fig.add_axes([left,bottom,width,height])
ax2.plot(y,x,'b')
ax2.set_xlabel('x')
ax2.set_ylabel('y')
ax2.set_title('title inside 1')
#图2,也是一种方法
plt.axes([0.6,0.2,0.25,0.25])
plt.plot(y[::-1],x,'g')
plt.xlabel('x')
plt.ylabel('y')

plt.show()
Result:
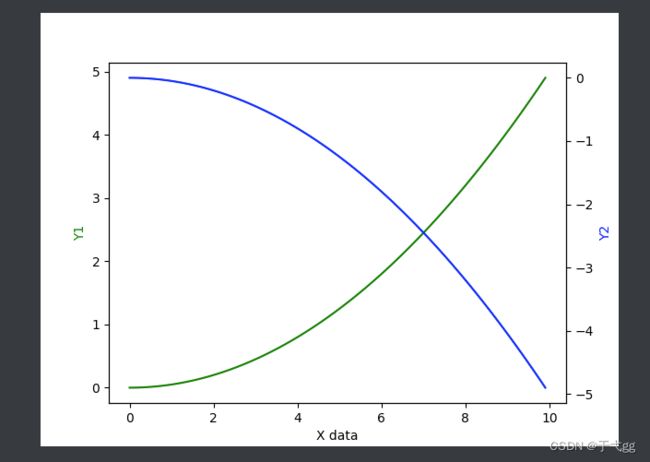
十、次坐标轴
x = np.arange(0,10,0.1)
y1 = 0.05*x**2
y2 = -1*y1
fig,ax1 = plt.subplots()
ax2 = ax1.twinx()
ax1.plot(x,y1,'g-')
ax2.plot(x,y2,'b-')
ax1.set_xlabel('X data')
ax1.set_ylabel('Y1',color='g')
ax2.set_ylabel('Y2',color='b')
plt.show()
Result:
十一、Animation动画
fig,ax = plt.subplots()
x = np.arange(0,2*np.pi,0.01)
line, =ax.plot(x,np.sin(x))

def animate(i):
    line.set_ydata(np.sin(x+i/100))
    return line,

def init():
    line.set_ydata(np.sin(x))
    return line,
# frames 帧数,也就是运动的时间
ani = animation.FuncAnimation(fig=fig,func=animate,frames=1200,init_func=init,interval=20,blit=False)
plt.show()  # 要看动画别忘记去Setting里面关掉scientific工具
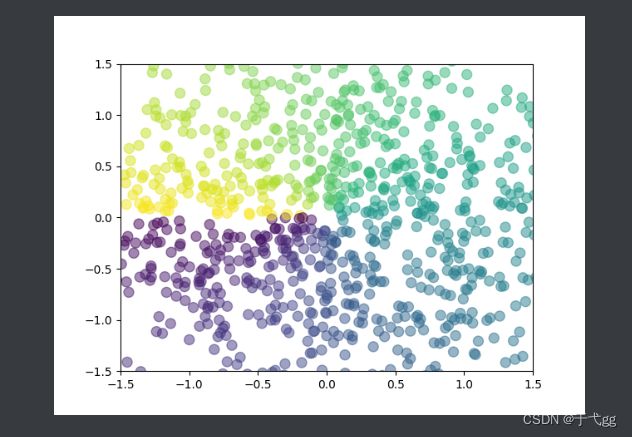
十二、散点图
n=1024
X = np.random.normal(0,1,n) # normal是正态分布
Y = np.random.normal(0,1,n)
T = np.arctan2(Y,X) # for color value
plt.scatter(X,Y,s=75,c=T,alpha=0.5)  # s表示size,c表示Color
plt.xlim((-1.5,1.5))
plt.ylim((-1.5,1.5))
plt.show()
Result:
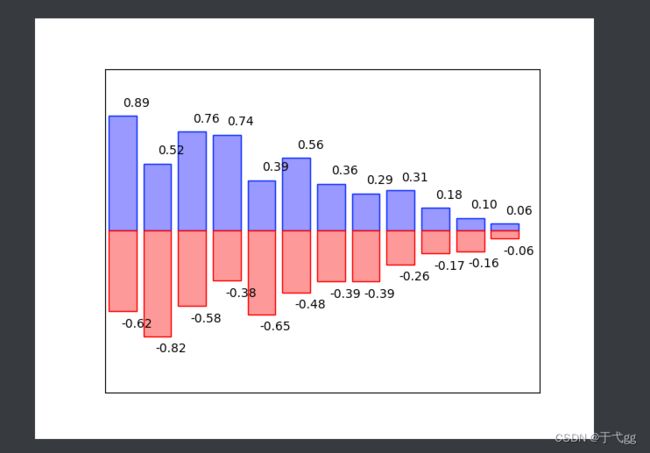
十三、柱状图
n = 12
X = np.arange(n)
Y1 = (1-X/float(n)) * np.random.uniform(0.5,1.0,n)  #uniform 是均匀分布
Y2 = (1-X/float(n)) * np.random.uniform(0.5,1.0,n)
#上柱
plt.bar(X,+Y1,facecolor='#9999ff',edgecolor='blue')
#下柱
plt.bar(X,-Y2,facecolor='#ff9999',edgecolor='red')
#对上柱加文字
for x,y in zip(X,Y1):  # zip 是指分别将X,Y1这两个值分别传入x,y中
    plt.text(x+0.4,y+0.05,'%.2f'%y,ha='center',va='bottom')  #前面两个参数是text的位置 , ha和va分别是横向和纵向对齐方式
#对下柱加文字
for x,y in zip(X,Y2):  # zip 是指分别将X,Y1这两个值分别传入x,y中
    plt.text(x+0.4,-y-0.05,'-%.2f'%y,ha='center',va='top')
plt.xlim(-.5,n)
plt.xticks(())
plt.ylim(-1.25,1.25)
plt.yticks(())
plt.show()
Result:
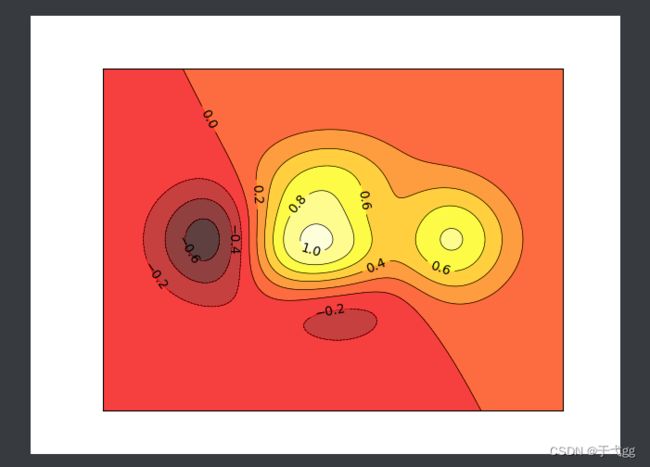
十四、Contours等高线图
def f(x,y):  #算一个高度的值,不用管
    return (1-x/2+x**5+y**3)*np.exp(-x**2-y**2)

n = 256
x = np.linspace(-3,3,n)
y = np.linspace(-3,3,n)
X,Y = np.meshgrid(x,y)  # 将x,y绑定为网格的输入值
#等高线
plt.contourf(X,Y,f(X,Y),8,alpha=0.75,cmap=plt.cm.hot)  #第三个参数是等高线高度,第四个参数是区域数,cmap是找颜色点
#等高线的线
C = plt.contour(X,Y,f(X,Y),8,colors='black',linewidths=.5)
#标签数
plt.clabel(C,inline=True,fontsize=10)
plt.xticks(())
plt.yticks(())
plt.show()
Result:
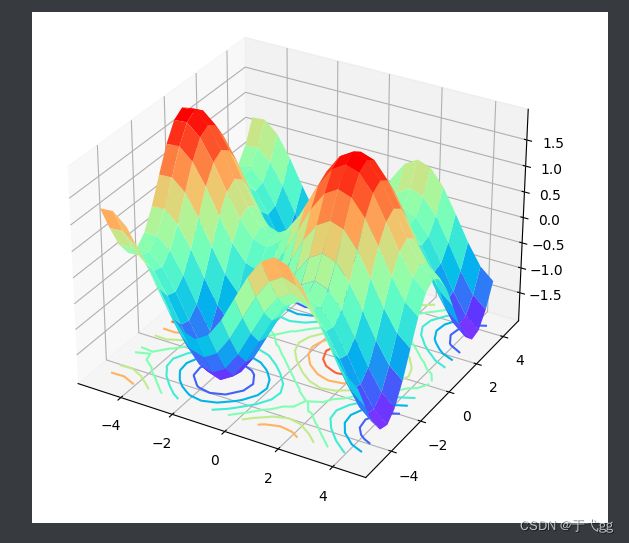
十五、3D图
fig=plt.figure()
ax3=plt.axes(projection='3d')

#定义三维数据
XX=np.arange(-5,5,0.5)
YY=np.arange(-5,5,0.5)
X,Y=np.meshgrid(XX,YY)
Z=np.sin(X)+np.cos(Y)

#作图
ax3.plot_surface(X,Y,Z,cmap='rainbow')
ax3.contour(X,Y,Z,zdim='z',offset=-2,cmap='rainbow') #等高线图,要设置offset,为Z的最小值
plt.show()
Result:

