建立个人网站并使用vue + node + mysql 实现登录注册修改密码等功能
1.购买服务器和域名
我的服务器和域名是都在腾讯云买的
服务器选的是轻量级的 Windows Server 的操作系统

2.备案
如果买的是国内的服务器需要备案,备案需要审核半个月左右,只要填写一些基本信息,然后等待管局审核通过即可

3.然后就可以通过远程桌面直接访问你的服务器了

4.通过服务器管理功能进行一些简单的配置就可以使用了

5.然后使用iis配置服务器,不会iis的百度一下,在服务器安装mysql环境和可视化工具,还有node环境,然后就可以先在自己本机的电脑进行操作了,到时候代码写好了直接给复制到服务器上就可以了。

6. 然后开始使用node js来搭建一个本地的服务,让前端来进行访问。
先来创建一个mysql.js的文件,来连接mysql数据库,直接上代码。
let mysql = require('mysql')
const db_config = {
    host: 'localhost',
    user: 'root',
    password: '122500',
    port: "3306",// 默认使用3306端口号
    database: 'biuder'
}
// 进行数据库交互
function conMysql(sql) {
    let connect = mysql.createConnection(db_config)
    // 开始链接数据库
    connect.connect(function (err) {
        if (err) {
            console.log(`mysql连接失败: ${err}!`)
        } else {
            console.log('mysql连接成功!')
        }
    })
    // 返回一个Promise承诺对象
    return new Promise((resolve, reject) => {
        connect.query(sql, (err, result) => {
            if (err) {
                reject(err)
            } else {
                // 此处需要将返回数据转为JSON再转回来,否则原数据不为任何数据类型
                let res = JSON.parse(JSON.stringify(result))
                closeMysql(connect)
                resolve(res)
            }
        });
    })
}
// 查询成功后关闭mysql
function closeMysql(connect) {
    connect.end((err) => {
        if (err) {
            console.log(`mysql关闭失败:${err}!`)
        } else {
            console.log('mysql关闭成功!')
        }
    })
}
// 导出方法
exports.conMysql = conMysql
连接上mysql后创建一个app.js的文件
const express = require('express')
let { conMysql } = require('./mysql')
const app = express()
const cors = require('cors')
app.use(cors())
const bodyParser = require('body-parser')
const multiparty = require('connect-multiparty')
app.use(bodyParser.urlencoded({
    extended:true
}));
app.use(bodyParser.json())
app.use(multiparty())
// 启动
app.listen(4000, () => {
    console.log('express server running at http://127.0.0.1:' + 4000);
})
app.get('/getUser', (req, res) => {
    let sql = 'select * from biu'
    conMysql(sql).then(result => {
        res.send(result)
    })
})
class Response {
    constructor(isSucceed, msg, code, data) {
        this.isSucceed = isSucceed;
        this.msg = msg;
        this.code = code;
        this.data = data;
    }
}
然后在终端输入 node app.js 来测试是否连接成功

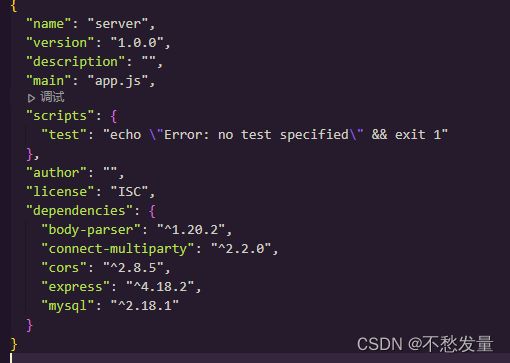
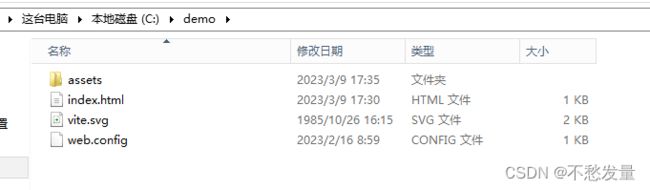
具体这个文件夹目录如下

需要的依赖
登录功能
// 登录
app.post('/login', (req, res) => {
    let sql = `select * from biu where username = '${req.body.username}'`
    conMysql(sql).then(result => {
        if (result[0].password === req.body.password) {
            let response = new Response(true, '登录成功', 200, result)
            res.send(response)
        } else {
            let response = new Response(false, '用户名或密码错误', 400)
            res.status(400).send(response)
        }
    }).catch(err => {
        res.status(500).send('数据库连接出错!')
    })
})
注册功能
// 注册
app.post('/addUser', (req, res) => {
    let { username, password,biuname} = req.body
    let sql = `insert into biu(username, password,biuname) values('${username}', '${password}', '${biuname}')`
    conMysql(sql).then(result => {
        if(result.affectedRows == 1){
            let response = new Response(true, '注册成功', 200, result)
            res.send(response)
        } else{
            let response = new Response(false, '注册失败,请联系开发者解决')
            res.status(400).send(response)
        }
    }).catch(err => {
        res.status(500).send('数据库连接出错!')
    })
})
修改密码功能
// 修改密码
app.post('/updatePassword', (req, res) => {
    let sql = `update biu set password = '${req.body.newPassword}' where username = '${req.body.username}'`
    conMysql(sql).then(result => {
      if (result.affectedRows == 1) {
        let response = new Response(true, '修改成功', 200, result)
        res.send(response)
      } else {
        let response = new Response(false, '修改失败,请联系开发者解决')
        res.status(400).send(response)
      }
    }).catch(err => {
      res.status(500).send('数据库连接出错!')
    })
})
后台代码就完事了 ,接下来就是前端来进行请求数据
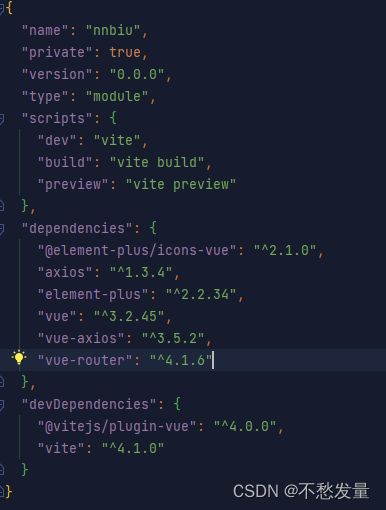
新建文件夹 创建vue项目
具体下载的依赖如下
main.js配置
import { createApp } from 'vue'
import './style.css'
import './phone.css'
import App from './App.vue'
import router from './router'
import ElementPlus from 'element-plus'
import * as ElementPlusIconsVue from '@element-plus/icons-vue'
import 'element-plus/dist/index.css'
import zhCn from 'element-plus/dist/locale/zh-cn.mjs'
import axios from 'axios';
import VueAxios from 'vue-axios';
import loginLogic from './js/loginlogic'
const app = createApp(App)
app.use(ElementPlus, {
    locale: zhCn,
})
for (const [key, component] of Object.entries(ElementPlusIconsVue)) {
    app.component(key, component)
}
app.use(router)
app.use(VueAxios, axios)

app.config.globalProperties.loginLogic = loginLogic;
// app.config.globalProperties.baseURL = "http://127.0.0.1:4000";      // 本地
app.config.globalProperties.baseURL = "http://你自己服务器的ip:服务器的端口";  // 服务器
const proxy = app.mount("#app")
export default proxy
登录页的关键代码
登录
login(){
      if (this.userLoginForm.verifyNum === "") {
        this.$message({
          message: '大哥填验证码啊',
          type: 'warning'
        });
      } else if (this.userLoginForm.verifyNum !== this.loginLogic.identCode) {
        this.$message.error('验证码填错了,重填去');
      } else {
        if(this.userLoginForm.username != '' && this.userLoginForm.password != ''){
          this.axios.post( this.baseURL + '/login', this.userLoginForm).then((res) => {
            this.$message({
              message: res.data.msg,
              type: 'success'
            });
            this.$router.push("/Index");
          })
          .catch((err) => {
            this.$message.error('账号或密码填错了,重填去');
          })
        } else {
          this.$message({
            message: '不填账号密码拿啥登录呢???',
            type: 'warning'
          });
        }
      }
    },
注册
 zclogin(){
      if(this.userLoginformzc.username != '' && this.userLoginformzc.password != '' &&
         this.userLoginformzc.biuname != '') {
          this.axios.post(this.baseURL + '/addUser', this.userLoginformzc).then(res => {
            this.$message({
              message: res.data.msg,
              type: 'success'
            });
            this.logindl = true
            this.loginzc = false
          })
          .catch((err) => {
            this.$message.error(err.response.data.msg);
          })
      }else{
        this.$message({
          message: '请输入账号密码昵称',
          type: 'warning'
        });
      }
    },
完成后的效果 做了部分机型的兼容处理
登录 pc端
手机端

注册也用什么区别

登录成功后跳转至首页,目前这个东西只做到这里了,备案后一定要把备案号给整在网页底部,不然管局审核会给你把网站暂时封掉。开发完成后只要把你本地的ip换成你服务器的地址,然后将代码文件都放到服务器就可以了,还有mysql数据库的sql文件。

线上地址:
咕噜咕噜http://biu.nn1225.club/