zabbix从入门到精通
文章目录
- 1. zabbix概念
-
- 1.1 zabbix概况
- 1.2 zabbix采集方式
- 1.3 架构
- 1.4 数据流
- 1.5 监控总结
- 2. zabbix安装
-
- 2.1 环境检查
- 2.2 安装zabbix
-
- 2.2.1 安装yum源
- 2.2.2 安装zabbix
- 2.2.3 修改配置
- 2.2.4 启动zabbix
- 2.2.5 浏览器web界面安装
- 2.2.6 修改默认语言
- 2.2.7 用户管理
- 3. zabbix使用
-
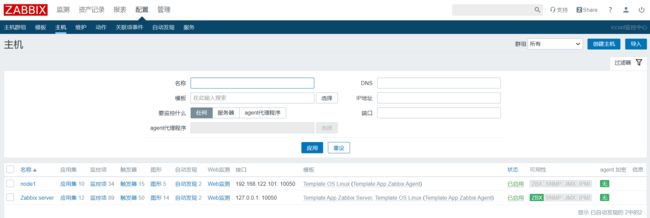
- 3.1 添加监控主机
-
- 3.1.1 安装zabbix-agent
- 3.1.2 zabbix-server测试
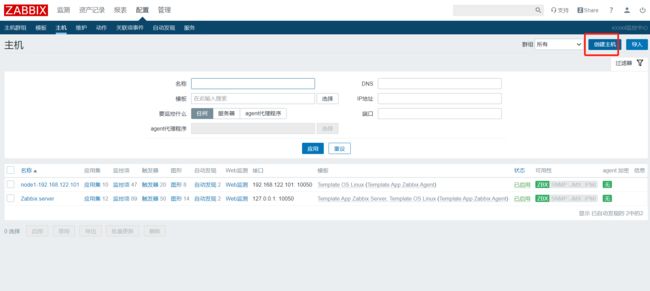
- 3.1.3 web端添加被监控主机信息
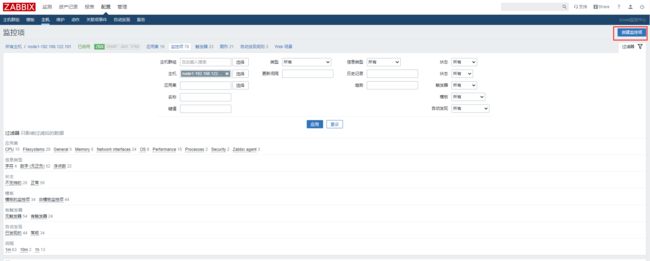
- 3.2 添加监控指标
-
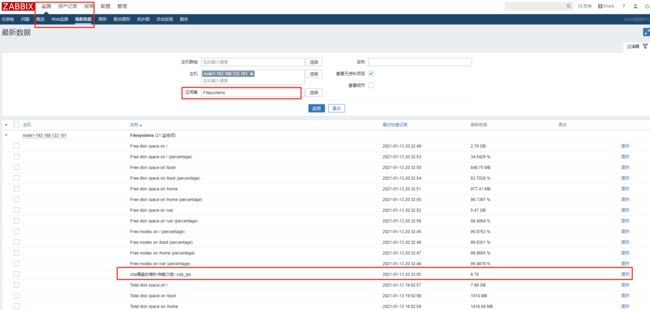
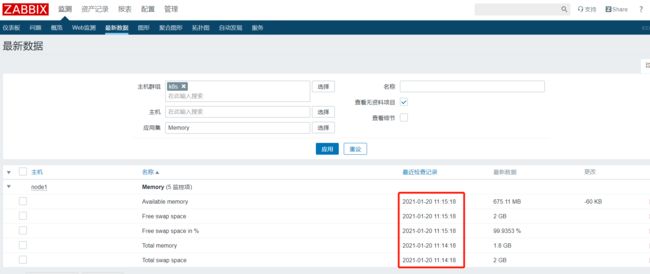
- 3.2.1 最新数据及监控间隔
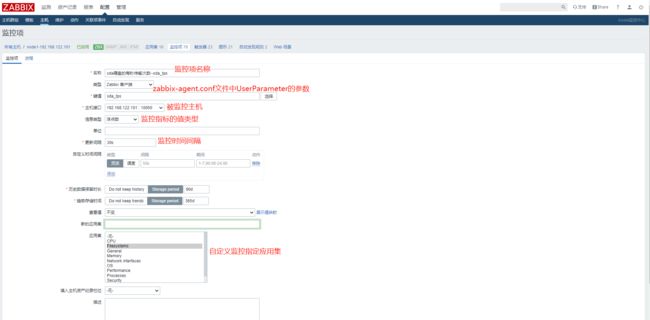
- 3.2.2 自定义监控项
- 3.2.3 批量导入自定义监控项-(可利用模板)
- 3.3 添加触发器
-
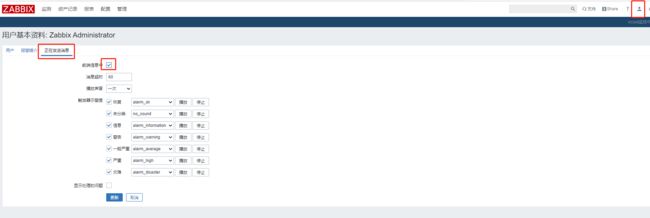
- 3.3.1 开启web界面报警器
- 3.3.2 自定义添加触发器
- 3.4 添加报警方式
-
- 3.4.1 邮件报警
- 3.4.2 微信报警
- 3.5 添加自定义模板
- 4. grafana展示zabbix监控报表
-
- 4.1 安装grafana
- 4.2 安装zabbix插件
-
- 4.2.1 命令行安装
- 4.2.2 web界面安装
- 4.2.3 插件包下载
- 4.2.4 启用zabbix插件
- 4.3 添加zabbix数据源
- 4.4 导入zabbix-dashboard
- 5. 自动发现与自动注册
-
- 5.1 自动发现监控主机
-
- 5.1.1 添加自动发现规则
- 5.1.2 添加自动发现动作
- 5.1.3 监测自动发现
- 5.2 自动注册监控主机
-
- 5.2.1 zabbix-server配置自动注册动作
- 5.2.2 修改zabbix-agent配置
- 5.2.3 web界面测试
- 6. snmp监控模式
-
- 6.1 snmp安装与配置
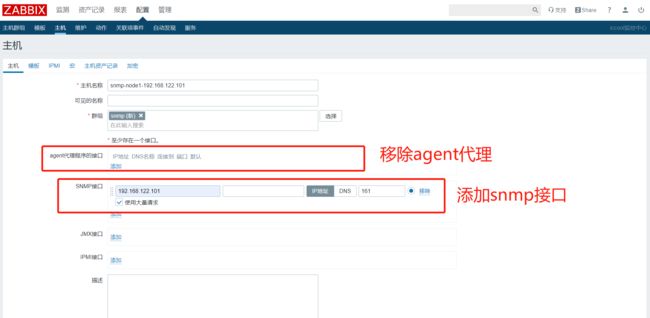
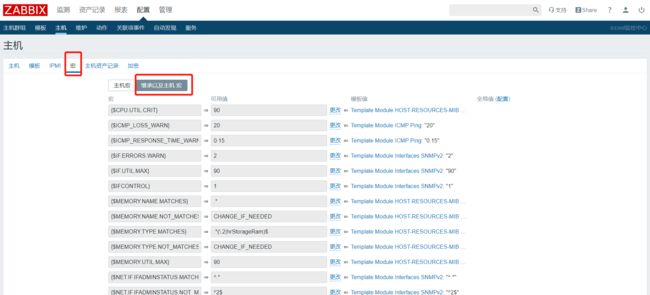
- 6.2 zabbix配置snmp监控
- 7. zabbix-agent主动与被动模式
-
- 7.1 主动与被动模式的概念
- 7.2 修改模板为主动模式
-
- 7.2.1 克隆原模板
- 7.2.2 批量更新为主动模式
- 7.2.3 查看最新数据
- 8. zabbix-proxy模式
-
- 8.1 zabbix-proxy架构图
- 8.2 zabbix-proxy内网环境配置
-
- 8.2.1 proxy机器内网环境配置
- 8.2.2 内网机器网络配置
- 8.3 安装zabbix-proxy
-
- 8.3.1 安装zabbix-proxy
- 8.3.2 修改zabbix-proxy配置
- 8.4 修改内网机器agent配置文件
- 8.5 zabbix-server的web界面配置
-
- 8.5.1 添加agent代理程序
- 8.5.2 添加内网agent主机
- 8.6 zabbix-server与zabbix-proxy同步配置
- 9. zabbix监控java进程
-
- 9.1 java环境搭建
- 9.2 开启jmx监控
- 9.3 安装zabbix-java-gateway
- 9.4 zabbix-server配置zabbix-java-gateway
- 9.5 zabbix-server的web界面配置
- *zabbix优化
- QA:问题
-
- 1. web界面安装提示连不上mysql数据库
- 参考
1. zabbix概念
1.1 zabbix概况
Zabbix 是一个企业级分布式开源监控解决方案。
Zabbix 支持主动轮询(polling)和被动捕获(trapping)。
Zabbix所有的报表、统计数据和配置参数都可以通过基于 Web 的前端页面进行访问。
1.2 zabbix采集方式
- agent:代理程序监控,类似于master/agent模式
- SNMP:基于简单网络管理协议与被监控的主机进行通讯,例如无法安装agent的路由器、交换机等网络设备
- IPMI:基于IPMI接口监控物理硬件状态信息
- JMX:监控JVM虚拟机
1.3 架构
![]()
图片来自:http://www.zsythink.net/
-
zabbix-server
Zabbix server 是 Zabbix软件的核心组件,agent 向其报告可用性、系统完整性信息和统计信息。server也是存储所有配置信息、统计信息和操作信息的核心存储库。
-
database
所有配置信息以及 Zabbix 采集到的数据都被存储在数据库中。 默认Postgres和Mysql
-
zabbix-web
为了从任何地方和任何平台轻松访问 Zabbix ,我们提供了基于 web 的界面。该界面是 Zabbix server 的一部分,通常(但不一定)和 Zabbix server 运行在同一台物理机器上。
-
zabbix-proxy
Zabbix proxy 可以代替 Zabbix server采集性能和可用性数据。Zabbix proxy在Zabbix的部署是可选部分;但是proxy的部署可以很好的分担单个Zabbix server的负载。
-
zabbix-agent
Zabbix agents 部署在被监控目标上,用于主动监控本地资源和应用程序,并将收集的数据发送给 Zabbix server。
1.4 数据流
另外,回过头来整体的了解下 Zabbix 内部的数据流对Zabbix的使用也很重要。首先,为了创建一个采集数据的监控项,您就必须先创建主机。其次,在任务的另外一端,必须要有监控项才能创建触发器(trigger),必须要有触发器来创建动作(action)。因此,如果您想要收到类似“X个server上CPU负载过高”这样的告警,您必须首先为 Server X 创建一个主机条目,其次创建一个用于监控其 CPU的监控项,最后创建一个触发器,用来触发 CPU负载过高这个动作,并将其发送到您的邮箱里。虽然这些步骤看起来很繁琐,但是使用模板的话,实际操作非常简单。也正是由于这种设计,使得 Zabbix 的配置变得更加灵活易用。
1.5 监控总结
- 物理硬件监控 —— ipmitool工具,机房巡检
- 操作系统监控—— linux模板
- 应用软件监控 —— 修改开源模板
- 业务监控 —— 业务状态、网页速度、pv、uv、ip监控、日活
- 网络设备监控 —— snmp
- ELK日志监控
2. zabbix安装
2.1 环境检查
[root@study ~]# cat /etc/redhat-release
CentOS Linux release 7.2.1511 (Core)
[root@study ~]# uname -r
3.10.0-327.el7.x86_64
[root@study ~]# getenforce
Enforcing
[root@study ~]# systemctl status firewalld
● firewalld.service - firewalld - dynamic firewall daemon
   Loaded: loaded (/usr/lib/systemd/system/firewalld.service; disabled; vendor preset: enabled)
   Active: inactive (dead)
2.2 安装zabbix
- zabbix-server-mysql
- zabbix-web-mysql
- zabbix-agent
- mariadb
2.2.1 安装yum源
# 获取
wget https://mirrors.tuna.tsinghua.edu.cn/zabbix/zabbix/4.0/rhel/7/x86_64/zabbix-release-4.0-2.el7.noarch.rpm
# 安装
rpm -ivh zabbix-release-4.0-2.el7.noarch.rpm
# 修改官方源为国内清华源
sed -i 's#http://repo.zabbix.com#https://mirrors.tuna.tsinghua.edu.cn/zabbix#g'  /etc/yum.repos.d/zabbix.repo
sed -i 's#gpgcheck=1#gpgcheck=0#g'  /etc/yum.repos.d/zabbix.repo
2.2.2 安装zabbix
# 安装zabbix-server-mysql zabbix-web-mysql zabbix-agent
yum install -y zabbix-server-mysql zabbix-web-mysql zabbix-agent

# 安装mariadb    (如果已安装mysql,可自用mysql环境)
yum install -y mariadb-server

[root@study yum.repos.d]# mysql_secure_installation

Securing the MySQL server deployment.

Enter password for user root:

VALIDATE PASSWORD PLUGIN can be used to test passwords
and improve security. It checks the strength of password
and allows the users to set only those passwords which are
secure enough. Would you like to setup VALIDATE PASSWORD plugin?

Press y|Y for Yes, any other key for No:
Using existing password for root.
Change the password for root ? ((Press y|Y for Yes, any other key for No) :

 ... skipping.
By default, a MySQL installation has an anonymous user,
allowing anyone to log into MySQL without having to have
a user account created for them. This is intended only for
testing, and to make the installation go a bit smoother.
You should remove them before moving into a production
environment.

Remove anonymous users? (Press y|Y for Yes, any other key for No) : y
Success.


Normally, root should only be allowed to connect from
'localhost'. This ensures that someone cannot guess at
the root password from the network.

Disallow root login remotely? (Press y|Y for Yes, any other key for No) : y
Success.

By default, MySQL comes with a database named 'test' that
anyone can access. This is also intended only for testing,
and should be removed before moving into a production
environment.


Remove test database and access to it? (Press y|Y for Yes, any other key for No) : y
 - Dropping test database...
Success.

 - Removing privileges on test database...
Success.

Reloading the privilege tables will ensure that all changes
made so far will take effect immediately.

Reload privilege tables now? (Press y|Y for Yes, any other key for No) : y
Success.

All done!


# 启动mariadb数据库 (可自用mysql数据库)
systemctl start mariadb
systemctl enable mariadb

# 创建zabbix数据库
mysql -uroot -p
mysql> create database zabbix character set utf8 collate utf8_bin;
Query OK, 1 row affected (0.02 sec)

mysql> grant all on zabbix.* to zabbix@localhost identified by '123456';
Query OK, 0 rows affected, 1 warning (0.05 sec)
# 导入数据
zcat /usr/share/doc/zabbix-server-mysql-*/create.sql.gz |mysql -uzabbix -p123456 zabbix

# 检查zabbix数据库表
mysql -e 'use zabbix;show tables;' -uzabbix -p123456
2.2.3 修改配置
# 修改zabbix-server的配置,添加DB的password,匹配到DBUser=zabbix,在下一行添加DBPassword=123456,a表示在下方添加

sed -i.ori '/DBUser=zabbix/aDBPassword=123456' /etc/zabbix/zabbix_server.conf

# 修改时区   a表示在下方添加,i表示在上方添加
sed -i.ori '/Europe\/Riga/iphp_value date.timezone Asia\/Shanghai' /etc/httpd/conf.d/zabbix.conf

#解决中文乱码 上传msyh.ttf文件到/usr/share/zabbix/assets/fonts 目录下,并将其改名为graphfont.ttf
cd /usr/share/zabbix/assets/fonts
[root@master alternatives]# ls -arlt
lrwxrwxrwx    1 root root    38 1月  11 23:13 graphfont.ttf -> /etc/alternatives/abbix-web-font
\mv msyh.ttf DejaVuSans.ttf
2.2.4 启动zabbix
# 启动zabbix-server
systemctl start zabbix-server

# 启动zabbix-web
systemctl start httpd

# 启动zabbix-agent
systemctl start zabbix-agent

# 设置开机自启
systemctl enable zabbix-server
systemctl enable httpd
systemctl enable zabbix-agent
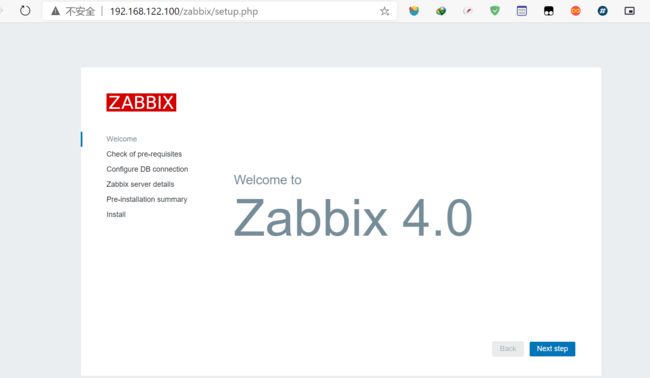
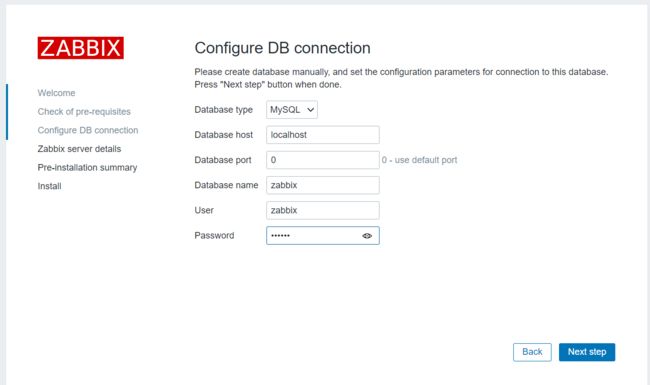
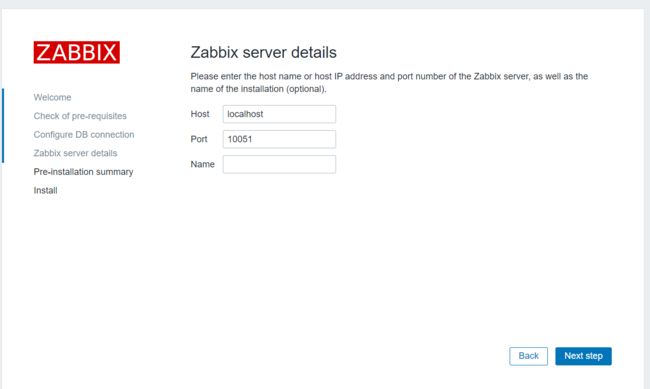
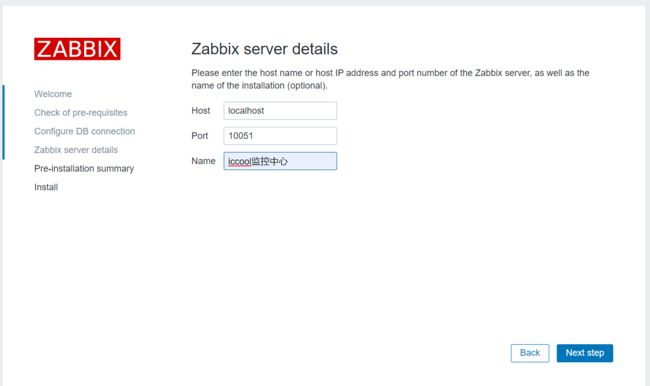
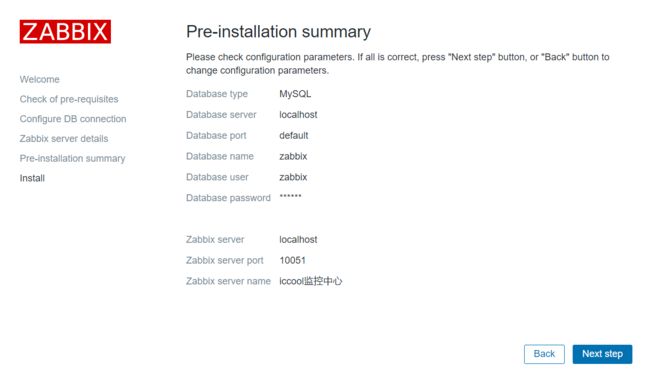
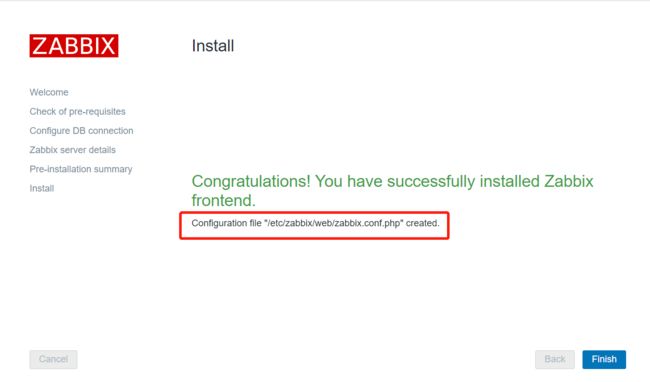
2.2.5 浏览器web界面安装
文件/etc/zabbix/web/zabbix.conf.php,后期用于迁移升级
<?php
// Zabbix GUI configuration file.
global $DB;

$DB['TYPE']     = 'MYSQL';
$DB['SERVER']   = 'localhost';
$DB['PORT']     = '0';
$DB['DATABASE'] = 'zabbix';
$DB['USER']     = 'zabbix';
$DB['PASSWORD'] = '123456';

// Schema name. Used for IBM DB2 and PostgreSQL.
$DB['SCHEMA'] = '';

$ZBX_SERVER      = 'localhost';
$ZBX_SERVER_PORT = '10051';
$ZBX_SERVER_NAME = 'iccool监控中心';

$IMAGE_FORMAT_DEFAULT = IMAGE_FORMAT_PNG;
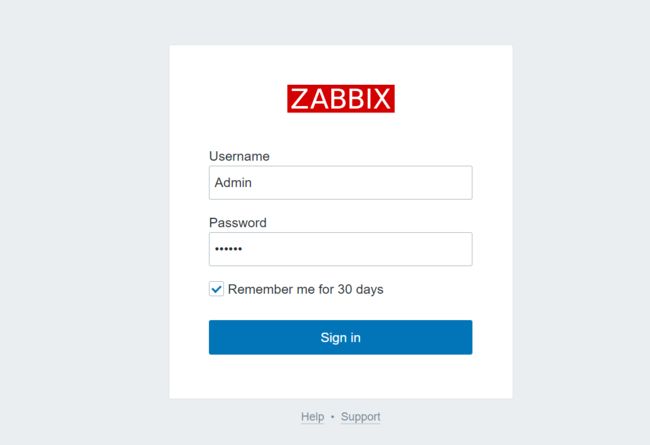
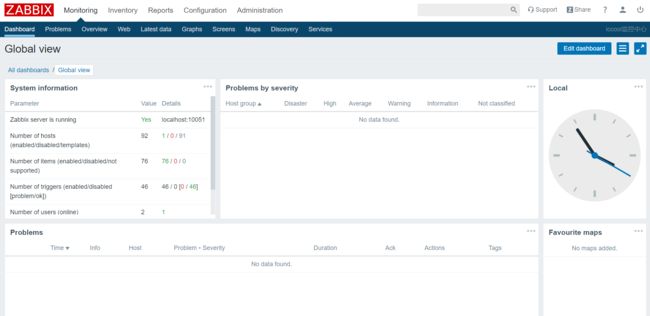
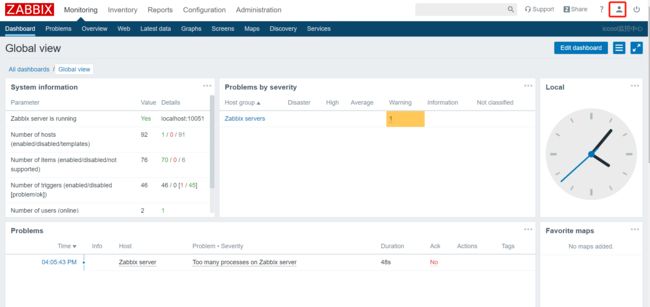
默认账号为 Admin,默认密码为zabbix
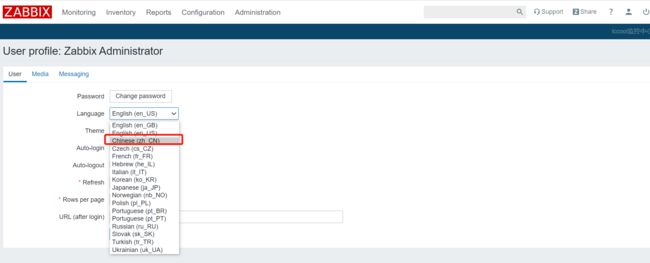
2.2.6 修改默认语言
![]()
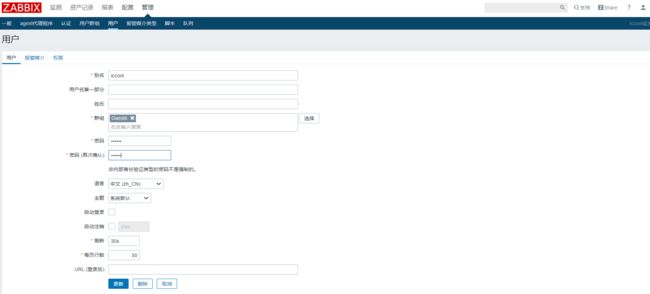
2.2.7 用户管理
3. zabbix使用
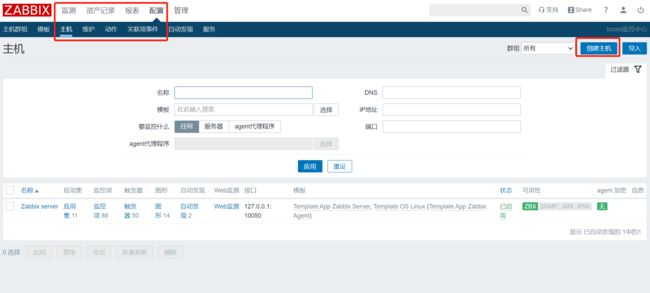
3.1 添加监控主机
准备主机:192.168.122.101
3.1.1 安装zabbix-agent
同2.2.1 先安装zabbix的yum源
# 安装agent
yum install zabbix-agent -y

# 在被监控的agent机器执行 修改配置 连接zabbix-server
sed -i.ori 's#Server=127.0.0.1#Server=192.168.122.100#' /etc/zabbix/zabbix_agentd.conf
# 修改zabbix_agentd.conf配置文件需重启zabbix-agent服务
systemctl restart zabbix-agent
3.1.2 zabbix-server测试
通过zabbix-server节点执行zabbix_get命令,获取agent监控信息。
# 在zabbix-server节点 测试
yum install zabbix-get -y
# 执行
[root@master zabbix]# zabbix_get -s 192.168.122.101 -p 10050 -k 'system.hostname'
node1
[root@master zabbix]#
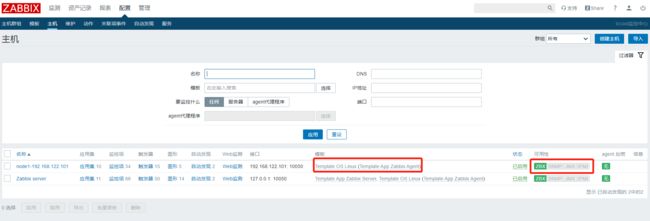
3.1.3 web端添加被监控主机信息
3.2 添加监控指标
系统监控指标参数:https://www.zabbix.com/documentation/4.0/zh/manual/config/items/itemtypes/zabbix_agent
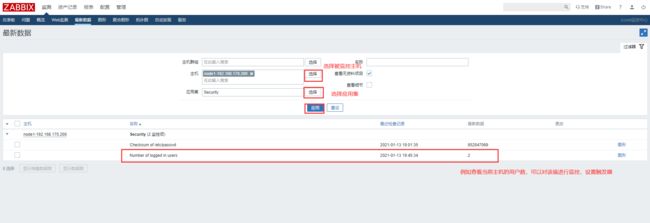
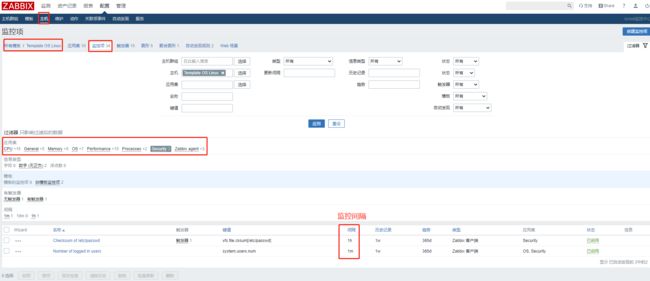
3.2.1 最新数据及监控间隔
3.2.2 自定义监控项
-
命令取值
[root@node1 ~]# iostat Linux 3.10.0-957.el7.x86_64 (node1) 2021年01月13日 _x86_64_ (2 CPU) avg-cpu: %user %nice %system %iowait %steal %idle 0.77 0.04 1.44 0.02 0.00 97.73 Device: tps kB_read/s kB_wrtn/s kB_read kB_wrtn sda 3.99 183.09 92.49 7916152 3998754 scd0 0.00 0.02 0.00 1050 0 dm-0 1.71 89.59 25.37 3873628 1097038 dm-1 0.00 0.05 0.00 2072 0 dm-2 2.33 93.03 66.84 4022070 2890029 dm-3 0.02 0.19 0.22 8090 9618 [root@node1 ~]# iostat|awk '$1 ~/sda/' sda 3.98 182.92 92.40 7916160 3998805 [root@node1 ~]# iostat|awk '$1 ~/sda/ {print $2}' 3.98 -
修改zabbix-agent配置文件
vim /etc/zabbix/zabbix_agentd.conf # 找到UserParameter ### Option: UserParameter # User-defined parameter to monitor. There can be several user-defined parameters. # Format: UserParameter=, # See 'zabbix_agentd' directory for examples. # 添加 UserParameter=sda_tps,iostat|awk '$1 ~/sda/ {print $2}' # 重启agent生效 systemctl restart zabbix-agent -
zabbix-server测试监控项取值
[root@master ~]# zabbix_get -s 192.168.122.101 -p 10050 -k "sda_tps" 41.60 -
在web界面添加自定义监控项
3.2.3 批量导入自定义监控项-(可利用模板)
- agent添加自定义监控项配置配置
# 添加tcp状态表
[root@master tmp]# cat << EOF > tcps.txt
ESTABLISHED
SYN_SENT
SYN_RECV
FIN_WAIT1
FIN_WAIT2
TIME_WAIT
CLOSE
CLOSE_WAIT
LAST_ACK
LISTEN
CLOSING
UNKNOWN
EOF
# 创建自定义监控项
[root@master tmp]# for n in `cat tcps.txt`;do echo "UserParameter=$n,netstat -ant |grep -c $n" >> /etc/zabbix/zabbix_agentd.d/user_def.conf;done

# 重启agent生效
[root@master tmp]# systemctl restart zabbix-agent

# 测试
[root@master tmp]# zabbix_get -s master -p 10050 -k TIME_WAIT
3
-
批量导入自定义监控项到zabbix
详情见:https://www.bilibili.com/video/BV1AC4y1Y7UN?p=18
# 服务器端模拟登录保存cookie
curl -X POST -L -c cookie -b cookie -d "name=Admin&password=123456&autologin=1&enter=Sign+in" http://192.168.122.100/zabbix/index.php

# 将cookie带入到请求中 注意修改自己的sid
for n in `cat tcps.txt`;do curl -X POST -L -c cookie -b cookie -d "sid=2e90716568e2e52d&form_refresh=2&form=create&hostid=10084&selectedInterfaceId=1&name=${n}%E7%8A%B6%E6%80%81%E7%9A%84%E6%95%B0%E9%87%8F&type=0&key=${n}&url=&query_fields%5Bname%5D%5B1%5D=&query_fields%5Bvalue%5D%5B1%5D=&timeout=3s&post_type=0&posts=&headers%5Bname%5D%5B1%5D=&headers%5Bvalue%5D%5B1%5D=&status_codes=200&follow_redirects=1&retrieve_mode=0&http_proxy=&http_username=&http_password=&ssl_cert_file=&ssl_key_file=&ssl_key_password=&interfaceid=1&snmpv3_authprotocol=0&snmpv3_privprotocol=0¶ms_es=¶ms_ap=¶ms_f=&value_type=3&units=&delay=30s&delay_flex%5B0%5D%5Btype%5D=0&delay_flex%5B0%5D%5Bdelay%5D=&delay_flex%5B0%5D%5Bschedule%5D=&delay_flex%5B0%5D%5Bperiod%5D=&history_mode=1&history=90d&trends_mode=1&trends=365d&valuemapid=0&new_application=&applications%5B%5D=1160&inventory_link=0&description=&status=0&add=%E6%B7%BB%E5%8A%A0" http://192.168.122.100/zabbix/items.php;done
3.3 添加触发器
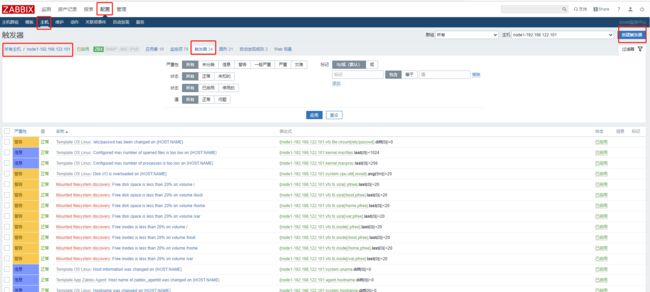
3.3.1 开启web界面报警器
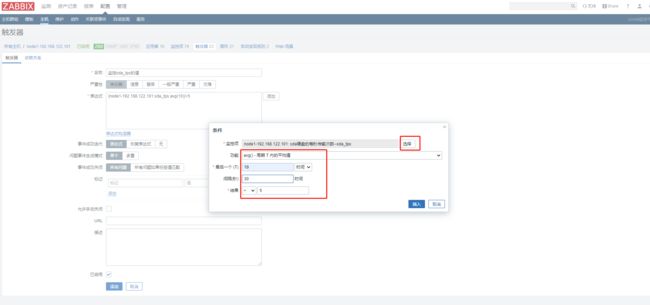
3.3.2 自定义添加触发器
3.4 添加报警方式
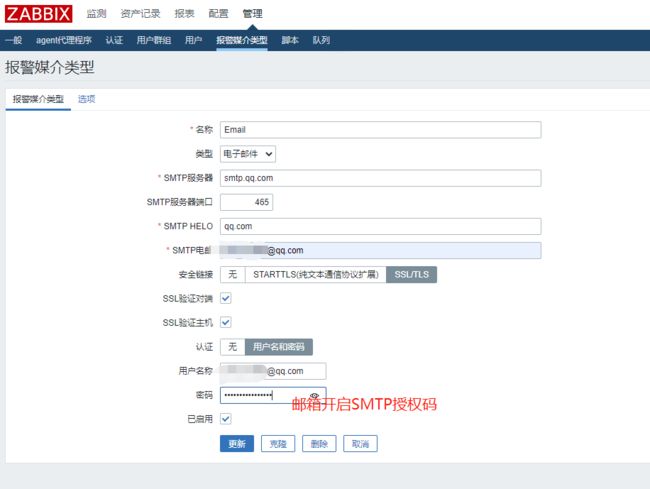
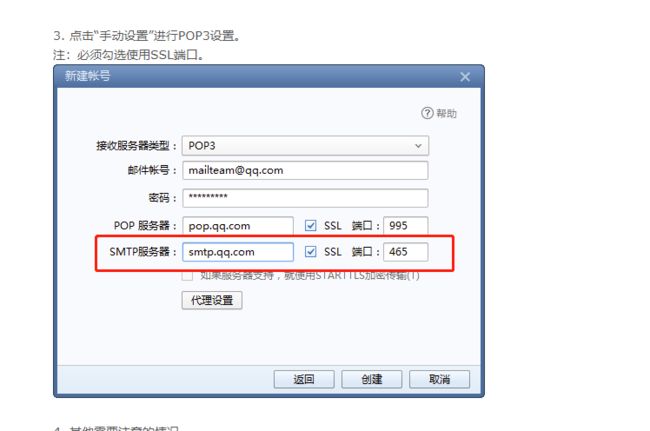
3.4.1 邮件报警
- 定义邮箱报警发件人
3.4.2 微信报警
- 申请企业微信号
- 编写微信报警脚本
- 将微信报警的脚本放到自定义报警脚本目录下
# 查看server配置的脚本目录 /usr/lib/zabbix/alertscripts
[root@master zabbix]# grep -Ev '^$|#' zabbix_server.conf
LogFile=/var/log/zabbix/zabbix_server.log
LogFileSize=0
PidFile=/var/run/zabbix/zabbix_server.pid
SocketDir=/var/run/zabbix
DBName=zabbix
DBUser=zabbix
DBPassword=123456
SNMPTrapperFile=/var/log/snmptrap/snmptrap.log
Timeout=4
AlertScriptsPath=/usr/lib/zabbix/alertscripts
ExternalScripts=/usr/lib/zabbix/externalscripts
LogSlowQueries=3000
# 将脚本放到/usr/lib/zabbix/alertscripts目录下
# 并授予执行权限
chmod +x weixin.py
- 触发报警测试
3.5 添加自定义模板
- 开启监控取值页面
- 导入模板
- 创建zabbix-agent的自定义配置文件,把脚本放到指定脚本目录下
- zabbix_get测试
- 创建主机,关联模板
详情参考:https://www.xuliangwei.com/bgx/982.html
4. grafana展示zabbix监控报表
4.1 安装grafana
wget https://dl.grafana.com/oss/release/grafana-6.2.4-1.x86_64.rpm
yum localinstall grafana-6.2.4-1.x86_64.rpm

#国内源加速
# wget https://mirrors.huaweicloud.com/grafana/7.3.7/grafana-7.3.7-1.x86_64.rpm
# rpm -ivh grafana-7.3.7-1.x86_64.rpm

# 监听端口 3000
[root@master ~]# netstat -nutlp|grep grafana
tcp6       0      0 :::3000                 :::*                    LISTEN      18278/grafana-serve


# 附:grafana版本升级
# 停原grafana服务
systemctl stop grafana-server
# 升级
rpm -Uvh grafana-7.3.7-1.x86_64.rpm
# 启动
systemctl start grafana-server
# 查看版本
grafana-cli -v
4.2 安装zabbix插件
4.2.1 命令行安装
[root@master opt]# grafana-cli plugins list-remote|grep zabbix
id: alexanderzobnin-zabbix-app version: 4.1.1
[root@master opt]# grafana-cli plugins install alexanderzobnin-zabbix-app
installing alexanderzobnin-zabbix-app @ 4.1.1
from: https://grafana.com/api/plugins/alexanderzobnin-zabbix-app/versions/4.1.1/download
into: /var/lib/grafana/plugins

✔ Installed alexanderzobnin-zabbix-app successfully

Restart grafana after installing plugins . <service grafana-server restart>

[root@master opt]# systemctl restart grafana-server.service
4.2.2 web界面安装
4.2.3 插件包下载
# 下载地址https://grafana.com/api/plugins/alexanderzobnin-zabbix-app/versions/4.0.1/download
# 上传到/var/lib/grafana/plugins 并解压
[root@master plugins]# ll
total 16200
drwxr-xr-x 8 root root     4096 Sep  2 23:06 alexanderzobnin-zabbix-app
-rw-r--r-- 1 root root 16584375 Jan 18 09:35 alexanderzobnin-zabbix-app-4.0.1.zip
# 重启grafana-server服务
systemctl restart grafana-server
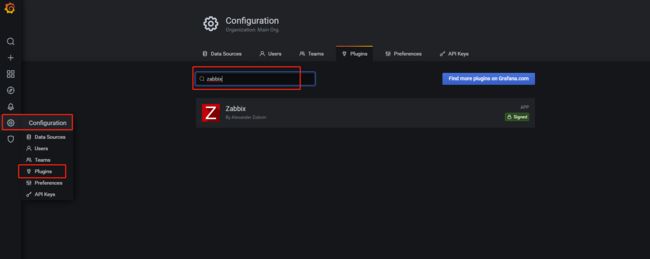
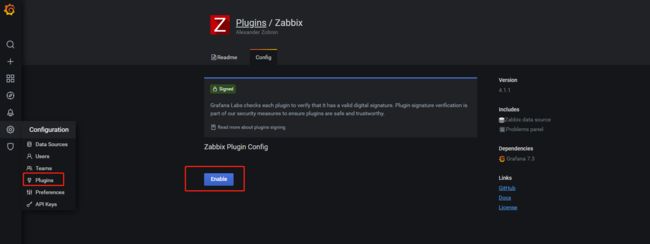
4.2.4 启用zabbix插件
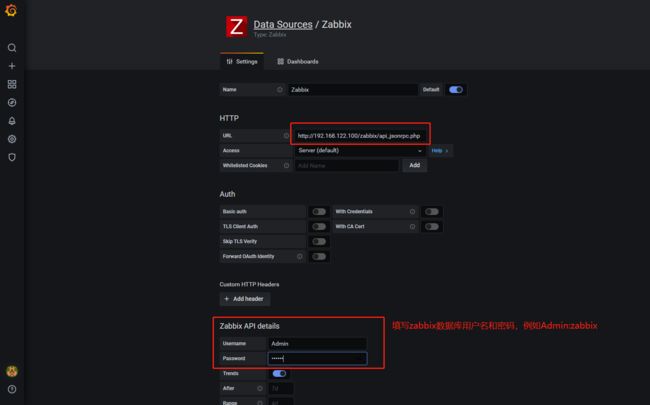
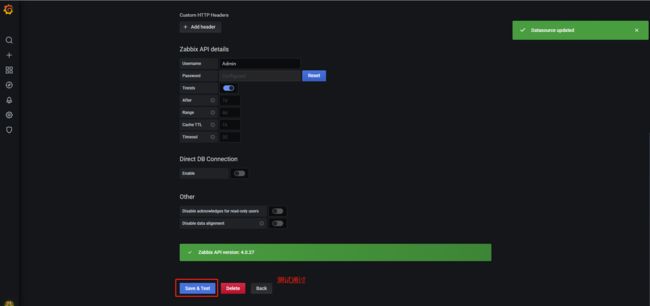
4.3 添加zabbix数据源
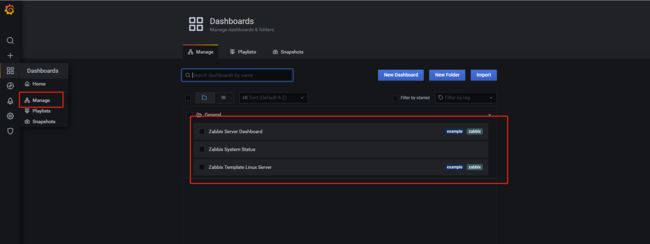
4.4 导入zabbix-dashboard
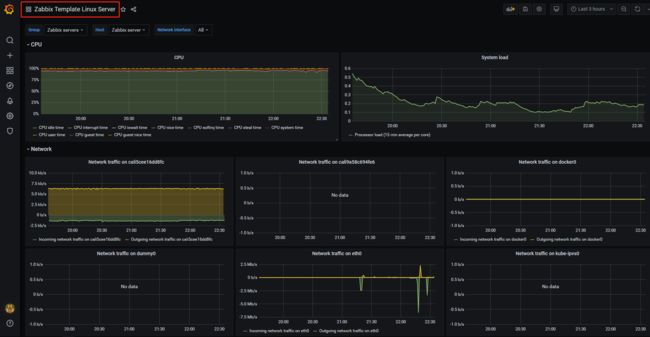
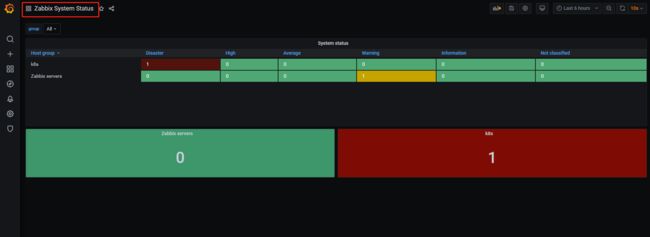
点击其中一个dashboard,展示如下
5. 自动发现与自动注册
5.1 自动发现监控主机
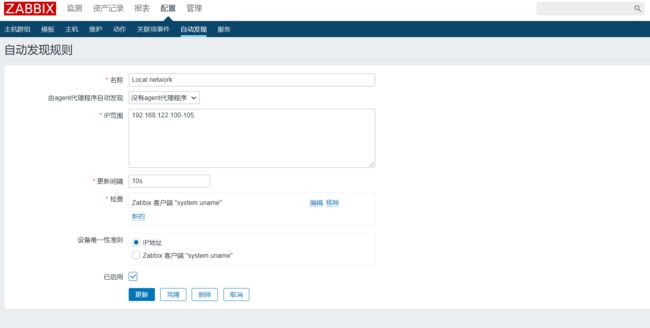
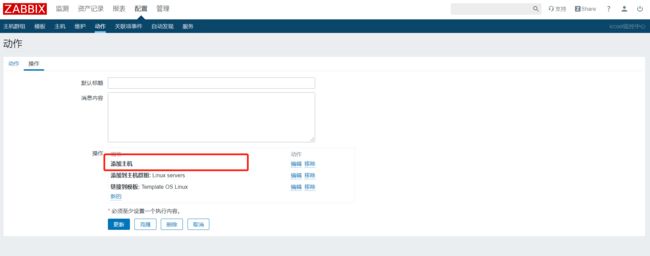
5.1.1 添加自动发现规则
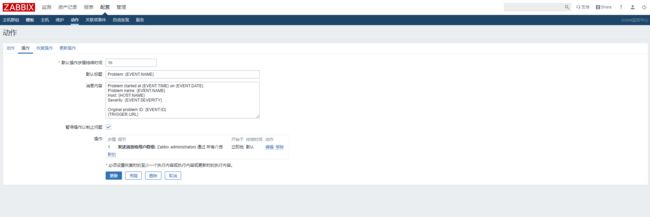
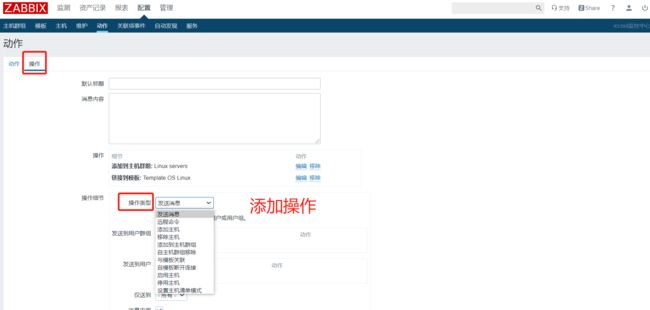
5.1.2 添加自动发现动作
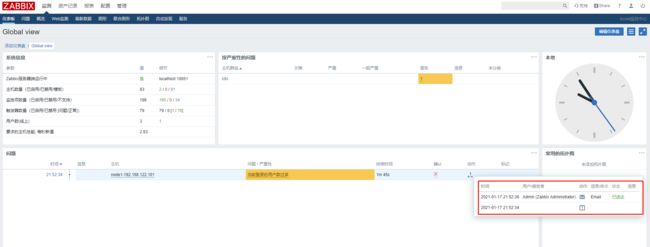
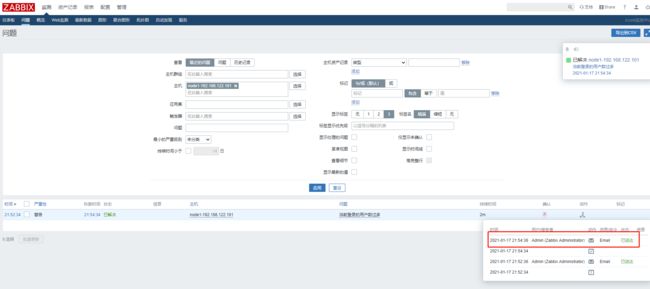
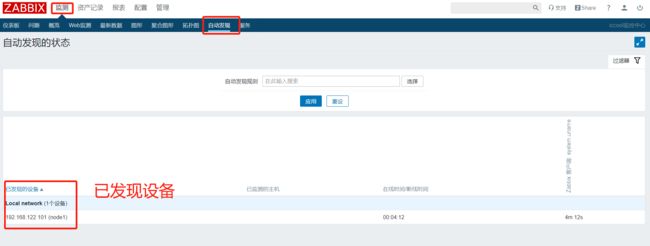
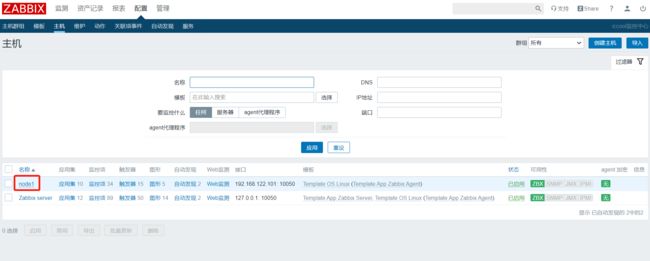
5.1.3 监测自动发现
5.2 自动注册监控主机
zabbix-agent向zabbix-server注册
- zabbix-server配置自动注册动作、HostMetadata
- zabbix-agent配置Server和ServerActive,hostname和HostMetadata
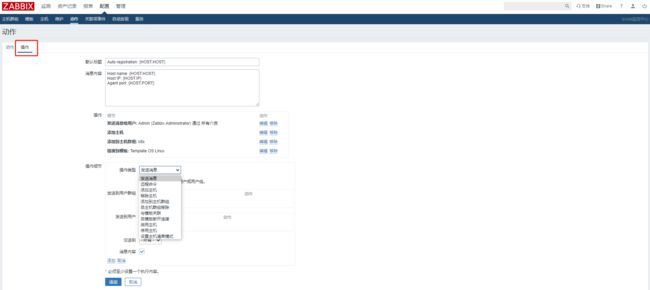
5.2.1 zabbix-server配置自动注册动作
5.2.2 修改zabbix-agent配置
cat /etc/zabbix/zabbix_agentd.conf

Server=master   # 可填zabbix-server的ip地址
ServerActive=master # 可填zabbix-server的ip地址
Hostname=node1	# 可填zabbix-agent的ip地址
HostMetadata=web	 # 与zabbix-server配置的动作里的HostMetadata匹配


[root@node1 ~]# cat /etc/zabbix/zabbix_agentd.conf |grep -Ev "^$|#"
PidFile=/var/run/zabbix/zabbix_agentd.pid
LogFile=/var/log/zabbix/zabbix_agentd.log
LogFileSize=0
Server=master
ServerActive=master
Hostname=node1
HostMetadata=web
Include=/etc/zabbix/zabbix_agentd.d/*.conf
UserParameter=sda_tps,iostat|awk '$1 ~/sda/ {print $2}'
5.2.3 web界面测试
# 重启agent  立即生效
systemctl restart zabbix-agent
6. snmp监控模式
6.1 snmp安装与配置
# server和client都需要安装
yum install -y net-snmp net-snmp-utils

# 修改snmp配置

vim /etc/snmp/snmpd.conf

# First, map the community name "public" into a "security name"
#       sec.name  source          community
# com2sec notConfigUser  default   public
# 修改默认的community
com2sec notConfigUser  default      zabbixsnmp

####
# Second, map the security name into a group name:

#       groupName      securityModel securityName
group   notConfigGroup v1           notConfigUser
group   notConfigGroup v2c           notConfigUser

####
# Third, create a view for us to let the group have rights to:

# Make at least  snmpwalk -v 1 localhost -c public system fast again.
#       name           incl/excl     subtree         mask(optional)
# 添加view    systemview    included   .1
view    systemview    included   .1
view    systemview    included   .1.3.6.1.2.1.1
view    systemview    included   .1.3.6.1.2.1.25.1.1


# 启动
systemctl start snmpd
systemctl enable snmpd

# 测试
## 具体的oid值,参考http://www.ttlsa.com/monitor/snmp-oid/
## -c: 配置的community值
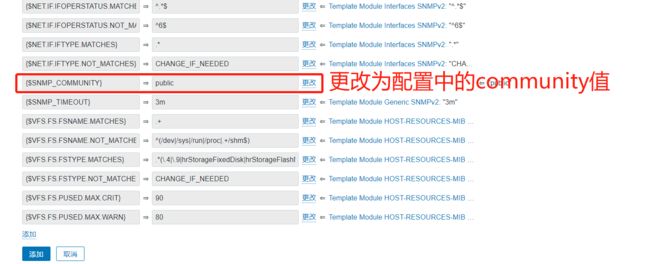
snmpwalk -v 2c -c zabbixsnmp 192.168.122.101 .1.3.6.1.2.1.1.3.0

DISMAN-EVENT-MIB::sysUpTimeInstance = Timeticks: (30041) 0:05:00.41
community: 密码
.1 :表示oid,OID唯一标识MIB层次结构中的托管对象。这可以描述为树,其级别由不同的组织分配。顶级MIB对象ID(OID)属于不同的标准组织。http://www.ttlsa.com/monitor/snmp-oid/
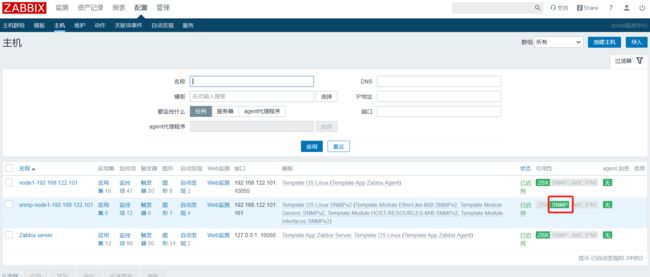
6.2 zabbix配置snmp监控
7. zabbix-agent主动与被动模式
7.1 主动与被动模式的概念
主动与被动是相对于agent来说的。
- 被动模式:默认被动模式,zabbix-agent被动受zabbix-server监控项定义的时间去收集监控信息。当zabbix-agent节点过多时,zabbix-server压力较大。
- 主动模式:zabbix-agent主动将监控信息推送给zabbix-server。但需要将模板修改为主动模式。
7.2 修改模板为主动模式
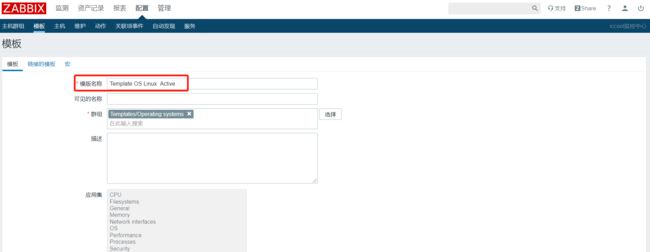
7.2.1 克隆原模板
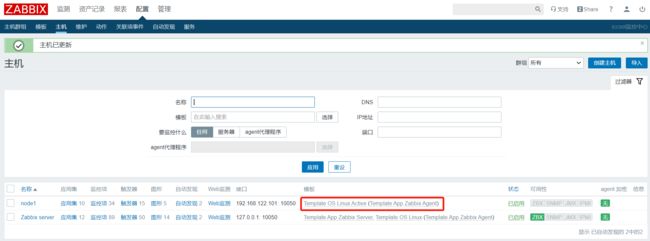
7.2.2 批量更新为主动模式
7.2.3 查看最新数据
8. zabbix-proxy模式
8.1 zabbix-proxy架构图
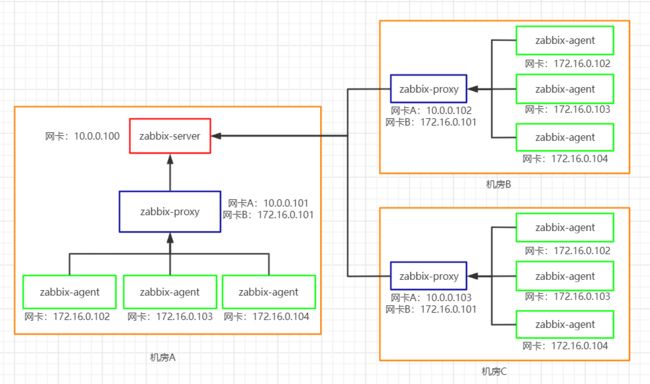
内网环境agent将信息上报给proxy,由proxy定期发送给server,所以proxy需要有单独的数据库存储监控数据。
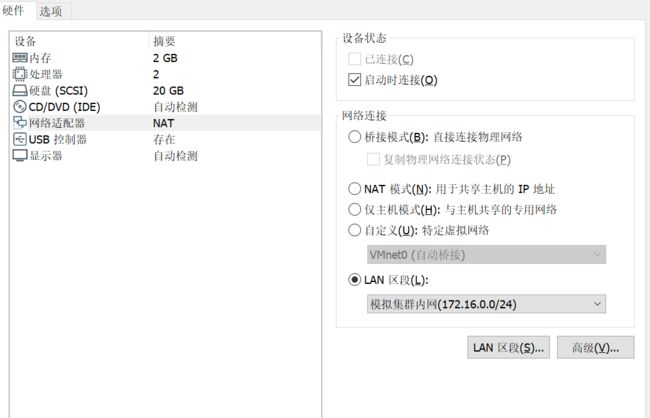
8.2 zabbix-proxy内网环境配置
8.2.1 proxy机器内网环境配置
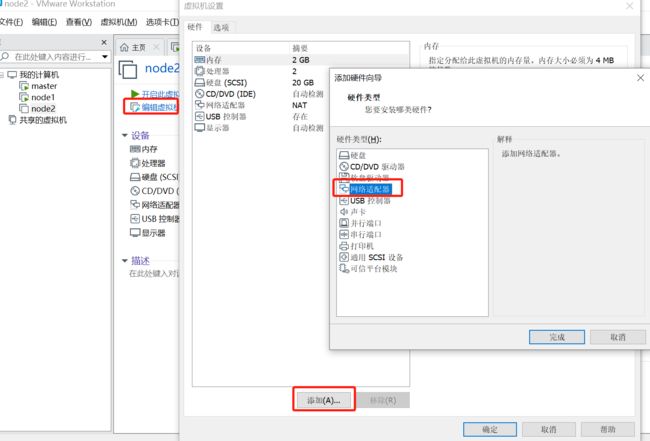
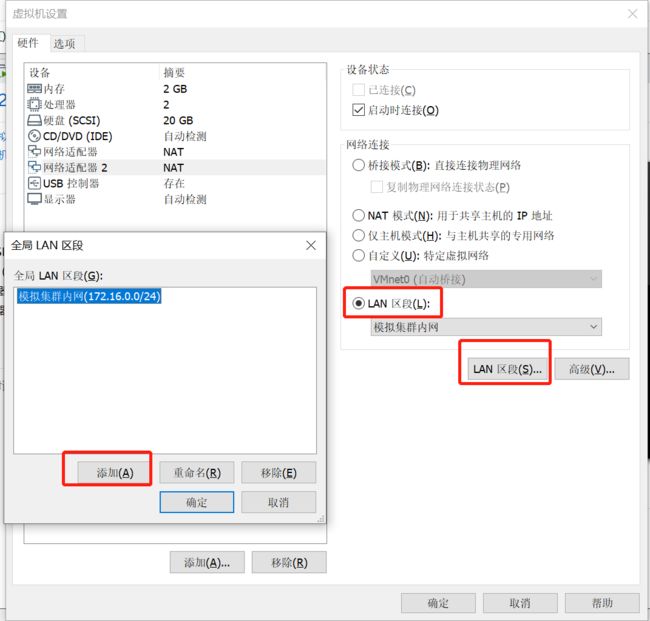
# 添加网卡   双网卡——外网与内网
[root@node2 ~]# cd /etc/sysconfig/network-scripts/
[root@node2 network-scripts]# cp ifcfg-eth0 ifcfg-eth1
[root@node2 network-scripts]# vim ifcfg-eth1
TYPE=Ethernet
NAME=eth1
DEVICE=eth1
BOOTPROTO=static
IPADDR=172.16.0.101

# 启动网卡
[root@node2 network-scripts]# ifup eth1
# 检查
[root@node2 network-scripts]# ipconfig -a
8.2.2 内网机器网络配置
# 修改网卡为内网
vim /etc/sysconfig/network-scripts/ifcfg-eth0
TYPE=Ethernet
NAME=eth0
DEVICE=eth0
BOOTPROTO=static
IPADDR=172.16.0.102

# 重启网络
systemctl restart network
# 检查
ipconfig -a

# 测试
ping 172.16.0.101

# 在proxy机器测试
ping 172.16.0.102

# 内网无法直接登录 可从proxy机器跳转
ssh [email protected]
8.3 安装zabbix-proxy
8.3.1 安装zabbix-proxy
# 安装zabbix-proxy
yum install -y zabbix-proxy-mysql

# 安装本地数据库 见2.2.2小节

# 创建proxy本地数据库
[root@node2 ~]# mysql -uroot -p
mysql> create database zabbix_proxy character set utf8;
mysql> grant all on zabbix_proxy.* to 'zabbix_proxy'@'localhost' identified by '123456';

# 导入数据库表
## 查看SQL语句位置  /usr/share/doc/zabbix-proxy-mysql-4.0.27/schema.sql.gz
rpm -ql zabbix-proxy-mysql
## 导表
zcat /usr/share/doc/zabbix-proxy-mysql-4.0.27/schema.sql.gz |mysql -uzabbix_proxy -p zabbix_proxy
## 检查表是否导入
8.3.2 修改zabbix-proxy配置
[root@cn-proxy ~]# grep -Ev '^$|#' /etc/zabbix/zabbix_proxy.conf
Server=192.168.122.100
Hostname=cn-proxy   # 建议定义为地区代理,方便归类
LogFile=/var/log/zabbix/zabbix_proxy.log
LogFileSize=0
PidFile=/var/run/zabbix/zabbix_proxy.pid
SocketDir=/var/run/zabbix
DBName=zabbix_proxy
DBUser=zabbix_proxy
DBPassword=123456
SNMPTrapperFile=/var/log/snmptrap/snmptrap.log
Timeout=4
ExternalScripts=/usr/lib/zabbix/externalscripts
LogSlowQueries=3000


# 启动
systemctl restart zabbix-proxy
systemctl enable zabbix-proxy
8.4 修改内网机器agent配置文件
# 将Server改为proxy内网ip
[root@node1 ~]# grep -Ev '^$|#' /etc/zabbix/zabbix_agentd.conf
PidFile=/var/run/zabbix/zabbix_agentd.pid
LogFile=/var/log/zabbix/zabbix_agentd.log
LogFileSize=0
Server=172.16.0.101    # proxy内网ip
ServerActive=172.16.0.101   # proxy内网ip
Hostname=172.16.0.102    # 本机ip
Include=/etc/zabbix/zabbix_agentd.d/*.conf

# 重启agent生效
systemctl restart zabbix-agent
8.5 zabbix-server的web界面配置
8.5.1 添加agent代理程序
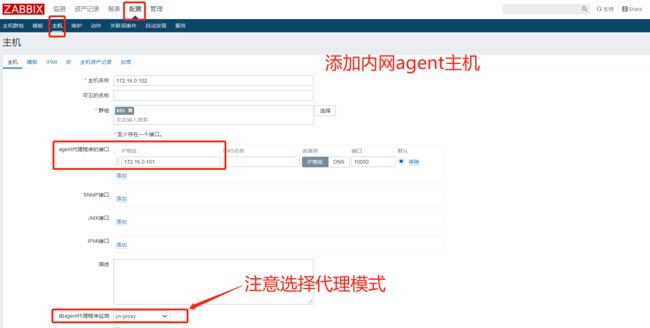
8.5.2 添加内网agent主机
8.6 zabbix-server与zabbix-proxy同步配置
# 检查zabbix-proxy.conf配置文件  根据需要修改
vim /etc/zabbix/zabbix_proxy.conf

# 心跳检测频率
### Option: HeartbeatFrequency
#       Frequency of heartbeat messages in seconds.
#       Used for monitoring availability of Proxy on server side.
#       0 - heartbeat messages disabled.
#       For a proxy in the passive mode this parameter will be ignored.
#
# Mandatory: no
# Range: 0-3600
# Default:
# HeartbeatFrequency=60


# 添加配置同步频率
### Option: ConfigFrequency
#       How often proxy retrieves configuration data from Zabbix Server in seconds.
#       For a proxy in the passive mode this parameter will be ignored.
#
# Mandatory: no
# Range: 1-3600*24*7
# Default:
# ConfigFrequency=3600

# 发送数据同步频率
### Option: DataSenderFrequency
#       Proxy will send collected data to the Server every N seconds.
#       For a proxy in the passive mode this parameter will be ignored.
#
# Mandatory: no
# Range: 1-3600
# Default:
# DataSenderFrequency=1
9. zabbix监控java进程
9.1 java环境搭建
# 准备java和tomcat安装包
[root@master opt]# ll |grep jdk
-rw-rw-r--. 1 root root 195132576 Nov 23 16:43 jdk-8u251-linux-x64.tar.gz
[root@master opt]# ll |grep tomcat
-rw-r--r--  1 root   root     9487006 Dec  4  2017 apache-tomcat-8.5.24.tar.gz
# 安装java
## 解压
tar xf jdk-8u251-linux-x64.tar.gz -C /usr/local/
## 配置Java环境
vim /etc/profile
export JAVA_HOME=/usr/local/jdk1.8.0_251
export PATH=$JAVA_HOME/bin:$PATH
export CLASSPATH=.:$JAVA_HOME/lib/dt.jar:$JAVA_HOME/lib/tools.jar

# 安装tomcat
mkdir /app
tar xf apache-tomcat-8.5.24.tar.gz -C /app/
# 启动
cd /app/apache-tomcat-8.5.24/bin/
./startup.sh

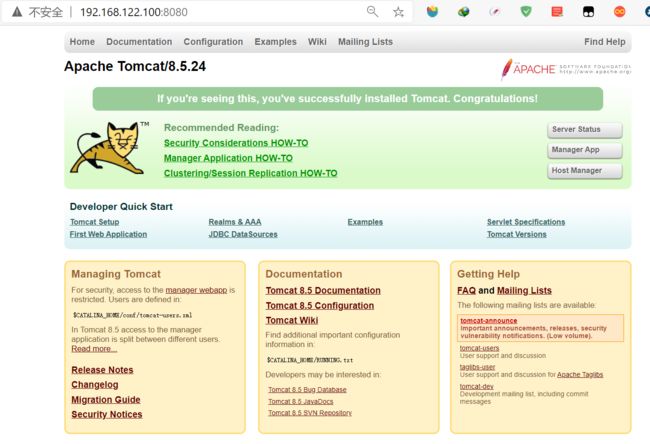
#测试    访问8080端口  能访问tomcat
9.2 开启jmx监控
# 修改catalina.sh 文件
vim /app/apache-tomcat-8.5.24/bin/catalina.sh
# 注意添加的位置    添加上如下内容


#   USE_NOHUP       (Optional) If set to the string true the start command will
#                   use nohup so that the Tomcat process will ignore any hangup
#                   signals. Default is "false" unless running on HP-UX in which
#                   case the default is "true"
# -----------------------------------------------------------------------------
CATALINA_OPTS="$CATALINA_OPTS
-Dcom.sun.management.jmxremote=true
-Djava.rmi.server.hostname=192.168.122.100
-Dcom.sun.management.jmxremote.port=12345
-Dcom.sun.management.jmxremote.ssl=false
-Dcom.sun.management.jmxremote.authenticate=false"


# 重启tomcat
[root@master bin]# ./shutdown.sh
[root@master bin]# ./startup.sh

# 检查12345端口
[root@master bin]# netstat -ntulp|grep 12345
tcp6       0      0 :::12345                :::*                    LISTEN      11713/java
9.3 安装zabbix-java-gateway
# 安装
yum install -y zabbix-java-gateway

# 修改zabbix_java_gateway.conf
vim /etc/zabbix/zabbix_java_gateway.conf

# 启动线程   取决于java业务情况
### Option: zabbix.startPollers
#       Number of worker threads to start.
#
# Mandatory: no
# Range: 1-1000
# Default:
# START_POLLERS=5

[root@master bin]# grep -Ev '^$|#' /etc/zabbix/zabbix_java_gateway.conf
PID_FILE="/var/run/zabbix/zabbix_java.pid"
START_POLLERS=5


# 启动
systemctl start zabbix-java-gateway
systemctl enable zabbix-java-gateway
# 检查 10052端口
[root@master bin]# netstat -nutlp|grep 10052
tcp6       0      0 :::10052                :::*                    LISTEN      12595/java
9.4 zabbix-server配置zabbix-java-gateway
# 修改zabbix-server配置 添加zabbix-java-gateway相关配置
vim /etc/zabbix/zabbix_server.conf

### Option: JavaGateway
#       IP address (or hostname) of Zabbix Java gateway.
#       Only required if Java pollers are started.
#
# Mandatory: no
# Default:
JavaGateway=127.0.0.1

### Option: JavaGatewayPort
#       Port that Zabbix Java gateway listens on.
#
# Mandatory: no
# Range: 1024-32767
# Default:
JavaGatewayPort=10052

### Option: StartJavaPollers
#       Number of pre-forked instances of Java pollers.
#
# Mandatory: no
# Range: 0-1000
# Default:
StartJavaPollers=5

# 重启zabbix-server
systemctl restart zabbix-server
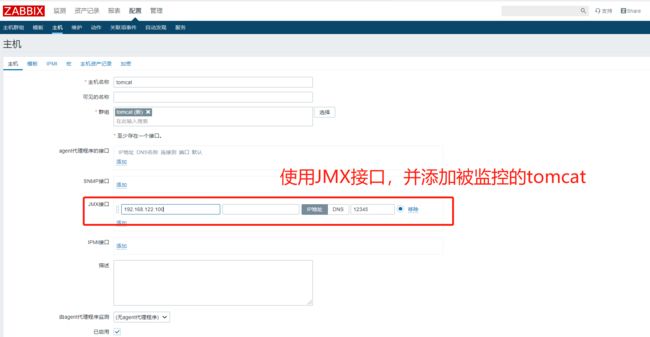
9.5 zabbix-server的web界面配置
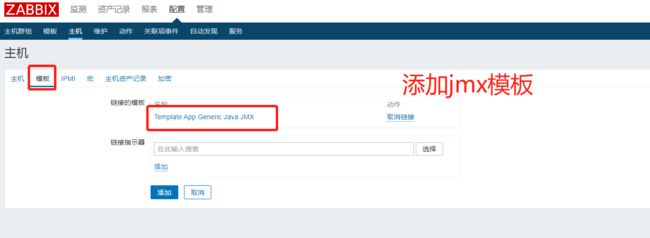
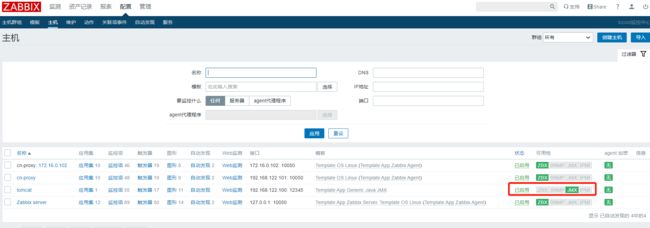
未配置zabbix-java-gateway时,是不支持监控java的;
配置zabbix-java-gateway后,支持监控java
添加jmx监控模板
*zabbix优化
-
数据库
特点:写多读少
引擎优化:MyISAM < Innodb < tokudb
-
监控项
减少不必要的监控项
增加监控项取值间隔
减少历史数据保存周期
-
agent模式
由被动模式改为主动模式,增加zabbix-proxy(跨机房)
-
server优化(zabbix-server.conf)
进程调优,优化采集器进程的进程数
缓存调优,优化缓存大小
-
*zabbix历史数据进行周期性分表
QA:问题
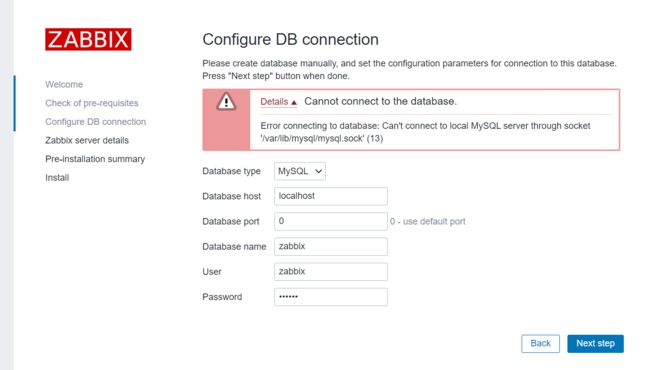
1. web界面安装提示连不上mysql数据库
日志信息:
vim /var/log/zabbix/zabbix_server.log

 57701:20210112:104942.672 [Z3001] connection to database 'zabbix' failed: [2002] Can't connect to local MySQL server through socket '/var/lib/mysql/mysql.sock' (2)
 57701:20210112:104942.672 database is down: reconnecting in 10 seconds
 57701:20210112:104952.675 [Z3001] connection to database 'zabbix' failed: [2002] Can't connect to local MySQL server through socket '/var/lib/mysql/mysql.sock' (2)
 57701:20210112:104952.676 database is down: reconnecting in 10 seconds
 57701:20210112:105002.686 [Z3001] connection to database 'zabbix' failed: [2002] Can't connect to local MySQL server through socket '/var/lib/mysql/mysql.sock' (2)
 57701:20210112:105002.686 database is down: reconnecting in 10 seconds
 57701:20210112:105012.689 [Z3001] connection to database 'zabbix' failed: [2002] Can't connect to local MySQL server through socket '/var/lib/mysql/mysql.sock' (2)
 57701:20210112:105012.689 database is down: reconnecting in 10 seconds
 57701:20210112:105022.690 [Z3001] connection to database 'zabbix' failed: [2002] Can't connect to local MySQL server through socket '/var/lib/mysql/mysql.sock' (2)
 57701:20210112:105022.690 database is down: reconnecting in 10 seconds
 57701:20210112:105032.696 [Z3001] connection to database 'zabbix' failed: [2002] Can't connect to local MySQL server through socket '/var/lib/mysql/mysql.sock' (2)
 57701:20210112:105032.696 database is down: reconnecting in 10 seconds
解决方案:
-
检查mysql的配置,查看mysql.sock文件的位置,例如/etc/my.cnf文件配置的socket文件地址为/tmp/mysql.sock,而zabbix-server默认查找的mysql.sock文件地址为/var/lib/mysql/mysql.sock;
- 可以修改zabbix-server.conf中的
DBSocket=为/tmp/mysql.sock - 添加软链接
ln -s /tmp/mysql.sock /var/lib/mysql/mysql.sock - 修改mysql的配置文件到
/var/lib/mysql/mysql.sock
- 可以修改zabbix-server.conf中的
-
检查系统SELinux是否关闭
getenforce
cat /etc/selinux/config
参考
https://www.bilibili.com/video/BV1AC4y1Y7UN
https://www.zabbix.com/documentation/4.0/zh/manual
http://www.zsythink.net/archives/447
https://blog.csdn.net/weixin_42170236/article/details/99942384
