LVS + Keepalived群集
文章目录
- LVS + Keepalived
-
- 1 Keepalived及其工作原理
- 2 一个健康的集群的特点
- 3 Keepalived常见问题脑裂
-
- 3.1 原因
- 3.2 预防
- 3.3 配置
- 4 部署keepalived
-
- 4.1 部署192.168.146.20
- 4.2 部署192.168.146.30
- 5 LVS+Keepalived高可用群集
-
- 5.1 部署192.168.146.50(nginx)
- 5.2 部署192.168.146.60(nginx)
- 5.3 部署192.168.146.20 主
- 5.4 部署192.168.146.30 从
- 5.5 测试访问
LVS + Keepalived
1 Keepalived及其工作原理
keepalived高可用应用(健康检查,故障切换)
底层基于VRRP协议实现的高可用
由优先级决定服务器的主备角色,Master服务器上会生成vip,客户端会把访问发送给vip,由Master服务器接收用户的请求,Master服务器会定期给Backup服务器发送VRRP报文,来告知Master服务器状态正常
当Backup在超时时间内没有收到VRRP报文则会认为Master异常,此时会通过ip命令生成VIP,接替Master的工作接收用户请求
2 一个健康的集群的特点
1.负载均衡
2.健康检查:探针 (心跳消息-ping, tcp端口检查-三次握手,http url检查-返回码)
3.故障切换
3 Keepalived常见问题脑裂
3.1 原因
Master一直发送心跳消息给backup主机
如果中间的链路突然断掉,backup主机将无法收到master主机发送过来的心跳消息(也就是vrrp报文),backup这时候会立即抢占master的工作
但其实这时候的master是正常工作的,此时就会出现脑裂的现象
3.2 预防
1.使用shell脚本对这两个主机之间的连通性进行监测,如果发现有问题,就会立即关闭keepalived服务来防止脑裂的产生
2.增加一条链路作为备用链路,即使主链路挂掉了,备用链路也会顶上来,master主机可以继续给backup主机发送心跳消息
3.监控软件的方法,这边主要是采用的zabbix来监控的,主要就是创建监控项,创建触发器来测试关闭keepalived服务
3.3 配置
cd /etc/keepalived/
cp keepalived.conf keepalived.conf.bak
vim keepalived.conf
......
global_defs {						#定义全局参数
--10行--修改,邮件服务指向本地
	smtp_server 127.0.0.1
--12行--修改,指定服务器(路由器)的名称,主备服务器名称须不同,主为LVS_01,备为LVS_02
	router_id LVS_01
--14行--注释掉,取消严格遵守VRRP协议功能,否则VIP无法被连接
	#vrrp_strict
}

vrrp_instance VI_1 {				#定义VRRP热备实例参数
--20行--修改,指定热备状态,主为MASTER,备为BACKUP
    state MASTER
--21行--修改,指定承载vip地址的物理接口
    interface ens33
--22行--修改,指定虚拟路由器的ID号,每个热备组保持一致
    virtual_router_id 10
	#nopreempt		#如果设置非抢占模式,两个节点state必须为bakcup,并加上配置 nopreempt
--23行--修改,指定优先级,数值越大优先级越高,这里设置主为100,备为90
    priority 100
    advert_int 1					#通告间隔秒数(心跳频率)
    authentication {				#定义认证信息,每个热备组保持一致
		auth_type PASS				#认证类型
--27行--修改,指定验证密码,主备服务器保持一致
        auth_pass abc123
    }
    virtual_ipaddress {				#指定群集vip地址
        192.168.80.188
    }
}
--36行--修改,指定虚拟服务器地址(VIP)、端口,定义虚拟服务器和Web服务器池参数
virtual_server 192.168.80.188 80 {
    delay_loop 6					#健康检查的间隔时间(秒)
    lb_algo rr						#指定调度算法,轮询(rr)
--39行--修改,指定群集工作模式,直接路由(DR)
    lb_kind DR
    persistence_timeout 0			#连接保持时间(秒)
    protocol TCP					#应用服务采用的是 TCP协议
--43行--修改,指定第一个Web节点的地址、端口
    real_server 192.168.80.12 80 {
        weight 1					#节点的权重
--45行--删除,添加以下健康检查方式
        TCP_CHECK {
			connect_port 80			#添加检查的目标端口
			connect_timeout 3		#添加连接超时(秒)
			nb_get_retry 3			#添加重试次数
			delay_before_retry 3	#添加重试间隔
		}
	}

	real_server 192.168.80.13 80 {		#添加第二个 Web节点的地址、端口
        weight 1
        TCP_CHECK {
			connect_port 80
			connect_timeout 3
			nb_get_retry 3
			delay_before_retry 3
		}
	}
##删除后面多余的配置##
}


systemctl start keepalived
ip addr						#查看虚拟网卡vip
4 部署keepalived
192.168.146.20(主)
192.168.146.30(备)
4.1 部署192.168.146.20
systemctl stop firewalld
setenforce 0
yum -y install keepalived.x86_64
cd /etc/keepalived/
cp keepalived.conf keepalived.conf.bak
vim keepalived.conf
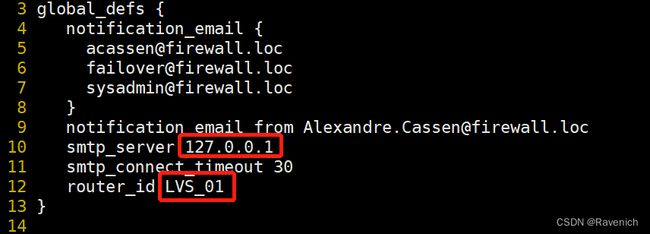
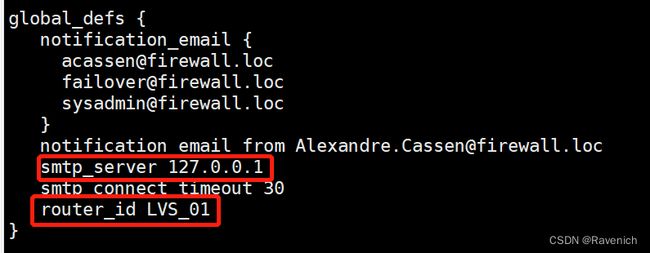
global_defs {
     notification_email {
     [email protected]
     [email protected]
     [email protected]
    }
    notification_email_from [email protected]
    smtp_server 127.0.0.1
    smtp_connect_timeout 30
    router_id LVS_01
 }


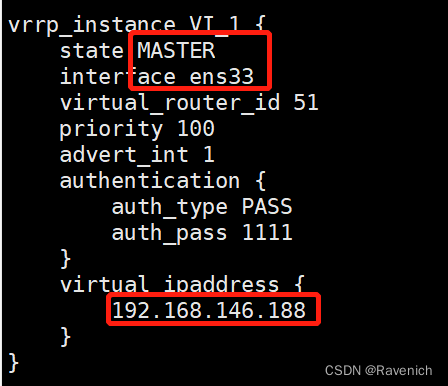
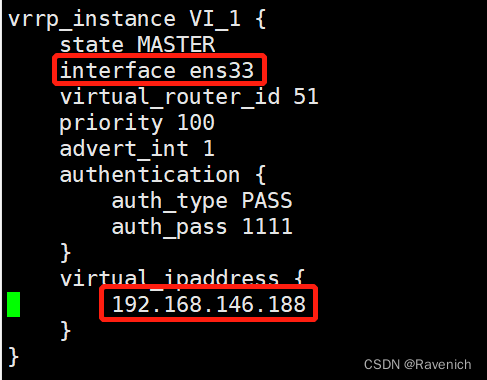
vrrp_instance VI_1 {
     state MASTER
     interface ens33
     virtual_router_id 51
     priority 100
     advert_int 1
     authentication {
         auth_type PASS
         auth_pass 1111
     }
     virtual_ipaddress {
         192.168.146.188
      }
  }

systemctl start keepalived.service
systemctl enable keepalived.service
可以将主的配置文件复制到从后进行修改
scp keepalived.conf 192.168.146.30`pwd`
4.2 部署192.168.146.30
systemctl stop firewalld
setenforce 0
yum -y install keepalived.x86_64

cd /etc/keepalived/
cp keepalived.conf keepalived.conf.bak


vim keepalived.conf  ##此文件已经从主服务器上复制过来了
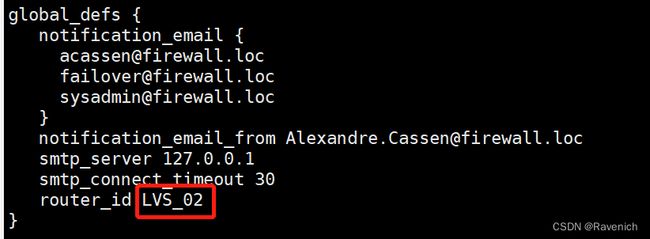
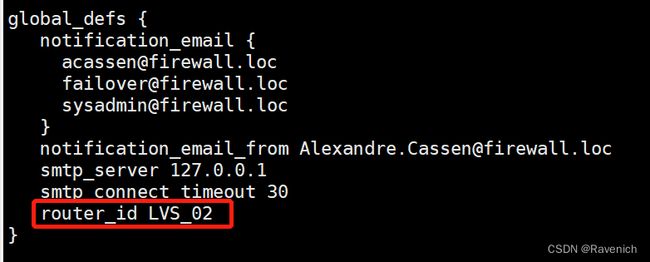
global_defs {
   notification_email {
     [email protected]
     [email protected]
     [email protected]
   }
   notification_email_from [email protected]
   smtp_server 127.0.0.1
   smtp_connect_timeout 30
   router_id LVS_02
}

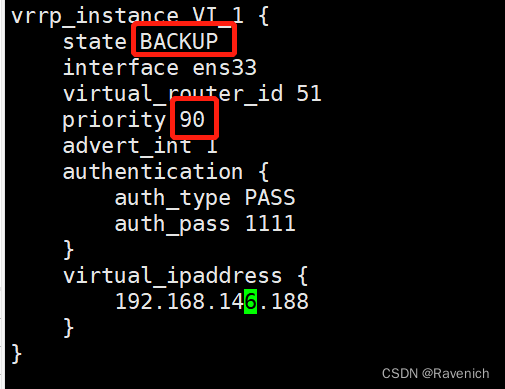
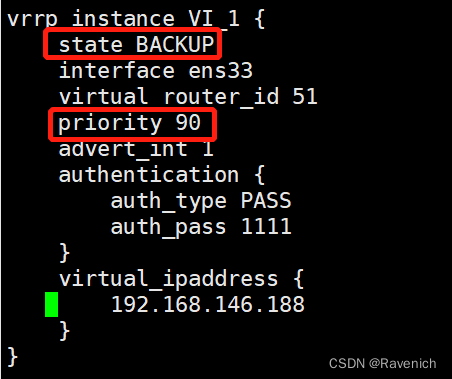
vrrp_instance VI_1 {
    state BACKUP
    interface ens33
    virtual_router_id 51
    priority 90
    advert_int 1
    authentication {
        auth_type PASS
        auth_pass 1111
    }
    virtual_ipaddress {
        192.168.146.188
    }
}


systemctl start keepalived.service
systemctl enable keepalived.service
5 LVS+Keepalived高可用群集
192.168.146.20 主
192.168.146.30 备
192.168.146.50 nginx
192.168.146.60 nginx
5.1 部署192.168.146.50(nginx)
把nginx.repo的包拖到/etc/yum.repos.d
yum -y install nginx

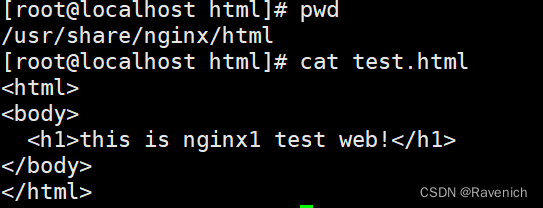
编辑网页文件
cd /usr/share/nginx/html/
vim test.html


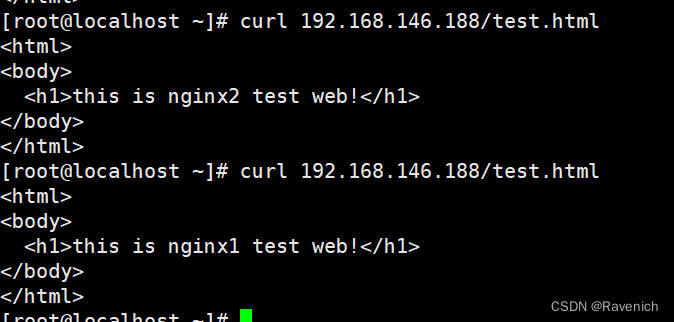
  this is nginx1 test web!
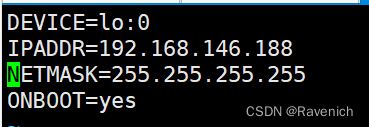
添加vip,在lo上面
cd /etc/sysconfig/network-scripts/
cp ifcfg-lo ifcfg-lo:0
vim ifcfg-lo:0
DEVICE=lo:0
IPADDR=192.168.146.188
NETMASK=255.255.255.255
ONBOOT=yes
修改内核参数
vim /etc/sysctl.conf
net.ipv4.conf.lo.arp_ignore = 1
net.ipv4.conf.lo.arp_announce = 2
net.ipv4.conf.all.arp_ignore = 1
net.ipv4.conf.all.arp_announce = 2
指定路由
route add -host 192.168.146.188 dev lo:0
5.2 部署192.168.146.60(nginx)
把nginx.repo的包拖到/etc/yum.repos.d
yum -y install nginx

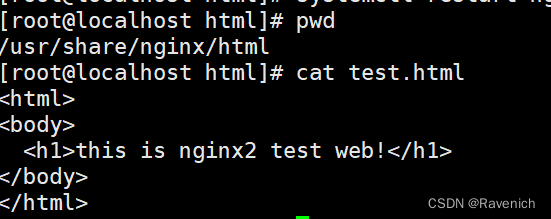
添加网页文件
cd /usr/share/nginx/html/
vim test.html


  this is nginx2 test web!
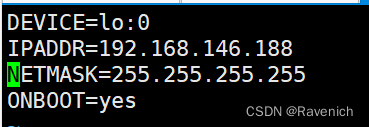
添加vip,在lo上面
cd /etc/sysconfig/network-scripts/
cp ifcfg-lo ifcfg-lo:0
vim ifcfg-lo:0
DEVICE=lo:0
IPADDR=192.168.146.188
NETMASK=255.255.255.255
ONBOOT=yes
修改内核参数
vim /etc/sysctl.conf
net.ipv4.conf.lo.arp_ignore = 1
net.ipv4.conf.lo.arp_announce = 2
net.ipv4.conf.all.arp_ignore = 1
net.ipv4.conf.all.arp_announce = 2
指定路由
route add -host 192.168.146.188 dev lo:0
5.3 部署192.168.146.20 主
systemctl stop firewalld.service
setenforce 0

yum -y install keepalived ipvsadm
modprobe ip_vs

ipvsadm-save > /etc/sysconfig/ipvsadm
systemctl start ipvsadm

cd /etc/keepalived/
cp keepalived.conf keepalived.conf.bak

vim keepalived.conf

global_defs {
   notification_email {
     [email protected]
     [email protected]
     [email protected]
   }
   notification_email_from [email protected]
   smtp_server 127.0.0.1
   smtp_connect_timeout 30
   router_id LVS_01
}

vrrp_instance VI_1 {
    state MASTER
    interface ens33
    virtual_router_id 51
    priority 100
    advert_int 1
    authentication {
        auth_type PASS
        auth_pass 1111
    }
    virtual_ipaddress {
        192.168.146.188
    }
}


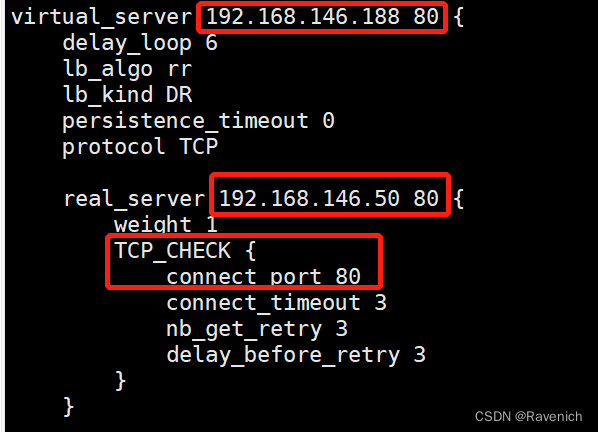
virtual_server 192.168.146.188 80 {
    delay_loop 6
    lb_algo rr
    lb_kind DR
    persistence_timeout 0
    protocol TCP

    real_server 192.168.146.50 80 {
        weight 1
        TCP_CHECK {
            connect_port 80
            connect_timeout 3
            nb_get_retry 3
            delay_before_retry 3
        }
    }
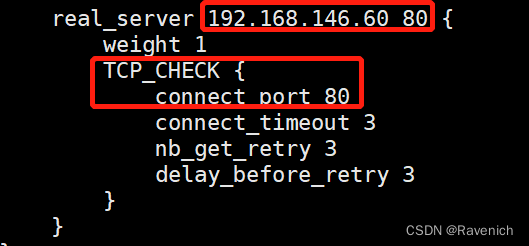
real_server 192.168.146.60 80 {
        weight 1
        TCP_CHECK {
            connect_port 80
            connect_timeout 3
            nb_get_retry 3
            delay_before_retry 3
        }
    }
}
#可以把主的配置文件复制到从中去
scp keepalived.conf 192.168.146.30:`pwd`
设置内核参数
vim /etc/sysctl.conf
net.ipv4.ip_forward = 0
net.ipv4.conf.all.send_redirects = 0
net.ipv4.conf.default.send_redirects = 0
net.ipv4.conf.ens33.send_redirects = 0

sysctl -p
systemctl start keepalived
5.4 部署192.168.146.30 从
systemctl stop firewalld.service
setenforce 0

yum -y install keepalived ipvsadm
modprobe ip_vs
ipvsadm-save > /etc/sysconfig/ipvsadm
systemctl start ipvsadm


keepalived的配置文件已经从主复制过来了
vim keepalived.conf
global_defs {
   notification_email {
     [email protected]
     [email protected]
     [email protected]
   }
   notification_email_from [email protected]
   smtp_server 127.0.0.1
   smtp_connect_timeout 30
   router_id LVS_02
}
vrrp_instance VI_1 {
    state BACKUP
    interface ens33
    virtual_router_id 51
    priority 90
    advert_int 1
    authentication {
        auth_type PASS
        auth_pass 1111
    }
    virtual_ipaddress {
        192.168.146.188
    }
}
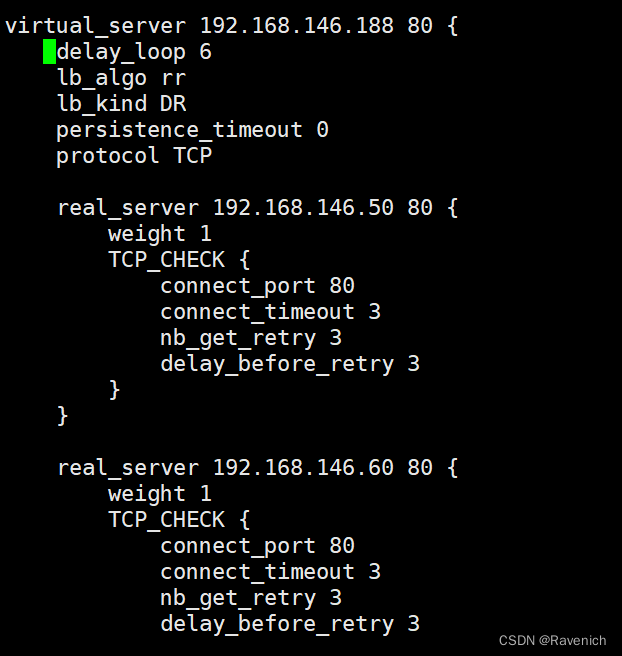
virtual_server 192.168.146.188 80 {
    delay_loop 6
    lb_algo rr
    lb_kind DR
    persistence_timeout 0
    protocol TCP

    real_server 192.168.146.50 80 {
        weight 1
        TCP_CHECK {
            connect_port 80
            connect_timeout 3
            nb_get_retry 3
            delay_before_retry 3
        }
    }
real_server 192.168.146.60 80 {
        weight 1
        TCP_CHECK {
            connect_port 80
            connect_timeout 3
            nb_get_retry 3
            delay_before_retry 3
        }
    }
}
设置内核参数
vim /etc/sysctl.conf
net.ipv4.ip_forward = 0
net.ipv4.conf.all.send_redirects = 0
net.ipv4.conf.default.send_redirects = 0
net.ipv4.conf.ens33.send_redirects = 0

sysctl -p
systemctl start keepalived
