java+vue+onlyoffice的简单集成
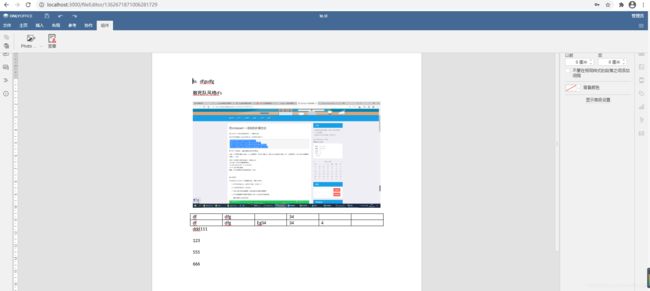
完成了springboot+vue+onlyoffice的集成,实现用户上传文件,编辑文件的基本操作。
后续将完成协作编辑,版本管理,文件加密,解密打开等相关操作。
1、部署onlyoffice的docker
docker run -i -t -d --name onlyoffice --privileged -p 9999:80 -p 5432:5432 --restart=always -v /e/publish/onlyoffice/DocumentServer/logs:/var/log/onlyoffice -v /e/publish/onlyoffice/DocumentServer/data:/var/www/onlyoffice/Data -v /e/publish/onlyoffice/DocumentServer/lib:/var/lib/onlyoffice -v /e/publish/onlyoffice/DocumentServer/db:/var/lib/postgresql -v /e/work/gznew/seal:/var/www/onlyoffice/documentserver/sdkjs-plugins/seal onlyoffice/documentserver
-v /e/work/gznew/seal:/var/www/onlyoffice/documentserver/sdkjs-plugins/seal 是将自己写的签章插件挂载到插件目录
2、编辑器控件
<!--onlyoffice 编辑器-->
<template>
  <div id="editorDiv"></div>
</template>

<script>
import { handleDocType } from '@/utils/onlyofficeUtil'

export default {
  name: 'editor',
  props: {
    option: {
      type: Object,
      default: () => {
        return {}
      }
    }
  },
  data() {
    return {
      doctype: ''
    }
  },
  mounted() {
    if (this.option.url) {
      this.setEditor(this.option)
    }
  },
  methods: {
    setEditor(option) {
      this.doctype = handleDocType(option.fileType)
      let config = {
        document: {
          fileType: option.fileType,
          key: option.key,
          title: option.title,
          permissions: {
            comment: true,
            download: true,
            modifyContentControl: true,
            modifyFilter: true,
            print: false,
            edit: option.isEdit,
            fillForms: true,
            review: true
          },
          url: option.url
        },
        documentType: this.doctype,
        editorConfig: {
          callbackUrl: option.editUrl,
          lang: 'zh',
          customization: {
            commentAuthorOnly: false,
            comments: true,
            compactHeader:false,
            compactToolbar:true,
            feedback:false,
            plugins:true
          },
          user:{
            id:option.user.id,
            name:option.user.name
          },
          mode:option.model?option.model:'edit',

        },
        width: '100%',
        height: '100%',
        token:option.token
      }
      // console.log(config)
      let docEditor = new DocsAPI.DocEditor('editorDiv', config)
    },
  },
  watch: {
    option: {
      handler: function (n, o) {
        this.setEditor(n)
        this.doctype = handleDocType(n.fileType)
      },
      deep: true,
    }
  }
}
</script>

<style scoped>

</style>
3、控件中用到的方法,判断文件类型
export function handleDocType(fileType) {
  let docType = '';
  let fileTypesDoc = [
    'doc', 'docm', 'docx', 'dot', 'dotm', 'dotx', 'epub', 'fodt', 'htm', 'html', 'mht', 'odt', 'ott', 'pdf', 'rtf', 'txt', 'djvu', 'xps'
  ];
  let fileTypesCsv = [
    'csv', 'fods', 'ods', 'ots', 'xls', 'xlsm', 'xlsx', 'xlt', 'xltm', 'xltx'
  ];
  let fileTypesPPt = [
    'fodp', 'odp', 'otp', 'pot', 'potm', 'potx', 'pps', 'ppsm', 'ppsx', 'ppt', 'pptm', 'pptx'
  ];
  if (fileTypesDoc.includes(fileType)) {
    docType = 'text'
  }
  if (fileTypesCsv.includes(fileType)) {
    docType = 'spreadsheet'
  }
  if (fileTypesPPt.includes(fileType)) {
    docType = 'presentation'
  }
  return docType;
}
4、用一个控件来引用编辑器控件,接收文件参数,并组织编辑器控件参数
<template>
  <editor :option="option"></editor>
</template>

<script>
import { getAction } from '@/api/manage'
import editor from './editor'
import Vue from 'vue'
import { ACCESS_TOKEN, USER_INFO } from '@/store/mutation-types'

export default {
  name: 'fView',
  components: { editor },
  data() {
    return {
      id: this.$route.params.id,
      option: {
        url: '',
        isEdit: true,
        fileType: '',
        title: '',
        token: Vue.ls.get(ACCESS_TOKEN),
        user: {
          id: '',
          name: ''
        },
        mode: 'edit',
        editUrl: '',
        key: ''
      },
    }
  },
  created() {
    let userInfo = Vue.ls.get(USER_INFO)
    this.option.user.id = userInfo.id
    this.option.user.name = userInfo.realname
    this.getFile()
  },
  methods: {
    getFile() {
      getAction('/onlyfile/file/queryById', { id: this.id }).then(res => {
        this.option.url = window._CONFIG['officeUrl'] + '/' + res.result.fileUrl
        this.option.editUrl = window._CONFIG['callBackUrl'] + '?userId=' + this.option.user.id + '&fileId=' + this.id
        this.option.title = res.result.fileName
        this.option.fileType = res.result.fileExt
      })
    }
  },
  watch: {
    '$route'(to, from) {
      this.id = to.params.id
      this.getFile()
    }
  }
}
</script>

<style scoped>

</style>
注意:key 不用设置,会自动分配一个,如果用文件id设置为key,则打开文件时,会用key在文档服务器中寻找文件,已有的key会直接打开,且不可编辑。
window._CONFIG的定义:
//在线文档后端地址
Vue.prototype.OFFICE_API_URL = process.env.VUE_APP_OFFICE_API_URL
window._CONFIG['officeUrl'] = Vue.prototype.OFFICE_API_URL + '/sys/common/static'  //上传地址
window._CONFIG['callBackUrl'] = Vue.prototype.OFFICE_API_URL + '/onlyfile/file/editCallBack'  //编辑器回调地址

.env文件中
VUE_APP_OFFICE_API_URL=http://192.168.124.200:8080
5、将这个控件配置一个路由地址,就可以使用了
router.config.js中
  {
    //在线文件编辑
    path: '/fileEditor/:id',
    component: () => import('@/components/onlyoffice/fView')
  },
使用:
goEditor(id){
      let routeUrl = this.$router.resolve({
          path: "/fileEditor/"+id
        });
        window.open(routeUrl.href,'_blank')
      }
参数id 是文件的id
6、后端回调地址:
 /**
     * 在线编辑器回调操作
     */
    @RequestMapping(path = "/editCallBack", method = {RequestMethod.POST, RequestMethod.GET})
    public void editCallBack(HttpServletRequest request, HttpServletResponse response) throws IOException {
        PrintWriter writer = response.getWriter();
        Scanner scanner = new Scanner(request.getInputStream()).useDelimiter("\\A");
        String body = scanner.hasNext() ? scanner.next() : "";
        JSONObject jsonObj = JSONObject.parseObject(body);

        String userId = request.getParameter("userId");
        String fileId = request.getParameter("fileId");

        log.info("在线编辑器回调参数:{}", jsonObj);

        if ((Integer) jsonObj.get("status") == 2) {
            String downUrl = (String) jsonObj.get("url"); //保存变更后文件
            String changeUrl = (String) jsonObj.get("changesurl"); //保存文件的修改记录
            String lastsave = (String) jsonObj.get("lastsave");

            try {
                fileChangeService.saveChange(downUrl, changeUrl, fileId, userId, lastsave);
            } catch (Exception e) {
                log.info("保存回调文件出错:{}", e.getMessage());
            }
        }

        writer.write("{\"error\":0}");
    }
最后需要返回:“error”:0 ,否则编辑器会出现错误。
7、saveChange 方法,下载文档服务器中最新版文件,覆盖到原文件地址,将原文件备份为历史文件,保存修改记录
  @Value(value = "${jeecg.path.upload}")
    private String uploadpath;

    @Override
    public void saveChange(String downUrl, String changeUrl, String fileId, String userId, String changeTime) throws IOException {
        File entity = fileService.getById(fileId);
        String bizPath = "office" + java.io.File.separator + entity.getUserId();
        String fullName = entity.getFileUrl().substring(bizPath.length() + 1); //文件全名
        String fName = fullName.substring(0, fullName.lastIndexOf(".")); //文件名
        String hisPath = bizPath + java.io.File.separator + fName;
        String hisFile = hisPath + java.io.File.separator + entity.getFileName() + "_" + System.currentTimeMillis() + "." + entity.getFileExt();
        String zipFile = hisFile + ".zip";

        java.io.File dirHisPath = new java.io.File(hisPath);
        if (!dirHisPath.exists()) {
            dirHisPath.mkdir();
        }

        //复制保存旧文件
        java.io.File oldFile = new java.io.File(uploadpath + java.io.File.separator + bizPath + java.io.File.separator + fullName);
        java.io.File dstFile = new java.io.File(uploadpath + java.io.File.separator + hisFile);
        FileUtil.copy(oldFile, dstFile, true);

        try {
            URL url = new URL(downUrl);
            URL zipUrl = new URL(changeUrl);

            try {
                //新版文件
                HttpURLConnection connection = (HttpURLConnection) url.openConnection();
                InputStream inputStream = connection.getInputStream();
                FileOutputStream fileOutputStream = new FileOutputStream(oldFile);
                int read = 0;
                final byte[] bytes = new byte[1024];
                while ((read = inputStream.read(bytes)) != -1) {
                    fileOutputStream.write(bytes, 0, read);
                }
                fileOutputStream.flush();
                fileOutputStream.close();
                connection.disconnect();
                //变更记录
                HttpURLConnection urlConnection = (HttpURLConnection) zipUrl.openConnection();
                InputStream inputStream1 = urlConnection.getInputStream();
                java.io.File changeFile = new java.io.File(uploadpath + java.io.File.separator + zipFile);
                FileOutputStream fileOutputStream1 = new FileOutputStream(changeFile);
                int readZip = 0;
                byte[] buffer = new byte[1024];
                while ((readZip = inputStream1.read(buffer)) != -1) {
                    fileOutputStream1.write(buffer, 0, readZip);
                }
                fileOutputStream1.flush();
                fileOutputStream1.close();
                urlConnection.disconnect();

                inputStream.close();
                inputStream1.close();


            } catch (IOException e) {
                throw e;
            }
        } catch (MalformedURLException e) {
            throw e;
        }

        FileChange fileChange = new FileChange();
        fileChange.setUserId(userId);
        fileChange.setFileId(fileId);
        fileChange.setHisFileUrl(hisFile);
        fileChange.setHisChangeUrl(zipFile);
        try {
            SimpleDateFormat simpleDateFormat = new SimpleDateFormat("yyyy-MM-dd'T'HH:mm:ss.SSS'Z'");
            simpleDateFormat.setTimeZone(TimeZone.getTimeZone("UTC"));
            Date parse =simpleDateFormat.parse(changeTime);
            fileChange.setChangeTime(parse);
        } catch (ParseException e) {
            fileChange.setChangeTime(new Date());
        }

        this.save(fileChange);


    }
很重要的一个给忘了,需要在前端的index.html中,包含进onlyoffice的js地址
<script type="text/javascript" src="http://192.168.124.200:9999/web-apps/apps/api/documents/api.js"></script>

