微信小程序实现订阅消息推送的实现步骤
1、准备工作
准备小程序账号、开发环境,我小程序是基于uniapp开发,后台代码基于SpringBoot开发。同时先阅读官方文档,了解小程序订阅消息和后端如何发送订阅消息等相关知识,官方文档地址如下:
- 《小程序订阅消息》
- 《发送订阅消息》
2、实现步骤
2.1、启用并配置消息推送
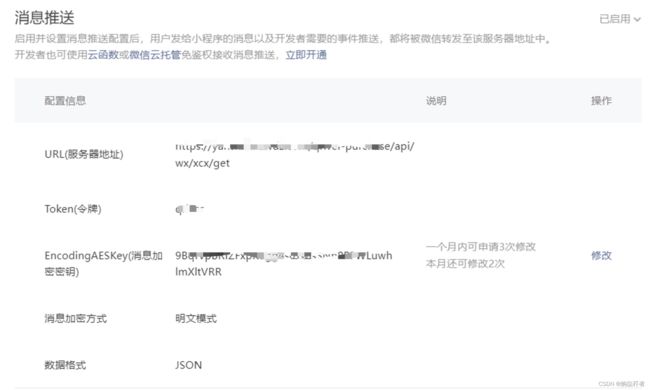
登录微信小程序后台,在开发->开发管理->开发设置,下拉到消息推送面板,填写自己的服务器推送地址。 Token(令牌)和EncodingAESKey(消息加密密钥)随意,设置后最好不要再改变也不要泄露,后台接口校验需要使用。

2.2、搭建推送接口服务
在上述的配置中,需要用到相关服务接口,该服务接口需要两个同名的接口,一个支持Get ,另外一个支Post,其中Get方法主要实现权限归属认证,只调用一次;而Post方法, 当用户在微信小程序中主动订阅一次性消息时,腾讯服务器将请求Post的接口,发送用户的相关行为事件结果到开发者服务器,只有用户订阅的用户才允许进行消息推送,其实这里接收的不只是消息订阅事件,各类的交互事件都在这里进行接收的。下面代码,只是简单实现了解析,没有具体实现相关逻辑。
@RequestMapping(value = "get")
    @ResponseBody
    public String get(HttpServletRequest request,String signature, String timestamp, String nonce, String echostr) {
        if(request.getMethod().equalsIgnoreCase("get")){//用来校验,一般会验证前端配置的token等,这里简化了代码。
            return echostr;
        }else if(request.getMethod().equalsIgnoreCase("POST")){//接收用户的相关行为事件结果
            try {
                BufferedReader reader = new BufferedReader(new InputStreamReader(request.getInputStream()));
                StringBuilder requestContent = new StringBuilder();
                String line;
                while ((line = reader.readLine()) != null) {
                    requestContent.append(line);
                }
                reader.close();
                //接收:{"ToUserName":"gh_ea84a199bf81","FromUserName":"oG0NJ5Oi_3Dd1HlZJ14xfnA0sJ6s","CreateTime":1686131943,"MsgType":"event","Event":"subscribe_msg_popup_event","List":{"PopupScene":"0","SubscribeStatusString":"accept","TemplateId":"4ondVRxk4L20ihrJ3iI15BDK72XatGPxE0MeCVwHasQ"}}
                logger.info("接收:" + requestContent.toString());
                return "";
            } catch (IOException e) {
                // 处理异常情况
                e.printStackTrace();
                logger.error("异常:" + e.getMessage());
                return e.toString();
            }
        }else{
            logger.info("不是get 或 post方法");
            return null;
        }
    }
2.3、消息模板申请
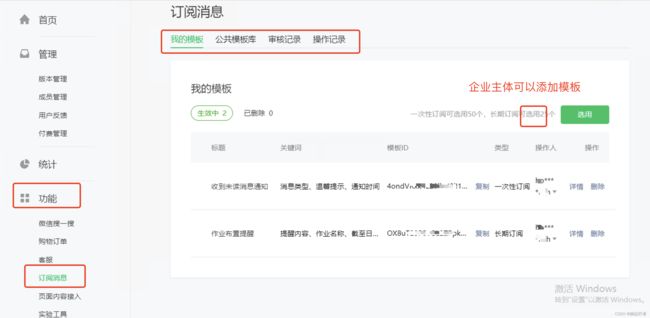
在微信公众平台选择公共模板或者申请符合自己需求的模板(需要符合规则)。这里我们选择了一个公共的模板,申请通过后,我们就可以获取到消息模板ID和详细内容等信息。
1、对于个人开发者的微信小程序账号,是无法直接添加订阅消息模板的。订阅消息模板的功能只对企业主体的微信公众号和小程序开放。
2、个人开发者账号只能使用已经存在的订阅消息模板进行订阅消息推送,无法自定义和添加新的模板。
2.4、用户授权
在小程序中获取用户订阅消息的授权:在小程序中,你需要调用wx.requestSubscribeMessage接口获取用户的订阅消息授权。用户同意授权后,你可以得到用户的订阅消息订阅状态。
//uniapp封装了wx.requestSubscribeMessage接口
uni.requestSubscribeMessage({
 tmplIds: ['4ondVRxk4L20ihrJ3iI15BDK72XatGPxE0MeCVwHasQ'],
  success (res) {
	  console.log(res);
  }
})
该方法的详细用法,请参考 《wx.requestSubscribeMessage(Object object)用法》官方文档。
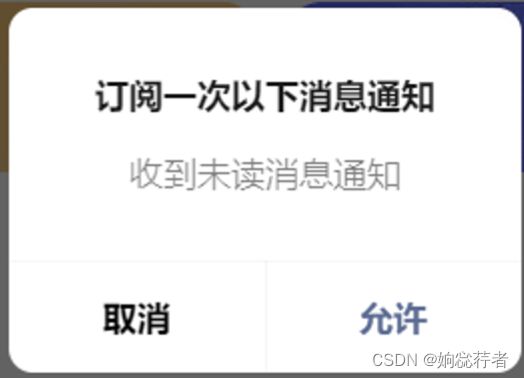
点击调用了上述方法的按钮,就会弹出如下页面,选择允许后,就可以接收后端推送的通知消息了。
2.5、消息推送实现
在实际应用中,我们应该维护一张需要推送消息的微信用户数据表,包括该用户是否已订阅,微信用户的openid等信息,这里暂时演示,省略了该信息,直接固定硬编码了模板ID、消息内容、微信用户openId等信息。
/**
 * 订阅消息推送方法
 */
public class WeChatSubscribeMessageSender {
    private static final String API_URL = "https://api.weixin.qq.com/cgi-bin/message/subscribe/send";
    public static void sendSubscribeMessage(String accessToken, String openid, String templateId, String page, String data) {
        try {
            String url = API_URL + "?access_token=" + accessToken;

            URL apiUrl = new URL(url);
            HttpURLConnection connection = (HttpURLConnection) apiUrl.openConnection();
            connection.setRequestMethod("POST");
            connection.setRequestProperty("Content-Type", "application/json;charset=UTF-8");
            connection.setDoOutput(true);

            // 构建请求体
            String body = buildRequestBody(openid, templateId, page, data);
            byte[] requestBodyBytes = body.getBytes(StandardCharsets.UTF_8);

            // 发送请求
            connection.getOutputStream().write(requestBodyBytes);

            // 读取响应
            int responseCode = connection.getResponseCode();
            BufferedReader reader = new BufferedReader(new InputStreamReader(connection.getInputStream()));
            StringBuilder response = new StringBuilder();
            String line;
            while ((line = reader.readLine()) != null) {
                response.append(line);
            }
            reader.close();

            if (responseCode == HttpURLConnection.HTTP_OK) {
                // 请求成功处理逻辑
                System.out.println("发送订阅消息成功");
                System.out.println(response.toString());
            } else {
                // 请求失败处理逻辑
                System.out.println("发送订阅消息失败");
                System.out.println("响应码:" + responseCode);
                System.out.println(response.toString());
            }

            connection.disconnect();
        } catch (IOException e) {
            // 异常处理逻辑
            e.printStackTrace();
        }
    }

    private static String buildRequestBody(String openid, String templateId, String page, String data) {
        // 构建请求体的JSON字符串
        return String.format(
                "{\"touser\":\"%s\",\"template_id\":\"%s\",\"page\":\"%s\",\"data\":%s}",
                openid, templateId, page, data);
    }
}
//推送消息的时候需要accessToken,这里是获取token的方法,在实际环境中,一般是定时刷新,两个小时内有效,获取accesstoken时需要appid和secret信息,一般是后台参数或常量进行配置。
 //获取accessToken的请求接口
private final static String GetAccessToken = "https://api.weixin.qq.com/cgi-bin/token?grant_type=client_credential&appid={appid}&secret={secret}";

public String refreshAccessToken(String appid, String secret){
        if(StringUtils.isEmpty(appid) || StringUtils.isEmpty(secret)){
            logger.error("刷新微信AccessToken时,缺少appid或secret参数!");
            throw new WxBzException(SysErrorCode.SYS_ERROR_700000,"刷新微信AccessToken时,缺少appid或secret参数!");
        }
        Map<String, Object> param = new HashMap<>();
        param.put("appid",appid);
        param.put("secret",secret);
        ResponseEntity<JSONObject> resp = restTemplate.getForEntity(GetAccessToken, JSONObject.class,param);
        JSONObject jsonObj = resp.getBody();
        String accessToken = null;
        if(jsonObj != null){
            accessToken = jsonObj.getString("access_token");
        }
        return accessToken;
    }
//消息推送的模拟方法
@Controller
@RequestMapping(value = "/api/wx/xcx")
public class WxApi {

    Logger logger = LoggerFactory.getLogger(WxApi.class);

    @Autowired
    private WxCommonService wxCommonService;

    @RequestMapping(value = "sendMsg")
    @ResponseBody
    public String sendMsg(HttpServletRequest request){
        //String token = request.getParameter("token");
        //请求 微信接口 获取 accessToken
        String accessToken = wxCommonService.refreshAccessToken(WxConstants.WX_XCX_APPID,WxConstants.WX_XCX_SECRET);
        String openid = "接收消息的微信用户的openId";
        String templateId = "微信订阅消息模板";
        String page = "点击消息的跳转路径";
        // 构建订阅消息内容的JSON对象
        // 构建订阅消息内容的JSON对象
        JSONObject messageData = new JSONObject();
        messageData.put("thing1", createDataItem("提醒内容", "您有新的提醒"));
        messageData.put("thing2", createDataItem("作业名称", "Java作业"));
        messageData.put("time3", createDataItem("截至日期", "2023-06-30"));
        messageData.put("thing4", createDataItem("发布人员", "张三"));
        // 将订阅消息内容转换为JSON字符串
        String jsonData = messageData.toJSONString();
        WeChatSubscribeMessageSender.sendSubscribeMessage(accessToken,openid,templateId,page,jsonData);
        return null;
    }
    private static Map<String, Object> createDataItem(String name, String value) {
        Map<String, Object> item = new HashMap<>();
        item.put("value", value);
        return item;
    }
}
2.6、测试模拟消息
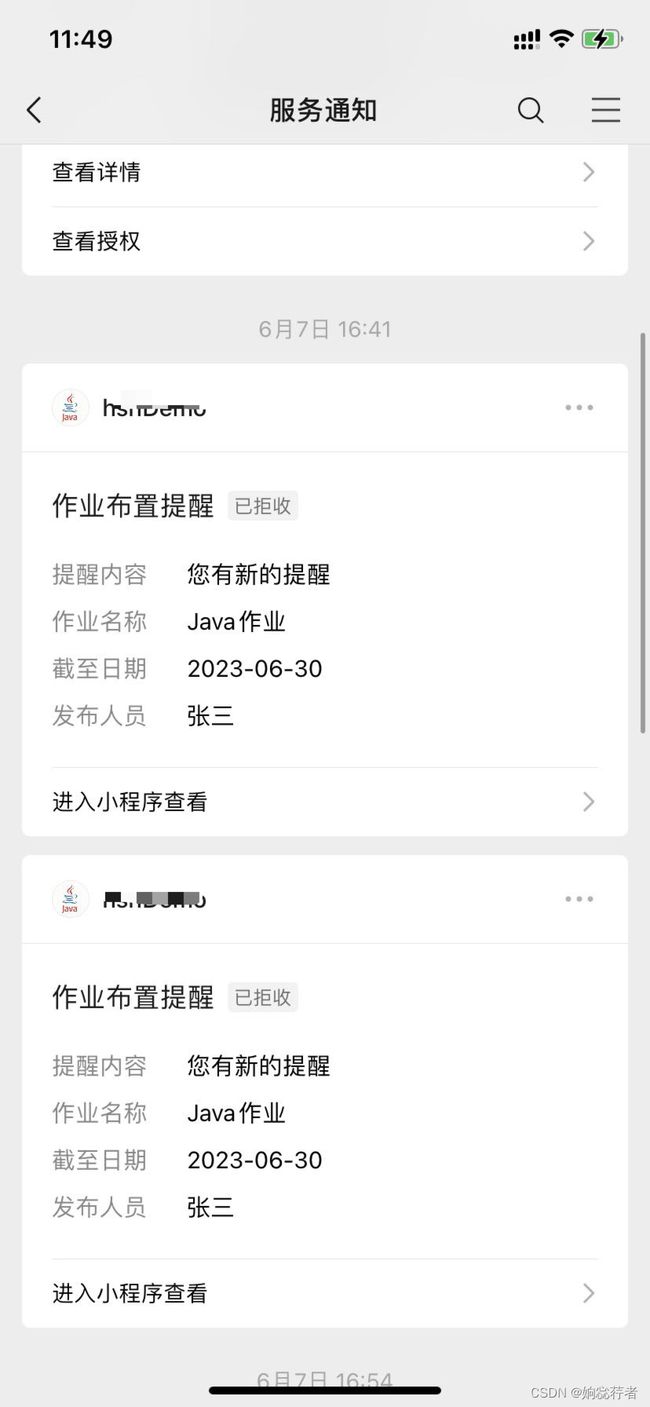
完成上述工作后,启动服务,先通过微信小程序进行消息订阅,
然后调用模拟消息推送的方法http://localhost:8080/api/wx/xcx/sendMsg,这个时候微信服务中就会收到消息,如下图所示;


