yoloV5目标识别以及跟踪,功能识别动物(大象,犀牛,水牛,斑马)
yolo目标识别以及跟踪还是很强的嘞!
一. YOLO V5我来啦
1. 前期准备
yolo V5项目下载
- 项目的github地址
- 项目的gitee地址
- 使用git 克隆下来到项目目录下面就好
环境配置
-
在
yolov5的文件下面有一个requirements.txt文件,这里就是环境依赖的说明。 -
在
vscode打开终端 输入pip install -r requirements.txt下载安装依赖包
创建数据集
-
自己去找训练的图片啦
-
接下来就是漫长的标注过程了!奥里给!
-
我们使用的工具是
labelImg -
继续我们在
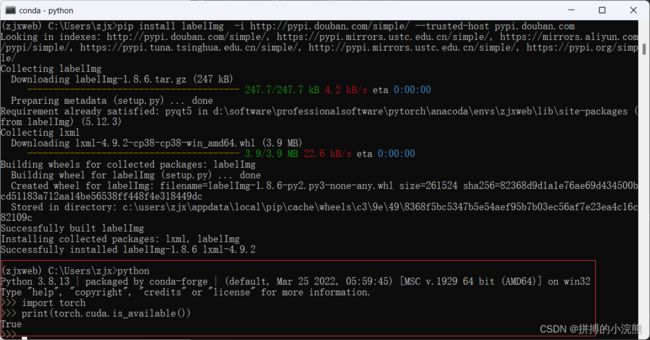
conda终端输入以下命令进行安装pip install labelImg -
等待下载完毕后再接着输入命令
labelImg -
然后我们就可以进行标注过程啦!
(1)是打开相应的图片文件
(2)首先在这里设定好保存的路径地址,这样待会直接“save”就很方便
(3)这里一定!!!!要记得先设好形式!!!!
(4)创建标记框
(5)删除标记框注:同时注意保存的文件夹的形式。
-
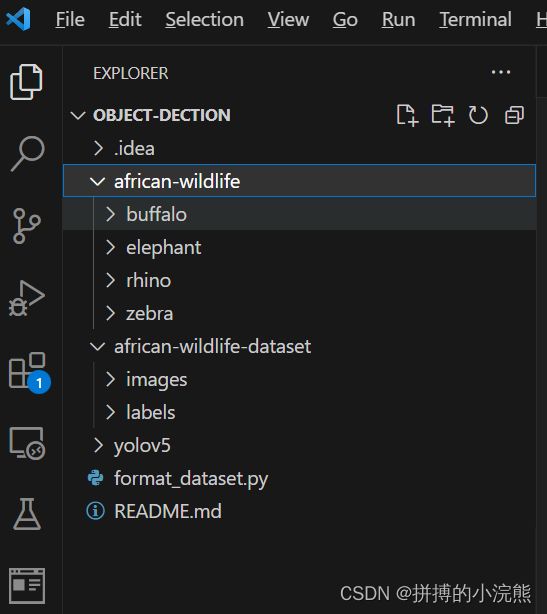
然后在我们项目的根目录下面创建我们的数据目录用来存放我们的数据
african-wildlife未分类之前的african-wildlife-dataset已经分类
其中labels中的txt文件里面代表的是:每一行代表标注的一个目标,第一个数字代表着这个数的类别,后面的四个数字是归一化后的的标注的中心点坐标(x,y)和归一化标注框的宽和高(w,h)。
注:这里文件夹名尽量是images和labels,不然会有各种报错,懒得去找哪里的原因,先让他跑起来吧(label也会报错,加了个s后他就乖了)
更改配置
-
coco128.yaml-
可以参考我的改一下哦
-
# COCO 2017 dataset http://cocodataset.org - first 128 training images # Train command: python train.py --data coco128.yaml # Default dataset location is next to /yolov5: # /parent_folder # /coco128 # /yolov5 # download command/URL (optional) # download: https://github.com/ultralytics/yolov5/releases/download/v1.0/coco128.zip # train and val data as 1) directory: path/images/, 2) file: path/images.txt, or 3) list: [path1/images/, path2/images/] train: ../african-wildlife-dataset/images/train/ # 128 images val: ../african-wildlife-dataset/images/train/ # 128 images # number of classes nc: 4 # class names names: [ 'buffalo', 'elephant', 'rhino', 'zebra' ] -
nc:是你要检测有多少类
-
names是这些类的名字
-
-
train.py-
if __name__ == '__main__': parser = argparse.ArgumentParser() parser.add_argument('--weights', type=str, default='yolov5s.pt', help='initial weights path') parser.add_argument('--cfg', type=str, default='', help='model.yaml path') parser.add_argument('--data', type=str, default='data/coco128.yaml', help='data.yaml path') parser.add_argument('--hyp', type=str, default='data/hyp.scratch.yaml', help='hyperparameters path') parser.add_argument('--epochs', type=int, default=300) parser.add_argument('--batch-size', type=int, default=16, help='total batch size for all GPUs') parser.add_argument('--img-size', nargs='+', type=int, default=[640, 640], help='[train, test] image sizes') parser.add_argument('--rect', action='store_true', help='rectangular training') parser.add_argument('--resume', nargs='?', const=True, default=False, help='resume most recent training') parser.add_argument('--nosave', action='store_true', help='only save final checkpoint') parser.add_argument('--notest', action='store_true', help='only test final epoch') parser.add_argument('--noautoanchor', action='store_true', help='disable autoanchor check') parser.add_argument('--evolve', action='store_true', help='evolve hyperparameters') parser.add_argument('--bucket', type=str, default='', help='gsutil bucket') parser.add_argument('--cache-images', action='store_true', help='cache images for faster training') parser.add_argument('--image-weights', action='store_true', help='use weighted image selection for training') parser.add_argument('--device', default='0', help='cuda device, i.e. 0 or 0,1,2,3 or cpu') parser.add_argument('--multi-scale', action='store_true', help='vary img-size +/- 50%%') parser.add_argument('--single-cls', action='store_true', help='train multi-class data as single-class') parser.add_argument('--adam', action='store_true', help='use torch.optim.Adam() optimizer') parser.add_argument('--sync-bn', action='store_true', help='use SyncBatchNorm, only available in DDP mode') parser.add_argument('--local_rank', type=int, default=-1, help='DDP parameter, do not modify') parser.add_argument('--log-imgs', type=int, default=16, help='number of images for W&B logging, max 100') parser.add_argument('--log-artifacts', action='store_true', help='log artifacts, i.e. final trained model') parser.add_argument('--workers', type=int, default=0, help='maximum number of dataloader workers') parser.add_argument('--project', default='runs/train', help='save to project/name') parser.add_argument('--name', default='exp', help='save to project/name') parser.add_argument('--exist-ok', action='store_true', help='existing project/name ok, do not increment') parser.add_argument('--quad', action='store_true', help='quad dataloader') opt = parser.parse_args() -
以上代码可以根据自己的需求更改
- weights是你选择的模型
- data:因为我用的是
coco128.yaml本身,所以我不用改~ - epochs和batch-size你看着办吧
- epochs是训练过程中整个数据集将被迭代多少次,显卡不行就调小些
- batch-size:一次看完多少张图片才进行权重更新,同样的显卡不行就调小些
device使用显卡跑就将default值调成和自己显卡对应的值,我的是 0
-
2. 是时候跑一下了
执行
python train.py --data coco128.yaml --cfg yolov5s.yaml --weights ' ' --batch-size 64
3. 对结果进行验证
执行命令
python detect.py --source .\videos\elephant-rhino2.mp4 --weights runs/train/exp2/weights/best.pt
--source后面跟的是要识别的路径--weights就是你训练好的模型啦- source 0指的是电脑摄像头为源
4. 踩坑集结大部队啦!(报错是真的多啊)
output type __int64报错
-
错误:
RuntimeError: result type Float can‘t be cast to the desired output type __int64报错 -
解决方法
-
在
yolov5\utils\loos.py替换如下代码 -
def build_targets(p, targets, model):
    # Build targets for compute_loss(), input targets(image,class,x,y,w,h)
    det = model.module.model[-1] if is_parallel(model) else model.model[-1]  # Detect() module
    na, nt = det.na, targets.shape[0]  # number of anchors, targets
    tcls, tbox, indices, anch = [], [], [], []
    gain = torch.ones(7, device=targets.device)  # normalized to gridspace gain
    ai = torch.arange(na, device=targets.device).float().view(na, 1).repeat(1, nt)  # same as .repeat_interleave(nt)
    targets = torch.cat((targets.repeat(na, 1, 1), ai[:, :, None]), 2)  # append anchor indices

    g = 0.5  # bias
    off = torch.tensor([[0, 0],
                        [1, 0], [0, 1], [-1, 0], [0, -1],  # j,k,l,m
                        # [1, 1], [1, -1], [-1, 1], [-1, -1],  # jk,jm,lk,lm
                        ], device=targets.device).float() * g  # offsets

    for i in range(det.nl):
        anchors, shape = det.anchors[i], p[i].shape
        gain[2:6] = torch.tensor(p[i].shape)[[3, 2, 3, 2]]  # xyxy gain

        # Match targets to anchors
        t = targets * gain
        if nt:
            # Matches
            r = t[:, :, 4:6] / anchors[:, None]  # wh ratio
            j = torch.max(r, 1. / r).max(2)[0] < model.hyp['anchor_t']  # compare
            # j = wh_iou(anchors, t[:, 4:6]) > model.hyp['iou_t']  # iou(3,n)=wh_iou(anchors(3,2), gwh(n,2))
            t = t[j]  # filter

            # Offsets
            gxy = t[:, 2:4]  # grid xy
            gxi = gain[[2, 3]] - gxy  # inverse
            j, k = ((gxy % 1. < g) & (gxy > 1.)).T
            l, m = ((gxi % 1. < g) & (gxi > 1.)).T
            j = torch.stack((torch.ones_like(j), j, k, l, m))
            t = t.repeat((5, 1, 1))[j]
            offsets = (torch.zeros_like(gxy)[None] + off[:, None])[j]
        else:
            t = targets[0]
            offsets = 0

        # Define
        bc, gxy, gwh, a = t.chunk(4, 1)  # (image, class), grid xy, grid wh, anchors
        a, (b, c) = a.long().view(-1), bc.long().T  # anchors, image, class
        gij = (gxy - offsets).long()
        gi, gj = gij.T  # grid indices

        # Append
        indices.append((b, a, gj.clamp_(0, shape[2] - 1), gi.clamp_(0, shape[3] - 1)))  # image, anchor, grid
        tbox.append(torch.cat((gxy - gij, gwh), 1))  # box
        anch.append(anchors[a])  # anchors
        tcls.append(c)  # class
-
No loop matching the specified signature and casting was found for ufunc gre
- 解决方案:
- 将此代码
\# cum_counts = np.cumsum(np.greater(counts, 0, dtype=np.int32))- 在终端点击报错信息就可到需要替换的位置
- 替换成此代码
cum_counts = np.cumsum(np.greater(counts, 0))
- 将此代码
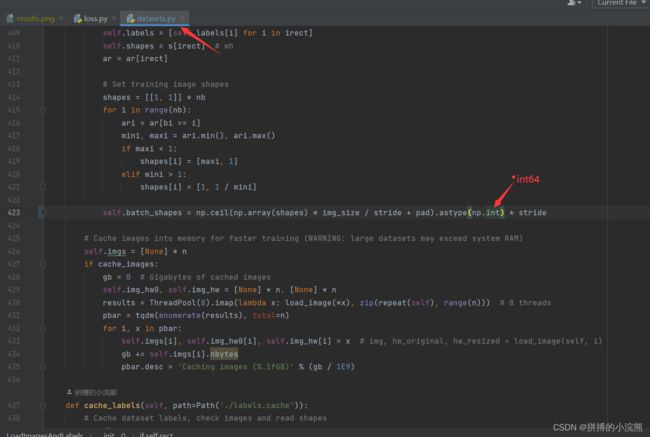
module ‘numpy’ has no attribute ‘int’
-
报错信息
-
`AttributeError: module 'numpy' has no attribute 'int'.
`np.int` was a deprecated alias for the builtin `int`. To avoid this error in existing code, use `int` by itself. Doing this will not modify any behavior and is safe. When replacing `np.int`, you may wish to use e.g. `np.int64` or `np.int32` to specify the precision. If you wish to review your current use, check the release note link for additional information.
-
-
解决方案:
将device默认值改为0,使用GPU训练报错,修改方法如下
-
报错信息:暂时找不到了 一般会出现
device 0invalid等问题 -
按如下输入
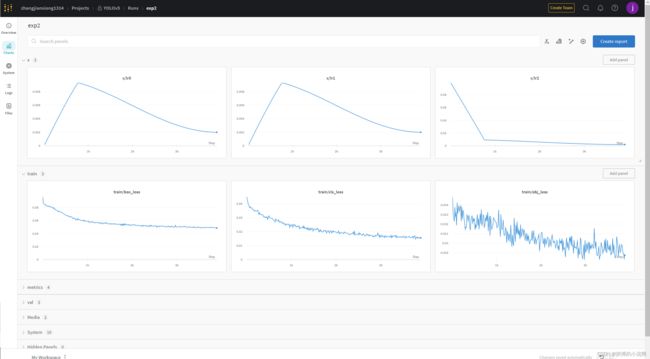
wand快速生成报告
-
看到这样的图就问你心动不心动,所有的图标都可以下载哦
-
第一步在
conda终端安装pip install wandb
-
第二步 注册并获取key
-
第三步执行训练命令
- 会弹出选择
- 选择第二个,黏贴刚才复制的key
- 回车大功告成
- 会弹出选择
-
[外链图片转存中…(img-q1Tq0gkU-1686798863240)]
-
看到这样的图就问你心动不心动,所有的图标都可以下载哦
-
第一步在
conda终端安装pip install wandb
-
第二步 注册并获取key
- wandb官网
- [外链图片转存中…(img-z6LbDUyh-1686798863240)]
-
第三步执行训练命令
- 会弹出选择
- 选择第二个,黏贴刚才复制的key
- 回车大功告成
- 会弹出选择


