【图片轮播】Vue如何实现移动端图片轮播效果,支持左右滑动(附图文及代码)
【写在前面】
日常生活中,其实我们是离不开手机查看相册的,尤其是图片的轮播展示,最近我就接到我家老大给出的需求,首先是从网上下载下来之前她做的图片,然后她就希望能够在自己手机上能随时查看,这不没办法作为程序员的我总不能说不会吧,别的不多说,咱玩的就是真实,开整。
【涉及知识点】
vue实现移动端图片轮播,移动端相册制作,vant3实现图片轮播效果,swipe轮播实现过程,swipe轮播组件实现照片轮播,vant3中swipe轮播组件应用。
【效果展示】
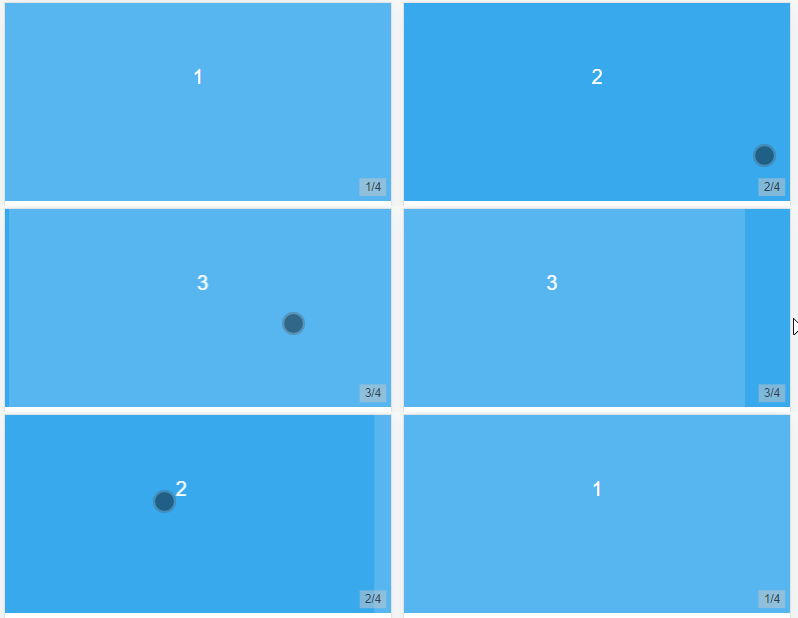
为了节省大家时间我就先给大家看一个效果(对您没有用处后面也不用看了)
版权声明:原创于CSDN博主-拄杖盲学轻声码,有疑惑可去留言私信哟!
轮播目录
- 1、搭建vue项目(已建可忽略)
- 2、引入vant3组件
-
- A、安装vant
- B、引入组件
- C、管理vant组件(更方便的引入)
- 3、添加轮播功能
-
- A、实现基础轮播效果
- B、实现带数字下标轮播效果
- C、遍历循环实现图片轮播
- 4、效果展示与彩蛋
1、搭建vue项目(已建可忽略)
搭建vue项目其实在我的之前文章里面就有详细的介绍过,这里我介绍一下核心步骤
A、创建命令(脚手架安装):vue create initvue3pro
B、安装路由组件命令:npm install vue-router --save
C、创建一些页面配置并路由映射
详情可以参考我原先写的文章《从零开始如何创建一个干净的vue3项目》
2、引入vant3组件
A、安装vant
首先我是通过npm命令进行安装的
命令行:npm i vant
其实还可以通过yarn 或 pnpm来进行安装
yarn安装命令行:yarn add vant
Pnpm安装命令行: pnpm add vant
B、引入组件
安装完成之后,正常我们引入的话是通过在main.js中使用import来引入
比如说我要引入vant的按钮组件Button,如下所示:
import { Button } from 'vant';//引入组件
const app = createApp();
app.use(Button);//注册你需要的组件
C、管理vant组件(更方便的引入)
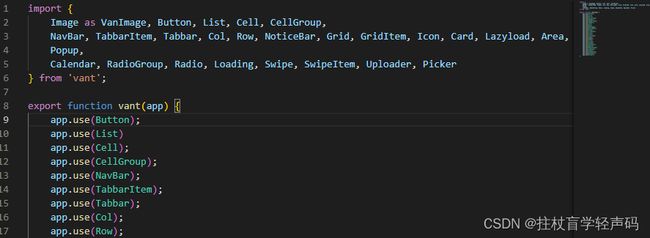
在这边我在config文件中创建了一个vant.config.js文件,专门用于存放所有的vant相关组件的,然后再一起注册组件,其内容如下所示:

Main.js引入vant.config.js文件

这样的话所有的页面就都可以应用vant.config.js里的组件了。
3、添加轮播功能
此处我们可以先从简单基础的背景色模块轮播入手,首先必须要引入Swipe和SwipeItem两个组件,vant.config.js(或者main.js)文件中必须包含这些。
import {Swipe, SwipeItem} from 'vant';
export function vant(app) {
    app.use(Swipe);
    app.use(SwipeItem);
}
版权声明:原创于CSDN博主-拄杖盲学轻声码,有疑惑可去留言私信哟!
A、实现基础轮播效果
基础轮播代码
<van-swipe class="my-swipe" :autoplay="2000" indicator-color="white">
      <van-swipe-item>1van-swipe-item>
      <van-swipe-item>2van-swipe-item>
      <van-swipe-item>3van-swipe-item>
      <van-swipe-item>4van-swipe-item>
 van-swipe>
<style>
.my-swipe .van-swipe-item {
  height: 200px;
  color: #fff;
  font-size: 20px;
  line-height: 150px;
  text-align: center;
  background-color: #39a9ed;
}
.my-swipe .van-swipe-item:nth-child(2n + 1) {
  background-color: #57b6ef;
}
style>
B、实现带数字下标轮播效果
引言: 通过上述的A模块我们得到了一个贴片式轮播效果,但是要是有20多个贴片要轮播,甚至100多个贴片要轮播的话,那么下面的小圆圈点的表示形式就不太友好了。下面我们就换一种展示缩略标的方式。简称自定义指示器轮播模式。
自定义指示器轮播代码
<van-swipe class="my-swipe" :autoplay="2000">
      <van-swipe-item>1van-swipe-item>
      <van-swipe-item>2van-swipe-item>
      <van-swipe-item>3van-swipe-item>
      <van-swipe-item>4van-swipe-item>
      <template #indicator="{ active, total }">
        <div class="custom-indicator">{{ active + 1 }}/{{ total }}div>
      template>
 van-swipe>
<style>
.my-swipe .van-swipe-item {
  height: 200px;
  color: #fff;
  font-size: 20px;
  line-height: 150px;
  text-align: center;
  background-color: #39a9ed;
}
.my-swipe .van-swipe-item:nth-child(2n + 1) {
  background-color: #57b6ef;
}
style>
C、遍历循环实现图片轮播
引言: 通过上面的代码我们也不难发现哈,其中我们使用的是贴片块,要是换成图片是否一样,还有就是我们要是图片很多呢,一百张图片不会让我写100次van-swipe-item标签吧,不可能,绝对不可能,下面就介绍多张照片轮播是如何实现的过程,具体如下:
核心使用了 v-for属性设置图片遍历图片数组实现批量展示。
多组图片轮播代码(切记去除样式背景色)
<van-swipe class="my-swipe" :autoplay="2000">
    <van-swipe-item v-for="image in images" :key="image">
      <van-image width="100%" height="200px" :src="image" />
    van-swipe-item>
    <template #indicator="{ active, total }">
      <div class="custom-indicator">{{ active + 1 }}/{{ total }}div>
    template>
van-swipe>

//定义图片路径
import imag1 from "../assets/imags/tpic/360-200-1.png";
import imag2 from "../assets/imags/tpic/360-200-2.png";
import imag3 from "../assets/imags/tpic/360-200-3.png";
import imag4 from "../assets/imags/tpic/360-200-4.png";
import imag5 from "../assets/imags/tpic/360-200-5.png";
export default {
  name: "Picture",
  data: function () {
   },
setup() {
    const images = [imag1, imag2, imag3, imag4, imag5];
    return { images };
  },
}
<style>
.my-swipe .van-swipe-item {
  height: 200px;
  color: #fff;
  font-size: 20px;
  line-height: 150px;
  text-align: center;
}
style>
多组图片轮播效果
版权声明:原创于CSDN博主-拄杖盲学轻声码,有疑惑可去留言私信哟!
4、效果展示与彩蛋
【写在后面】
最终呈现出来给大家的效果如上图所示的,我们将我们喜欢的照片做成这样的模式,然后build发布到自己的服务器上,这样的话就可以随时随地看相册了,尤其是你自己可以进行移动端左右滑动查看,也可以定时轮播图片。
【彩蛋区】
希望我写的文章能给您带来启发,如果觉得博主的东西对您有帮助的话,期待您的支持与谅解,童叟无欺,创作不易,欢迎您来打榜!!!皇榜入口点击此处(已联网备案)
皇榜如下:

时光不弃,有我有你,2023年我们一起加油哈!!!

