uniapp实现页面滚动显示隐藏自定义导航栏
**
方式设计的很全面 从封装工具类 到vue的原型挂载 到vuex的使用
基础不好不建议看****但是可以找关键代码复制
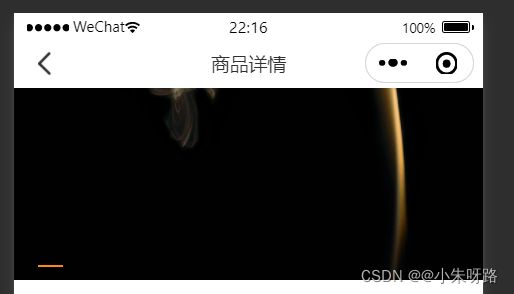
原理是:定义好的自定义导航栏让css属性opacity:0隐藏 利用uni的滚动事件的event滚动长度大于某一个值的时候 让自定义导航栏的动态class值为true触发 进而改变opacity:1实现显示
**
刚开始进来是隐藏自定义导航栏的

我上拉查看下面的参数信息的时候 顶部自定义导航栏出现

1.首先废话不多说实现这种肯定是自定义导航栏(在page.json里面的page取消原生导航栏)


实施步骤
1.该代码是封装在工具类js文件里面的 config/tool.js
getNavWHdata() {
		console.log('获取导航信息');
		try {
			// 有时候getSystemInfoSync API在手机端会报错 所以我做了缓存,
			调用此方法先读取缓存 没缓存继续执行去获取数据 否则return终止
			const value = uni.getStorageSync('statusBar_key_hk');
			if (value) {
				let obj = {
					statusBarHeight: value.statusBarHeight,
					navBarHeight: value.navBarHeight,
					windowWidth: value.windowWidth,
				}
				console.log('获取缓存导航信息成功');
				this.$store.dispatch('addasync', obj)
				return
			}


			let obj = {}
			// 获取手机系统信息
			const info = uni.getSystemInfoSync()
			// 设置状态栏高度(H5顶部无状态栏小程序有状态栏需要撑起高度)
			obj.statusBarHeight = info.statusBarHeight
			//可使用窗口宽度
			obj.windowWidth = info.windowWidth

			// 获取胶囊的位置
			const menuButtonInfo = uni.getMenuButtonBoundingClientRect()
			// (胶囊底部高度 - 状态栏的高度) + (胶囊顶部高度 - 状态栏内的高度) = 导航栏的高度
			obj.navBarHeight = (menuButtonInfo.bottom - info.statusBarHeight) + (menuButtonInfo.top - info
				.statusBarHeight)
			obj.windowWidth = menuButtonInfo.left
			//此处是调用的vuex的方法是把获取到的参数传输进去
			this.$store.dispatch('addasync', obj)
			uni.setStorage({
				key: 'statusBar_key_hk',
				data: obj,
				success: function() {
					console.log('缓存导航信息成功');
				}
			});
			return

		} catch (e) {
			console.log(e);
			//TODO handle the exception
			uni.showToast({
				title: '获取导航信息出错',
				icon: 'none'
			})
		}
	},
veux
在这里插入代码片
const store = new Vuex.Store({
	state: {
		/* 状态栏高度 */
		statusBarHeight: 39,
		/* 导航栏高度 */
		navBarHeight: 48,
		//可使用窗口宽度
		windowWidth: 255,
	},
	mutations: {
		tabarDara(state, value) {
			state.statusBarHeight = value.statusBarHeight
			state.navBarHeight = value.navBarHeight
			state.windowWidth = value.windowWidth
		}
	},
	actions: {
		addasync(context,data){
			context.commit('tabarDara',data)
		}
	},
	//我们使用的时候直接调用getters(有计算属性的意思)  return出state的值
	getters:{
		statusBarHeight(state){
			return state.statusBarHeight
		},
		navBarHeight(state){
			return state.navBarHeight
		},
		windowWidth(state){
			return state.windowWidth
		}
	}
})
main.js程序入口
import tool from '@/config/tool.js' // 工具模块
Vue.prototype.$tool=tool//注册到Vue的原型对象上 方便随时拿取
App.vue 应用生命周期仅可在App.vue中监听,在其它页面监听无效
我们在App.vue直接获取该方法获取导航信息
export default {
		onLaunch: function() {
			// 我们已经吧工具类放在vue原型上直接this.工具类.使用的方法.apply(this//指定下this指向)
			this.$tool.getNavWHdata.apply(this)
			console.log('App Launch');
		},
		onShow: function() {
			console.log('App Show')
		},
		onHide: function() {
			console.log('App Hide')
		}
	}
正常使用
**
原理是:定义好的自定义导航栏让css属性opacity:0隐藏 利用uni的滚动事件的event滚动长度大于某一个值的时候 让自定义导航栏的动态class值为true触发 进而改变opacity:1实现显示
子组件
**
<template>
	<view class="">
		<view class="navbar-fixed" :class="title_bg?'actve':''" >
			<!-- 状态栏小程序撑起高度 -->
			<view :style="{height:statusBarHeight+'px'}"></view>
			<!-- 状态栏的高度 -->
			<view class="navbar-content" :style="{height:navBarHeight+'px'}">
				<view class="navbar-search">
					<view class="imgbox" @tap="$tool.navigateBack()">
						<image class="img-bg" src="/static/icon/fanhui.png" mode=""></image>
					</view>
					<text class="navbar-search_text">{{titleText}}</text>
					<view class="navbar-serach"></view>
				</view>
			</view>
		</view>
		<!-- 需要添加占位符高度  状态栏高度+导航栏高度(否则下面tab会塌陷)-->
		<view v-if="ishowZw" :style="{height:statusBarHeight+navBarHeight+'px'}"></view>
	</view>
</template>

<script>
	import {
		mapGetters
	} from 'vuex'
	export default {
		name:'x-details-nav',
		props:{
			title_bg:{
				type:Boolean,
				default:false
			},
			titleText:{
				type:String,
				default:''
			},
			ishowZw:{
				type:Boolean,
				default:true
			}
		},
		data(){
			return {

			}
		},
		computed: {
			...mapGetters(['statusBarHeight', 'navBarHeight', 'windowWidth'])
		},
		methods: {
		}
	}
</script>

<style lang="scss">
	.navbar-fixed {
		position: fixed;
		top: 0;
		left: 0;
		z-index: 99;
		width: 100%;
		background: transparent;
		transition: all 0.3s;
		.navbar-content {
			display: flex;
			justify-content: center;
			align-items: center;
			height: 45px;
			box-sizing: border-box;
			.navbar-search {
				position: relative;
				display: flex;
				align-items: center;
				justify-content: center;
				// padding: 0 10px;
				width: 100%;
				height: 30px;
				.imgbox{
					position: absolute;
					left: 0;
					margin: 0 20rpx;
					width: 65rpx;
					height: 65rpx;
					display: flex;
					align-items: center;
					justify-content: center;
					background: rgba(255,255,255,0.3);
					border-radius: 50%;
					image {

						width: 40rpx;
						height: 40rpx;
						margin-right: -12rpx;
					}
				}

				.img-bg{
					transition: all 0.3s;
				}
				.navbar-search_text {
					font-size: 30rpx;
					opacity: 0;
					transition: all 0.3s;
				}
			}
		}

	}
	.navbar-fixed.actve{
		background: #fff;
		box-shadow: 0rpx 0rpx 14rpx 0rpx rgba(0, 0, 0, 0.1);
		.navbar-search_text{
			opacity: 1 !important;
		}
	}
</style>
父组件
<template>
<view>
 <x-details-nav :ishowZw='false' :title_bg='navbaractive' titleText='商品详情'></x-details-nav>
</<view>>
</<template>
<script>
这里无需引入import子组件 原因看下面
 methods:{},
 //该事件和methods是平级的
 //监听界面滚动事件
 onPageScroll(e) {
			if (e.scrollTop > 100) {
				this.navbaractive = true
			} else if (e.scrollTop < 100) {
				this.navbaractive = false
			}
		},
</script>
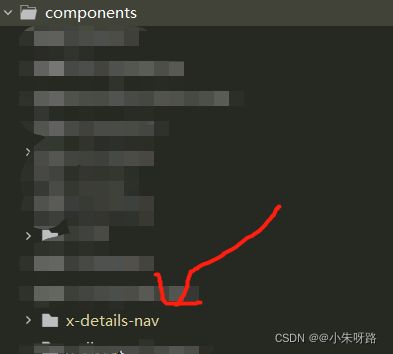
**具体原因:**子组件存放的位置 components/x-details-nav/x-details-nav.vue

在pages.json定义easycom标准
"easycom": {
			//熟悉不 引入uview组件配置项
		"^u-(.*)": "@/uview-ui/components/u-$1/u-$1.vue",
		//自定义组件配置项
		"^x-(.*)": "@/components/x-$1/x-$1.vue"
	},
官网的说法 easycom组件规范 Hb2.5.5支持 所以为了保险起见建议加上
“^x-(.*)”: “@/components/x-$1/x-$1.vue”

**
