Directx----Fonts
如果是制作一个游戏,文字是其中比不可少的一部分,这篇文章主要讨论Direct3D中3中显示文字的方式。
1. ID3DXFont
D3DX 库提供了一系列基于ID3DXFont的接口来绘制文字。IDXDFont 是基于GDI 来绘制文字的。正因为此,ID3DFont能提供非常复杂的字体和格式,但是效率显然没直接往显卡上画东西高了。
创建和显示一个ID3DXFont通常需要如下几个步骤:
(1) 填充 D3DXFONT_DESC结构体。
      1

      D3DXFONT_DESC fontDesc;


      2

      ZeroMemory(

     &

     fontDesc,

     sizeof

     (D3DXFONT_DESC));


      3

      fontDesc.Height

     =


     25

     ;

     //

      in logical units


      4


      fontDesc.Width

     =


     12

     ;

     //

      in logical units


      5


      fontDesc.Weight

     =


     500

     ;

     //

      boldness, range 0(light) - 1000(bold)


      6


      fontDesc.MipLevels

     =

      D3DX_DEFAULT;


      7

      fontDesc.Italic

     =


     false

     ;


      8

      fontDesc.CharSet

     =

      DEFAULT_CHARSET;


      9

      fontDesc.OutputPrecision

     =


     0

     ;


     10

      fontDesc.Quality

     =


     0

     ;


     11

      fontDesc.PitchAndFamily

     =


     0

     ;


     12

      lstrcpy (fontDesc.FaceName, _T(

     "

     Times New Roman

     "

     ));
(2) 创建 ID3DXFont 接口 。
     1

     if

      (FAILED(D3DXCreateFontIndirect(Device,

     &

     fontDesc,

     &

     font)))


     2


     return


     false

     ;
(3) 调用 ID3DXFont::DrawText() 绘制文字。
      1

     //

     Draw the scene


      2


     Device

     ->

     Clear(

     0

     ,

     0

     , D3DCLEAR_TARGET

     |

      D3DCLEAR_ZBUFFER,

     0x0000ffff

     ,

     1.0f

     ,

     0

     );


      3

     Device

     ->

     BeginScene();


      4

     RECT rect

     =

      {

     250

     ,

     200

     , Width, Height};


      5

     font

     ->

     DrawText(NULL,


      6

      _T(

     "

     ID3DXFont

     "

     ),


      7


     -

     1

     ,

     //

      size of string or -1 indicates null terminating string


      8


     &

     rect,

     //

      rectangle text is to be formatted to in windows coords


      9


      DT_TOP

     |

      DT_LEFT,

     //

      draw in the top left corner of the viewport


     10


     0xffff0000

     );

     //

      black text


     11


     Device

     ->

     EndScene();


     12

     Device

     ->

     Present(

     0

     ,

     0

     ,

     0

     ,

     0

     );
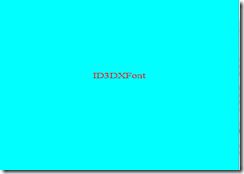
得到了如下图 1所示的文字:
嗯, 非常简单!!不是吗?
2. CD3DFont
在以前版本的Directx SDK 中提供了一个类CD3DFont 来绘制文字,该类主要用纹理三角形和Direct3D来渲染文字,所以其效率要高于用ID3DXFont::DrawText() 。但是这种方法的缺点就是不能像ID3DXFont::DrawText()那样有提供复杂的字体和格式。这个example在最新的Directx SDK中已经取消掉,所以在这里也不过多介绍。个人认为CD3DFont就是个鸡肋。我看了下最新Directx SDK下的Text3D样列,发现只用了ID3DXFont::DrawText()方法和下面介绍的D3DXCreateText方法。
3. D3DXCreateText
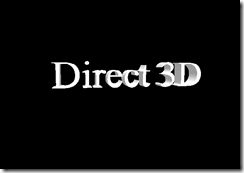
使用这种方式来渲染文字就会像渲染几何体一样来渲染。如下图 2:
图 2
使用D3DXCreateText()来渲染文字就是简单的把文字认为是一个ID3DXMesh,然后就以渲染ID3DXMesh的方式来渲染文字。 下面是一个简单的例子:
(1). 首先需要得到我们屏幕的DC和我们需要创建的字体, 这里调用的是Win32的API和结构体。
      1

     HDC hdc

     =

      CreateCompatibleDC(

     0

     );


      2

      HFONT hFont;


      3

      HFONT hFontOld;


      4

      LOGFONT lf;


      5

      ZeroMemory(

     &

     lf,

     sizeof

     (LOGFONT));


      6

      lf.lfHeight

     =


     25

     ;

     //

      in logical units


      7


      lf.lfWidth

     =


     12

     ;

     //

      in logical units


      8


      lf.lfEscapement

     =


     0

     ;


      9

      lf.lfOrientation

     =


     0

     ;


     10

      lf.lfWeight

     =


     500

     ;

     //

      boldness, range 0(light) - 1000(bold)


     11


      lf.lfItalic

     =


     false

     ;


     12

      lf.lfUnderline

     =


     false

     ;


     13

      lf.lfStrikeOut

     =


     false

     ;


     14

      lf.lfCharSet

     =

      DEFAULT_CHARSET;


     15

      lf.lfOutPrecision

     =


     0

     ;


     16

      lf.lfClipPrecision

     =


     0

     ;


     17

      lf.lfQuality

     =


     0

     ;


     18

      lf.lfPitchAndFamily

     =


     0

     ;


     19

      lstrcpy(lf.lfFaceName, _T(

     "

     Times New Roman

     "

     ));

     //

      font style


     20


      hFont

     =

      CreateFontIndirect(

     &

     lf);


     21

      hFontOld

     =

      (HFONT)SelectObject(hdc, hFont);
(2). 然后调用D3DXCreateText()接口来创建ID3DXMesh。
     1

     D3DXCreateText(Device, hdc, _T(

     "

     Direct 3D

     "

     ),

     0.001f

     ,

     0.4f

     ,

     &

     Text,

     0

     ,

     0

     );
(3).不要忘了删除资源
     1

     SelectObject(hdc, hFontOld);


     2

     DeleteObject(hFont);


     3

     DeleteDC(hdc);
(4). 然后是D3D在典型的几步: 设置灯光, 设置坐标系, 设置摄像头, 视口转换
 代码
代码
(5). 一切准备完毕了, 就可以显示文字了。
     1


     //

     Draw the scene


     2


      Device

     ->

     Clear(

     0

     ,

     0

     , D3DCLEAR_TARGET

     |

      D3DCLEAR_ZBUFFER,

     0x00000000

     ,

     1.0f

     ,

     0

     );


     3

      Device

     ->

     BeginScene();


     4

      Device

     ->

     SetMaterial(

     &

     d3d::WHITE_MTRL);


     5

      Text

     ->

     DrawSubset(

     0

     );


     6

      Device

     ->

     EndScene();


     7

      Device

     ->

     Present(

     0

     ,

     0

     ,

     0

     ,

     0

     );
这样一个如图 2 所示的图片就出来了。


