前端vue入门(纯代码)09
【09.vue中组件的自定义事件】
自定义组件链接
- 在vue中用的click【点击】、keyup【按键】……等事件,这些属于内置事件,也就是js自带的事件。
问题一:什么是组件自定义事件呢?
- 【内置事件】:是给html元素用的,比如span、div等标签,不是组件。
- 【自定义事件】:顾名思义就是自己打造的事件,包含事件名,事件回调函数等,定义好之后去给组件使用。也是一种组件间的通信方式,适用于子组件==>父组件。这里我们通过传值去讲述自定义事件如何使用。
问题二:如何实现子组件给父组件传值?
(1)利用props传值实现
通过props也可以实现,先定义父子组件,school是父组件,student是子组件。
School.vue父组件
-
props传值:父组件需要提前给子组件一个函数【getStudentName】,子组件用props声明接收那个函数【getStudentName】
-
注意:使用props属性时,需要使用冒号来区别传入的是双引号里面的内容还是字符串,这里我们传的是一个函数,因此需要用冒号去识别函数名
-
具体写法对应是:
<template>
	<div class="school">
    <h1>父组件:Schoolh1>
    <Student :getStudentName="getStudentName"/>
    <h1>子组件Student传过来的值:{{ StudentName }}h1>
	div>
template>

<script>
import Student from './Student';
export default {
	name: 'School',
    components: {Student},
	data() {
		return {
           StudentName:'',
		};
	},
	methods: {
    getStudentName(name){
      console.log('School收到了学生名:',name)
      this.StudentName= name
    }
  },
};
script>

<style scoped>
.school {
	background-color: rgb(73, 192, 150);
}
style>
Student.vue子组件
-
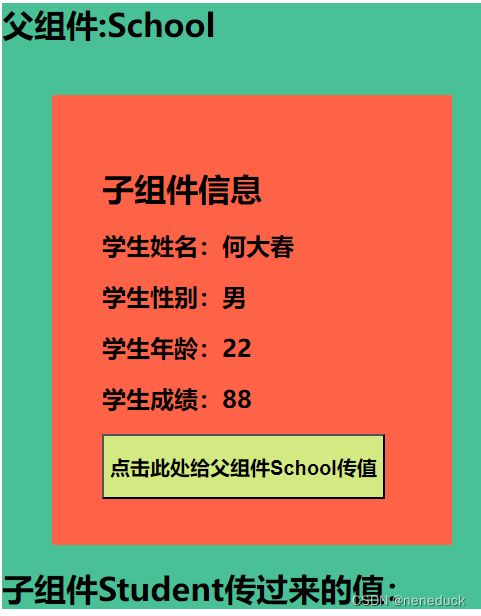
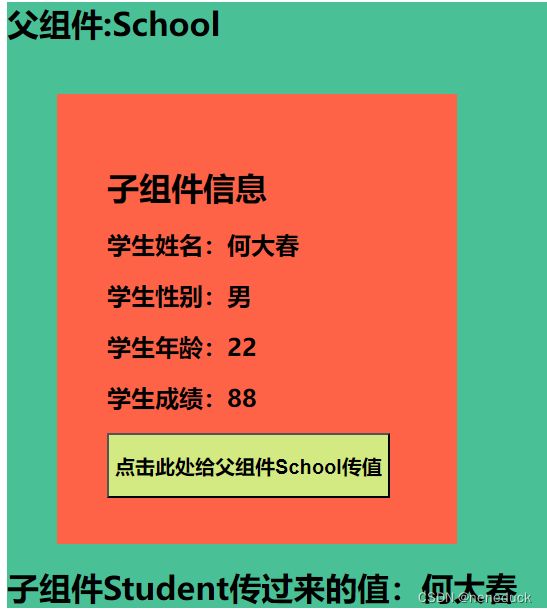
首先需要用props声明接收父组件传的函数【getStudentName】。然后给按钮添加点击事件,通过点击来触发点击事件,从而调用sendStudentlName(name)方法【
带参数:子组件中的参数name: '何大春'】,在该方法中调用已经声明过的父组件中的函数getStudentName(Studentname),并传入你要传递的数据参数,这就已经实现子组件向父组件传参,最后将该参数在父组件的模板中展示出来即可。 -
props子组件给父组件传递数据的过程就是:
- 子组件通过调用父组件传过来接收子组件数据的方法,来实现子组件数据向父组件的传递。
<template>
	<div class="student">
    <h1>子组件信息h1>
		<h2>学生姓名:{{ name }}h2>
		<h2>学生性别:{{ sex }}h2>
		<h2>学生年龄:{{ age }}h2>
		<h2>学生成绩:{{ score }}h2>

		<button class="haha" @click="sendStudentlName(name)"><h2>点击此处给父组件School传值h2>button>
	div>
template>

<script>
export default {
	name: 'Student',
  props:['getStudentName'],
	data() {
		return {
			name: '何大春',
			sex: '男',
			age: '22',
			score: '88',
		};
	},
	methods: {
    // 这里的Studentname就是name,别搞混了,我随便命名的
		sendStudentlName(Studentname) {
         // 调用父组件中的函数,并把子组件中的参数name传给父组件
         this.getStudentName(Studentname)
    },
	},
};
script>

<style lang="less" scoped>
.student {
	background-color: tomato;
	padding: 50px;
	margin-top: 50px;
	margin-left: 50px;
	width: 300px;
	height: 350px;
}
.h2 {
  padding: 5px;
  margin: 5px 5px 5px 5px;
}
.haha {
  background-color: rgb(211, 233, 130);
}
style>
App.vue组件
<template>
  <div>
    <School/>
  div>
template>

<script>
import School from "./components/School";
export default {
	name: 'App',
  components: {School},
	data() {
		return {};
	},
};
script>
界面展示:
(2)利用组件自定义事件实现父子传值
组件自定义事件需要用到v-on,也就是v-on在谁身上,就是在谁的组件实例上绑定了事件。
-
①在父组件School中给子组件Student绑定一个自定义事件getName
<Student v-on:getName="getStudentName"/> -
②如何触发自定义事件getName:在谁身上定义的就找谁触发,所以,我们需要找子组件的实例对象VC触发
- 在子组件Student的实例对象上去,触自定义事件
getName:this.$emit('getName',参数1,...,参数n)
- 在子组件Student的实例对象上去,触自定义事件
-
子组件传入参数。不传参数就是单纯的触发父组件对应的函数。
sendStudentlName() { // 触发自定义事件getName,并把子组件中的参数name传给父组件 this.$emit('getName',this.name,this.age,this.score) }, -
父组件接收子组件的参数
	methods: {
/*     getStudentName(name,age,score){
      console.log('School收到了学生名:',name,age,score)
      this.StudentName= name
    } */
    // 可以传多个参数【...params】
    getStudentName(name,...params){
      console.log('School收到了学生名:',name,params)
      // School收到了学生名: 何大春 (2) ['22', '88']
      this.StudentName= name
      this.StudentAge = params[0]
    }
  },
完整代码:
School.vue父组件【样式不变,还是上面的样式】
<template>
	<div class="school">
    <h1>父组件:Schoolh1>

    <Student v-on:getName="getStudentName"/>
    <h1>子组件Student传过来的name:{{ StudentName }}h1>
    <h1>子组件Student传过来的age:{{ StudentAge }}h1>
	div>
template>

<script>
import Student from './Student';
export default {
	name: 'School',
  components: {Student},
	data() {
		return {
      StudentName:'',
      StudentAge:'',
		};
	},
	methods: {
/*     getStudentName(name,age,score){
      console.log('School收到了学生名:',name,age,score)
      this.StudentName= name
    } */
    // 可以传多个参数【...params】
    getStudentName(name,...params){
      console.log('School收到了学生名:',name,params)
      // School收到了学生名: 何大春 (2) ['22', '88']
      this.StudentName= name
      this.StudentAge = params[0]
    }
  },
};
script>
Student.vue子组件
<template>
	<div class="student">
    <h1>子组件信息h1>
		<h2>学生姓名:{{ name }}h2>
		<h2>学生性别:{{ sex }}h2>
		<h2>学生年龄:{{ age }}h2>
		<h2>学生成绩:{{ score }}h2>


		<button class="haha" @click="sendStudentlName()">
      <h2>点击此处给父组件School传值h2>button>
	div>
template>

<script>
export default {
	name: 'Student',
	data() {
		return {
			name: '何大春',
			sex: '男',
			age: '22',
			score: '88',
		};
	},
	methods: {
    // 这里的Studentname就是name,别搞混了,我随便命名的
/*     sendStudentlName(Studentname) {
      // 触发自定义事件getName,并把子组件中的参数name传给父组件
      this.$emit('getName',Studentname)
    }, */
		sendStudentlName() {
      // 触发自定义事件getName,并把子组件中的参数name传给父组件
      console.log("发送数据")
      this.$emit('getName',this.name,this.age,this.score)
    },
	},
};
script>
- 【简写】:v-on的简写形式就是@
(3)利用ref实现父子传值
ref相当于一个组件的标识,可以直接拿到该组件的实例对象。
-
ref 加在子组件上,用
this.$refs.(ref值)获取到的是组件实例vc,可以使用组件的所有方法和属性。<Student ref="studentRef"/> -
如何通过ref去绑定自定义事件:通过**$on**
// 当父组School件挂载完毕时,通过$on去绑定自定义事件,以及调用的函数。 mounted() { this.$refs.studentRef.$on('getName',this.getStudentName) // 自定义事件只触发一次 // this.$refs.studentRef.$once('getName',this.getStudentName) }, -
好处是:虽然麻烦但灵活性强,比如我们想3秒之后再调用这个事件我们可以直接添加一个定时器:
// 3s之前,不会触发;3秒钟过后,才能触发该自定义事件
    setTimeout(() => {
      this.$refs.studentRef.$on('getName',this.getStudentName)
    }, 3000);
只想触发一次函数,怎么办?
-
第一种ref形式,将
$on,改为$once// 自定义事件只触发一次 this.$refs.studentRef.$once('getName',this.getStudentName) -
第二种 自定义事件的,添加once修饰符
<Student v-on:getName.once="getStudentName"/>
完整代码:
School.vue父组件【样式不变,还是上面的样式】
<template>
	<div class="school">
    <h1>父组件:Schoolh1>


    <Student ref="studentRef"/>
    <h1>子组件Student传过来的name:{{ StudentName }}h1>
    <h1>子组件Student传过来的age:{{ StudentAge }}h1>
	div>
template>

<script>
import Student from './Student';
export default {
	name: 'School',
  components: {Student},
	data() {
		return {
      StudentName:'',
      StudentAge:'',
		};
	},
	methods: {
/*     getStudentName(name,age,score){
      console.log('School收到了学生名:',name,age,score)
      this.StudentName= name
    } */
    // 可以传多个参数【...params】
    getStudentName(name,...params){
      console.log('School收到了学生名:',name,params)
      // School收到了学生名: 何大春 (2) ['22', '88']
      this.StudentName= name
      this.StudentAge = params[0]
    }
  },
  // 当父组件挂载完毕时,通过$on去绑定自定义事件,以及调用的函数。
  mounted() {
    // 3s之前,不会触发;3秒钟过后,才能触发该自定义事件
    /* setTimeout(() => {
      this.$refs.studentRef.$on('getName',this.getStudentName)
    }, 3000); */
    this.$refs.studentRef.$on('getName',this.getStudentName)
    // 事件只触发一次
    // this.$refs.studentRef.$once('getName',this.getStudentName)
  },
};
script>
Student.vue子组件
<template>
	<div class="student">
    <h1>子组件信息h1>
		<h2>学生姓名:{{ name }}h2>
		<h2>学生性别:{{ sex }}h2>
		<h2>学生年龄:{{ age }}h2>
		<h2>学生成绩:{{ score }}h2>


		<button class="haha" @click="sendStudentlName()">
      <h2>点击此处给父组件School传值h2>button>
	div>
template>

<script>
export default {
	name: 'Student',
	data() {
		return {
			name: '何大春',
			sex: '男',
			age: '22',
			score: '88',
		};
	},
	methods: {
    // 这里的Studentname就是name,别搞混了,我随便命名的
/*     sendStudentlName(Studentname) {
      // 触发自定义事件getName,并把子组件中的参数name传给父组件
      this.$emit('getName',Studentname)
    }, */
		sendStudentlName() {
      // 触发自定义事件getName,并把子组件中的参数name传给父组件
      console.log("发送数据")
      this.$emit('getName',this.name,this.age,this.score)
    },
	},
};
script>
只想触发一次函数,怎么办?
-
第一种ref形式,将
$on,改为$once// 自定义事件只触发一次 this.$refs.studentRef.$once('getName',this.getStudentName) -
第二种 自定义事件的,添加once修饰符
<Student v-on:getName.once="getStudentName"/>
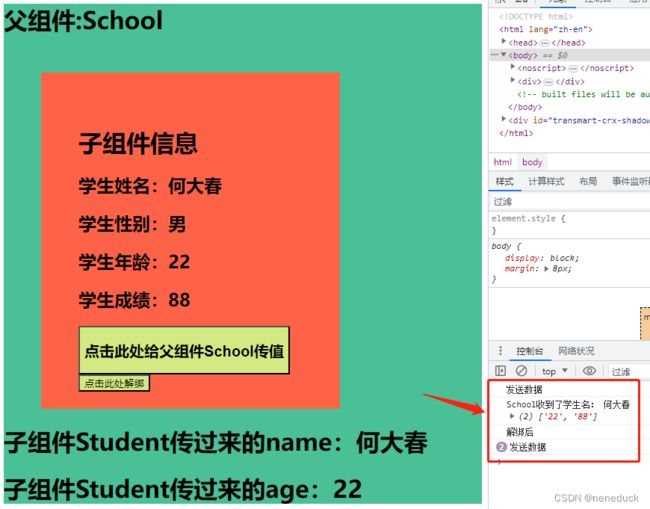
自定义事件,怎么解绑?
-
【解绑单个事件】在子组件Student中定义一个解绑按钮。
<button class="haha" @click="unbind">点击此处解绑button> -
在子组件的methods中配置,解绑单个自定义事件。
// 解绑自定义事件:getName
    unbind(){
      console.log("解绑后");
      this.$off('getName')
    }
-
【解绑多个自定义事件】
-
定义两个自定义事件:getName,getAge
this.$refs.studentRef.$on('getName',this.getStudentName) this.$refs.studentRef.$on('getAge',this.getStudentAge) -
解绑多个事件:
// 解绑自定义事件:getName unbind(){ console.log("解绑后"); // 解绑多个事件 this.$off(['getName','getAge']) // 解绑多个事件 // this.$off() } -
解绑全部事件:
 // 解绑全部事件
  this.$off()
-
完整代码:
School.vue
<template>
	<div class="school">
    <h1>父组件:Schoolh1>


    <Student ref="studentRef"/>
    <h1>子组件Student传过来的name:{{ StudentName }}h1>
    <h1>子组件Student传过来的age:{{ StudentAge }}h1>
	div>
template>

<script>
import Student from './Student';
export default {
	name: 'School',
  components: {Student},
	data() {
		return {
      StudentName:'',
      StudentAge:'',
		};
	},
	methods: {
/*     getStudentName(name,age,score){
      console.log('School收到了学生名:',name,age,score)
      this.StudentName= name
    } */
    // 可以传多个参数【...params】
    getStudentName(name,...params){
      console.log('School收到了学生名:',name,params)
      // School收到了学生名: 何大春 (2) ['22', '88']
      this.StudentName= name
      // this.StudentAge = params[0]
    },
    getStudentAge(age){
      console.log('School收到了学生age:',age)
      // School收到了学生名: 何大春 (2) ['22', '88']
      this.StudentAge=age
      // this.StudentAge = params[0]
    }
  },
  // 当父组件挂载完毕时,通过$on去绑定自定义事件,以及调用的函数。
  mounted() {
    // 3s之前,不会触发;3秒钟过后,才能触发该自定义事件
    /* setTimeout(() => {
      this.$refs.studentRef.$on('getName',this.getStudentName)
    }, 3000); */
    this.$refs.studentRef.$on('getName',this.getStudentName)
    this.$refs.studentRef.$on('getAge',this.getStudentAge)
    // 事件只触发一次
    // this.$refs.studentRef.$once('getName',this.getStudentName)
  },
};
script>

<style scoped>
.school {
	background-color: rgb(73, 192, 150);
}
style>
Student.vue
<template>
	<div class="student">
    <h1>子组件信息h1>
		<h2>学生姓名:{{ name }}h2>
		<h2>学生性别:{{ sex }}h2>
		<h2>学生年龄:{{ age }}h2>
		<h2>学生成绩:{{ score }}h2>


		<button class="haha" @click="sendStudentlName()">
    点击此处给父组件School传Namebutton>
    <button class="haha" @click="sendStudentlAge()">
    点击此处给父组件School传Agebutton>
    <button class="heihei" @click="unbind"><h2>点击此处解绑h2>button>
	div>
template>

<script>
export default {
	name: 'Student',
	data() {
		return {
			name: '何大春',
			sex: '男',
			age: '22',
			score: '88',
		};
	},
	methods: {
    // 这里的Studentname就是name,别搞混了,我随便命名的
/*     sendStudentlName(Studentname) {
      // 触发自定义事件getName,并把子组件中的参数name传给父组件
      this.$emit('getName',Studentname)
    }, */
		sendStudentlName() {
      // 触发自定义事件getName,并把子组件中的参数name传给父组件
      console.log("发送数据")
      this.$emit('getName',this.name,this.age,this.score)
    },
    sendStudentlAge() {
      // 触发自定义事件getName,并把子组件中的参数name传给父组件
      console.log("发送数据")
      this.$emit('getAge',this.age)
    },

    // 解绑自定义事件:getName
    unbind(){
      console.log("解绑后");
      // 解绑单个事件
      // this.$off('getName')
      // 解绑多个事件
      // this.$off(['getName','getAge'])
      // 解绑多个事件
      this.$off()
    },
	},
};
script>

<style lang="less" scoped>
.student {
	background-color: tomato;
	padding: 20px;
	margin-top: 20px;
	margin-left: 50px;
	width: 300px;
	height: 400px;
}
.h2 {
  padding: 5px;
  margin: 5px 5px 5px 5px;
}
.haha {
  background-color: rgb(211, 233, 130);
}
.heihei{
  background-color: aquamarine;
}
style>
-
【销毁组件实例】:
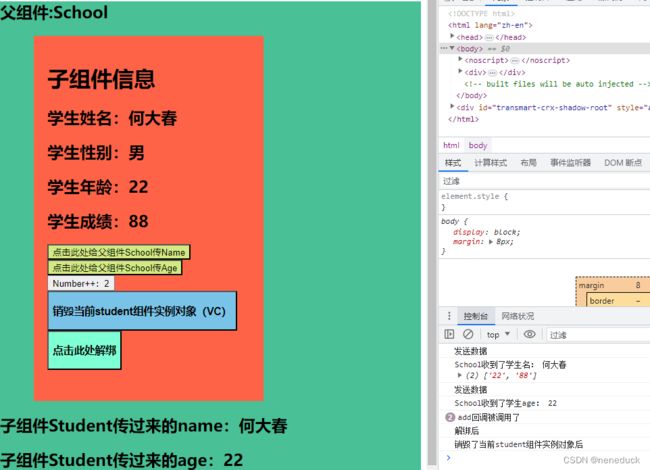
this.$destroy()生命周期钩子销毁了当前的组件实例,组件上事件监听没了,自定义事件也不奏效,但是,注意:原生DOM也销毁了。<button @click="add">Number++:{{ number }}button> <button class="hehe" @click="death"><h3>销毁当前student组件实例对象(VC)h3>button>add(){ console.log("add回调被调用了"); this.number++ }, // 销毁Student组件实例 death(){ // 销毁了当前student组件实例对象(VC) console.log("销毁了当前student组件实例对象后"); this.$destroy() }, -
如果vm被销毁了,那么,vm里面的所有子组件都会被销毁。
不管子组件,父组件,还是App,vm组件哪一个被销毁了,下图界面中的按钮不管如何点击,都是没有反映的。
完整代码:
School.vue
School.vue父组件代码不变。
Student.vue
<template>
<div class="student">
<h1>子组件信息h1>
<h2>学生姓名:{{ name }}h2>
<h2>学生性别:{{ sex }}h2>
<h2>学生年龄:{{ age }}h2>
<h2>学生成绩:{{ score }}h2>
<button class="haha" @click="sendStudentlName()">
点击此处给父组件School传Namebutton>
<button class="haha" @click="sendStudentlAge()">
点击此处给父组件School传Agebutton>
<button @click="add">Number++:{{ number }}button>
<button class="hehe" @click="death"><h3>销毁当前student组件实例对象(VC)h3>button>
<button class="heihei" @click="unbind"><h3>点击此处解绑h3>button>
div>
template>
<script>
export default {
name: 'Student',
data() {
return {
name: '何大春',
sex: '男',
age: '22',
score: '88',
number:0
};
},
methods: {
// 这里的Studentname就是name,别搞混了,我随便命名的
/* sendStudentlName(Studentname) {
// 触发自定义事件getName,并把子组件中的参数name传给父组件
this.$emit('getName',Studentname)
}, */
sendStudentlName() {
// 触发自定义事件getName,并把子组件中的参数name传给父组件
console.log("发送数据")
this.$emit('getName',this.name,this.age,this.score)
},
sendStudentlAge() {
// 触发自定义事件getName,并把子组件中的参数name传给父组件
console.log("发送数据")
this.$emit('getAge',this.age)
},
add(){
      console.log("add回调被调用了");
      this.number++
    },
    // 销毁Student组件实例
death(){
      // 销毁了当前student组件实例对象(VC)
      console.log("销毁了当前student组件实例对象后");
      this.$destroy()
    },
// 解绑自定义事件:getName
unbind(){
console.log("解绑后");
// 解绑单个事件
// this.$off('getName')
// 解绑多个事件
// this.$off(['getName','getAge'])
// 解绑多个事件
this.$off()
},
},
};
script>
<style lang="less" scoped>
.student {
background-color: tomato;
padding: 20px;
margin-top: 20px;
margin-left: 50px;
width: 300px;
height: 500px;
}
.h2 {
padding: 5px;
}
.haha {
background-color: rgb(211, 233, 130);
}
.heihei{
background-color: aquamarine;
}
.hehe{
background-color: rgb(121, 195, 232);
}
style>
总结:
-
一种组件间通信的方式,适用于:子组件 ===> 父组件
-
使用场景:A是父组件,B是子组件,B想给A传数据,那么就要在A中给B绑定自定义事件(事件的回调在A中)。
-
绑定自定义事件:
-
第一种方式,在父组件中:
-
第二种方式,在父组件中:
<Demo ref="demo"/> ...... mounted(){ this.$refs.xxx.$on('getName',this.test) }- 若想让自定义事件只能触发一次,可以使用
once修饰符,或$once方法。
-
-
触发自定义事件:
this.$emit('getName',数据) -
解绑自定义事件
this.$off('getName') -
组件上也可以绑定原生DOM事件,需要使用
native修饰符。 -
注意:通过
this.$refs.xxx.$on('getName',回调函数)绑定自定义事件时,回调要么配置在methods中,要么用箭头函数,否则this指向会出问题!
ground-color: rgb(121, 195, 232);
}
---
#### 总结:
1. 一种组件间通信的方式,适用于:子组件 ===> 父组件
2. 使用场景:A是父组件,B是子组件,B想给A传数据,那么就要在A中给B绑定自定义事件(事件的回调在A中)。
3. 绑定自定义事件:
- 第一种方式,在父组件中:```- 若想让自定义事件只能触发一次,可以使用
once修饰符,或$once方法。
-
触发自定义事件:
this.$emit('getName',数据) -
解绑自定义事件
this.$off('getName') -
组件上也可以绑定原生DOM事件,需要使用
native修饰符。 -
注意:通过
this.$refs.xxx.$on('getName',回调函数)绑定自定义事件时,回调要么配置在methods中,要么用箭头函数,否则this指向会出问题!


