AppSmith(安装与练习4套)
AppSmith官网文档:
https://docs.appsmith.com/getting-started/setup/installation-guides/docker
安装前需要已经安装好docker,需要版本如下:
Docker ( 20.10.7或者更高)
Docker-Compose ( 1.29.2或者更高)
安装Appsmith:
准备docker-compose.yml文件:
version: "3"

services:
  appsmith:
    image: index.docker.io/appsmith/appsmith-ce
    container_name: appsmith
    ports:
      - "80:80"
      - "443:443"
    environment:
      - APPSMITH_ALLOWED_FRAME_ANCESTORS="'self' http://trusted-other.com http://*.mycompany.com"
    volumes:
      - ./stacks:/appsmith-stacks
    restart: unless-stopped
    # Uncomment the lines below to enable auto-update
    #labels:
    #  com.centurylinklabs.watchtower.enable: "true"

  #auto_update:
  #  image: containrrr/watchtower
  #  volumes:
  #    - /var/run/docker.sock:/var/run/docker.sock
  #  # Update check interval in secondsversion: "3"

services:
  appsmith:
    image: index.docker.io/appsmith/appsmith-ce
    container_name: appsmith
    ports:
      - "80:80"
      - "443:443"
    environment:
      - APPSMITH_ALLOWED_FRAME_ANCESTORS="'self' http://trusted-other.com http://*.mycompany.com"
    volumes:
      - ./stacks:/appsmith-stacks
    restart: unless-stopped
    # Uncomment the lines below to enable auto-update
    #labels:
    #  com.centurylinklabs.watchtower.enable: "true"

  #auto_update:
  #  image: containrrr/watchtower
  #  volumes:
  #    - /var/run/docker.sock:/var/run/docker.sock
  #  # Update check interval in seconds.
  #  command: --schedule "0 0 * ? * *" --label-enable --cleanup
  #  restart: unless-stopped
  #  depends_on:
  #    - appsmith
  #  environment:
  #    - WATCHTOWER_LIFECYCLE_HOOKS=true.
  #  command: --schedule "0 0 * ? * *" --label-enable --cleanup
  #  restart: unless-stopped
  #  depends_on:
  #    - appsmith
  #  environment:
  #    - WATCHTOWER_LIFECYCLE_HOOKS=true
通过运行以下命令启动 Docker 容器。如果用户无法访问,docker这可能需要使用 sudo 运行。docker-compose如果镜像在本地不存在,此命令将下载必要的 Docker 镜像并启动容器
linux> docker-compose up -d
清理关闭appsmith:
linux> docker-compose down
此命令下载图像并启动 Appsmith:
linux> docker run -d --name appsmith -p 80:80 -v "$PWD/stacks:/appsmith-stacks" --pull always appsmith/appsmith-ce
更新
要手动更新 Appsmith,请转到安装的根目录并运行以下命令:
linux> docker rmi appsmith/appsmith-ce -f
linux> docker pull appsmith/appsmith-ce
linux> docker rm -f appsmith
linux> docker run -d --name appsmith -p 80:80 -v "$PWD/stacks:/appsmith-stacks" appsmith/appsmith-ce
下载完成后,服务器应该很快就会启动。可以在Docker 日志中验证它是否正常工作。
以使用以下命令跟踪日志:
linux> docker logs -f appsmith
服务器日志存储在stacks/logs/backend/backend.log.
日志可以在调试或分析问题时提供帮助,因为它们提供了有关问题所在的宝贵信息。有关详细信息,请参阅如何获取容器日志。
重启:
如果 Docker 容器无法重新启动,请下载并运行restart-container.sh下面链接的脚本来启动它们:
https://docs.appsmith.com/assets/files/restart-container-883f911b6163479131f70ab231412974.sh
将脚本 ( restart-container.sh) 复制到安装文件夹并使其可执行:
linux>chmod +x restart-container.sh
linux>./restart-container.sh
查看端口:
linux> netstat -anpt
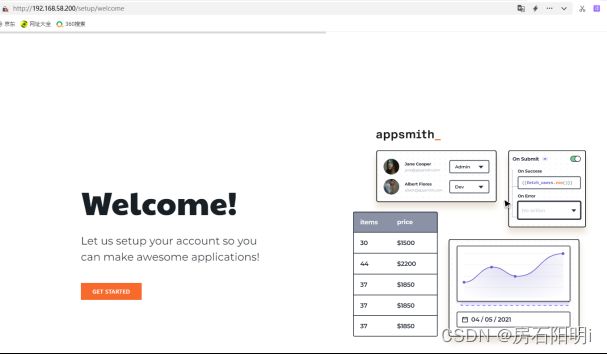
https://localhost:80
BUTTON 按钮
–CONTENT
-Label(“改名字”)
-onClick 可以进行一些行为上的操作触发
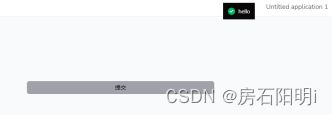
例1:点击按钮后反馈信息
设置按钮onClick类型选择show message
Message内容:hello
Type:Success

制作完成后点击DEPLOY进行发布
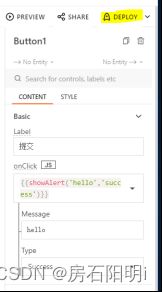
制作完成后点击DEPLOY进行发布
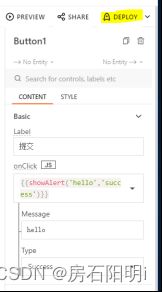
完成后结果:
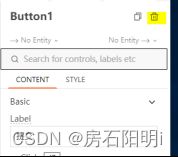
删除(点击最右边的小垃圾桶即可)
例2:连接数据库查看表与按钮集合
创建后内默认有数据,将其全部清空
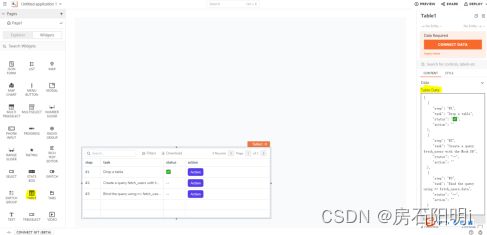
修改字段名称不够就选择ADD 添加字段,让字段与要展示的表字段一致

连接mysql数据库读取表

输入mysql连接信息点击test进行测试检查连通,测试通过后再点击SAVE保存

创建查询请求
在Queries/JS下点击ADD QUERY/JS选择Select 建立查询请求
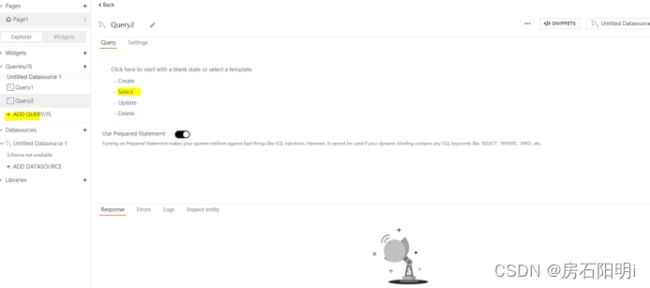
在Query内输入查询sql点击RUN运行下方会展示结果
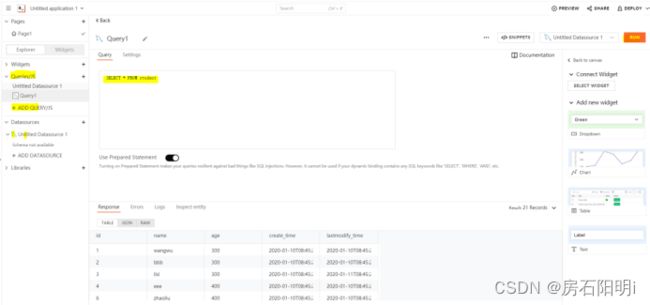
完成后点击CONTENT下的Table Datan内输入双括号{{}} 填写Query1.data(刚刚创建的连接名字)

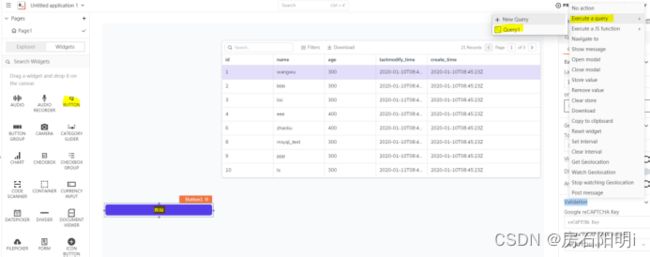
与按钮结合
将按钮BUTTON拖入画布中,点击CONTENT下的onClick点击Execute a query选择Query1,之后即可通过点击画布中的‘查询’按钮来查询画布中的表,数据发生改变可以看到变化
例3:制作登陆界面
修改页面名字Edit name,将CONTAINER容器拖入画布中高度可以选择Fixed手动调节
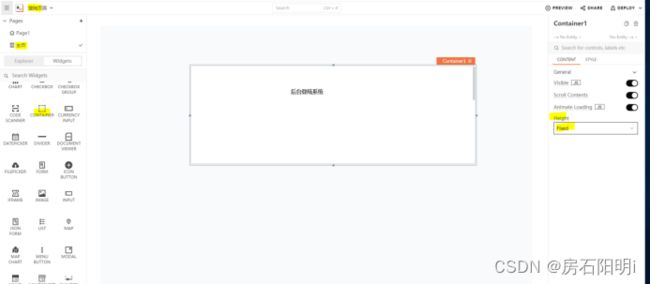
容器内加入TEXT内输入文本
INPUT插入输入框
BUTTON插入按钮
点击第一个INPUT插入框CONTENT下选Data Type选择Email
Placeholder提示“例:邮箱”
Error Message返回报错:“例:邮箱格式错误”
点击第二个INPUT插入框CONTENT下选Data Type选择Password

创建API
在Queries/JS下点击New Blank API

例4:图表可视化搭建
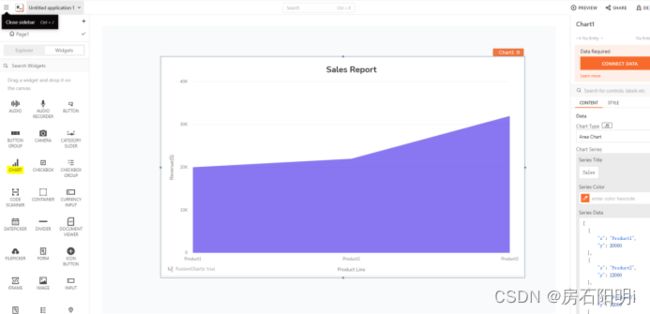
将“CHART” 拖入画布中
访问图表官网:
https://www.fusioncharts.com
打开后点击Developers->FusionCharts Suite XT
API Reference->Attributes->Chart Attributes

https://www.fusioncharts.com/dev/chart-attributes/cylinder
复制框内的代码

将代码粘贴到AppSmith中的CHART下Custom Fusion Chart,并修改type类型
类型是网站中显示的JavaScript alias: cylinder的cylinder

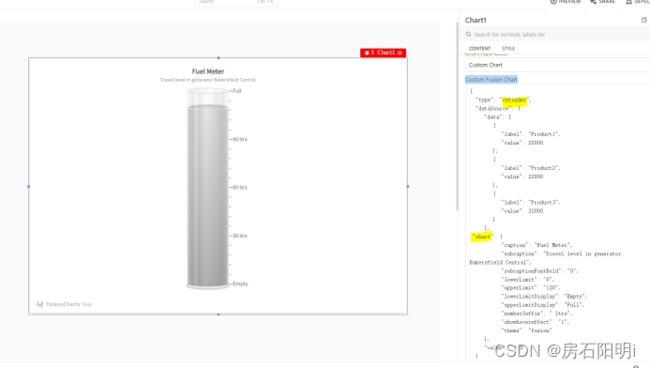
修改图形属性: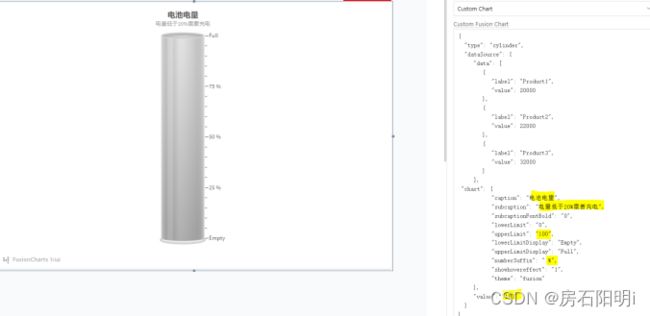
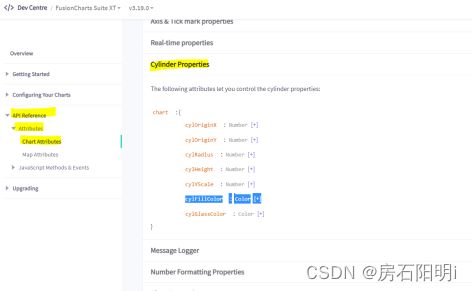
在FusionCharts中Cylinder Properties里复制cylFillColor : Color [+] 来修改图像颜色
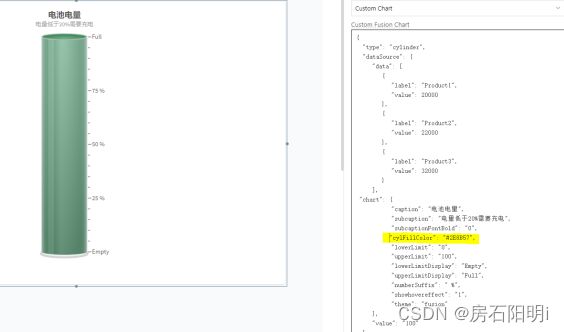
颜色码对照表网址:
https://www.sioe.cn/yingyong/yanse-rgb-16/
复制好想要颜色的十六进制码再修改图像属性
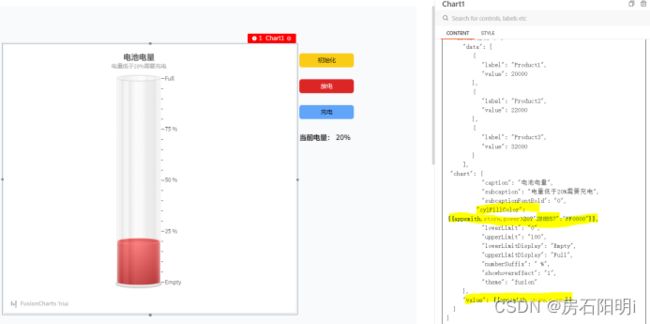
将“BUTTON”和“TEXT”拖入画布修改名称和颜色
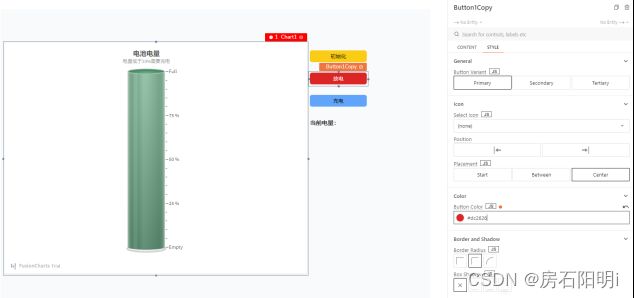
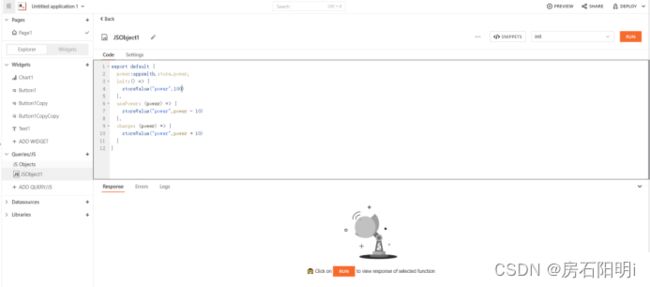
因为文本内要输出当前电量需要实时获取值,需要创建JS Object
Queries/JS–>New JS Object
编写JSObject设置变量power、init、usePower、charge
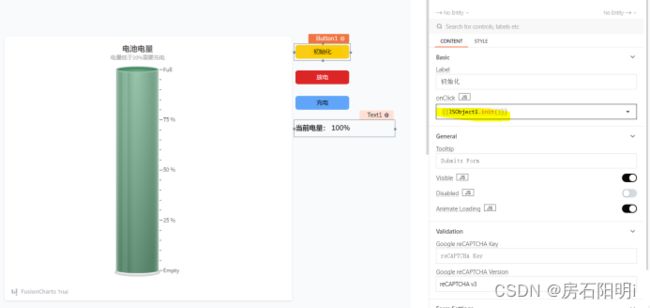
修改按钮属性点击onClick旁的JS将绑定创建好的JSobject 在()内传参
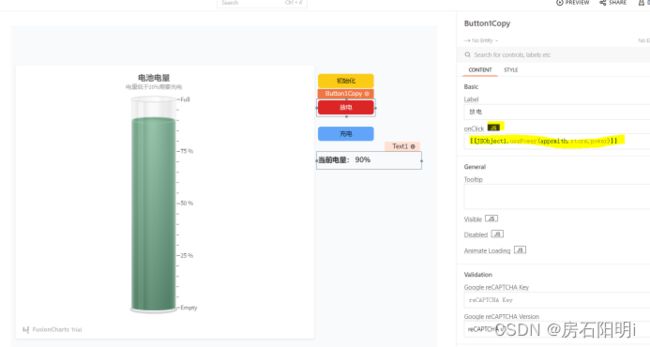

修改图形属性,设置cylFillColor做判断如果小于20将变色
修改value值 将值设为变量实时获取
错误处理:
报错:docker: Error response from daemon: Conflict. The container name “/appsmith” is already in use by container “f7c17ba24d068f10e42b199f3624ac0d321b2f484e5763f6ac4cdc0e4456b138”. You have to remove (or renam
e) that container to be able to reuse that name.See ‘docker run --help’.
解决办法:
systemctl status docker 查看服务状态
docker ps -a 查看docker容器信息
docker restart dockerID或容器名 重启服务
如果需要删除则docker rm dockerID或容器名

