uniapp小程序的getsysteminfo_小程序(uniapp)两分钟教你调起微信支付!
什么是uni-app?
首先前文,为什么是用uni-app开发,而不是用微信原生的微信开发者工具,这里也就不过多解释了,因为uni-app能够快速达到敏捷开发的效果,(并且实现跨平台)写法上和Vue及其相似,容易上手,现阶段的很多公司、企业也慢慢的开始重视起这项技术,并在这项技术上有专项的开发小组!本期内容讲述在uni-app实际开发中,我们如何调起微信支付。在日常开发中,涉及到H5、小程序、基本上就会涉及到微信支付,那么如何在uni-app里面实现快速调起微信支付?
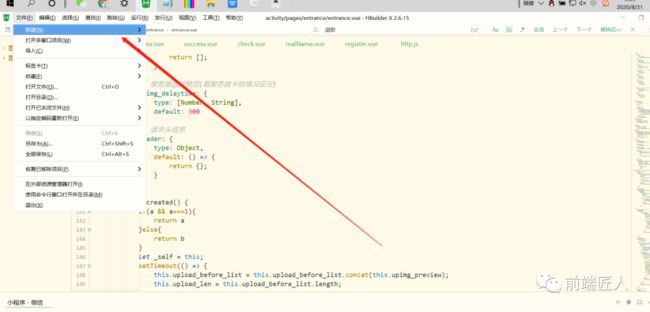
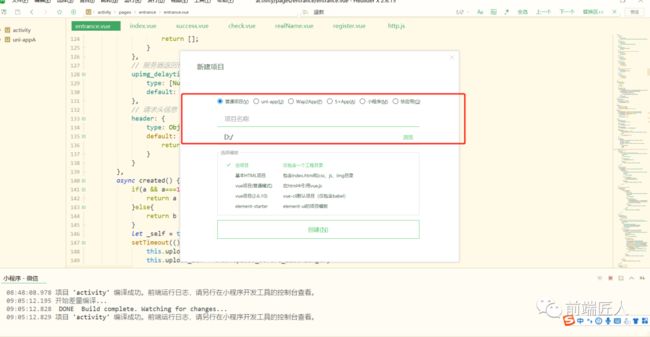
①、新建一个项目,安装插件及配置运行到小程序开发工具!填写你的项目名称
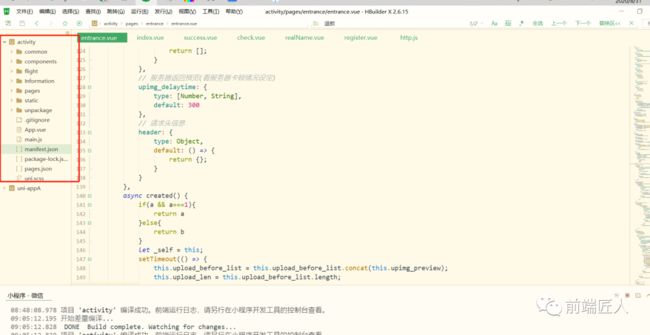
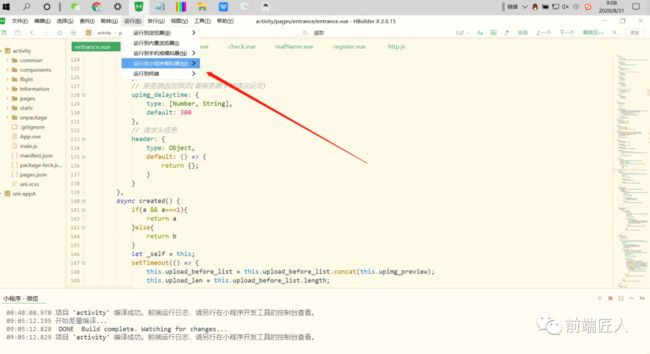
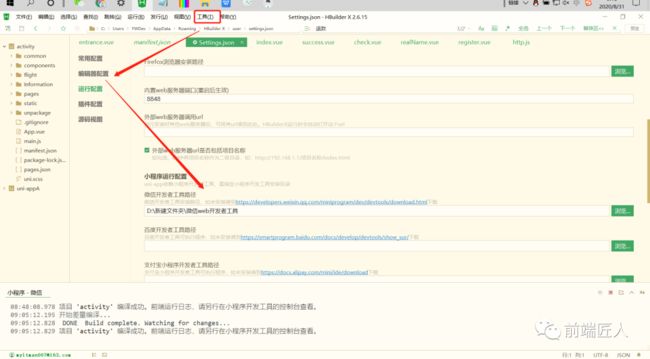
点击新建之后,你就会出现以下目录! 此时启动你的项目 点击运行到小程序模拟器--微信开发者工具注意:启动项目时如果你发现报错,那就是你的插件依赖注入没植入进去,点击工具插件安装,检查报错信息看看需要安装哪些插件!其次需要注意配置运行配置,工具--运行配置---你安装的微信开发者存放的路径!
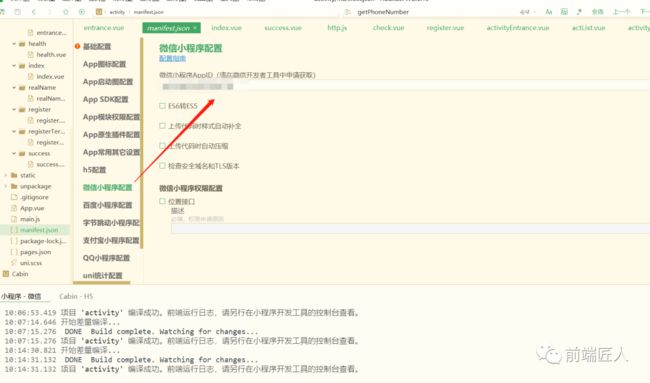
此时已正常启动项目并在微信开发者工具浏览! ②、找到manifest文件----微信小程序配置将自己的AppID贴上 这一步一定要做! ③、进入调起支付代码块!通过wx.login 获取到Code拿到openid 及 SessionKey!
通过按钮出发手机授权,拿到加密的用户信息,调起后台获取用户信息接口!
获取到用户信息,完成静默授权!
再次调起wx.login 获取到用户信息后 ,调起后台给的wx下单接口。
获取到后端的下单的接口成功返回对应的参数,使用requestPayment方法将order接口返回的参数填入 wx.requestPayment( obj ) 调起支付
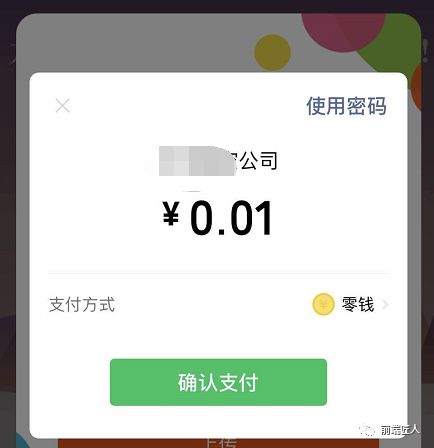
调起支付成功!
html代码块
//手机号授权
"!buttons && !checkedData " open-type="getPhoneNumber" @getphonenumber="getPhoneNumber" class="Opening">
     立即购买


  "ToPay" v-if="ToPayStatus" :class="ToPayStatus?'indexStyle':''">"ToPay-top">"color:#ED0B0B;margin-left: 20upx;">¥599"goTo" @click="GoToPay">去支付
①这一步 是因为获取手机号的时候我需要用到openid SessionKey,
通过SessionKey来判断是否过期!因为这个项目实际上并没有用到SessionKey默认就是手机号登陆及视为授权,如果需要判断 根据个人的业务逻辑来做即可!
// 授权获取SessionKey和用户的信息
   getSessionKey(){
     wx.login({
      success: (res) => {
       if (res.code) {
          uni.request({
        url: `${this.Interfaces}crm/api/wxpay/product/code2Session`,
        method:'GET',
        data:{
         code:res.code
        },
        success: (cts) => { //拿到openid和session
         this.entranceData.openid = cts.data.data.openid;
         this.entranceData.sessionKey = cts.data.data.session_key;
        },
         fail(err) {
          uni.showToast({title: err,icon: 'none'});
         }
          });
       } else {
        console.log('登录失败!' + res.errMsg)
       }
      }
     })
   },
这里是请求头,对数据进行加密处理的操作!通过MD5加密,因为下面代码块我需要用到!
// 设置请求头
   getHeader(){
    let time = dateFormat("YYYY-mm-dd HH:MM:SS",new Date())
    let appId  = 'wx-mini'
    let appKey = 'wx-minkey'
    let sign = md5( appId + appKey + time ).toLocaleUpperCase()
    return {
     timestamp:time,
     appId,
     sign
    }
   },
②点击开通做的是一个静默授权登录的功能!
// 点击立即开通
   getPhoneNumber(e){
    uni.showLoading({
        title: '加载中'
    });
    uni.request({ //获取到用户的信息通过后端解码才能拿到真是用户信息及手机号
     url: `${this.Interfaces}crm/api/wxpay/product/decode`,
     method:'POST',
     data:{ //为什么要这样做 因为要将加密的用户信息传入后台,后台返回真实用户信息!
      "appId":"appid(唯一的)",
      "sessionKey":this.entranceData.sessionKey,
      "encryptedData":e.detail.encryptedData,
      "iv":e.detail.iv
     },
     success: (res) => {
      let phoneNumber = res.data.data.phoneNumber;
      uni.request({ //将真实手机号发送给后端做自动登录功能
       url: `${this.Interfaces}crm/api/member/account/login/cellphone`,
       method:'POST',
       header:this.getHeader(),
       data:{
         "cellPhone":phoneNumber
       },
       success: (res) => {
        uni.hideLoading();
        // console.log(res.data.data,"数据11111")
        let entranceToken = res.data.data.token;
        let realNameState = res.data.data.memberBaseInfo.realNameState;
        if(entranceToken && realNameState == "1"){ //授权判断用户是否登录了且实名认证过
         this.modulStauts = true; //判断完成 打开支付按钮!
        }else {
         uni.navigateTo({
          url: '../realName/realName?name=goLogin'
         });
        }
       },
       fail(err) {
        uni.showToast({title: err,icon: 'none'});
       }
      });
     },
     fail(err) {
      uni.showToast({title: err,icon: 'none'});
     }
    });
   },
③支付按钮、调起支付
GoToPay(){ //支付按钮
    var that = this;
    uni.showLoading({
        title: '加载中'
    });
    uni.login({
     success(res) {
      uni.request({
       url: `${that.Interfaces}crm/api/wxpay/product/code2Session`,
       method:'GET',
       data:{
        code:res.code
       },
       success: (res) => {
         uni.request({
          url: `${that.Interfaces}crm/api/wxpay/product/order`,
          method:'POST',
          header:{
           memberId:uni.getStorageSync('entranceMemberID')
          },
          data:{
           openId:res.data.data.openid,
           evidenceUrl:that.upload_cache_list.toString(),
          },
          success: (res) => {
           let datas = res.data.data;
           let codes = res.data.code;
           if(codes == 500){
            uni.showToast({title: res.data.msg,icon: 'none'});
            return;
           }
             uni.requestPayment({
              provider: 'wxpay',
              timeStamp: datas.timeStamp,
              nonceStr: datas.nonceStr,
              package: datas.package,
              signType: datas.signType,
              paySign: datas.paySign,
              success: function (res) {
                 uni.hideLoading();
                 that.modulStauts =  false;
                 uni.showToast({title: that.msgObj.msgPayTo ,icon: 'none'});
                 uni.navigateTo({
                  url: "../entrance/entrance"
                 })
                 that.getOrderNumber();
              },
              fail: function (err) {
                 console.log(err,"sssssssss")
                 that.getOrderNumber();
                 uni.showToast({title: err,icon: 'none'});
                 uni.hideLoading();
                  }
             });
          },
        fail(err) {
             uni.showToast({title: err,icon: 'none'});
             uni.hideLoading();
            }
         });

       },
       fail(err) {
        uni.showToast({title: err,icon: 'none'});
        uni.hideLoading();
       }
      });
     },
     fail() {

     }
    })
   },
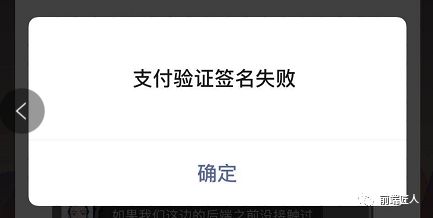
如果你调起支付是这样的,那是因为签名是需要签两次的,因为后台签名只签了一次,正常是需要签两次的,这个第二次签名通常是后台来做的,告诉你的后台支付签名失败,让他在签一次,前端也可以做这个签名,通过md5生成sign也是可以实现的,但一般是后台想偷懒的情况下,但他让你自己做你也可以做这个事情!
成功调起支付总结:支付流程大概的思想都一样、H5端也一样是类似的操作,唯一的区别是移动端项目如果不是用uni-app进行开发的话,我们需要额外引 weixin -jsapi 在调起后台接口才正式使用调起微信支付!
匠人持续更新~~

