Serverless 开发前端初尝试
Serverless 开发前端初尝试
啥是云开发
云开发serverless是一种模式,和传统模式的区别在于开发者不用维护服务器。服务器的日常维护, 负载均衡,扩容和减容, 运维,安全,日志等都交给了云开发服务提供商比如AWS Lambda,microsoft Azure,国内的微信等等。通常分为2类,Backend-as-a-Service (BaaS): 提供第三方服务比如鉴权,音频转文字之类的;开发者一般通过API调用。Function-as-a-Service (FaaS),serverless一般都是指Faas,开发者可以在本地编写服务端的逻辑,然后部署到云服务商提供的容器中。我们也可以开发一般serverless一半传统服务的应用
serverless app运行在哪里呢
云开发的应用部署在事件驱动的, 自动加载的容器中,比如用Knative for Kubernetes构建的Faas环境。Knative 是个开源的社区项目,可以在Kubernetes上创建容器镜像并在Kubernetes 平台上运行。
当代码运行时,服务商动态的分配资源给你,故当代码不再运行时,意味着你不用付钱。serverless容器有以下特点:
- Stateless, 易于数据整合
- 支持短时间内部署运行,释放,不需要永远占用资源
- 事件驱动,包括应用内事件,云服务事件等等
这样的特性比较适合开发一些应用如聊天机器人,日历等。
serverless app的缺点
- 云服务商对serverless 应用的规范限制
- 云服务商的标准差异导致的迁移成本
微信小程序云开发尝鲜
先进行各种前期的项目配置:
- 打开微信开发者工具,创建新项目
- 填写appid,勾选云开发,选择一个模板如:todolist
- 云开发实例没有的话创建一下
- (刚创建的云开发环境可能会有10min左右的时间不可用)
可以看到project.config.json有个cloudfunctionRoot表示云函数文件夹,开发工具中可以见到该文件夹有个特殊的图标

点击控制台查看云开发管理台:
包含运营分析面板,数据库,存储,云函数等面板
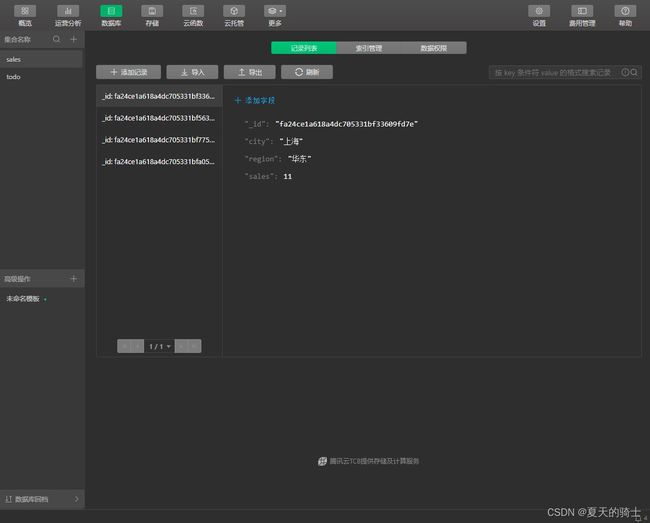
数据库
JSON格式的数据存储,每一条记录都是JSON对象, 有_id字段作为唯一标识字段。而且发现界面也跟之前用过的mongoDB的GUI设计十分相似,比较好上手。简单介绍下增删改查的语法:
add
db.collection('todos').add({
  // The data field represents the JSON data to add
  data: {
    // _id:'todo-identifiant-aleatoire', // You can choose a custom _id and use the one automatically assigned by the database in this scenario
    description: "learn cloud database",
    due: new Date("2018-09-01"),
    tags: [
      "cloud",
      "database"
    ],
    // Add a geographical location to the to-do (113°E, 23°N)
    location: new db.Geo.Point(113, 23),
    done: false
  },
  success: function(res) {
    // The res is an object with the _id field, marking the id of the record just created
    console.log(res)
  }
})

// 或者Promise式的写法

db.collection('todos').add({
  // The data field represents the JSON data to add
  data: {
    description: "learn cloud database",
    due: new Date("2018-09-01"),
    tags: [
      "cloud",
      "database"
    ],
    location: new db.Geo.Point(113, 23),
    done: false
  }
})
.then(res => {
  console.log(res)
})
get
db.collection('todos').doc(id).get({
  success: function(res) {
    // res.data contains the data of that record
    console.log(res.data)
  }
})

db.collection('todos').where({
  done: false
})
.get({
  success: function(res) {
    // res.data is an array containing the two records defined above
    console.log(res.data)
  }
})

db.collection('todos').get({
  success: function(res) {
    // res.data refers to the data of all records (no more than 20) to which the user has access permission in the collection
    console.log(res.data)
  }
})

// 然而云函数的查询最大记录数限制为100。。。
const cloud = require('wx-server-sdk')
cloud.init()
const db = cloud.database()
const MAX_LIMIT = 100
exports.main = async (event, context) => {
  // Get the total number of the collection records first
  const countResult = await db.collection('todos').count()
  const total = countResult.total
  // Calculate in how many times you can get it
  const batchTimes = Math.ceil(total / 100)
  // Carry all the promise arrays with read
  const tasks = []
  for (let i = 0; i < batchTimes; i++) {
    const promise = db.collection('todos').skip(i * MAX_LIMIT).limit(MAX_LIMIT).get()
    tasks.push(promise)
  }
  // Wait all
  return (await Promise.all(tasks)).reduce((acc, cur) => {
    return {
      data: acc.data.concat(cur.data),
      errMsg: acc.errMsg,
    }
  })
}
update
const _ = db.command // 这里是命令方法
db.collection('todos').doc('todo-identifiant-aleatoire').update({
  data: {
    // Indicates that the database automatically increases the field by 10
    progress: _.inc(10) // or 'doing';这个方法表示increased by 10;
  },
  success: function(res) {
    console.log(res.data)
  }
})
delete
// The async await syntax is used
const cloud = require('wx-server-sdk')
const db = cloud.database()
const _ = db.command

exports.main = async (event, context) => {
  try {
    return await db.collection('todos').where({
      done: true
    }).remove()
  } catch(e) {
    console.error(e)
  }
}
云函数
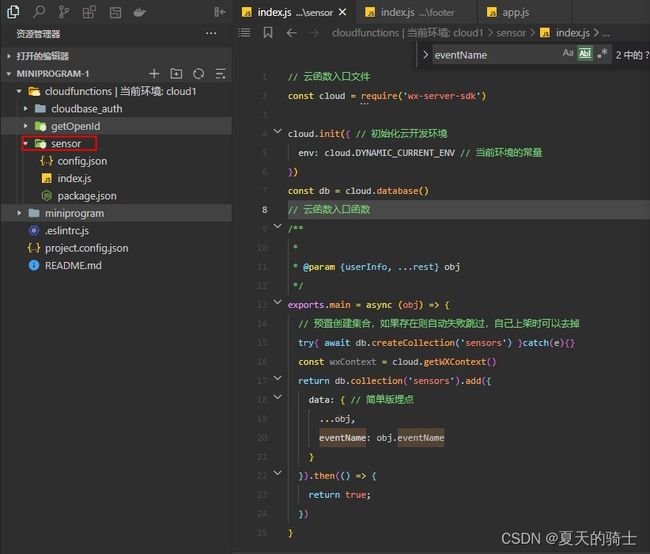
云函数可以简单理解为运行在云端容器中的代码,微信开发者工具钟可以右键,然后点击上传即可运行。下面给这个todolist的新增按钮增加一个埋点功能实践一下云函数:
创建一个sensor云函数并上传:
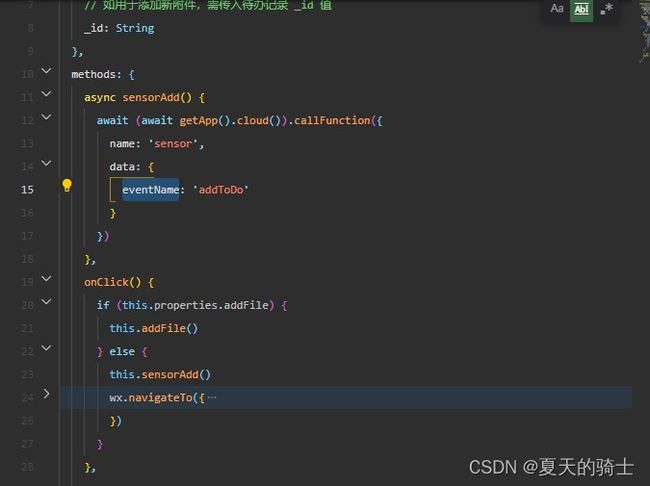
在添加todo按钮处增加云函数调用:
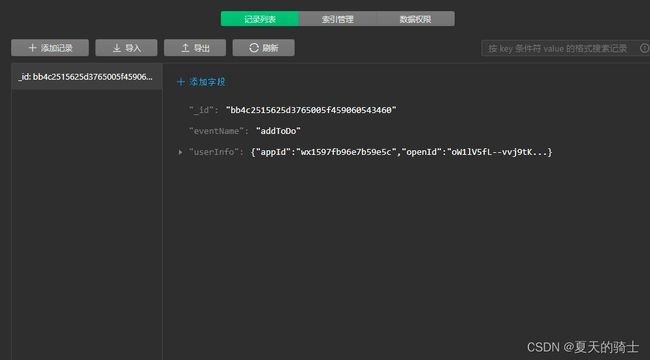
接下来进行操作,点击添加todo:
看看我们的云端数据库就新增了sensors collection,且插入了一条记录: