实现网页登录代码
python
一、前言
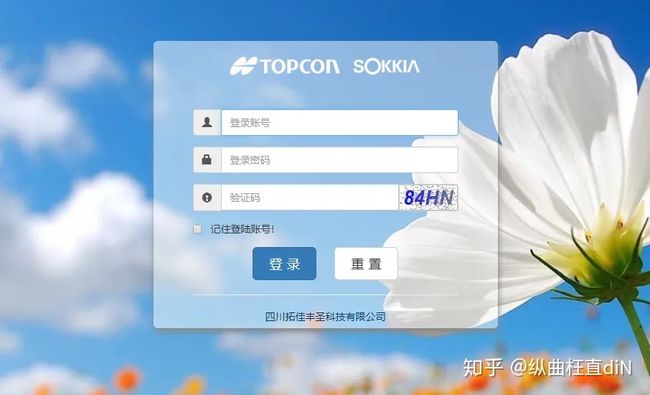
这是鄙人在知乎写的第一篇文章,旨在总结一下近期所学,本文通过selenium工具实现工作所用网站的自动登录,下图为网站登录界面。
1、运行环境
操作系统:Windows10
python版本:python3.7
2、需要的python第三方库
1、selenium
安装:
pip install seleniumselenium是ThoughtWorks提供的一个强大的基于浏览器的开源自动化测试工具。支持的浏览器包括IE、Chrome和Firefox等。
另外还需要下载浏览器驱动,我这里用的是Google浏览器驱动。
Google浏览器驱动:官网链接
选择适配的浏览器版本和Windows系统,然后将下载得到的exe文件放到python的安装目录下。
2、baidu_api
安装:
pip install baidu_apibaidu_api是百度文字识别的OCR(Optical Character Recognition,光学字符识别),很多人可能会用tesseract库,但以测试的效果来看,百度的API识别效果更好。了解此库大家可以看官方文档。百度OCR-API官方文档
3、pillow
安装:
pip install pillowpillow库是python最常用的第三方图像处理库
二、代码实现
1、导入第三方库
from selenium import webdriver
from PIL import Image
from aip import AipOcr
2、验证码的获取与处理
在进行验证码的获取之前,需要先实例化一个browser对象,代码如下:
browser = webdriver.Chrome() # 实例化对象获取验证码的方法是通过实例化后的browser对象的查找元素方法的得到验证码元素并截图。下为网站源代码的验证码标签。

代码如下:
url = 'http://120.77.44.123/Login/Login.aspx?title=exit&recode=1'
browser.get(url)
png = browser.find_element_by_id('captcha_img')  # 查找验证码元素
png.screenshot('capt.png')  # 对验证码进行截图并保存
这是获得的验证码图片:
![]()
为了提高验证码的识别率,我们需要用pillow库对验证码进行图像处理。
处理方法如下:
1、先将图像转换成灰度模式
2、通过对阈值的调整使得多余的噪点消失
img = Image.open('capt.png')
img = img.convert('L')  # P模式转换为L模式(灰度模式默认阈值127)
count = 165  # 设定阈值
table = []
for i in range(256):
    if i < count:
        table.append(0)
    else:
        table.append(1)

img = img.point(table, '1')
img.save('captcha1.png')  # 保存处理后的验证码
处理效果如下:
![]()
可以通多对阈值的调整使得程序获得更高的识别率。
3、验证码的识别
处理完验证码后现在我们可以对其进行识别,调用baidu_api的通用文字识别接口,官方文档上有详细的调用方法,每日可以免费使用5000次,这个数字也够挥霍了。
# 识别码
APP_ID = '*** '
API_KEY = '***'
SECRET_KEY = '***'
# 初始化对象
client = AipOcr(APP_ID, API_KEY, SECRET_KEY)
# 读取图片
def get_file_content(file_path):
    with open(file_path, 'rb') as f:
        return f.read()

image = get_file_content('captcha.png')
# 定义参数变量
options = {'language_type': 'ENG', }  # 识别语言类型,默认为'CHN_ENG'中英文混合
#  调用通用文字识别
result = client.basicGeneral(image, options)  # 高精度接口 basicAccurate
for word in result['words_result']:
    captcha = (word['words'])

    print('识别结果:' + captcha)

    return captcha
这是打印出的识别结果:
![]()
整体来看,识别效果还可以,当然这个验证码本身就不难。
4、自动键入信息并登录
这里用到的依然是browser对象的元素查找方法,代码如下:
browser.find_element_by_id('j_username').send_keys('***')  # 找到账号框并输入账号
browser.find_element_by_id('j_password').send_keys('***')  # 找到密码框并输入密码
browser.find_element_by_id('j_captcha').send_keys(captcha)  # 找到验证码框并输入验证码
browser.find_element_by_id('login_ok').click()  # 找到登陆按钮并点击
代码执行到这里,也就实现了网站的自动登录,下面是程序的完整代码。
三、完整代码
from selenium import webdriver
from PIL import Image
from aip import AipOcr

# 验证码的获取和处理
def get_captcha():
    # 获取验证码图片
    url = 'http://120.77.44.123/Login/Login.aspx?title=exit&recode=1'
    browser.get(url)
    png = browser.find_element_by_id('captcha_img')
    png.screenshot('capt.png')  # 将图片截屏并保存
    # 处理验证码
    img = Image.open('capt.png')
    img = img.convert('L')  # P模式转换为L模式(灰度模式默认阈值127)
    count = 160  # 设定阈值
    table = []
    for i in range(256):
        if i < count:
            table.append(0)
        else:
            table.append(1)

    img = img.point(table, '1')
    img.save('captcha.png')  # 保存处理后的验证码


# 验证码的识别
def discern_captcha():
    # 识别码
    APP_ID = '*** '
    API_KEY = '***'
    SECRET_KEY = '***'
    # 初始化对象
    client = AipOcr(APP_ID, API_KEY, SECRET_KEY)
    # 读取图片
    def get_file_content(file_path):
        with open(file_path, 'rb') as f:
            return f.read()

    image = get_file_content('captcha.png')
    # 定义参数变量
    options = {'language_type': 'ENG', }  # 识别语言类型,默认为'CHN_ENG'中英文混合
    #  调用通用文字识别
    result = client.basicGeneral(image, options)  # 高精度接口 basicAccurate
    for word in result['words_result']:
        captcha = (word['words'])

        print('识别结果:' + captcha)

        return captcha


# 登录网页
def login(captcha):
    browser.find_element_by_id('j_username').send_keys('***')  # 找到账号框并输入账号
    browser.find_element_by_id('j_password').send_keys('***')  # 找到密码框并输入密码
    browser.find_element_by_id('j_captcha').send_keys(captcha)  # 找到验证码框并输入验证码
    browser.find_element_by_id('login_ok').click()  # 找到登陆按钮并点击


def get_file():
    browser.find_element_by_xpath('/html/body/header/div/nav/ul/li[6]/a').click()  # 找到文件按钮并点击


if __name__ == '__main__':
    browser = webdriver.Chrome()  # 实例化对象

    get_captcha()
    captcha = discern_captcha()
    login(captcha)
    get_file()
HTML
先看一下最终效果,登陆和注册
背景图片:

附源码:
login.html
| 1 2 3 4 5 6 7 8 9 10 11 12 13 14 15 16 17 18 19 20 21 22 23 24 25 26 27 28 29 30 31 32 33 34 35 36 37 38 39 40 41 42 43 44 45 46 47 48 49 50 51 52 53 54 55 56 57 58 59 60 61 62 63 64 65 66 67 68 69 70 71 72 73 74 75 76 77 78 79 80 81 82 83 84 85 86 87 88 89 90 91 92 93 94 95 |
|
register.html
1 2 3 4 5 6register 7 110 111 112 113114 171172 173 174 293