2-1 A pretrained network that recognizes the subject of an image
For now, let’s load up and run two networks: first AlexNet, one of the early breakthrough networks for image recognition; and then a residual network, ResNet for short, which won the ImageNet classification, detection, and localization competitions, among others, in 2015.
The predefined models can be found in torchvision.models
We can take a look at the actual models:
from torchvision import models
dir(models)
The capitalized names refer to Python classes that implement a number of popular models.
The lowercase names are convenience functions that return models instantiated from those classes, sometimes with different parameter sets.
1.AlexNet
AlexNet是一个深度卷积神经网络模型,是第一个在ImageNet数据集上取得显著效果的深度学习模型,引领了卷积神经网络的发展潮流。
以下是AlexNet的基本架构:
(1)输入层:接受输入图像数据。通常是RGB图像,尺寸为224x224。
(2)卷积层(Convolutional Layers):AlexNet包含5个卷积层。这些卷积层使用不同的卷积核来提取图像特征。每个卷积层后面都会跟着一个ReLU(修正线性单元)激活函数来引入非线性性质。
(3)池化层(Pooling Layers):在卷积层之间,AlexNet使用了3个最大池化层。这些池化层有助于减少特征图的维度,并保留主要的特征信息。
(4)归一化层(Normalization Layers):为了提高模型的泛化能力和鲁棒性,AlexNet在一些卷积层之后引入了局部响应归一化(LRN)层。这一层对局部邻域的特征响应进行归一化处理,增强了不同特征通道之间的竞争关系。
(5)全连接层(Fully Connected Layers):在卷积层和全连接层之间,AlexNet有两个全连接层。这些全连接层负责将卷积层提取的特征映射转化为预测类别的概率。最后一个全连接层的输出使用了Softmax函数来进行类别概率归一化。
(6)Dropout层:为了减少过拟合现象,AlexNet在最后两个全连接层之间使用了Dropout层。这一层在训练过程中以一定的概率随机将一些神经元的输出置零,从而减少神经元之间的依赖关系。
We can see the structure of AlexNet in figure 2.3. First, each block consists of a bunch of multiplications and additions, plus a sprinkle of other functions in the output. We can think of it as a filter—a function that takes one or more images as input and produces other images as output. The way it does so is determined during training, based on the examples it has seen and on the desired outputs for those.In figure 2.3, input images come in from the left and go through five stacks of filters, each producing a number of output images. After each filter, the images are reduced in size, as annotated. The images produced by the last stack of filters are laid out as a 4,096-element 1D vector and classified to produce 1,000 output probabilities, one for each output class.
In order to run the AlexNet architecture on an input image, we can create an instance of the AlexNet class.
alexnet=models.AlexNet()
以下是一个使用alexnet模型的示例:
我们创建了一个AlexNet模型的实例,并生成一个形状为(1, 3, 224, 224)的随机输入张量。输入张量表示一张具有3个通道(RGB)和224x224像素空间分辨率的单张图像。然后,我们将输入张量传递给alexnet模型,它会生成一个输出张量。最后,我们打印输出张量的形状。
import torch
import torchvision.models as models

# 创建AlexNet模型的实例
alexnet = models.AlexNet()

# 生成随机输入张量,形状为(batch_size, channels, height, width)
input_tensor = torch.randn(1, 3, 224, 224)

# 将输入张量传递给模型
output = alexnet(input_tensor)

# 打印输出张量的形状
print(output.shape) # 输出:torch.Size([1, 1000])
输出形状 [1, 1000] 表示输入张量经过 AlexNet 模型的前向传播后,得到一个大小为 1000 的特征向量。这个特征向量包含了模型对输入图像的表示和提取的特征信息。即模型输出了对输入图像属于 1000 个类别的预测结果。
2.ResNet
ResNet是一种深度卷积神经网络架构,通过引入残差连接(residual connections)解决了深度神经网络训练过程中的梯度消失和模型退化问题,使得可以训练更深的网络。
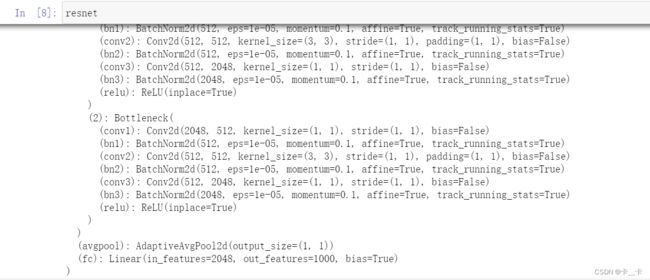
Let’s create an instance of the network now. We’ll pass an argument that will instruct the function to download the weights of resnet101 trained on the ImageNet dataset, with 1.2 million images and 1,000 categories:
resnet=models.resnet101(pretrained=True)
3.Ready, set, almost run
we have to preprocess the input images so they are the right size and so that their values (colors) sit roughly in the same numerical range. In order to do that, the torchvision module provides transforms, which allow us to quickly define pipelines of basic preprocessing functions:
以下代码定义了一个名为preprocess的数据预处理流程,这样做可以保证输入图像与训练ResNet模型时使用的图像数据具有相同的预处理方式,以获得更好的性能和准确性。
from torchvision import transforms
preprocess=transforms.Compose([
    transforms.Resize(256), # 将输入图像的短边缩放为256像素,保持长宽比不变
    transforms.CenterCrop(224), # 将图像裁剪到224 × 224
    transforms.ToTensor(), # 将其转换为一个张量,并将像素值归一化到范围[0, 1]
    transforms.Normalize( # 对图像进行标准化处理,将每个通道的像素值减去均值(mean)并除以标准差(std)
        mean=[0.485,0.456,0.406],
        std=[0.229,0.224,0.225]
    )
])
在使用ResNet模型进行推断或预测时,通常需要首先将输入图像进行预处理,然后将预处理后的图像作为输入传递给模型。preprocess定义的预处理流程可以方便地将原始图像进行预处理,并得到符合模型输入要求的张量。
We can now grab a picture of our favorite dog, preprocess it, and then see what ResNet thinks of it. We can start by loading an image from the local filesystem using Pillow , an image-manipulation module for Python:
from PIL import Image
img=Image.open("D:/Deep-Learning/资料/dlwpt-code-master/data/p1ch2/bobby.jpg") # 替换为图片存放路径
img
Next, we can pass the image through our preprocessing pipeline:
img_t = preprocess(img)
img_t
Then we can reshape, crop, and normalize the input tensor in a way that the network expects.
import torch
batch_t=torch.unsqueeze(img_t,0) # 在第0维(批次维)上添加一个维度,将其转换为一个大小为1的批次
batch_t.shape
这样的变化将img_t作为单个样本放入一个大小为1的批次中,为后续对模型进行推断或预测准备数据。

We’re now ready to run our model.
4.Run!
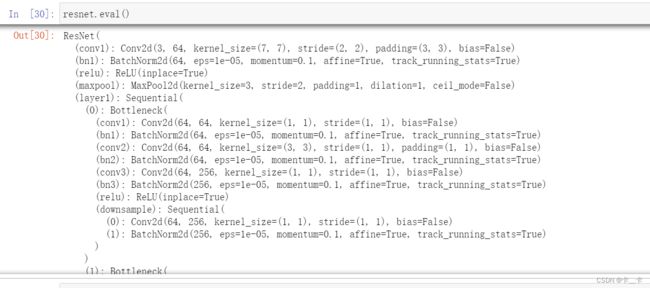
The process of running a trained model on new data is called inference in deep learning circles. In order to do inference, we need to put the network in eval mode:
resnet.eval()

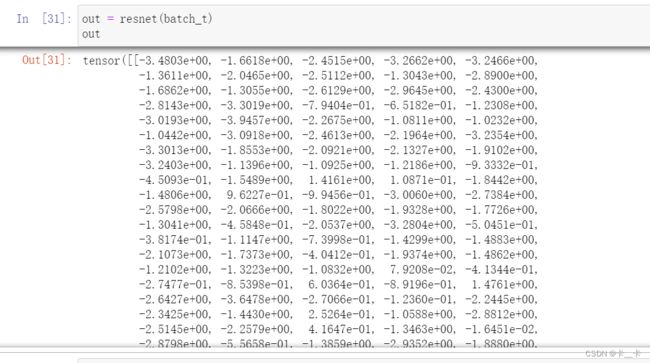
Now that eval has been set, we’re ready for inference:
out = resnet(batch_t)
out

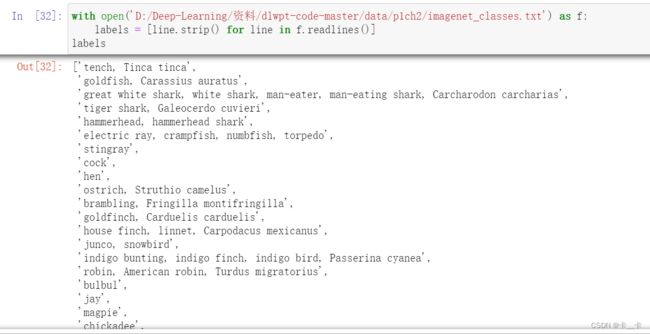
Let’s load the file containing the 1,000 labels for the ImageNet dataset classes:
with open('D:/Deep-Learning/资料/dlwpt-code-master/data/p1ch2/imagenet_classes.txt') as f:
    labels = [line.strip() for line in f.readlines()]
labels
At this point, we need to determine the index corresponding to the maximum score in the out tensor we obtained previously. We can do that using the max function in PyTorch, which outputs the maximum value in a tensor as well as the indices where that maximum value occurred:
out是一个形状为(1, 1000)的张量,其中第1维度表示批次大小为1,第2维度表示输出的类别数为1000。
_, index = torch.max(out, 1) # 1表示在第2维度里面找到最大值
# torch.max返回值有两个,第一个是最大值(我们不需要所以用_代替,第二个就是我们要的index,即最大值所在位置)
通过207也可以找到对应的labels
We can now use the index to access the label.
torch.nn.functional.softmax函数将对第2维度(dim=1)(按列)上的值进行softmax操作,计算每个类别的概率。
使用索引[0]从结果张量中提取第一个批次的元素,即预测结果的概率向量
*100转化为百分数
percentage = torch.nn.functional.softmax(out, dim=1)[0] * 100
torch.nn.functional.softmax(input, dim=None, _stacklevel=3, dtype=None)
input:输入张量,可以是任意形状的张量。
dim:指定在哪个维度上进行softmax操作。默认值为None,表示对最后一个维度进行softmax操作。
_stacklevel:指定内部堆栈级别的整数参数,用于显示警告消息的详细程度。默认值为3。
dtype:输出张量的数据类型。如果未提供,则根据输入张量的数据类型推断。
labels是一个包含ImageNet类标签的列表,其中每个元素对应一个类别。
index[0]即index
percentage[index[0]].item()表示通过索引index[0]从置信度张量percentage中提取对应的置信度值,并通过.item()方法将其转换为Python的标量(把张量变为一个数)。
labels[index[0]], percentage[index[0]].item()
In this case, the model is 96% certain that it knows what it’s looking at is a golden retriever:
Since the model produced scores, we can also find out what the second best, third best, and so on were. To do this, we can use the sort function, which sorts the values in ascending or descending order and also provides the indices of the sorted values in the original array:
# 对out张量进行降序排序
_, indices = torch.sort(out, descending=True)
# 使用列表推导式遍历前5个索引,根据索引从labels和percentage中提取对应的类别标签和置信度,并构成一个包含类别标签和置信度的元组列表
[(labels[idx], percentage[idx].item()) for idx in indices[0][:5]]

总结:使用预训练的ResNet-101模型对一张图像进行分类,并输出图像的预测标签和置信度
# 创建了一个数据预处理流程preprocess,其中包含了图像的尺寸调整、中心裁剪、转换为张量和标准化等操作
from torchvision import transforms
preprocess=transforms.Compose([
    transforms.Resize(256), # 将输入图像的短边缩放为256像素,保持长宽比不变
    transforms.CenterCrop(224), # 将图像裁剪到224×224
    transforms.ToTensor(), # 将其转换为一个张量,并将像素值归一化到范围[0, 1]
    transforms.Normalize( # 对图像进行标准化处理,将每个通道的像素值减去均值(mean)并除以标准差(std)
        mean=[0.485,0.456,0.406],
        std=[0.229,0.224,0.225]
    )
])

# 选择图片img
from PIL import Image
img=Image.open("D:/Deep-Learning/资料/dlwpt-code-master/data/p1ch2/bobby.jpg") # 替换为图片存放路径

# 通过preprocess处理img,得到img_t
img_t = preprocess(img)

# 将img_t的维度增加一个批次维度,得到一个大小为1的图像批次张量batch_t
import torch
batch_t=torch.unsqueeze(img_t,0)

# 创建ResNet-101模型的实例,并将网络转变为推理模式eval
import torchvision.models as models
resnet=models.resnet101(pretrained=True)
resnet.eval()

# 进行推理:将batch_t传入ResNet-101模型进行推理,得到输出张量out
out = resnet(batch_t)

# 加载包含1000个ImageNet数据集类标签的文件,将每一行的内容存储在labels列表中
with open('D:/Deep-Learning/资料/dlwpt-code-master/data/p1ch2/imagenet_classes.txt') as f:
    labels = [line.strip() for line in f.readlines()]

# 获取out张量中的最大值和对应的索引,并将索引存储在index中
_, index = torch.max(out, 1)

# 对out进行softmax操作,计算出每个类别的概率,并乘以100得到百分比
percentage = torch.nn.functional.softmax(out, dim=1)[0] * 100

# 使用索引来访问最大概率的预测标签
labels[index[0]], percentage[index[0]].item()


