vue-element-admin(后端管理系统)
1. vue-element-admin 项目的基本了解与总结
感谢这个博主的文章@初晨
windows 安装失败的很大原因是 node-sass 问题 换源一下就好了。
- npm install --registry=https://registry.npm.taobao.org
2. vue-element-admin 使用中遇到的问题
- 报错: No matching version found for JSV@^4.0.x.
- 解决办法:
- 换成官方源 : npm config set registry https://registry.npmjs.org/
问题2
- 报错:npm ERR! command git --no-replace-objects ls-remote ssh://[email protected]/nhn/raphael.git
- 解决办法:
- 修改 C:\Users\Administrator.gitconfig 将
- [url “https://github.com/nhn/raphael.git/”]
insteadOf = ssh://git@- 改为(注意不要删除第二行的缩进)
- [url “https://github.com/nhn/raphael.git/”]
insteadOf = git://github.com/nhn/raphael.git/
参考B站up主视频:https://www.bilibili.com/video/BV1Vq4y1k71U?spm_id_from=333.337.search-card.all.click
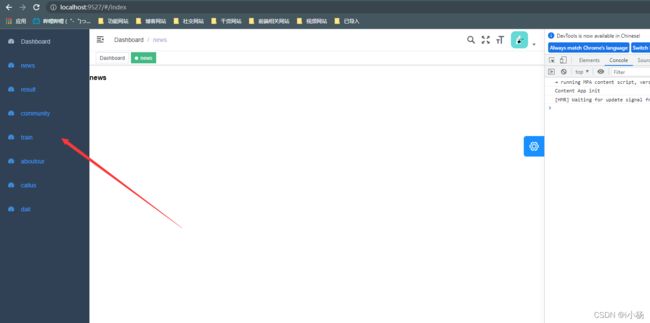
3. 问题3:左侧菜单栏点击高亮状态
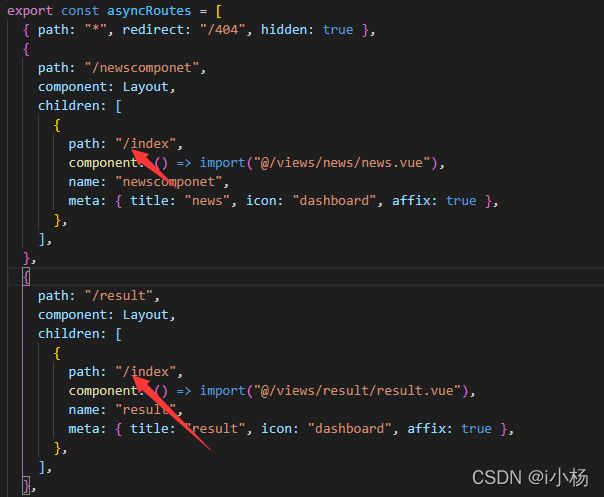
解决办法:二级路由在配置的时候不需要添加反斜线.
- children 中的 path:“index”,
4. element-ui 按需引入的配置文件
直接再.babel文件中配置以下代码
注意:在配置下面代码之前一定要先执行下面这个命令。
- npm install babel-plugin-component -D
{
	plugins: [
    [
      "component",
      {
        libraryName: "element-ui",
        styleLibraryName: "theme-chalk"
      }
    ]
  ]
}
5. vue-element-admin 二次开发
参考文章链接:感谢这个博主!@不要给我吃辣椒!
6. 登录逻辑判断相关文章
参考文章@古墩古墩
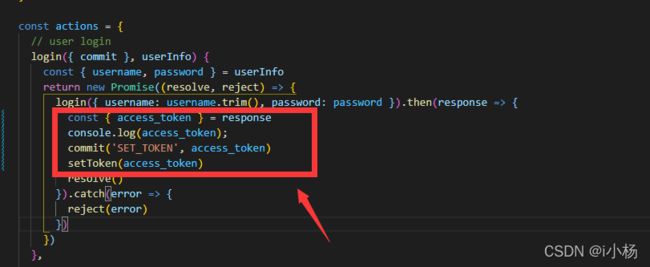
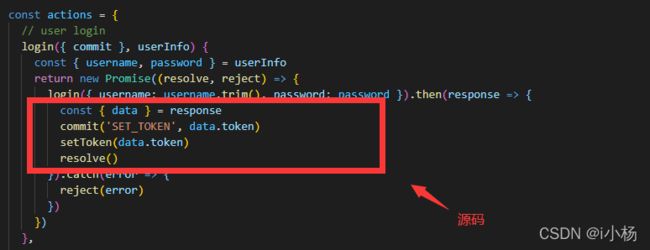
7. vue-element-admin 登录不跳转的问题
- 看自己封装的 “登录接口” 是否可以成功的发送请求
- 看自己封装的 “查询用户信息” 的接口是否可以成功调用;
- 需要做的改动
- 在vuex中的actions中的"login"动作中,查看token 的值;
- 封装自己的 登录,查询,登出 等接口;
- 注意:其他的都不需要做改动;

response => {//响应分支内
// 这样就更新了store里的token;
if (res.code === 50000) {
store.commit('SET_TOKEN',res.data.token)
setToken(res.data.token)
return Promise.reject(res)
}
}
- 找到 /store/modules/user.js
- 大致思路:
- 当第一次查询用户接口失败的时候,在 .catch 中根据响应返回的 状态,将响应中的 refresh_token 重新传入调用接口;
  getInfo({ commit, state }) {
	  return new Promise((resolve, reject) => {
	  	 //默认使用VUEX里的token
	     getInfo(state.token).then(response => {
	     	resolve(data)
		 }).catch(res => {
		  	  //如果返回的是刷新token就重新用新的token请求一次
			  if (res.code === 50000) {
			  	getInfo(res.data.token).then(response => {
			  	}
	     		resolve(data)
			  }
		 })
	  })
  }
10. 项目精简
感谢@盲流子开发这一位博主
1. 项目初始化
  git clone https://github.com/PanJiaChen/vue-element-admin
  cd vue-element-admin
  npm install
  npm run dev
2. 项目精简
- 删除scr/views下的源码, 保留:
- dashboard:首页
- error-page:异常页面
- login:登录
- redirect:重定向
- 对src/router/index 进行相应修改
import Vue from 'vue'
import Router from 'vue-router'

Vue.use(Router)

/* Layout */
import Layout from '@/layout'

/**
 * Note: sub-menu only appear when route children.length >= 1
 * Detail see: https://panjiachen.github.io/vue-element-admin-site/guide/essentials/router-and-nav.html
 *
 * hidden: true                   if set true, item will not show in the sidebar(default is false)
 * alwaysShow: true               if set true, will always show the root menu
 *                                if not set alwaysShow, when item has more than one children route,
 *                                it will becomes nested mode, otherwise not show the root menu
 * redirect: noRedirect           if set noRedirect will no redirect in the breadcrumb
 * name:'router-name'             the name is used by  (must set!!!)
 * meta : {
    roles: ['admin','editor']    control the page roles (you can set multiple roles)
    title: 'title'               the name show in sidebar and breadcrumb (recommend set)
    icon: 'svg-name'             the icon show in the sidebar
    noCache: true                if set true, the page will no be cached(default is false)
    affix: true                  if set true, the tag will affix in the tags-view
    breadcrumb: false            if set false, the item will hidden in breadcrumb(default is true)
    activeMenu: '/example/list'  if set path, the sidebar will highlight the path you set
  }
 */

/**
 * constantRoutes
 * a base page that does not have permission requirements
 * all roles can be accessed
 */
export const constantRoutes = [
  {
    path: '/redirect',
    component: Layout,
    hidden: true,
    children: [
      {
        path: '/redirect/:path(.*)',
        component: () => import('@/views/redirect/index')
      }
    ]
  },
  {
    path: '/login',
    component: () => import('@/views/login/index'),
    hidden: true
  },
  {
    path: '/auth-redirect',
    component: () => import('@/views/login/auth-redirect'),
    hidden: true
  },
  {
    path: '/404',
    component: () => import('@/views/error-page/404'),
    hidden: true
  },
  {
    path: '/401',
    component: () => import('@/views/error-page/401'),
    hidden: true
  },
  {
    path: '/',
    component: Layout,
    redirect: '/dashboard',
    children: [
      {
        path: 'dashboard',
        component: () => import('@/views/dashboard/index'),
        name: 'Dashboard',
        meta: { title: 'Dashboard', icon: 'dashboard', affix: true }
      }
    ]
  }
]

/**
 * asyncRoutes
 * the routes that need to be dynamically loaded based on user roles
 */
export const asyncRoutes = [
  // 404 page must be placed at the end !!!
  { path: '*', redirect: '/404', hidden: true }
]

const createRouter = () => new Router({
  // mode: 'history', // require service support
  scrollBehavior: () => ({ y: 0 }),
  routes: constantRoutes
})

const router = createRouter()

// Detail see: https://github.com/vuejs/vue-router/issues/1234#issuecomment-357941465
export function resetRouter() {
  const newRouter = createRouter()
  router.matcher = newRouter.matcher // reset router
}

export default router
3. 删除 src/router/modules 文件夹
4. 删除 src/vendor文件夹
11. 多级路由嵌套问题
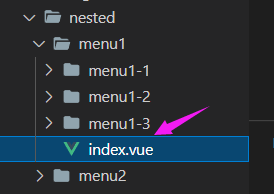
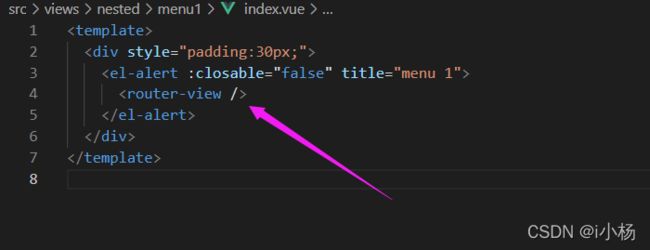
如果你的路由是多级目录,如本项目 @/views/nested 那样, 有三级路由嵌套的情况下,不要忘记还要手动在二级目录的根文件下添加一个 。
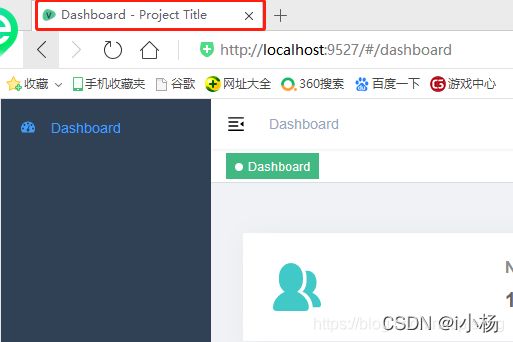
12. 修改页签标题Title
参考文章@维他命啊
首先找到以下文件
- src 路径下 permission 文件
- utils 路径下 get page tilte 文件
- src 路径下 settings 文件
- src 路径下 vue.config.js 文件
修改以下配置
13. 基于Vue-element-admin实现动态路由
参考文章@Hui_Li

