黑马程序员前端 Vue3 小兔鲜电商项目——(七)详情页
文章目录
-
- 路由配置
-
- 模板代码
- 配置路由
- 链接跳转
- 渲染基础数据
-
- 封装接口
- 渲染数据
- 热榜区域
-
- 模板代码
- 封装接口
- 渲染数据
- 图片预览组件封装
-
- 小图切换大图显示
-
- 模版代码
- 绑定事件
- 放大镜效果
- 图片优化
- SKU组件熟悉
- 全局组件统一插件化
-
- 插件化开发
- 插件注册
路由配置
模板代码
创建 src\views\Detail\index.vue 文件,添加以下代码:
首页
母婴
跑步鞋
抓绒保暖,毛毛虫子儿童运动鞋
-
销量人气
100+
销量人气
-
商品评价
200+
查看评价
-
收藏人气
300+
收藏商品
-
品牌信息
400+
品牌主页
配置路由
在 src\router\index.js 中添加对应路由【/detail/{goodId}】:
routes: [
  {
    path: '/',
    component: Layout,
    children: [
      {
        path: 'category/sub/:id',
        component: SubCategory
      },
      {
        path: "/detail/:id",
        component: Detail
      }
    ]
  }
]
链接跳转
对 src\views\Home\components\HomeNew.vue 文件及其他涉及商品信息的页面修改路由跳转:
<RouterLink :to="`/detail/${item.id}`">
  <img v-img-lazy="item.picture" alt="" />
  <p class="name">{{ item.name }}p>
  <p class="price">¥{{ item.price }}p>
RouterLink>
渲染基础数据
封装接口
在 src\apis\detail.js 文件中封装接口用于获取商品信息:
import http from "@/utils/http"

//获取商品信息
export const getDetail = (id) => {
    return http({
        url: '/goods',
        params: {
            id
        }
    })
}
渲染数据
在 src\views\Detail\index.vue 文件中编写方法用于接收商品信息数据:
修改模板代码,渲染数据:
<div class="container" v-if="goods.details">
  <div class="bread-container">
    <el-breadcrumb separator=">">
      <el-breadcrumb-item :to="{ path: '/' }">首页el-breadcrumb-item>
      <el-breadcrumb-item :to="{ path: `/category/${goods.categories[1].id}` }">{{ goods.categories[1].name }}
      el-breadcrumb-item>
      <el-breadcrumb-item :to="{ path: `/category/sub/${goods.categories[0].id}` }">{{
        goods.categories[0].name }}
      el-breadcrumb-item>
      <el-breadcrumb-item>{{ goods.name }}el-breadcrumb-item>
    el-breadcrumb>
  div>

  <div class="info-container">
    <div>
      <div class="goods-info">
        <div class="media">


          <ul class="goods-sales">
            <li>
              <p>销量人气p>
              <p>{{ goods.salesCount }}+p>
              <p><i class="iconfont icon-task-filling">i>销量人气p>
            li>
            <li>
              <p>商品评价p>
              <p>{{ goods.commentCount }}+p>
              <p><i class="iconfont icon-comment-filling">i>查看评价p>
            li>
            <li>
              <p>收藏人气p>
              <p>{{ goods.collectCount }}+p>
              <p><i class="iconfont icon-favorite-filling">i>收藏商品p>
            li>
            <li>
              <p>品牌信息p>
              <p>{{ goods.brand.name }}p>
              <p><i class="iconfont icon-dynamic-filling">i>品牌主页p>
            li>
          ul>
        div>
				...
      div>
      <div class="goods-footer">
        <div class="goods-article">

          <div class="goods-tabs">
            <nav>
              <a>商品详情a>
            nav>
            <div class="goods-detail">

              <ul class="attrs">
                <li v-for="item in goods.details.properties" :key="item.value">
                  <span class="dt">{{ item.name }}span>
                  <span class="dd">{{ item.value }}span>
                li>
              ul>

              <img v-for="img in goods.details.pictures" v-img-lazy="img" :key="img" alt="" />
            div>
          div>
        div>
      div>
    div>
  div>
div>
热榜区域
模板代码
创建 src\views\Detail\components\DetailHot.vue 文件,将榜单的代码粘贴进去,方便日榜和周榜进行复用:
周日榜单
![]()
一双男鞋
一双好穿的男鞋
¥200.00
封装接口
在 src\apis\detail.js 文件中,封装 API,获取热榜商品,通过 type 参数进行区分日榜和周榜数据:
/**
 * 获取热榜商品
 * @param {Number} id - 商品id
 * @param {Number} type - 1代表24小时热销榜 2代表周热销榜
 * @param {Number} limit - 获取个数
 */
export const getHotGoodsAPI = ({ id, type, limit = 3 }) => {
    return http({
        url: '/goods/hot',
        params: {
            id,
            type,
            limit
        }
    })
}
渲染数据
定义 props 参数,接收传入的 type 参数,导入封装好的方法,获取对应 type 榜单的数据:
将获取到的榜单商品渲染到页面中:
<template>
  <div class="goods-hot">
    <h3>{{ title }}h3>

    <RouterLink :to="`/detail/${item.id}`" class="goods-item" v-for="item in hotList" :key="item.id">
      <img :src="item.picture" alt="" />
      <p class="name ellipsis">{{ item.name }}p>
      <p class="desc ellipsis">{{ item.desc }}p>
      <p class="price">¥{{ item.price }}p>
    RouterLink>
  div>
template>
src\views\Detail\index.vue 中使用组件传入不同的 type:
import GoodHot from '@/views/Detail/components/DetailHot.vue'
图片预览组件封装
小图切换大图显示
思路:维护一个数组图片列表,鼠标划入小图记录当前小图下标值,通过下标值在数组中取对应图片,显示到大图位置。
模版代码
创建 src\components\ImageView\index.vue 文件,添加代码:
![]()
-
![]()
绑定事件
为小图绑定事件,记录当前激活下标值,通过下标切换大图显示:
//记录激活下标
const activeIndex = ref(0)
//鼠标划过事件
const enterhandler=(i)=>{
    activeIndex.value=i
}
修改模板代码,通过判断图片下标与当前激活图片的下标是否相等来添加激活样式:
![]()
-
![]()
放大镜效果
使用 VueUse 提供的 useMouselnElement() 获取到当前的鼠标在盒子内的相对位置,控制滑块跟随鼠标移动(left/top):
-
有效移动范围内的计算逻辑:
横向:100
纵向:100
-
边界距离控制
横向:elementX>300(left=200) elementX<100(left=0)
纵向:elementY>300(top=200) elementY<100(top=0=)
-
src\components\ImageView\index.vue 中导入 useMouseInElement 组件:
import { ref,watch } from 'vue' import { useMouseInElement } from '@vueuse/core' -
处理逻辑如下:
// 2. 获取鼠标相对位置 const target = ref(null) const { elementX, elementY, isOutside } = useMouseInElement(target) // 3. 控制滑块跟随鼠标移动(监听elementX/Y变化,一旦变化 重新设置left/top) const left = ref(0) const top = ref(0) const positionX = ref(0) const positionY = ref(0) watch([elementX, elementY, isOutside], () => { console.log('xy变化了') // 如果鼠标没有移入到盒子里面 直接不执行后面的逻辑 if (isOutside.value) return console.log('后续逻辑执行了') // 有效范围内控制滑块距离 // 横向 if (elementX.value > 100 && elementX.value < 300) { left.value = elementX.value - 100 } // 纵向 if (elementY.value > 100 && elementY.value < 300) { top.value = elementY.value - 100 } // 处理边界 if (elementX.value > 300) { left.value = 200 } if (elementX.value < 100) { left.value = 0 } if (elementY.value > 300) { top.value = 200 } if (elementY.value < 100) { top.value = 0 } // 控制大图的显示 positionX.value = -left.value * 2 positionY.value = -top.value * 2 } -
修改模板代码调用
<div class="middle" ref="target">
  <img :src="imageList[activeIndex]" alt="" />

  <div class="layer" v-show="!isOutside" :style="{ left: `${left}px`, top: `${top}px` }">div>
div>
...

<div class="large" :style="[
                           {
                           backgroundImage: `url(${imageList[activeIndex]})`,
                           backgroundPositionX: `${positionX}px`,
                           backgroundPositionY: `${positionY}px`,
                           },
                           ]" v-show="!isOutside">div>
图片优化
在 src\components\ImageView\index.vue 中定义 props 参数,接收图片列表:
// 图片列表
defineProps({
    imageList: {
        type: Array,
        default: () => []
    }
})
修改 src\views\Detail\index.vue 中图片预览部分:
<ImageView :image-list="goods.mainPictures"/>
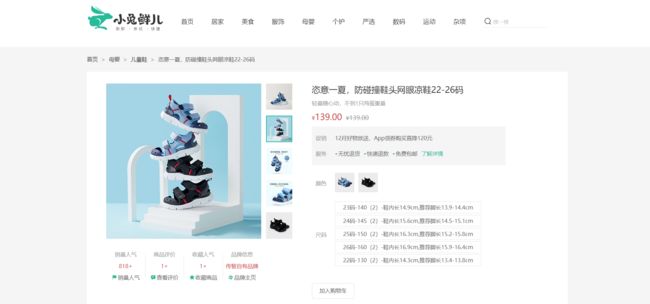
SKU组件熟悉
SKU:存货单位(英语:stock keeping unit,SKU/,es,keju:/),也翻译为库存单元,是一个会计学名词,定义为库存管理
中的最小可用单元,例如纺织品中一个SKU通常表示规格、颜色、款式,而在连锁零售门店中有时称单品为一个 SKU。
SKU组件的作用:产出当前用户选择的商品规格,为加入购物车操作提供数据信息。
-
导入 src\components\XtxSku 组件:
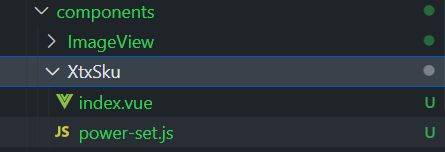
-
在 src\views\Detail\index.vue 中引入 XtxSku 组件:
import XtxSku from '@/components/XtxSku/index.vue' -
在 Html 代码中插入组件:
<XtxSku :goods="goods"/>
全局组件统一插件化
背景:components 目录下有可能还会有很多其他通用型组件,有可能在多个业务模块中共享,所有统一进行全局组件注册比较好。
插件化开发
新建 src\components\index.js 文件,在其中进行封装 components 目录下的所有组件:
// 把components中的所组件都进行全局化注册
// 通过插件的方式
import ImageView from './ImageView/index.vue'
import Sku from './XtxSku/index.vue'
export const componentPlugin = {
  install (app) {
    // app.component('组件名字',组件配置对象)
    app.component('XtxImageView', ImageView)
    app.component('XtxSku', Sku)
  }
}
插件注册
在 main.js 文件中进行注册插件即可:
// 引入全局组件插件
import { componentPlugin } from '@/components'

app.use(componentPlugin)
修改 src\views\Detail\index.vue 中的代码,替换插件的方式:
<XtxImageView :image-list="goods.mainPictures"/>


<XtxSku :goods="goods"/>