SpringBoot+JWT实现单点登录解决方案
一、什么是单点登录?
单点登录是一种统一认证和授权机制,指在多个应用系统中,用户只需要登录一次就可以访问所有相互信任的系统,不需要重新登录验证。
单点登录一般用于互相授信的系统,实现单一位置登录,其他信任的应用直接免登录的方式,在多个应用系统中,只需要登录一次,就可以访问其他互相信任的应用系统。
随着时代的演进,大型web系统早已从单体应用架构发展为如今的多系统分布式应用群。但无论系统内部多么复杂,对用户而言,都是一个统一的整体,访问web系统的整个应用群要和访问单个系统一样,登录/注销只要一次就够了,不可能让一个用户在每个业务系统上都进行一次登录验证操作,这时就需要独立出一个单独的认证系统,它就是单点登录系统。
二、单点登录的优点
1.方便用户使用。用户不需要多次登录系统,不需要记住多个密码,方便用户操作。
2.提高开发效率。单点登录为开发人员提供类一个通用的验证框架。
3.简化管理。如果在应用程序中加入了单点登录的协议,管理用户账户的负担就会减轻。
三、JWT 机制
JWT(JSON Web Token)它将用户信息加密到token里,服务器不保存任何用户信息。服务器通过使用保存的密钥验证JWTToken的正确性,只要正确就通过验证。
数据结构:
JWT包含三个部分:Header头部,Payload负载和Signature签名。三个部门用“.”分割。校验也是JWT内部自己实现的 ,并且可以将你存储时候的信息从token中取出来无须查库。
JWT执行流程:
JWT的请求流程也特别简单,首先使用账号登录获取Token,然后后面的各种请求,都带上这个Token即可。具体流程如下:
1. 客户端发起登录请求,传入账号密码;
2. 服务端使用私钥创建一个Token;
3. 服务器返回Token给客户端;
4. 客户端向服务端发送请求,在请求头中携带Token;
5. 服务器验证该Token;
6. 返回结果。
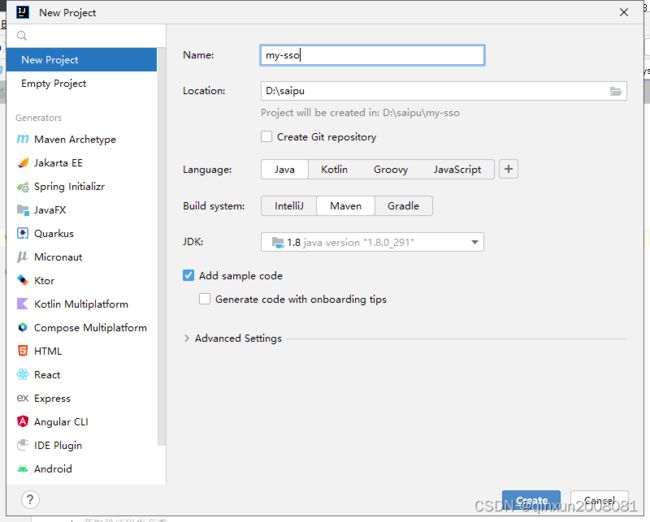
四.创建Maven父项目
2.指定打包类型为pom
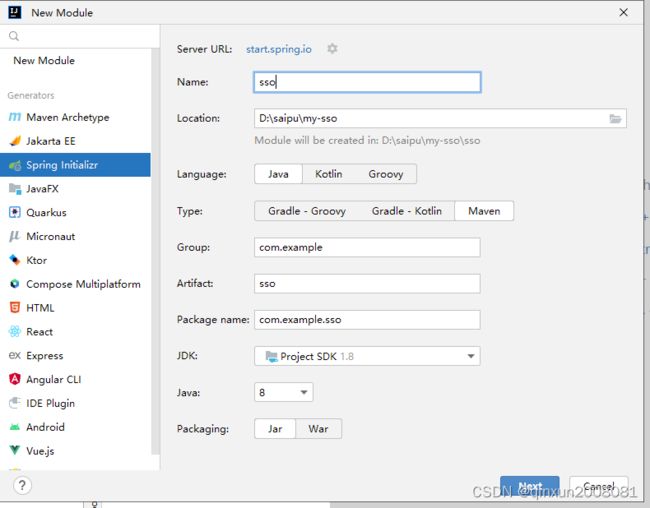
五.创建认证模块sso
1.添加依赖,完整的pom文件如下:
    4.0.0

        org.springframework.boot
        spring-boot-starter-parent
        2.7.13


    com.example
    sso
    0.0.1-SNAPSHOT
    sso
    sso

        1.8


            org.springframework.boot
            spring-boot-starter-web


            org.projectlombok
            lombok


            com.auth0
            java-jwt
            3.8.2


            org.springframework.boot
            spring-boot-starter-thymeleaf


            org.springframework.boot
            spring-boot-starter-test
            test


                org.springframework.boot
                spring-boot-maven-plugin
2添加jwt相关配置
3.创建JWT配置类和JWT工具类
示例代码如下:
package com.example.sso.bean;

import lombok.Getter;
import lombok.Setter;
import org.springframework.boot.context.properties.ConfigurationProperties;
import org.springframework.stereotype.Component;

/**
 * @author qx
 * @date 2023/7/4
 * @des Jwt配置类
 */
@Component
@ConfigurationProperties(prefix = "jwt")
@Getter
@Setter
public class JwtProperties {

    /**
     * 过期时间-分钟
     */
    private Integer expireTime;

    /**
     * 密钥
     */
    private String secret;
}
package com.example.sso.util;
import com.auth0.jwt.JWT;
import com.auth0.jwt.JWTVerifier;
import com.auth0.jwt.algorithms.Algorithm;
import com.example.sso.bean.JwtProperties;
import org.springframework.beans.factory.annotation.Autowired;
import org.springframework.stereotype.Component;
import java.util.Date;
/**
* @author qx
* @date 2023/7/4
* @des JWT工具类
*/
@Component
public class JwtUtil {
@Autowired
private JwtProperties jwtProperties;
/**
* 生成一个jwt字符串
*
* @param username 用户名
* @return jwt字符串
*/
public String sign(String username) {
Algorithm algorithm = Algorithm.HMAC256(jwtProperties.getSecret());
return JWT.create()
// 设置过期时间1个小时
.withExpiresAt(new Date(System.currentTimeMillis() + jwtProperties.getExpireTime() * 60 * 1000))
// 设置负载
.withClaim("username", username).sign(algorithm);
}
public static void main(String[] args) {
Algorithm algorithm = Algorithm.HMAC256("KU5TjMO6zmh03bU3");
String username = "admin";
String token = JWT.create()
// 设置过期时间1个小时
.withExpiresAt(new Date(System.currentTimeMillis() + 60 * 60 * 1000))
// 设置负载
.withClaim("username", username).sign(algorithm);
System.out.println(token);
}
/**
* 校验token是否正确
*
* @param token token值
*/
public boolean verify(String token) {
if (token == null || token.length() == 0) {
throw new RuntimeException("token为空");
}
try {
Algorithm algorithm = Algorithm.HMAC256(jwtProperties.getSecret());
JWTVerifier jwtVerifier = JWT.require(algorithm).build();
jwtVerifier.verify(token);
return true;
} catch (Exception e) {
e.printStackTrace();
return false;
}
}
}
4.创建服务层
package com.example.sso.service;

import com.example.sso.util.JwtUtil;
import org.springframework.beans.factory.annotation.Autowired;
import org.springframework.stereotype.Service;

/**
 * @author qx
 * @date 2023/7/4
 * @des 登录服务层
 */
@Service
public class LoginService {


    @Autowired
    private JwtUtil jwtUtil;

    /**
     * 登录
     *
     * @param username 用户名
     * @param password 密码
     * @return token值
     */
    public String login(String username, String password) {
        if ("".equals(username) || "".equals(password)) {
            throw new RuntimeException("用户名或密码不能为空");
        }
        // 为了测试方便 不去数据库比较密码
        if ("123".equals(password)) {
            // 返回生成的token
            return jwtUtil.sign(username);
        }
        return null;
    }

    /**
     * 校验jwt是否成功
     *
     * @param token    token值
     * @return 校验是否超过
     */
    public boolean checkJwt(String token) {
        return jwtUtil.verify(token);
    }
}
5.创建控制层
package com.example.sso.controller;

import com.example.sso.service.LoginService;
import org.springframework.beans.factory.annotation.Autowired;
import org.springframework.stereotype.Controller;
import org.springframework.web.bind.annotation.GetMapping;
import org.springframework.web.bind.annotation.PostMapping;
import org.springframework.web.bind.annotation.RequestMapping;
import org.springframework.web.bind.annotation.ResponseBody;

/**
 * @author qx
 * @date 2023/7/4
 * @des 验证控制层
 */
@Controller
@RequestMapping("/sso")
public class AuthController {

    @Autowired
    private LoginService loginService;

    /**
     * 登录页面
     */
    @GetMapping("/login")
    public String toLogin() {
        return "login";
    }

    /**
     * 登录
     *
     * @param username 用户名
     * @param password 密码
     * @return token值
     */
    @PostMapping("/login")
    @ResponseBody
    public String login(String username, String password) {
        return loginService.login(username, password);
    }

    /**
     * 验证jwt
     *
     * @param token token
     * @return 验证jwt是否合法
     */
    @RequestMapping("/checkJwt")
    @ResponseBody
    public boolean checkJwt(String token) {
        return loginService.checkJwt(token);
    }


}
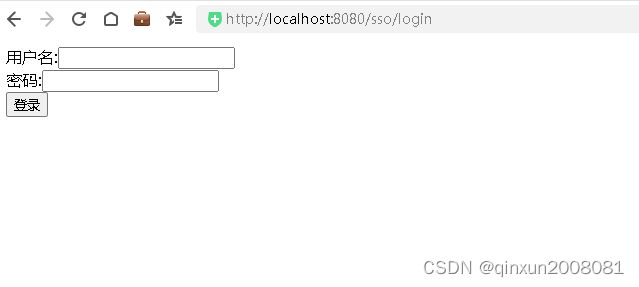
6.创建一个登录页面login.html
登录
六、创建应用系统projectA
1.项目pom文件如下所示
    4.0.0

        org.example
        my-sso
        1.0-SNAPSHOT


    projectA


        8
        8
        UTF-8


            org.springframework.boot
            spring-boot-starter-web
            2.7.13


            com.squareup.okhttp3
            okhttp
            4.10.0
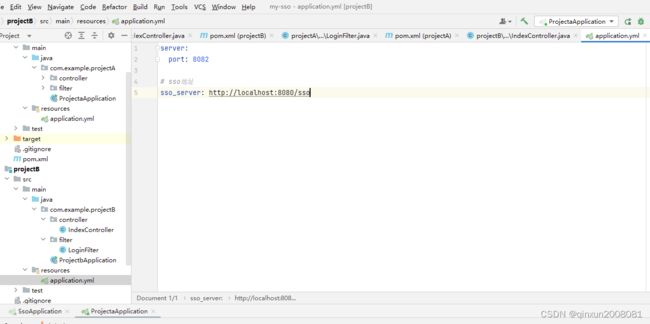
2.修改配置文件
3.创建过滤器
package com.example.projectA.filter;

import okhttp3.OkHttpClient;
import okhttp3.Request;
import okhttp3.Response;
import org.springframework.beans.factory.annotation.Value;
import org.springframework.stereotype.Component;

import javax.servlet.*;
import javax.servlet.annotation.WebFilter;
import javax.servlet.http.HttpServletRequest;
import javax.servlet.http.HttpServletResponse;
import java.io.IOException;

/**
 * @author qx
 * @date 2023/7/4
 * @des 登录过滤器
 */
@Component
@WebFilter(urlPatterns = "/**")
public class LoginFilter implements Filter {

    @Value("${sso_server}")
    private String serverHost;

    @Override
    public void doFilter(ServletRequest servletRequest, ServletResponse servletResponse, FilterChain filterChain) throws IOException, ServletException {
        HttpServletRequest httpServletRequest = (HttpServletRequest) servletRequest;
        String token = httpServletRequest.getParameter("token");
        if (this.check(token)) {
            filterChain.doFilter(servletRequest, servletResponse);
        } else {
            HttpServletResponse response = (HttpServletResponse) servletResponse;
            String redirect = serverHost + "/login";
            response.sendRedirect(redirect);
        }
    }

    /**
     * 验证token
     *
     * @param token
     * @return
     * @throws IOException
     */
    private boolean check(String token) throws IOException {
        if (token == null || token.trim().length() == 0) {
            return false;
        }
        OkHttpClient client = new OkHttpClient();
        // 请求验证token的合法性
        String url = serverHost + "/checkJwt?token=" + token;
        Request request = new Request.Builder().url(url).build();
        Response response = client.newCall(request).execute();
        return Boolean.parseBoolean(response.body().string());
    }
}
4.创建测试控制层
package com.example.projectA.controller;

import org.springframework.web.bind.annotation.GetMapping;
import org.springframework.web.bind.annotation.RestController;

/**
 * @author qx
 * @date 2023/7/4
 * @des 测试A
 */
@RestController
public class IndexController {

    @GetMapping("/testA")
    public String testA() {
        return "输出testA";
    }
}
5.启动类
package com.example.projectA;

import org.springframework.boot.SpringApplication;
import org.springframework.boot.autoconfigure.SpringBootApplication;
import org.springframework.boot.web.servlet.ServletComponentScan;

/**
 * @author qx
 * @date 2023/7/4
 * @des Projecta启动类
 */
@SpringBootApplication
@ServletComponentScan
public class ProjectaApplication {

    public static void main(String[] args) {
        SpringApplication.run(ProjectaApplication.class,args);
    }
}
6.启动项目测试
我们访问http://localhost:8081/testA 系统跳转到了验证模块的登录页面
我们输入账号密码登录成功后返回token
如何我们复制这段数据,把数据传递到token参数。
我们看到正确获取到了数据。
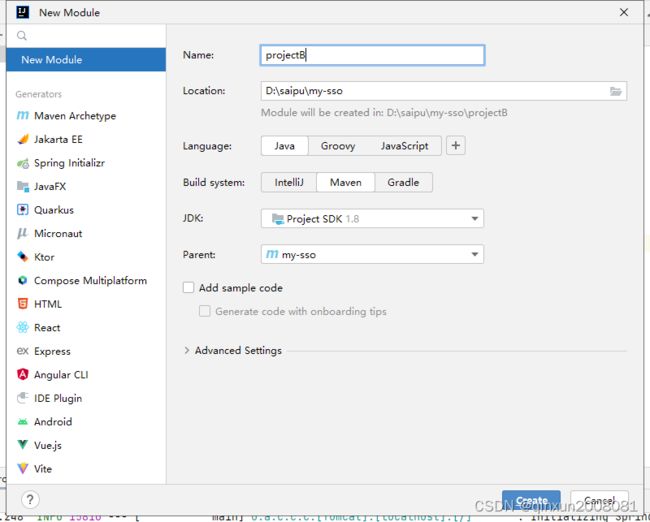
七、创建应用系统projectB
我们再次模仿projectA创建projectB子模块。
启动模块B
通过之前的token,无需登录即可成功进入了应用系统B。说明我们的单点登录系统搭建成功。

