控件的属性、事件与样式资源
怎样加入控件
加入控件的方式有多种,大家更喜欢以下哪一种呢?
1)使用诸如Blend for Visual Studio或Microsoft Visual Studio XAML设计器的设计工具。
2)在Visual Studio XAML编辑器中将控件加入到XAML代码中。
3)在代码中加入控件。 注意:当应用执行时会看到你在代码中加入的控件,但在 Visual Studio XAML 设计器中看不到。
前面我们通过在工具箱拖住控件以及直接在写XAML代码来设置控件,在教程的后面,我们会看到在C#后台代码中加入控件。Blend我们临时还没实用到。只是其在绘制图形和动画上可谓非常强大和优秀。
设置控件的属性
控件的属性相比大家都已经会用了,一来能够直接在XAML中加入属性,二来能够在属性视图中加入和改动属性。
为控件加入事件
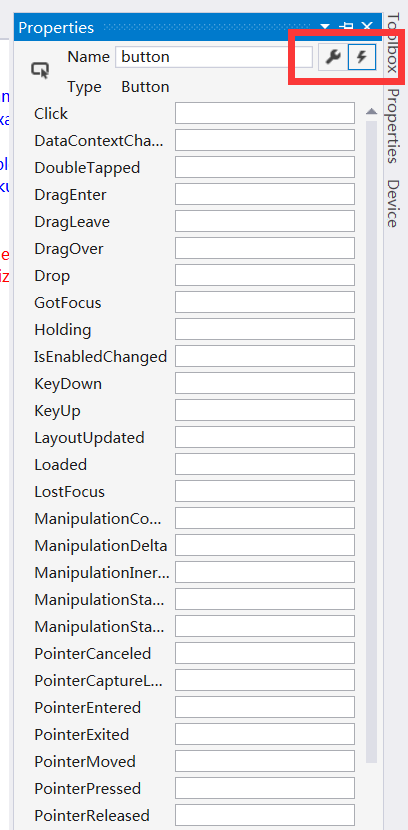
假设要加入和改动事件呢。相同在属性视图中,点击右上角的闪电图标就可以。假设要加入Click事件,那么在Click的输入框中输入好事件名称后直接按Enter就可以。此时VS就会自己主动跳转到C#后台代码中。第一个參数sender是对处理程序所附加的对象的应用,第二參数是事件数据,它通常在签名中显示为e參数。
private void btnSetStyle_Click(object sender, RoutedEventArgs e)
{
    Button b = (Button)sender;
    b.Height = 400;
    b.Width = 320;
}
上面的这段代码这会将所点击的Button的高设置为400,宽设置为320;除了这样的方式外,也能够按例如以下操作。当中btnSetStyle是当前Button的名字:
private void btnSetStyle_Click(object sender, RoutedEventArgs e)
{
    btnSetStyle.Height = 400;
    btnSetStyle.Width = 320;
}
除此之外,我们也能够不在XAML中定义Click事件。依照例如以下操作也能够达到相同的效果,它会将两个事件相互关联。
public MainPage()
{
     this.InitializeComponent();

     btnSetStyle.Click += new RoutedEventHandler(btnSetStyle_Click);
}

private void btnSetStyle_Click(object sender, RoutedEventArgs e)
{
    btnSetStyle.Height = 400;
    btnSetStyle.Width = 320;
}
为控件设置样式资源
即便没有加入过资源,也不清楚什么是样式,没关系,想必大家都玩过2048吧。
游戏中有很多方格。那这些方格的样式会不会一个个去定义呢,当然不是。能够直接用样式资源来定位到全部的Button。
以下是一个基本样式,
   <Style TargetType="Button">
      <Setter Property="FontWeight" Value="Bold"/>
      <Setter Property="FontSize" Value="40"/>
      <Setter Property="HorizontalAlignment" Value="Center">Setter>
      <Setter Property="VerticalAlignment" Value="Center">Setter>
      <Setter Property="Background" Value="Gray">Setter>
      <Setter Property="Width" Value="100">Setter>
      <Setter Property="Height" Value="100">Setter>
      <Setter Property="Template">
          <Setter.Value>
              "Button">
                  <Grid x:Name="Grid" Background="Transparent">
                      "Border" Width="{TemplateBinding Width}" Height="{TemplateBinding Height}" Background="{TemplateBinding Background}" >
                          "ContentPresenter" ContentTemplate="{TemplateBinding ContentTemplate}" Content="{TemplateBinding Content}" HorizontalAlignment="Center"  VerticalAlignment="Center"/>

                   Grid>

           Setter.Value>
       Setter>
    Style>
可是这里也有一个问题。假设我们有10个Button控件,却仅仅想当中8个用到这些定义。另外2个想用另一种控件。那该怎么办呢?
将样式定义为资源,事实上是有2中方式的。
一种就是直接用Style的TargetType属性来定义到全部的目标控件。
另一种则除了用TargetType属性外。还能够用x:key属性,然后再详细的控件中庸显式的关键字StaticResource来设置详细的Style属性。
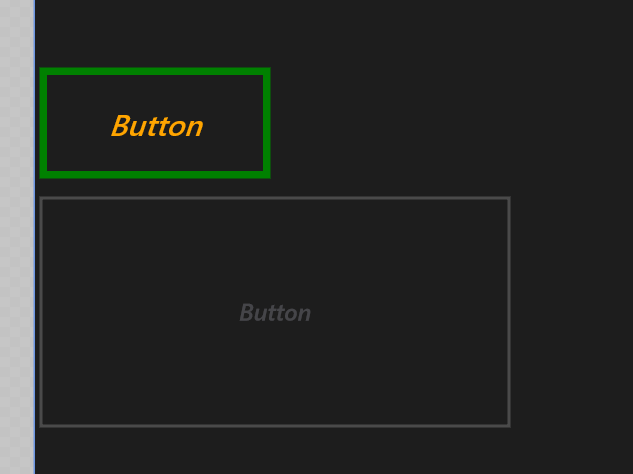
     <Style TargetType="Button">
         <Setter Property="FontStyle" Value="Oblique" />
         <Setter Property="FontSize" Value="20" />
         <Setter Property="BorderBrush" Value="Green" />
         <Setter Property="BorderThickness" Value="5" />
         <Setter Property="Foreground" Value="Orange" />
         <Setter Property="Height" Value="80"/>
         <Setter Property="Width" Value="160"/>
     Style>

     <Style x:Key="OtherStyle" TargetType="Button">
         <Setter Property="FontStyle" Value="Italic" />
         <Setter Property="FontSize" Value="16" />
         <Setter Property="Foreground" Value="Lavender" />
         <Setter Property="Height" Value="160"/>
         <Setter Property="Width" Value="320"/>
         <Setter Property="Opacity" Value="0.2"/>
     Style>
详细效果见下图,当中Opacity属性为透明度。
大家都知道类能够继承,样式也是能够继承的。
部分控件介绍
通过前面的学习,已经见过一些控件了,如今起将逐步见到很多其它控件。
但由于控件太多,教程中无法一一介绍。请自行举一反三。教程内容也将不断更新。
Button
前面最经常使用的控件就是Button了,Button另一个有意思的属性,当把鼠标指针放在Button上时,就会在Button的头顶冒出一串文本。
<Button ToolTipService.ToolTip="Go to www.blog.csdn.net/nomasp" Margin="692,458,0,230"/>Button有一个非常有意思的属性。
<Button Content="摩天轮" Margin="134,363,0,367">
    <ToolTipService.ToolTip>
        <Image MaxHeight="80" MaxWidth="100" Source="Assets/343219.jpg"/>
    ToolTipService.ToolTip>
Button>
仅仅要把鼠标放到Button上面就会显示出这张图片了,也叫做帮助提示吧。事实上更简单的方法是以下这样的。
它显示的是一个后退的样式,并且鼠标放上去会有文字Back提示。
<Button Content="摩天轮" ToolTipService.ToolTip="Back"
                Style="{StaticResource NavigationBackButtonNormalStyle}" />
ToggleSwitch
这个控件和Button非常像。它像开关一样。
<ToggleSwitch x:Name="toggleSwitch1" Header="NoMasp Toggle"
      OnContent="On" OffContent="Off" Toggled="ToggleSwitch_Toggled"
      Margin="409,468,0,227"/>

<ToggleSwitch x:Name="toggleSwitch2" Header="NoMasp Toggle"
     OnContent="On" OffContent="Off" IsOn="True"
     Toggled="ToggleSwitch_Toggled" Margin="409,565,0,130"/>
MessageDialog
这控件和Button一起讲还蛮合适的,我们任意加入一个Button,然后写好Click事件例如以下。
private async void Button_Click(object sender, RoutedEventArgs e)
{
    Windows.UI.Popups.MessageDialog messageDialog =
        new Windows.UI.Popups.MessageDialog("噢。你刚刚踩到了地雷。");
    await messageDialog.ShowAsync();
}
注意要在函数上加上async表示异步。
假设须要预览效果,能够參见教程随后的“用浮出控件做预览效果”。
ComboBox
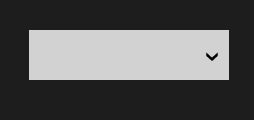
ComboBox提供了下拉列表,自然也是一个非经常常使用的控件。
"50" Width="200" Name="cbox1" SelectionChanged="cbox1_SelectionChanged" Margin="17,47,1049,671">
String>Select 1 String>
String>Select 2 String>
String>Select 3 String>
String>Select 4 String>
ListBox
ListBox控件和ComboBox非常相似,都能够让用户选择已经嵌入在列表中的选项。使用方法例如以下:
"listBox1" SelectionChanged="listBox1_SelectionChanged" Width="100">
String>Item 1 String>
String>Item 2 String>
String>Item 3 String>
DatePicker、TimePicker
Winows平台设置时间的控件倒是非常有特色。就是DatePicker和TimePicker。
<DatePicker Foreground="Red" Header="NoMasp Date" Margin="3,177,0,533"/>
<TimePicker Foreground="Green" Header="NoMasp Time" Margin="3,246,0,464" Width="289"/> 这个控件的很多其它介绍也在教程随后的“时间控件的很多其它介绍”中。
FlipView
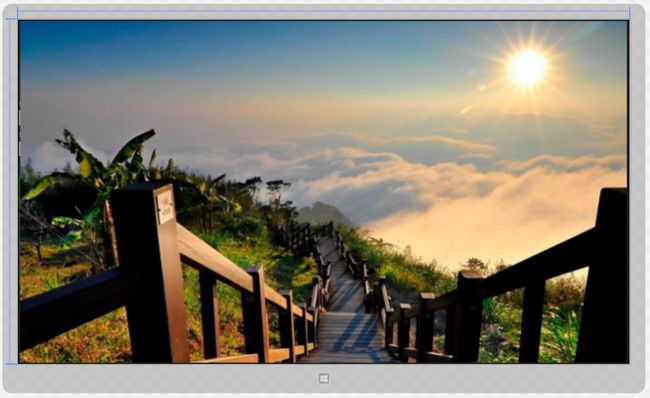
FlipView是一个能够让用户逐个浏览的项目集合的控件,以下是相关的演示样例代码。CommonAssets文件夹全然能够定义在Shared文件夹下,这样WP也能够拿来用了。
<FlipView>
    <Image Source="CommonAssets/5083.jpg"/>
    <Image Source="CommonAssets/5503.jpg"/>
    <Image Source="CommonAssets/6121.jpg"/>
FlipView>
除此之外呢,我们还能够在后台代码中加入,以下的第二段代码和第一段相似,只是是用的List。
FlipView flipView = new FlipView();
flipView.Items.Add("Item 1");
flipView.Items.Add("Item 2");
flipView.SelectionChanged += filpView_SelectionChanged;
grid1.Children.Add(flipView);
List listItems = new List();
listItems.Add("Item 1");
listItems.Add("Item 2");
FlipView flipView = new FlipView();
flipView.ItemsSource = listItems;
flipView.SelectionChanged += filpView_SelectionChanged;
grid1.Children.Add(flipView); 除了这2种方式之外呢。用CollectionViewSource来绑定数据也是全然没问题的。
<Page.Resources>
    <CollectionViewSource x:Name="collectionVSFlipView" Source="{Binding Items}"/>
Page.Resources>
上面是一段资源文件。然后FlipView ListView的ItemsSource加入静态资源绑定就OK了。
<FlipView x:Name="flipView"
          ItemsSource="{Binding Source={StaticResource collectionVSFlipView}}"/>
假设大家自己试过FlipView就会发现它的图片资源等都是左右滚动的,假设要用上下滚动呢?那就用以下这个ItemsPanelTemplate模板就好了。
<FlipView.ItemsPanel>
     <ItemsPanelTemplate>
          <VirtualizingStackPanel Orientation="Vertical"/>
     ItemsPanelTemplate>
FlipView.ItemsPanel>
ScrollBar
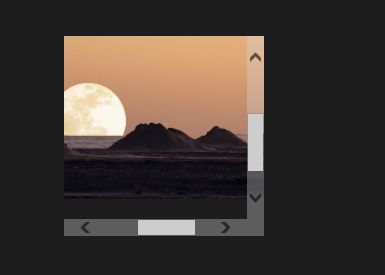
假设有缩放图片,并且能够滚动以查看图片的须要,那么就能够用ScrollBar啦。
这主要是能留给图片的位置太小以至于图片无法全部显示出来。
<ScrollViewer ZoomMode="Enabled" MaxZoomFactor="12" HorizontalScrollMode="Enabled" HorizontalScrollBarVisibility="Visible" VerticalScrollBarVisibility="Visible" VerticalScrollMode="Enabled" Height="200" Width="200" Margin="363,35,803,533">

    <Image Source="CommonAssets/6121.jpg" Height="400" Width="400"/>
ScrollViewer>
Viewbox
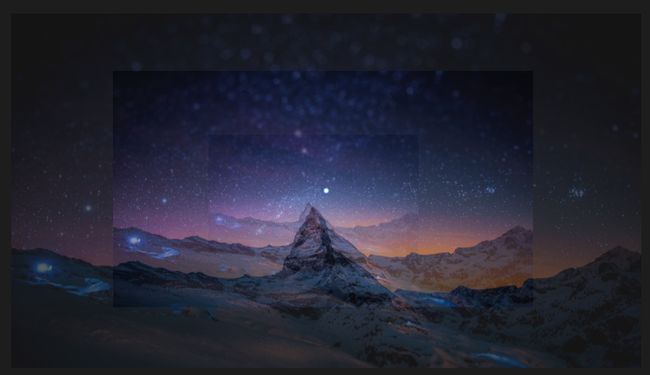
另一个控件则能够将图片等缩放到指定的大小的,那就是Viewbox。大家看看以下这个图,是不是非常炫酷呢。
    <Viewbox MaxHeight="33" MaxWidth="33" Margin="23.5,35,-26,-35">
            <Image Source="CommonAssets/5503.jpg" Opacity="0.9 "/>
        Viewbox>
        <Viewbox MaxHeight="66" MaxWidth="66" Margin="26,35,-26,-35">
            <Image Source="CommonAssets/5503.jpg" Opacity="0.6"/>
        Viewbox>
        <Viewbox MaxHeight="99" MaxWidth="99" Margin="26,35,-26,-35">
            <Image Source="CommonAssets/5503.jpg" Opacity="0.3"/>
        Viewbox>
GridView
相信大家都已经看过了GridView控件,非常多Modern应用都会採用的。
其和ComboBox挺相似的。
"gView1" SelectionChanged="gView1_SelectionChanged">
String>Item 1 String>
String>Item 2 String>
String>Item 3 String>
HyperlinkButton
HyperlinkButton既能够作为Button来用,也能够用来做超链接。
<HyperlinkButton Content="NoMasp--CSDN" NavigateUri="http://blog.csdn.net/nomasp" />ProgressBar
相信大家都挺喜欢玩进度条的吧?我本人倒是认为相比于Win7及Vista等。Win8的进度条变得更加有意思了。
<ProgressBar x:Name="progressBar1" IsIndeterminate="True" Width="100" Margin="607,377,659,385"/>
<ProgressBar x:Name="progressBar2" Value="70 " Width="100" Margin="607,352,659,410"/>
第一个图是执行中的进度条啦。第二个图中的上图也就是progressBar1。其Value为70的确定进度的进度条,下图则是progressBar2,是执行中的进度条在设计器中的精巧状态。
ProgressRing
环形的进度条会不会更好玩呢?
<ProgressRing x:Name="progressRing1" IsActive="True" />Slider
比方说win8上的音量呀、屏幕亮度呀。这些地方都用到了滑动条。
这里来看看它的ThumbToolTipValueConverter属性吧。为了将值绑定到Slider上。我们须要有一个类。这个类须要一个为数据绑定提供值转换的接口。可视化元素也就是Slider为绑定目标,其有2个方向:数据源->数据->绑定目标,绑定目标->数据->数据源。
我们须要写一个类,能够直接在MainPage.xaml.cs下写,但更好是单独新建一个类。再考虑到这个是通用应用。所以将类新建到Shared下比較合适。
public class ThumbToolTipValueConverter : Windows.UI.Xaml.Data.IValueConverter
{
    public object Convert(object value, Type targetType, object parameter, string language)
    {
        if(value is double)
        {
                double dValue= System.Convert.ToDouble(value);
                return dValue;
        }
        return null;
     }

    public object ConvertBack(object value, Type targetType, object parameter, string language)
    {
        return null;
    }
}
然后加入以下代码作为本地实例化的资源就可以。
<Page.Resources>
   <local:ThumbToolTipValueConverter x:Key="thumbToolTipValueC"/>
Page.Resources>
最后就是传说中的本体啦。
<Slider Width="200" Height="50" Name="slider1"
      ThumbToolTipValueConverter="{StaticResource thumbToolTipValueC}" />
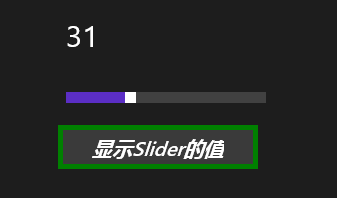
我们还能够加入一个Button和TextBlock,让点击来在TextBlock上显示Slider的Value。
private void btnGetSliderValue_Click(object sender, RoutedEventArgs e)
{
    tblockSlider.Text = slider1.Value.ToString();
}
用浮出控件做预览效果
在前面学习控件的时候。我们已经见过了MessageDialog了,关于Button另一个浮出控件Flyout哦。
详细是怎样用呢?接下来就一起看看。
我们还是延续前面的那个演示样例好了,那么,代码来了。
        <Button x:Name="btnWhat" Content="这是什么?">
            <Button.Flyout>
                <Flyout>
                    <StackPanel>
                        <TextBlock Width="430" Style="{StaticResource BaseTextBlockStyle}"
                                   Text="噢!
你刚刚又踩到地雷了,要撤销吗?"
Foreground="Red" FontSize="25"/> <Button Click="btnUndo_Click" Margin="12" Content="撤销"/> StackPanel> Flyout> Button.Flyout> Button>
当我们点击了撤销button后,当然须要btnWhatbutton的Flyout消失掉,这个嘛,也仅仅要1行代码啦。另外这个踩雷的逻辑这里就不展开啦.
private void btnUndo_Click(object sender, RoutedEventArgs e)
{
     btnWhat.Flyout.Hide();
}
更为重要的是在于这些在WP8上也是通用的,这才是核心所在。
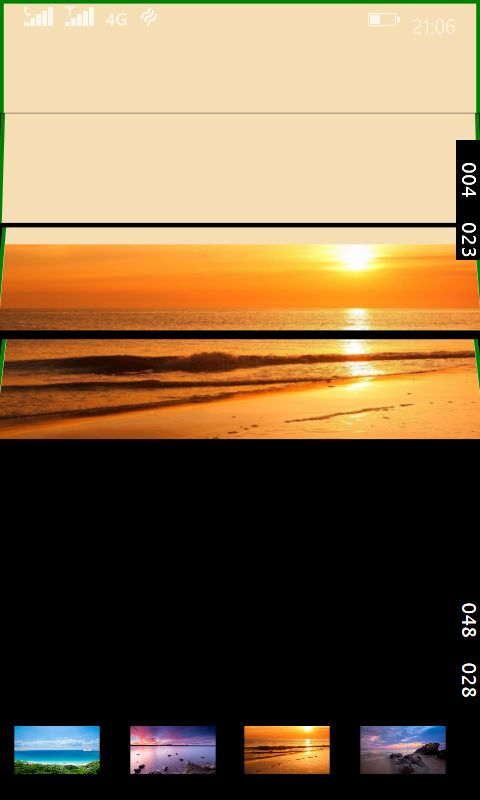
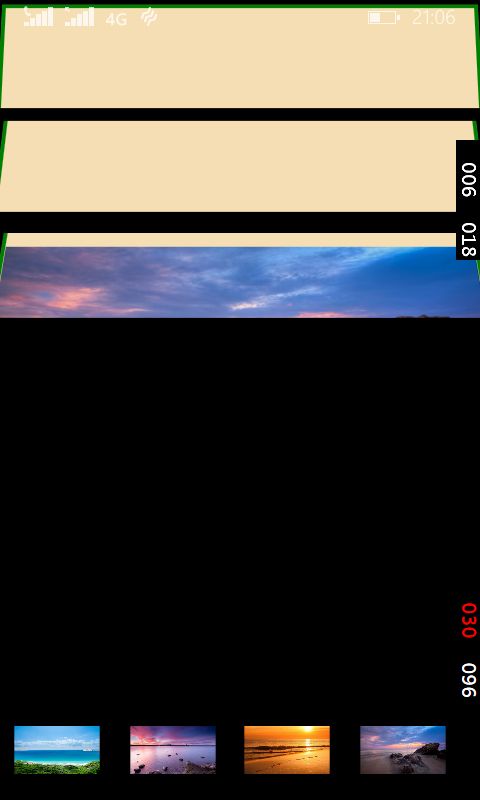
既然这一篇教程主要是浮出控件,假设能够借助浮出产生预览图像的效果会不会非常棒呢?先来看张执行截图吧。
以下都是代码啦,什么Binding呀之类的都不用管啦。须要注意的地方也就是那些Height和Width可能须要拿来调整一下。
        "ResourceFlyoutImage" Placement="Right">
            <Image Source="{Binding Path=Source}" MaxHeight="800" MaxWidth="1400" Stretch="Uniform"/>

                <Style TargetType="FlyoutPresenter">
                    <Setter Property="MinHeight" Value="900"/>
                    <Setter Property="MinWidth"  Value="1600"/>
                    <Setter Property="BorderThickness" Value="3"/>
                    <Setter Property="Background" Value="Wheat"/>
                    <Setter Property="BorderBrush" Value="Green"/>
                    <Setter Property="ScrollViewer.ZoomMode" Value="Enabled"/>
                Style>


    <Grid>
        "Left" Orientation="Vertical">
            <Image Source="Assets/14152.jpg" Width="100" Height="100" Margin="12" Tapped="img_Tapped"
                   FlyoutBase.AttachedFlyout="{StaticResource ResourceFlyoutImage}"
                   DataContext="{Binding RelativeSource={RelativeSource Mode=Self}}"/>

            <Image Source="Assets/14158.jpg" Width="100" Height="100" Margin="12" Tapped="img_Tapped"
                   FlyoutBase.AttachedFlyout="{StaticResource ResourceFlyoutImage}"
                   DataContext="{Binding RelativeSource={RelativeSource Mode=Self}}"/>

            <Image Source="Assets/14160.jpg" Width="100" Height="100" Margin="12" Tapped="img_Tapped"
                   FlyoutBase.AttachedFlyout="{StaticResource ResourceFlyoutImage}"
                   DataContext="{Binding RelativeSource={RelativeSource Mode=Self}}"/>

            <Image Source="Assets/14164.jpg" Width="100" Height="100" Margin="12" Tapped="img_Tapped"
                   FlyoutBase.AttachedFlyout="{StaticResource ResourceFlyoutImage}"
                   DataContext="{Binding RelativeSource={RelativeSource Mode=Self}}"/>

    Grid>
private void img_Tapped(object sender, TappedRoutedEventArgs e)
{
FlyoutBase.ShowAttachedFlyout((FrameworkElement)sender);
} 相同的,在WP上也是能够得哦,一下是做了些改动后的XAML代码啦。
正如大家所见,我把图片都缩小了,Placement也设置成了Top,StactPanel的属性也做了改动。
        "ResourceFlyoutImage" Placement="Top">
            <Image Source="{Binding Path=Source}" MaxHeight="600" MaxWidth="400" Stretch="Uniform"/>

                <Style TargetType="FlyoutPresenter">
                    <Setter Property="MinHeight" Value="600"/>
                    <Setter Property="MinWidth"  Value="400"/>
                    <Setter Property="BorderThickness" Value="3"/>
                    <Setter Property="Background" Value="Wheat"/>
                    <Setter Property="BorderBrush" Value="Green"/>
                    <Setter Property="ScrollViewer.ZoomMode" Value="Enabled"/>
                Style>


    <Grid>
        "Bottom" Orientation="Horizontal">
            <Image Source="Assets/14152.jpg" Width="72" Height="60" Margin="12" Tapped="img_Tapped"
                   FlyoutBase.AttachedFlyout="{StaticResource ResourceFlyoutImage}"
                   DataContext="{Binding RelativeSource={RelativeSource Mode=Self}}"/>

            <Image Source="Assets/14158.jpg" Width="72" Height="60" Margin="12" Tapped="img_Tapped"
                   FlyoutBase.AttachedFlyout="{StaticResource ResourceFlyoutImage}"
                   DataContext="{Binding RelativeSource={RelativeSource Mode=Self}}"/>

            <Image Source="Assets/14160.jpg" Width="72" Height="60" Margin="12" Tapped="img_Tapped"
                   FlyoutBase.AttachedFlyout="{StaticResource ResourceFlyoutImage}"
                   DataContext="{Binding RelativeSource={RelativeSource Mode=Self}}"/>

            <Image Source="Assets/14164.jpg" Width="72" Height="60" Margin="12" Tapped="img_Tapped"
                   FlyoutBase.AttachedFlyout="{StaticResource ResourceFlyoutImage}"
                   DataContext="{Binding RelativeSource={RelativeSource Mode=Self}}"/>

    Grid>
看样子效果还不错嘛。
时间控件的很多其它介绍
在前面我们走马观花地介绍了一大堆控件,当中自然也包含这DatePicker和TimePicker,那么略微高级些的使用方法呢?
假设你想做一个关于健身、闹钟等的App。那么不可避免的会用到时间这些控件了。
<DatePicker x:Name="datePicker" Header="NoMasp Date" Foreground="Beige"/>
<Button x:Name="btnOK" Click="btnOK_Click" Content="确定" Foreground="Cyan" Margin= "292,378,0,352" >
     <Button.Flyout>
          <Flyout>
              <TextBlock x:Name="tblock1" Foreground="Fuchsia"/>
          Flyout>
     Button.Flyout>
Button>
那么我们可能须要所选定的时间是未来时间。也就是比应用执行时的时间要大。获取当前选中的时间给程序的其它部分使用也是非常easy的,我这里的year等都在之前定义过了哦,在函数内定义可是不明智的哟。
private void btnOK_Click(object sender, RoutedEventArgs e)
{
    if(datePicker.Date>DateTimeOffset.Now)
        tblock1.Text = string.Format("你所选中的时间是:{0}。", datePicker.Date.ToString("D"));
    else
        tblock1.Text = "噢!你想要穿越吗?";

    year = datePicker.Date.Year;
    month = datePicker.Date.Month;
    day = datePicker.Date.Day;
}
有意思的事情又来了。假设你是想要做一个时间囊,默认的时间就是10年之后。那么DatePicker的初始事件假设正好就是10年后不是非常好吗。
那么我们要做的呢,首先就是给DatePicker的Loaded写一条事件啦。
(尽管我认为App是保存不了10年的)
private void datePicker_Loaded(object sender, RoutedEventArgs e)
{
    datePicker.Date = DateTimeOffset.Now.AddYears(10);
}
假设不想兴师动众去用DatePicker的Loaded,那么也能够直接在后台代码中这样写。
protected override void OnNavigatedTo(NavigationEventArgs e)
{
    datePicker.Date = DateTimeOffset.Now.AddYears(10);
}
我还做了一个小測试呢,在Loaded事件中让时间添加11年。在OnNavigatedTo事件中让时间添加10年。结果——结果是添加了11年啦。看来还是自家的Loaded更厉害。
接下来就是TimePicker啦,回到健身的话题,假设哈,6点到18点才适合运动。那么我们的Microsoft Band就做了以下这么个要求(开玩笑啦)。
    private void btnOK_Click(object sender, RoutedEventArgs e)
        {
            TimeSpan startTime = new TimeSpan(6, 0, 0);
            TimeSpan endTime = new TimeSpan(18, 0, 0);

            if(timePicker.Time>=startTime&&timePicker.Time<=endTime)
            {
                tblock1.Text = string.Format("这段时间运动都是非常好的哦——{0}。", timePicker.Time.ToString());
            }
            else
            {
                tblock1.Text = "此时间吧不适合运动的吧?";
            }
        }
或许你还想控制手环上时间选择器的初始时间,那么代码来了。
protected override void OnNavigatedTo(NavigationEventArgs e)
{
     timePicker.Time = new TimeSpan(23, 0, 0);
}
作为强迫症患者呢,每次我设定闹钟的时候都要设置在一个比較好的时间,比方被5整除啦、质数啦。这里能够用MinuteIncrement属性来控制分钟的增量哟。比方增量为5呀。从小学起就飞得把电子手表的时间给设置成24小时制的,这个也是能够实现的,ClockIdentifier设置成24HourClock就搞定啦。
应用栏
主要的使用方法我们在教程前面的“页面布局与基本导航”中已经讲过了,这里继续补充关于应用栏的很多其它使用方法。
Icon
在之前的学习中,我们知道Icon属性中有非常多非常多系统提前定义。但或许这些还是不够的。如今就来添加几种使用方法。
字符集应用
<AppBarToggleButton Label="Sigma" Click="AppBarButton_Click">
    <AppBarToggleButton.Icon>
        <FontIcon Glyph="Σ"/>
    AppBarToggleButton.Icon>
AppBarToggleButton>
关于很多其它字符集的应用请訪问维基百科。
PathIcon
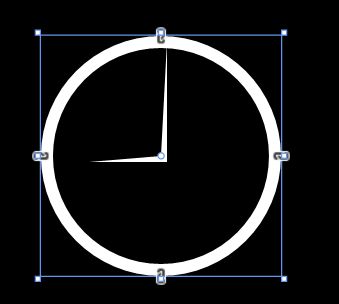
我们也能够用路径来绘制一个属于自己的图形哦,以下的图形大概就是9点钟的样子啦。
<AppBarToggleButton Label="Time" Click="AppBarButton_Click">
    <AppBarToggleButton.Icon>
        <PathIcon Data="F1 M 20,20 21,1L 21,21L 8,21"/>
    AppBarToggleButton.Icon>
AppBarToggleButton>
怎样适应不同的分辨率
怎样适应不同的分辨率这也是值得我们去解决的问题,毕竟不论是从8英寸的平板还是25英寸的台式机,甚至还有4英寸至7英寸的手机,在应用栏button太多而屏幕不够大时。多余的button该怎么办呢?
默认情况下。应用栏图标的宽度都是确定好的100像素哦。那么我们先来看两张图片好了,由于Windows 10是能够直接调整Modern应用的大小的(而不是windows 8那种仅仅能全屏显示)。所以我直接拉伸Modern大小以模拟分辨率的概率啦。
    <Page.BottomAppBar>
        <AppBar x:Name="bottomAppBar" IsSticky="True">
            <Grid>
                <StackPanel x:Name="leftBottomAppBar"
                            Orientation="Horizontal">
                    <AppBarButton Label="Like" Icon="Like"/>
                    <AppBarButton Label="Dislike" Icon="Dislike"/>
                    <AppBarButton Label="Delete" Icon="Delete"/>
                    <AppBarButton Label="Download" Icon="Download"/>
                    <AppBarButton Label="Pin" Icon="Pin"/>
                StackPanel>
                <StackPanel x:Name="rightBottomAppBar"
                        Orientation="Horizontal" HorizontalAlignment="Right">
                    <AppBarButton Label="Play" Icon="Play"/>
                    <AppBarButton Label="Pause" Icon="Pause"/>
                    <AppBarButton Label="Stop" Icon="Stop"/>
                    <AppBarButton Label="Previous" Icon="Previous"/>
                    <AppBarButton Label="Next" Icon="Next"/>
                StackPanel>
            Grid>
        AppBar>
    Page.BottomAppBar>
这里为了调试更加方便。所以使用了IsSticky属性。AppBarButton另一个非常重要的属性哟,之前用不到,只是这里就是核心成员了呢。它就是IsCompact。这个属性能够让应用栏button仅仅显示图标而不显示文字。也就是Label啦。
那么我们的工作就要环绕这个属性来展开了。
我们能够这样假设,有一个函数,它有一个布尔变量的參数,參数为真的话呢,那么全部的这些AppBarButton的IsCompact属性也为真。在以下这段代码中,我们先将bottomAppBar的自对象选取为root,这样一来的话呢,假设应用中还有顶部的应用栏,就不会相互干扰啦。然后逐步取出root和panel中的自对象就好咯。
     private void AppBarButtonCompact(bool isCompact)
        {
            Panel root = bottomAppBar.Content as Panel;
            if(root!=null)
            {
                foreach(Panel panel in root.Children)
                {
                    foreach (ICommandBarElement child in panel.Children)
                    {
                        child.IsCompact = isCompact;
                    }
                }
            }
        }
接下来还须要推断究竟需不须要启用IsCompact,那这又是由什么决定的呢。既然前面提到是由于屏幕的分辨率,也就是所应用所占用的宽度会导致应用栏发生重叠,那么答案就毫无疑问了。看到以下的代码相信大家都明确了。至于为何是宽度的界限在1000呢,那是由于有10个AppBarButton,前面也说了它们的宽度是100。(不带Label的话呢,就仅仅须要60像素啦。)
     void AppSizeChanged(object sender, SizeChangedEventArgs e)
        {
            if (e.NewSize.Width != e.PreviousSize.Width)
            {
                if (e.NewSize.Width < 1000)
                {
                    AppBarButtonCompact(true);
                }
                else
                {
                    AppBarButtonCompact(false);
                }
            }
        }
来张图片以示搞定这个问题了吧。
可是像我这么钻牛角尖的人,10个AppBarButton用这样的方式搞定了,那20个呢?我们就来演示一下,把之前XAML中的AppBarButton复制粘贴一番。假设是2K、4K的屏幕应对20个没问题啊,但我这1920X1080的屏幕就放不下了。
那么这又有什么办法能够解决的吗?当然有啦。将这20个图标切成2列就好啦。
我们首先在Grid中加入一行。
<Grid.RowDefinitions>
    <RowDefinition Height="auto"/>
    <RowDefinition Height="auto"/>
Grid.RowDefinitions>
再通过以下这张方式来调整它处于哪一行。以及在水平方向的右側还是左側。
这里我将两行都设置在右側啦。
leftBottomAppBar.SetValue(Grid.RowProperty, 1);
leftBottomAppBar.SetValue(HorizontalAlignmentProperty, HorizontalAlignment.Right);
当然了,这样一来就能够放40个AppBarButton啦,假设缩小应用的大小的话为了容纳很多其它还能够用IsCompact属性呢。只是没有哪个应用做成这样吧。
另外呢,假设把应用栏设计成这样的话。
<Page.BottomAppBar>
   <AppBar x:Name="bottomAppBar" IsSticky="True">
      <Grid>
         <Grid.ColumnDefinitions>
             <ColumnDefinition Width="*"/>
             <ColumnDefinition Width="*"/>
         Grid.ColumnDefinitions>
         <StackPanel Grid.Column="0" x:Name="leftBottomAppBar"  Orientation="Horizontal" HorizontalAlignment="Left">
             <AppBarButton Label="Like" Icon="Like"/>
             <AppBarButton Label="Dislike" Icon="Dislike"/>
             <AppBarButton Label="Delete" Icon="Delete"/>
             <AppBarButton Label="Download" Icon="Download"/>
             <AppBarButton Label="Pin" Icon="Pin"/>
         StackPanel>
         <StackPanel Grid.Column="1" x:Name="rightBottomAppBar" Orientation="Horizontal" HorizontalAlignment="Right">
             <AppBarButton Label="Play" Icon="Play"/>
             <AppBarButton Label="Pause" Icon="Pause"/>
             <AppBarButton Label="Stop" Icon="Stop"/>
             <AppBarButton Label="Previous" Icon="Previous"/>
             <AppBarButton Label="Next" Icon="Next"/>
         StackPanel>
      Grid>
   AppBar>
Page.BottomAppBar>
那么对于Windows 10。在拉伸的过程中。中间部分的控件就会慢慢消失啦。以下这张图片呢,是我在拉伸到中间有2个控件刚好重叠的时候啦。至于把AppBarButton设计成这样是好是坏大家自己决定咯。我反正认为这样不好呢。只是有意思的是,即便如此,它们彼此的Click事件还都是有效的噢,会区分左右两部分,而不会叠在一起。
当然啦。这个的应用远不是应用栏这么简单哟,对于其它的前景,比方有两个TextBlock在屏幕左右两側,当应用把收缩变小之后也能够让这个TextBlock叠成2层在屏幕的一边。
在应用栏上加入菜单
我们都见过有菜单的应用栏button对吧。这个的实现事实上也挺简单的。用Flyout属性就好了。
<Page.BottomAppBar>
    <CommandBar>
        <AppBarButton Icon="Rotate" Label="Rotate">
            <AppBarButton.Flyout>
                <MenuFlyout>
                   <MenuFlyoutItem Text="Rotate 90" Click="MenuFlyoutItem_Click" Tag="Rotate90"/>
                   <MenuFlyoutItem Text="Rotate 180" Click="MenuFlyoutItem_Click" Tag="Rotate180"/>
                   <MenuFlyoutItem Text="Rotate 270" Click="MenuFlyoutItem_Click" Tag="Rotate270"/>
               MenuFlyout>
           AppBarButton.Flyout>
       AppBarButton>
   CommandBar>
Page.BottomAppBar>
Tag属性,就相当于做一个标签。以下这段代码就让Flyout菜单发挥作用了。
private void MenuFlyoutItem_Click(object sender, RoutedEventArgs e)
{
    MenuFlyoutItem selectedItem = sender as MenuFlyoutItem;

    if (selectedItem != null)
    {
        if (selectedItem.Tag.ToString() == "Rotate90")
        {
            DoRotate(90);
        }
        else if (selectedItem.Tag.ToString() == "Rotate180")
        {
            DoRotate(180);
        }
        else if (selectedItem.Tag.ToString() == "Rotate270")
        {
            DoRotate(270);
        }
    }
}
很多其它控件的补充
Pivot
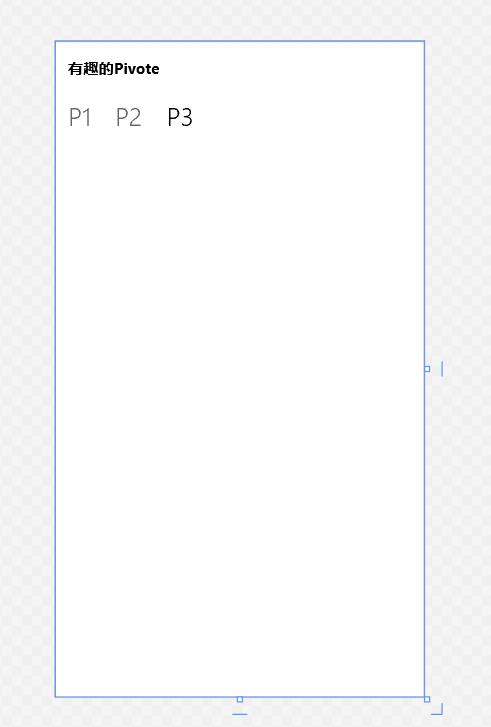
以下是一个简单的演示样例。你能够在PivotItem标签下加入直接的内容。
它的长处在于是左右滑动的,比点击一个标题栏更加方面快捷,我也认为也是WP8/8.1时代的一个特色。而Win10时代微软重操汉堡菜单。滑动渐渐变成了安卓是的点按。
<Grid Background="{ThemeResource ApplicationPageBackgroundThemeBrush}">
        <Pivot Title="有趣的Pivote">
            <PivotItem Header="P1">

            PivotItem>
            <PivotItem Header="P2">

            PivotItem>
            <PivotItem Header="P3">

            PivotItem>
        Pivot>
    Grid>
以下两张截图分别相应的是手机和IoT设备的喔。
