云计算与大数据——MPI集群配置
什么是MPI集群?
MPI(消息传递接口)是一种用于编写并行程序的标准,它允许在多个计算节点上进行通信和协作。MPI集群配置是指在一个或多个计算节点上设置MPI环境以实现并行计算。
MPI集群配置的步骤:
硬件选型:选择适合你需求的硬件设备,包括主节点和计算节点。主节点负责协调计算节点之间的通信和任务分配,而计算节点执行实际的计算任务。
操作系统安装:为每个节点安装操作系统,常见的选择包括Linux、Windows服务器等。确保所有节点都能够相互访问,并具备网络连接功能。
MPI软件安装:选择一种MPI实现,如OpenMPI、MPICH等,并根据操作系统的要求在每个节点上安装相应的MPI软件。MPI库提供了一组用于并行计算的函数和工具,以便在节点之间进行通信和同步。
配置主节点:编辑主节点的MPI配置文件,通常是mpiexec或mpirun的配置文件,以指定运行MPI程序的方式。这可以包括指定计算节点的数量、启动脚本、进程分配等选项。
配置计算节点:对于计算节点,编辑其MPI配置文件以指定主节点的位置和其他必要的信息。此外,确保计算节点能够访问主节点和其他计算节点,以便进行通信。
测试MPI集群:编写一个简单的MPI程序,并在MPI集群上进行测试。确保MPI程序能够正确地在多个节点上并行执行,并且能够通过消息传递实现节点之间的数据交换和同步。
扩展集群规模(可选):如果需要更多的计算能力,可以添加更多的计算节点到集群中。确保新的节点也安装了相应的MPI软件,并按照步骤4和5配置好。
下面我们来进行一个简单的MPI集群配置,希望对各位学习云计算和相关MPI集群知识有所帮助。
一、 用VMware Workstation Pro配置虚拟机并打开
1. 保证网络畅通,设置各节点的固定IP,并重新启动网络服务。
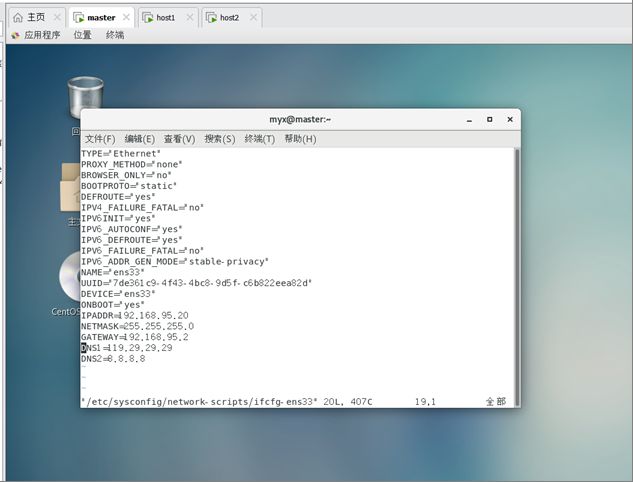
配置master网络服务:
sudo vim /etc/sysconfig/network-scripts/ifcfg-ens33
sudo vim /etc/sysconfig/network-scripts/ifcfg-ens33
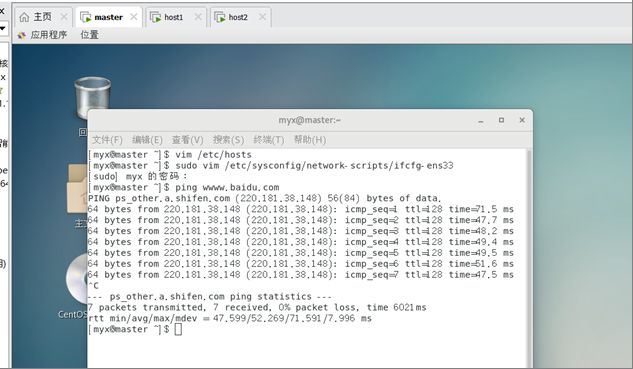
成功配置网络
ping www.baidu.com 成功!
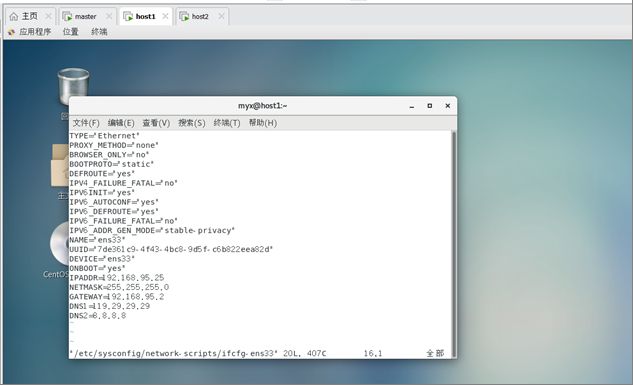
sudo vim /etc/sysconfig/network-scripts/ifcfg-ens33
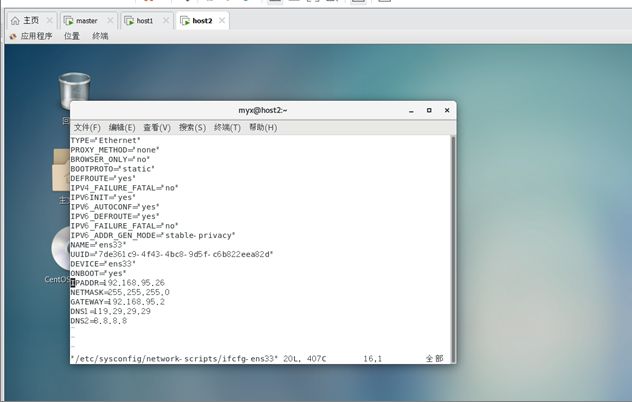
成功配置网络
ping www.baidu.com 成功!

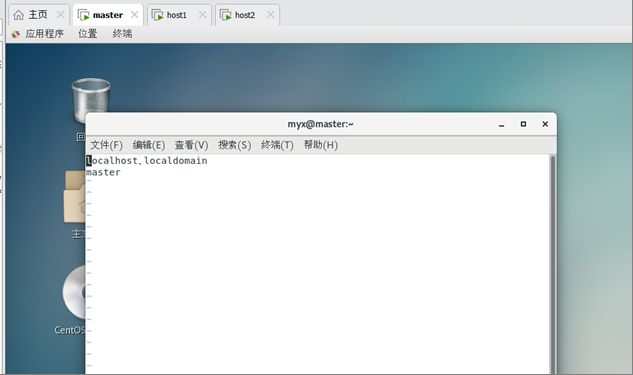
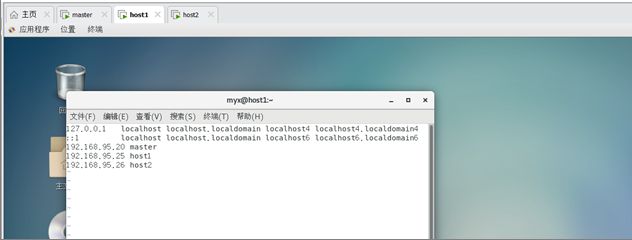
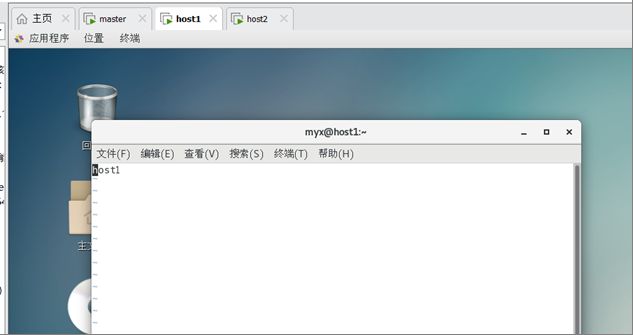
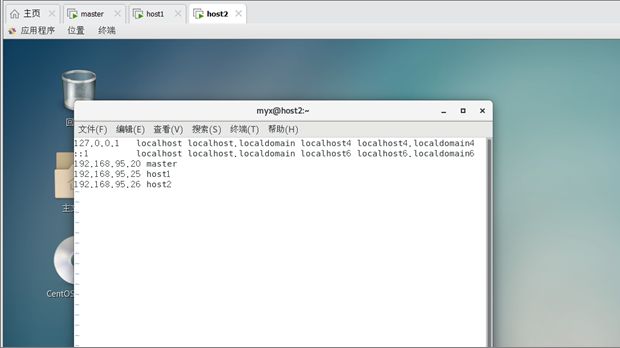
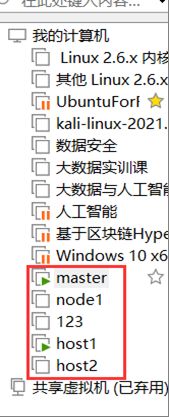
2. 配置两台机器的hosts文件:主机名分别为master、host1和host2
命令:
vim /etc/hosts
vim /etc/hosts
vim /etc/hosname
vim /etc/hosname
vim /etc/hosts
vim /etc/hosname
2. SSH免密登陆
ssh-keygen –t rsa 一路回车
在master,host1,host2分别
2.将公钥追加到authorized_keys文件中,命令:
cat ~/.ssh/id_rsa.pub>>~/.ssh/authorized_keys
在master,host1,host2分别
所有节点都要设置
3.将公钥拷贝到其它机器
(1)master
 ssh-copy-id -i  ~/.ssh/id_rsa.pub host1
ssh-copy-id  -i  ~/.ssh/id_rsa.pub host2
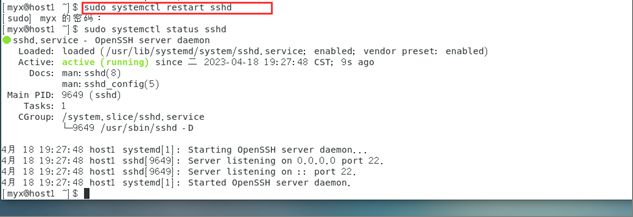
重启ssh服务:
sudo systemctl restart sshd
ssh host1
ssh-copy-id  -i  ~/.ssh/id_rsa.pub master
ssh-copy-id  -i  ~/.ssh/id_rsa.pub host2
sudo systemctl restart sshd
ssh host2
ssh-copy-id  -i  ~/.ssh/id_rsa.pub master
ssh-copy-id  -i  ~/.ssh/id_rsa.pub host1
重启ssh服务:
sudo systemctl restart sshd
ssh host1
CentOS 7在安装时自动安装了ssh软件包,并配置了SSH服务。
三台机器ssh服务状态:
systemctl status sshd
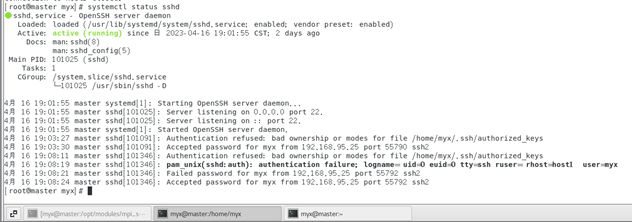

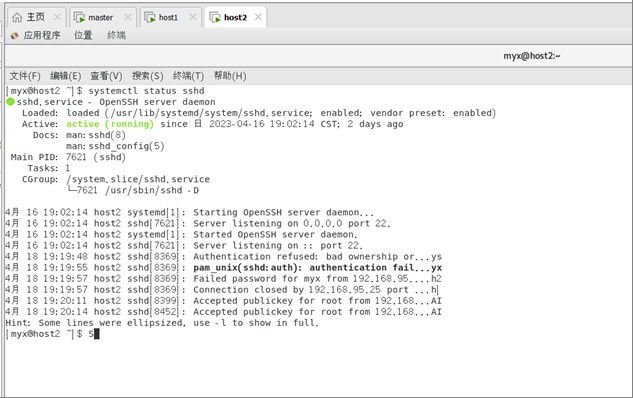
注意,ssh免密登陆是用户对用户式的,所以在操作中要保证主节点终端和子节点的终端是对应的。
1)关闭各节点防火墙和Selinux
关闭:sudo systemctl stop firewalld
开机禁用:sudo systemctl disable firewalld
关闭Selinux:sudo setenforce 0


2)服务端(master,建议取第一台主机)
(1)sudo yum -y install nfs-utils rpcbind #安装软件
(2)mkdir -p /opt/modules/mpi_share #创建共享目录
(3)chmod 777 /opt/modules/mpi_share -R #授予权限

(4)sudo vi /etc/exports #修改配置写入:
/opt/modules/mpi_share 192.168.95.25(rw,sync,no_root_squash) /opt/modules/mpi_share 192.168.95.26(rw,sync,no_root_squash)
192.168.95.25是子节点的地址,也可以是主机名,权限选项中的rw表示允许读写,视自己主机具体IP地址输入;ro为只读;sync表示同步写入,no_root_squash表示当客户机以root身份访问时赋予本地root权限。
sudo exportfs -rv
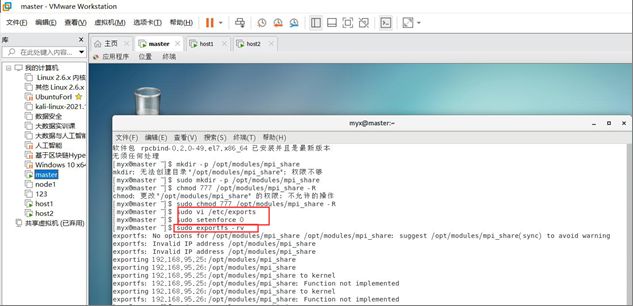
(5)sudo systemctl start rpcbind
sudo systemctl start nfs #启动nfs,或者设置为开机启动
 (6)sudo systemctl enable rpcbind
sudo systemctl enable nfs
showmount -e #查看NFS服务器端的共享目录

3)客户端(host1)
(1)sudo yum -y install nfs-utils rpcbind
(2)mkdir -p /opt/modules/mpi_share #将各个节点的共享目录位置和名字设置成一样的
(3)sudo systemctl start rpcbind
sudo systemctl start nfs #同样可以设置开机启动
(4)sudo systemctl enable rpcbind
(5)sudo mount -t nfs 192.168.95.20:/opt/modules/mpi_share /opt/modules/mpi_share #将服务器端共享目录挂载到本地文件夹
(6)或者永久挂载(可选)
vim /etc/fstab
添加192.168.95.20:/home/mpi_share /home/mpi_share nfs rw 0 0

4)客户端(host2)
(1)sudo yum -y install nfs-utils rpcbind
(2)mkdir -p /opt/modules/mpi_share #将各个节点的共享目录位置和名字设置成一样的
(3)sudo systemctl start rpcbind
sudo systemctl start nfs #同样可以设置开机启动
(4)sudo systemctl enable rpcbind
(5)sudo mount -t nfs 192.168.95.20:/opt/modules/mpi_share /opt/modules/mpi_share #将服务器端共享目录挂载到本地文件夹
(6)或者永久挂载(可选)
vim /etc/fstab
添加192.168.95.20:/home/mpi_share /home/mpi_share nfs rw 0 0

5. 安装配置mpich
1)安装编译器
yum install gcc gcc-c++ gcc-fortran kernel-devel -y # https://blog.csdn.net/wangzhouf/article/details/108222704
(yum install gcc g++ #mpich默认的编译器是gcc,g++和gfortran,但是yum命令找不到gfortran的安装包
#可以自行查找安装gfortran编译器的方法 作者:风干橘子皮- https://www.bilibili.com/read/cv15215061 出处:bilibili)

2)下载并安装mpi安装包
(1)创建目录并下载包
mkdir -p /opt/softwares
cd softwares
wget http://www.mpich.org/static/downloads/3.4.1/mpich-3.4.1.tar.gz
tar -zxvf mpich-3.4.1.tar.gz
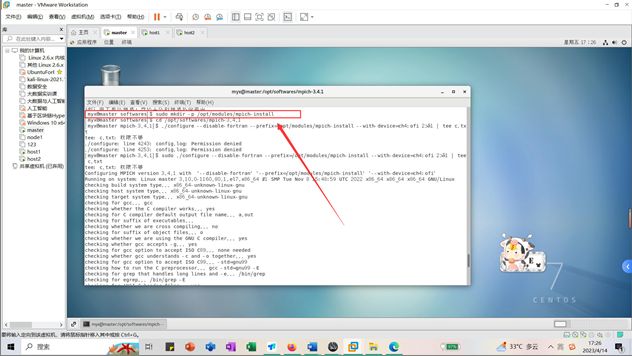
mkdir -p /opt/modules/mpich-install
cd /opt/softwares/mpich-3.4.1
./configure --disable-fortran --prefix=/opt/modules/mpich-install --with-device=ch4:ofi 2>&1 | tee c.txt
或:
./configure --disable-fortran //作者:风干橘子皮- https://www.bilibili.com/read/cv15215061 出处:bilibili

make
make install
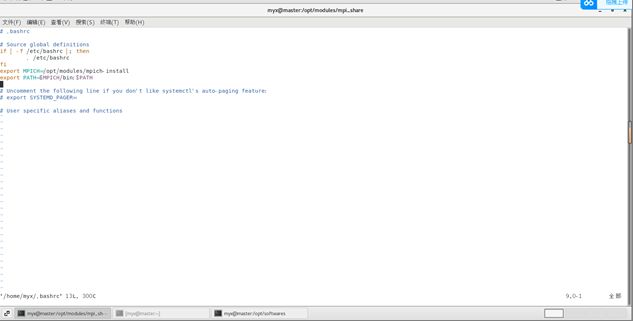
vim ~/.bashrc
export MPICH=/opt/modules/mpich-install
export PATH=$MPICH/bin:$PATH
source ~/.bashrc
mpirun -version

6.在每台主机上编译C程序
1)将C程序代码helloWorld.c上传到 每台主机的/opt/modules/mpi_share目录
2)cd /opt/modules/mpi_share`
3)先编写一个helloWorld.c和一个helloWorld2.c:
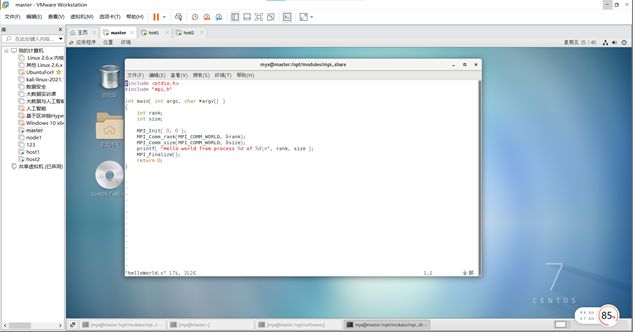
mpicc -o helloWorld helloWorld.c
#include "mpi.h"
#include
#include
void main(argc,argv)
int argc;
char *argv[];
{
  int myid, numprocs;
  int namelen;
  char processor_name[MPI_MAX_PROCESSOR_NAME];
  MPI_Init(&argc,&argv);
  MPI_Comm_rank(MPI_COMM_WORLD,&myid);
  MPI_Comm_size(MPI_COMM_WORLD,&numprocs);
  MPI_Get_processor_name(processor_name,&namelen);
  fprintf(stderr,"Hello World! Process %d of %d on %s\n", myid, numprocs, processor_name);
  MPI_Finalize();
}
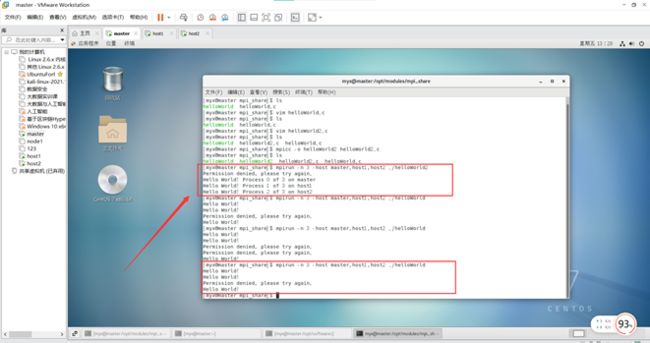
mpirun -n 3 -host master,host1,host2 ./helloWorld

mpirun -n 3 -host master,host1,host2 ./helloWorld2


当我们面对我们主要的矛盾时候,如果我们能够站在更高维度、更高层次去看待问题,我们将会发现新大陆,会有一种忽如一夜春风来,千树万树梨花开的感受,这对我们个人思维层面又一个巨大的提升,但是这个过程需要我们不断学习,不断历练,当达到一定层次的时候,量变就会发生质变。
