python+pytest+allure
文章目录
- 我的第一个自动化测试
-
- vscode
-
- 1.vscode介绍
- 2.vscode 配置
- POM模式
-
- 1.POM介绍
-
- 1) 运行方式:
- 2)运行逻辑:
- 2.例子
-
- 1) pages
- 2)testcase
- 3.其他文件
-
- 1) common/param
- 2) db/cont_mysql_db.py
- 3) conftest.py
- pytest.ini
- fixture
-
- 1.登录
- 2.登出
- 3.菜单
- 4.使用方式
- 参数化
- allure
-
- 1.配置
- 2.生成结果
- 3.生成报告
我的第一个自动化测试
本文章介绍python+pytest+allure自动化测试的搭建。使用vscode进行编写运行,POM模式,pytest框架,allure生成测试结果。
vscode

1.vscode介绍
17年用pycharm写过一个简单的自动化脚本,当时是学习selenium以及实践应用。
19年再次想编写脚本时,pycharm控制比较严格,一直提示需要输入码,所以改用vscode,使用起来发现vscode除了使用门槛比pycharm高一点,其他都还是非常不错的。
推荐指数*****
vscode是微软出品的编程软件,有以下特点:
1、 占用内存低
2、 代码补全,比较人性化
3、 加载文件无压力
4、 界面设计杠杠的
5、 多插件安装
6、 内置Git
2.vscode 配置
虽说优点很多,但是使用起来,需要很多自己的配置。(可能会有不对的地方,需要大家指出)
launch.json配置:
{
    // 使用 IntelliSense 了解相关属性。
    // 悬停以查看现有属性的描述。
    // 欲了解更多信息,请访问: https://go.microsoft.com/fwlink/?linkid=830387
    "version": "0.2.0",
    "configurations": [

        {
            "name": "Python:Debug",
            "type": "python",
            "request": "launch",
            "stopOnEntry": false,
            "pythonPath": "D:\\Program Files\\Python38\\python.exe",
            //"pythonPath": "${command:python.interpreterPath}",
            "program": "${file}",
            "cwd": "${workspaceFolder}",
            "env": {},
            "envFile": "${workspaceFolder}/.env",
        },
        {
            "name": "PyTest",
            "type": "python",
            "request": "launch",
            "stopOnEntry": false,
            "pythonPath": "D:\\Program Files\\Python38\\python.exe",
            "module":"pytest",
            "args": [
                "-sv",
                "--disable-pytest-warnings",
                "--html=report.html"
            ],
            "cwd": "${workspaceRoot}",
            "env": {},
            "envFile": "${workspaceRoot}/.env",
        },
        {
            "name": "PyTest: Debug",
            "type": "python",
            "request": "launch",
            "stopOnEntry": false,
            "pythonPath": "D:\\Program Files\\Python38\\python.exe",
            "module":"pytest",
            "args": [
                "-sv",
                "--disable-pytest-warnings",
                "--html=report.html"
            ],
            "cwd": "${workspaceRoot}",
            "env": {},
            "envFile": "${workspaceRoot}/.env",
        },
        {
            "name": "Python: 当前文件",
            "type": "python",
            "request": "launch",
            "program": "${file}",
            "console": "integratedTerminal",
            "host": "localhost",
            "port": 3000
        }
    ]
}
setting.json
{
    "python.pythonPath": "D:\\Program Files\\Python38\\python.exe",
    "python.linting.pylintEnabled": true,
    "python.linting.enabled": true,
    "python.testing.unittestEnabled": false,
    "python.testing.unittestArgs": [
        "-v",
        "-s",
        ".",
        "-p",
        "test*.py"
    ],
    "python.testing.nosetestsEnabled": false,
    "python.testing.pytestEnabled": true,
    "python.testing.pytestPath":"d:\\program files\\python38\\lib\\site-packages\\pytest",
    "python.testing.pytestArgs": [
        "."
    ],
    "python.testing.autoTestDiscoverOnSaveEnabled":true,
    "python.linting.flake8Enabled": false,
    "python.jediEnabled": true,
    "python.autoComplete.addBrackets": true,
    "python.formatting.provider": "yapf",
    "files.autoSave": "afterDelay",
    "files.autoSaveDelay": 100,
    "editor.fontSize": 15,
    "fileheader.configObj": {
        "createFileTime": true,
        "timeNoDetail": false,
        "language": {
            "languagetest": {
                "head": "/$$",
                "middle": " $ @",
                "end": " $/"
            }
        },
        "autoAdd": false,
        "autoAlready": true,
        "annotationStr": {
            "head": "/*",
            "middle": " * @",
            "end": " */",
            "use": true
        },
        "headInsertLine": {
            "php": 2
        },
        "beforeAnnotation": {
            "py": "#!/usr/bin/env python\n# coding=UTF-8"
        },
        "specialOptions": {}
    },
    "fileheader.customMade": {
        "Author": "user",
        "Date": "Do not edit",
        "LastEditors": "user",
        "LastEditTime": "Do not Edit",
        "Descripttion": "",
    },
    "fileheader.cursorMode": {
        "description": "",
        "param": "",
        "return": ""
    },
    "python.languageServer": "Jedi"
}
task.json
{
    // See https://go.microsoft.com/fwlink/?LinkId=733558
    // for the documentation about the tasks.json format
    "version": "2.0.0",
    "tasks": [
        {

            "label": "VScode",
            "type": "shell",
           // "command"为python.exe的绝对路径
            "command": "D:\\Program Files\\Python38\\python.exe",
            "args": [
                "${file}"
            ],
            "problemMatcher": [],
            "presentation": {
                "echo": true,
                "reveal": "always",
                "focus": false,
                "panel": "shared",
                "showReuseMessage": true,
                "clear": false
            },
            "group": {
                "kind": "build",
                "isDefault": true
            }
        }
    ]
}
POM模式
1.POM介绍
采用PageObject设计模式是将某个页面的所有"元素(包含控件)属性"及"元素操作"封装在1个类(Class)里面,目的是为了将测试代码与被测页面对象代码分离,后期如果有页面元素发生更改,只需要修改相应页面对象的代码(即对应class文件),而不需要修改测试代码。也是为了进一步降低后续因页面变化带来的维护成本。
1) 运行方式:
1.在test_login_page.py 中执行main方法
if __name__ == '__main__':
    pytest.main(['-s','test_login_page.py'])
2.在终端中执行:
pytest testcase/test_login_page.py
2)运行逻辑:
执行test_login_page.py文件后,会根据文件中的方法进行执行,再调用loginPage.py ,再调用basePage.py
2.例子
建立如下的文件夹路径,以及py文件:
- pages
basePage.py
loginPage.py - testcase
test_login_page.py - common
param.py - db
cont_mysql_db.py - conftest.py
1) pages
basePage.py是页面的所有基础操作的方法。如图所示,基类,其他页面需要调用的所有基础方法都在此类中。
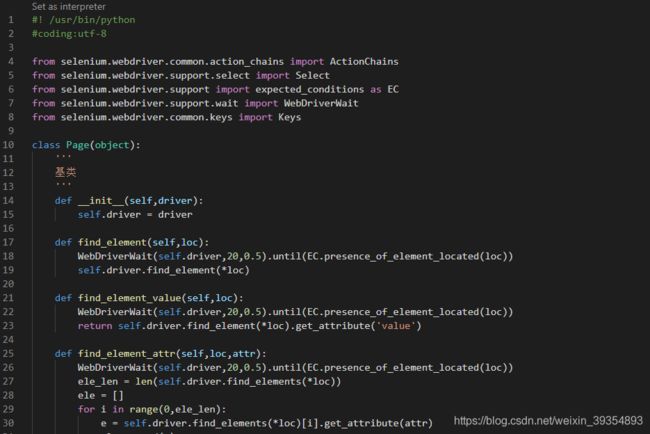
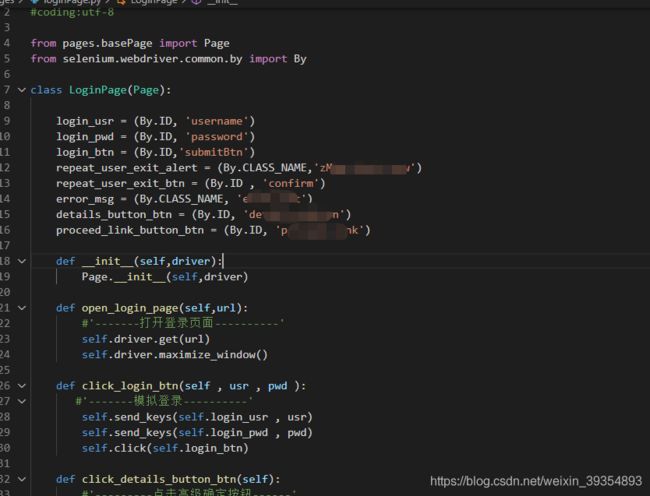
除basePage.py外,其他都是页面的定位,以及页面操作。
例如loginPage.py
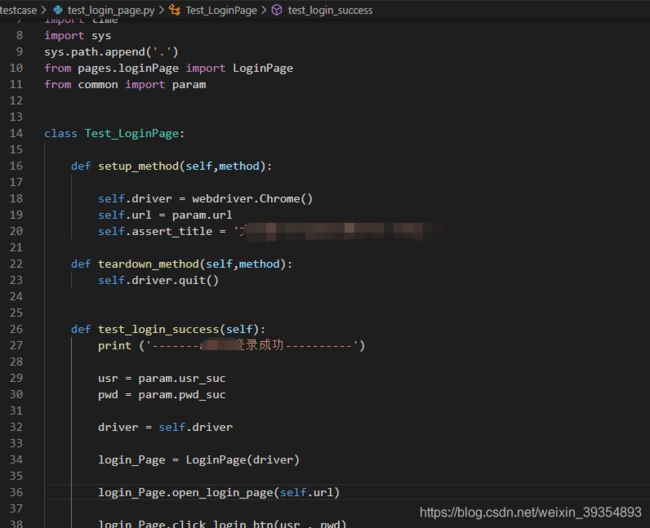
2)testcase
所有的测试用例类都在此文件夹下,例如test_login_page.py
3.其他文件
1) common/param
param文件中写入一些通用的参数
例如:登录地址,用户名,密码,数据库链接信息,参数化的参数
参数化在其他章节介绍

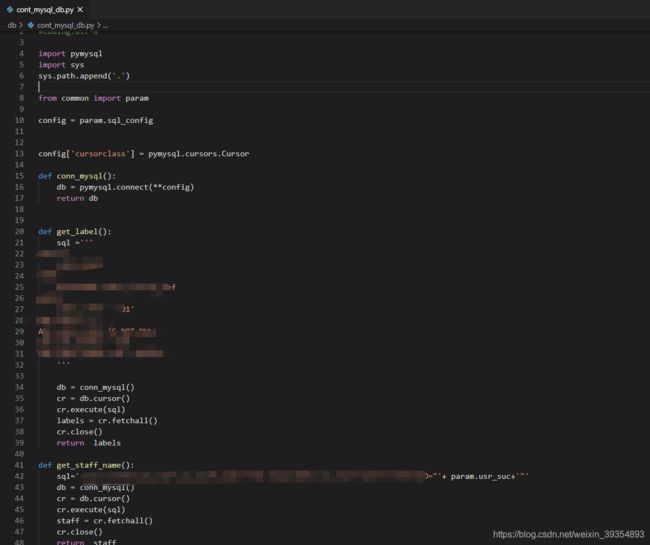
2) db/cont_mysql_db.py
mysql数据库访问信息,返回数据库查询结果。
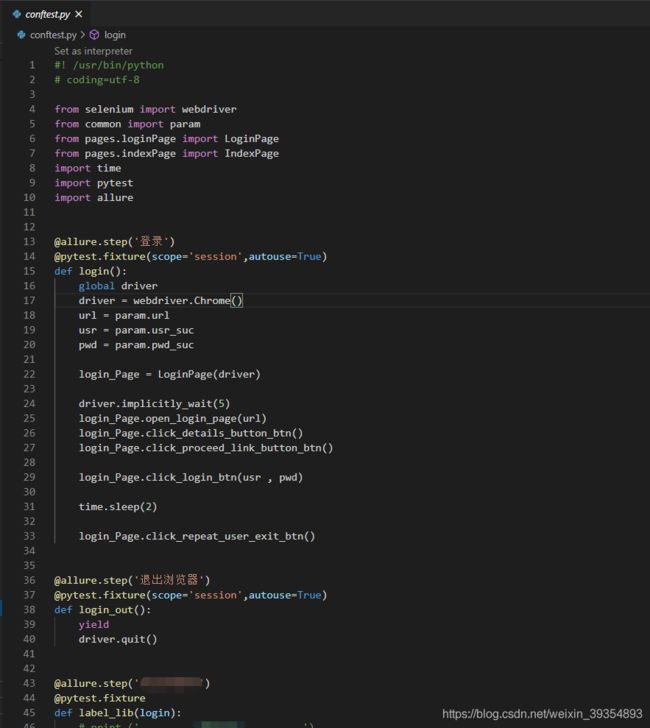
3) conftest.py
conftest.py 在参数化章节,详细介绍
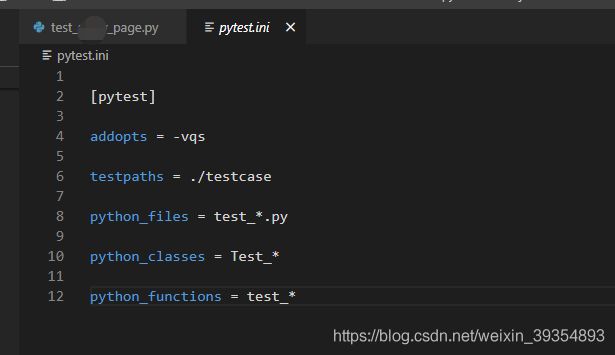
pytest.ini
pytest根据pytest.ini 配置文件中的配置匹配哪些文件是测试文件,以及测试类,测试方法。
例如如下,定义文件test_开头的文件才当作测试文件。
fixture
pytest框架的fixture 是公共的资源,类似与unittest的setup和teardown 。具体使用方法可以百度一下,这里只做了实例讲解。
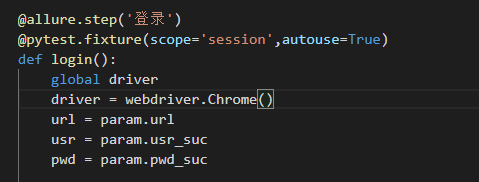
1.登录
编写了10个测试用例,每次都登录登出,很浪费时间,没有必要。所以可以将登录登出写到方法中,在登录方法名上面写 @pytest.fixture(scope=“session”,autouse=True),这样所有用例只需要执行一次即可。
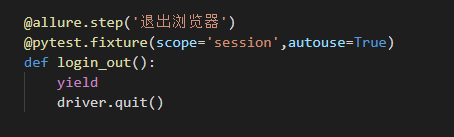
2.登出
登出的方法中需要加 yield 声明这是结束的时候运行。使用方式是使用的方法将登录登出的方法名称放入到方法的参数中。
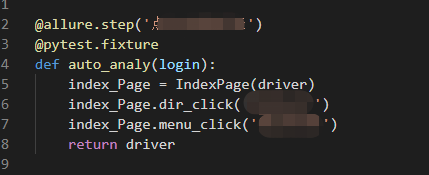
3.菜单
部分模块点击某个菜单,需要再定义一个@pytest.fixture 的函数,函数的参数是登录方法的名字。测试用例在使用时,将新定义的函数名称放入到测试用例方法参数中即可。
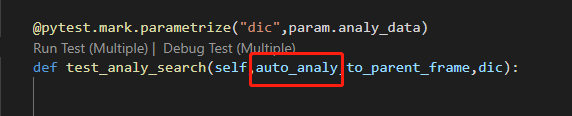
4.使用方式
参数化
例如登录功能,想测试登录成功和失败,只需要每次传入的用户名和密码不同,这样写两个方法很浪费资源。所以可以使用参数化,定义两个参数组时,会执行两次。
只需要在方法前:@pytest.mark.parametrize(“变量名称”,变量)
方法名参数中接收:变量名称
方法中使用方式:变量名称[‘字段’]

allure
allure 生成自动化测试结果
安装:pip install allure-pytest
1.配置
只需要在测试用例的方法前: @allure.story(‘查询’)
需要查看步骤的方法前:@allure.step(‘点击标签库’)
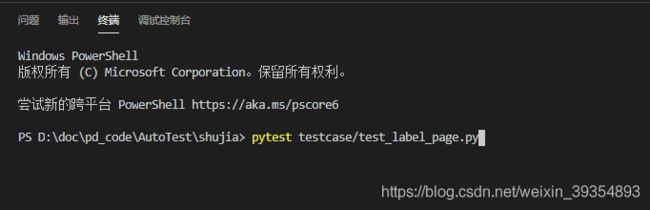
2.生成结果
pytest testcase/test_label_page.py --alluredir report
执行testcase目录下的test_label_page.py文件中的所有用例,生成结果到根目录下的report目录下
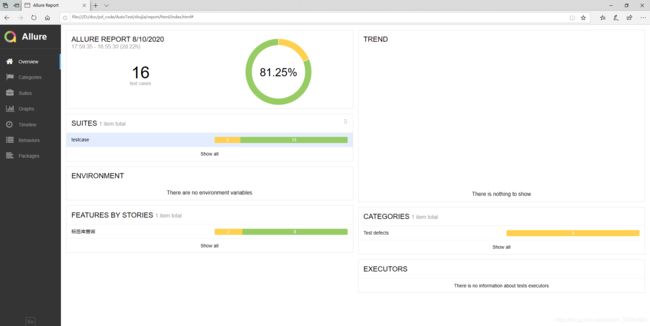
3.生成报告
allure generate report -o report/html --clean
将report 目录下的测试结果整理,生成到html文件夹下。其中index.html 使用浏览器打开后查看结果。
注意:如果打开404可以尝试换个浏览器