1.9 用整合Swagger2文档api
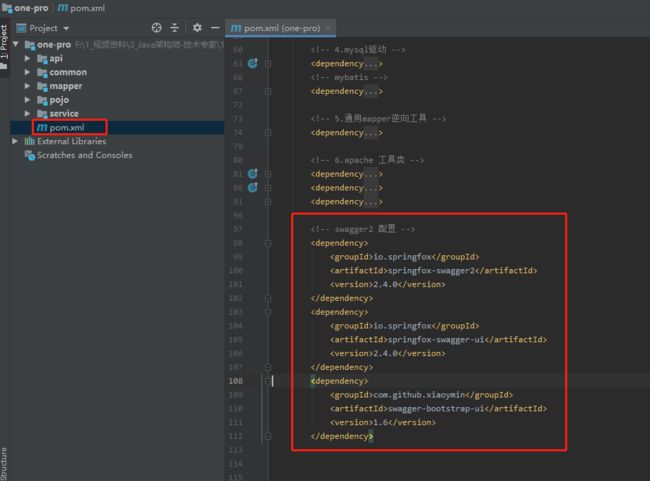
步骤1:在顶级工程的pom.xml下添加依赖
<!-- swagger2 配置 -->
<dependency>
	<groupId>io.springfox</groupId>
	<artifactId>springfox-swagger2</artifactId>
	<version>2.4.0</version>
</dependency>
<dependency>
	<groupId>io.springfox</groupId>
	<artifactId>springfox-swagger-ui</artifactId>
	<version>2.4.0</version>
</dependency>
<dependency>
	<groupId>com.github.xiaoymin</groupId>
	<artifactId>swagger-bootstrap-ui</artifactId>
	<version>1.6</version>
</dependency>
步骤2:创建Swagger2配置类
package com.one.config;
import org.springframework.context.annotation.Bean;
import org.springframework.context.annotation.Configuration;
import springfox.documentation.builders.ApiInfoBuilder;
import springfox.documentation.builders.PathSelectors;
import springfox.documentation.builders.RequestHandlerSelectors;
import springfox.documentation.service.ApiInfo;
import springfox.documentation.service.Contact;
import springfox.documentation.spi.DocumentationType;
import springfox.documentation.spring.web.plugins.Docket;
import springfox.documentation.swagger2.annotations.EnableSwagger2;
/**
 * @Description: swagger2.0 配置类
 * @author: DJH
 * @date: 2023年07月13日 21:13
 * http://localhost:8088/swagger-ui.html     springfox-swagger-ui 路径
 * http://localhost:8088/doc.html            swagger-bootstrap-ui路径
 */
@Configuration
@EnableSwagger2
public class Swagger2 {
    @Bean
    public Docket createRestApi() {
        // 配置swagger2核心配置 docket
        return new Docket(DocumentationType.SWAGGER_2)  // 指定api类型为swagger2
                .apiInfo(apiInfo())  // 用于定义api文档汇总信息
                .select()
                .apis(RequestHandlerSelectors
                        .basePackage("com.one.controller"))   // 指定controller包
                .paths(PathSelectors.any())  // 所有controller
                .build();
    }

    private ApiInfo apiInfo() {
        return new ApiInfoBuilder()
                .title("项目平台接口api") // 文档页标题
                .contact(new Contact("name",
                        "https://localhost",
                        "[email protected]"))// 联系人信息
                .description("专为项目平台接口api文档")// 详细信息
                .version("1.0.1") // 文档版本号
                .termsOfServiceUrl("https://localhost") // 网站地址
                .build();
    }

}
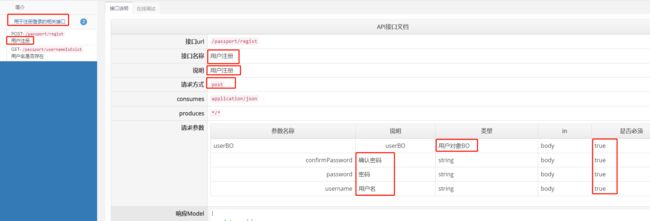
步骤3:相关的api文档编写
1.忽略controller显示
@ApiIgnore
2.controller类说明
@Api(value = "注册登录", tags = {"用于注册登录的相关接口"})
3.controller类中的方法说明
@ApiOperation(value = "用户名是否存在", notes = "用户名是否存在", httpMethod = "GET")
4.实体封装数据类说明
@ApiModel(value = "用户对象BO", description = "从客户端,由用户传入的数据封装在此entity中")
5.实体封装属性说明
@ApiModelProperty(value = "用户名", name = "username", example = "imooc", required = true)
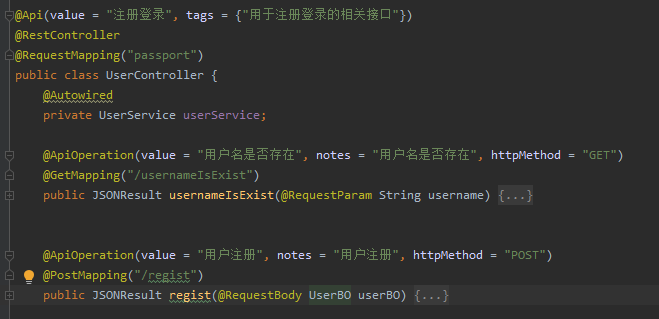
具体案例:
@Api(value = "注册登录", tags = {"用于注册登录的相关接口"})
@RestController
@RequestMapping("passport")
public class UserController {
    @Autowired
    private UserService userService;

    @ApiOperation(value = "用户名是否存在", notes = "用户名是否存在", httpMethod = "GET")
    @GetMapping("/usernameIsExist")
    public JSONResult usernameIsExist(@RequestParam String username) {
        return null;
    }
    @ApiOperation(value = "用户注册", notes = "用户注册", httpMethod = "POST")
    @PostMapping("/regist")
    public JSONResult regist(@RequestBody UserBO userBO) {
        return null;
    }
}
@ApiModel(value = "用户对象BO", description = "从客户端,由用户传入的数据封装在此entity中")
public class UserBO {
    @ApiModelProperty(value = "用户名", name = "username", example = "imooc", required = true)
    private String username;
    @ApiModelProperty(value = "密码", name = "password", example = "123456", required = true)
    private String password;
    @ApiModelProperty(value = "确认密码", name = "confirmPassword", example = "123456", required = false)
    private String confirmPassword;
}


