Shapes
系列文章
SFML-windows 篇
SFML-Events explained 篇
SFML-Keyboard, mouse and joystick 篇
SFML-Using OpenGL in a SFML window 篇
SFML-Drawing 2D stuff 篇
SFML-Shapes 篇
SFML-Sprites and textures 篇
文章目录
- 系列文章
- 一、Introduction
- 二、Common shape properties
-
- 颜色
- 轮廓
- 纹理
- 三、Drawing a shape
- 四、Built-in shape types
-
- Rectangles
- Circles
- Regular polygons
- Convex shapes
- Lines
- Custom shape types
- Antialiased shapes
一、Introduction
SFML提供了一组表示简单形状实体的类。每种形状都是一个单独的类,但它们都来自同一基类,因此它们可以访问相同的公共特征子集。然后,每个类都添加了自己的细节:圆形类的半径属性、矩形类的大小、多边形类的点等。
二、Common shape properties
变换(位置、旋转、比例)
这些属性对于所有SFML图形类都是通用的,因此在单独的教程:Transforming entities. 中对其进行了解释。
颜色
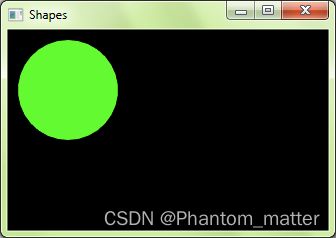
形状的基本属性之一是其颜色。您可以使用setFillColor函数进行更改。
sf::CircleShape shape(50.f);

// set the shape color to green
shape.setFillColor(sf::Color(100, 250, 50));
轮廓
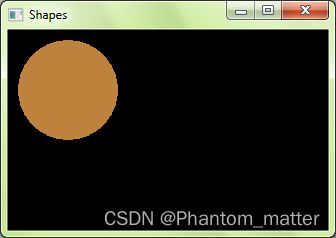
形状可以有轮廓。可以使用SetOutlineHickness和setOutlineColor函数设置轮廓的厚度和颜色。
sf::CircleShape shape(50.f);
shape.setFillColor(sf::Color(150, 50, 250));

// set a 10-pixel wide orange outline
shape.setOutlineThickness(10.f);
shape.setOutlineColor(sf::Color(250, 150, 100));
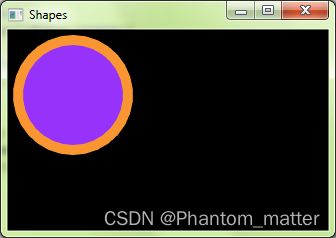
默认情况下,轮廓从形状向外挤出(例如,如果有一个半径为10、轮廓厚度为5的圆,则圆的总半径为15)。通过设置负厚度,可以使其向形状中心挤出。
要禁用轮廓,请将其厚度设置为0。如果只需要轮廓,可以将填充颜色设置为sf::color::Transparent。
纹理
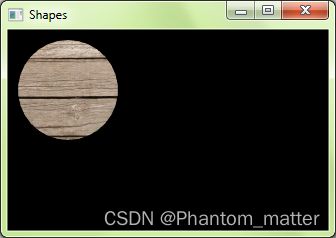
shapes也可以有texture,就像 sprites一样。要指定要映射到形状的纹理的一部分,必须使用setTextureRect函数。它需要纹理矩形映射到形状的边界矩形。这种方法没有提供最大的灵活性,但比单独设置形状每个点的纹理坐标更容易使用。
sf::CircleShape shape(50);

// map a 100x100 textured rectangle to the shape
shape.setTexture(&texture); // texture is a sf::Texture
shape.setTextureRect(sf::IntRect(10, 10, 100, 100));
重要的是要知道纹理是用形状的填充颜色调制(乘以)的。如果其填充颜色为sf::color::white,则纹理将显示为未修改。
要禁用纹理,请调用setTexture(NULL)。
三、Drawing a shape
绘制形状与绘制任何其他SFML实体一样简单:
window.draw(shape);
四、Built-in shape types
Rectangles
要绘制矩形,可以使用sf::RectangleShape类。它只有一个属性:矩形的大小。
// define a 120x50 rectangle
sf::RectangleShape rectangle(sf::Vector2f(120.f, 50.f));

// change the size to 100x100
rectangle.setSize(sf::Vector2f(100.f, 100.f));
Circles
圆由sf::CircleShape类表示。它有两个属性:半径和边数。边数是一个可选属性,它允许您调整圆的“质量”:圆必须由具有多条边的多边形近似(图形卡无法直接绘制完美的圆),该属性定义圆近似将具有多少条边。如果你画一个小圆圈,你可能只需要几个边。如果你画大圆,或者放大规则圆,你很可能需要更多的边。
// define a circle with radius = 200
sf::CircleShape circle(200.f);

// change the radius to 40
circle.setRadius(40.f);

// change the number of sides (points) to 100
circle.setPointCount(100);
Regular polygons
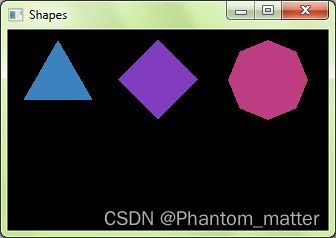
正多边形没有专用的类,事实上,您可以使用sf::CircleShape类表示具有任意边数的正多边形:由于圆由具有多条边的多边形近似,因此您只需调整边数即可获得所需的多边形。有3个点的sf::CircleShape是三角形,有4个点sf::CircleShape是正方形,等等。
// define a triangle
sf::CircleShape triangle(80.f, 3);

// define a square
sf::CircleShape square(80.f, 4);

// define an octagon
sf::CircleShape octagon(80.f, 8);
Convex shapes
凸形状sf::ConvexShape类是最终的形状类:它允许您定义任何凸形状。SFML无法绘制凹面形状。如果你需要画一个凹形,你必须把它分割成多个凸多边形。
要构造凸形状,必须首先设置其应有的点的数量,然后定义点。
// create an empty shape
sf::ConvexShape convex;

// resize it to 5 points
convex.setPointCount(5);

// define the points
convex.setPoint(0, sf::Vector2f(0.f, 0.f));
convex.setPoint(1, sf::Vector2f(150.f, 10.f));
convex.setPoint(2, sf::Vector2f(120.f, 90.f));
convex.setPoint(3, sf::Vector2f(30.f, 100.f));
convex.setPoint(4, sf::Vector2f(0.f, 50.f));
定义点的顺序非常重要。它们都必须按顺时针或逆时针顺序定义。如果以不一致的顺序定义它们,则形状的构造将不正确。
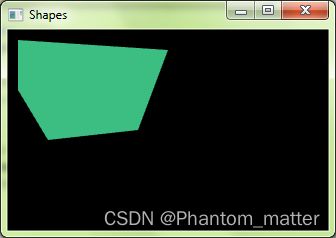
虽然sf::converxshape的名称意味着它只能用于表示凸形状,但它的要求稍微宽松一些。事实上,你的形状必须满足的唯一要求是,如果你继续画从重心到所有点的线,这些线必须以相同的顺序绘制。你不允许“跳到前一行后面”。在内部,凸形状是使用三角形扇形自动构造的,因此,如果形状可以由三角形扇形表示,则可以使用sf::ConvexShape。有了这个宽松的定义,您可以使用sf::converxshape绘制恒星。
Lines
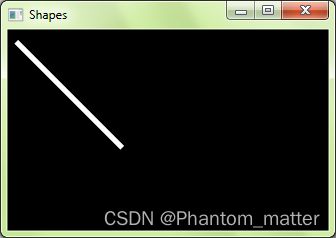
线条没有形状类。原因很简单:如果你的线有一个厚度,它是一个矩形。如果没有,则可以使用线原语绘制。
带厚度的线条:
sf::RectangleShape line(sf::Vector2f(150.f, 5.f));
line.rotate(45.f);
sf::Vertex line[] =
{
    sf::Vertex(sf::Vector2f(10.f, 10.f)),
    sf::Vertex(sf::Vector2f(150.f, 150.f))
};

window.draw(line, 2, sf::Lines);
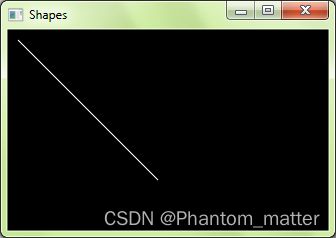 要了解有关顶点和基本体的更多信息,可以阅读有关顶点阵列的教程。
Custom shape types
可以使用自己的形状类型扩展形状类集。为此,必须从sf::Shape派生并重写两个函数:
getPointCount: return the number of points in the shape
getPoint: return a point of the shape
每当形状中的任何点发生更改时,还必须调用update()保护函数,以便通知基类并更新其内部几何体。
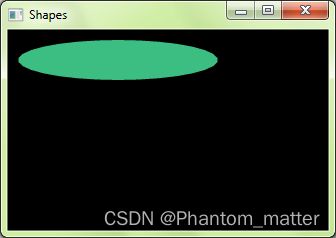
下面是自定义形状类的完整示例:EllipseShape。
class EllipseShape : public sf::Shape
{
public :

    explicit EllipseShape(const sf::Vector2f& radius = sf::Vector2f(0.f, 0.f)) :
    m_radius(radius)
    {
        update();
    }

    void setRadius(const sf::Vector2f& radius)
    {
        m_radius = radius;
        update();
    }

    const sf::Vector2f& getRadius() const
    {
        return m_radius;
    }

    virtual std::size_t getPointCount() const
    {
        return 30; // fixed, but could be an attribute of the class if needed
    }

    virtual sf::Vector2f getPoint(std::size_t index) const
    {
        static const float pi = 3.141592654f;

        float angle = index * 2 * pi / getPointCount() - pi / 2;
        float x = std::cos(angle) * m_radius.x;
        float y = std::sin(angle) * m_radius.y;

        return sf::Vector2f(m_radius.x + x, m_radius.y + y);
    }

private :

    sf::Vector2f m_radius;
};
Antialiased shapes
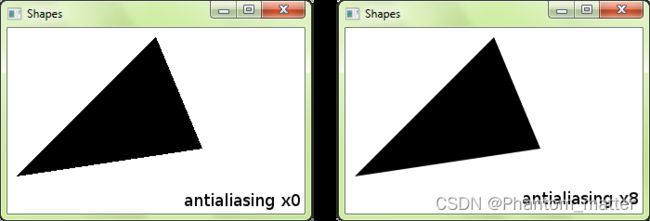
没有选项可以反锯齿单个形状。要获得消除混叠的形状(即边缘平滑的形状),您必须在创建窗口时使用sf::ContextSettings结构的相应属性全局启用消除混叠。
sf::ContextSettings settings;
settings.antialiasingLevel = 8;

sf::RenderWindow window(sf::VideoMode(800, 600), "SFML shapes", sf::Style::Default, settings);
请记住,消除混叠的可用性取决于图形卡:图形卡可能不支持消除混叠,或者在驱动程序设置中强制禁用消除混叠。
