Apache HTTP Server (httpd)服务离线安装
Apache(httpd)服务离线安装文档
目录
-
- 一、说明
-
- 依赖包及下载地址
- 依赖包描述
- 二、安装准备
-
- 软件包上传
- 软件包解压
- 处理依赖关系
- 三、开始安装
- 四、配置
- 五、启动
- 六、验证
- 七、附
一、说明
本文依据Apache官方使用文档编写,地址:https://httpd.apache.org/docs/2.4
依赖包及下载地址
本文使用到的离线包:
apr-1.7.0.tar.gz
apr-util-1.6.1.tar.gz
pcre2-10.40.tar.gz
expat-2.1.0-14.el7_9.x86_64.rpm
expat-devel-2.1.0-14.el7_9.x86_64.rpm
httpd-2.4.54.tar.gz
官方下载地址:
apr-1.7.0.tar.gz
https://dlcdn.apache.org//apr/apr-1.7.0.tar.gz
apr-util-1.6.1.tar.gz
https://dlcdn.apache.org//apr/apr-util-1.6.1.tar.gz
pcre2-10.40.tar.gz
https://github.com/PCRE2Project/pcre2/releases/download/pcre2-10.40/pcre2-10.40.tar.gz
expat-2.1.0-14.el7_9.x86_64.rpm
http://mirror.centos.org/centos/7/updates/x86_64/Packages/expat-2.1.0-14.el7_9.x86_64.rpm
expat-devel-2.1.0-14.el7_9.x86_64.rpm
http://mirror.centos.org/centos/7/updates/x86_64/Packages/expat-devel-2.1.0-14.el7_9.x86_64.rpm
httpd-2.4.54.tar.gz
https://dlcdn.apache.org/httpd/httpd-2.4.54.tar.gz
注:以上链接会由于版本更新导致失效,建议走官网入口:
https://httpd.apache.org/
依赖包描述
相关依赖包使用关键描述(此处引用官方文档原文):
APR and APR-Util:
Make sure you have APR and APR-Util already
installed on your system. If you don’t, or prefer to not use the
system-provided versions, download the latest versions of both APR and
APR-Util from Apache APR, unpack them into
/httpd_source_tree_root/srclib/apr and
/httpd_source_tree_root/srclib/apr-util (be sure the directory names
do not have version numbers; for example, the APR distribution must be
under /httpd_source_tree_root/srclib/apr/) and use ./configure’s
–with-included-apr option. On some platforms, you may have to install the corresponding -dev packages to allow httpd to build against your
installed copy of APR and APR-Util
Perl-Compatible Regular Expressions Library (PCRE):
This library is
required but not longer bundled with httpd. Download the source code
from http://www.pcre.org, or install a Port or Package. If your build
system can’t find the pcre-config script installed by the PCRE build,
point to it using the --with-pcre parameter. On some platforms, you
may have to install the corresponding -dev package to allow httpd to
build against your installed copy of PCRE…
Expat:
This is expat, the C library for parsing XML, written by James Clark.
Expat is a stream oriented XML parser. This means that you register
handlers with the parser prior to starting the parse. These handlers
are called when the parser discovers the associated structures in the
document being parsed. A start tag is an example of the kind of
structures for which you may register handlers.
Expat-devel:
The expat-devel package contains the libraries, include files and
documentation to develop XML applications with expat.
二、安装准备
软件包上传
将六个软件包上传到要运行httpd的目录:{httpd_root_path},本文后续将采用此标识表示httpd服务的根目录。本文推荐上传至/usr/local,即:{httpd_root_path}变量替换为/usr/local
软件包解压
进入到目录{httpd_root_path}下:
将httpd-2.4.54.tar.gz解压:
tar -zxvf httpd-2.4.54.tar.gz
将apr-1.7.0.tar.gz解压:
tar -zxvf apr-1.7.0.tar.gz
将apr-util-1.6.1.tar.gz解压:
tar -zxvf apr-util-1.6.1.tar.gz
将pcre2-10.40.tar.gz解压:
tar -zxvf pcre2-10.40.tar.gz
解压完成后{httpd_root_path}中含有以下文件夹:
httpd-2.4.54
apr-1.7.0
apr-util-1.6.1
pcre2-10.40
处理依赖关系
将apr与apr-util的解压文件复制到目录{httpd_root_path}/httpd-2.4.54/srclib目录下。
在{httpd_root_path}下执行:
mv apr-1.7.0 httpd-2.4.54/srclib/apr
mv apr-util-1.6.1 httpd-2.4.54/srclib/apr-util
编译pcre:
进入目录:{httpd_root_path}/pcre2-10.40
cd {httpd_root_path}/pcre2-10.40
配置pcre编译选项:
./configure --prefix={httpd_root_path}/pcre
编译pcre:
make && make install
安装expat:
进入目录:{httpd_root_path}执行:
rpm -Uvh expat-2.1.0-14.el7_9.x86_64.rpm
rpm -Uvh expat-devel-2.1.0-14.el7_9.x86_64.rpm
三、开始安装
3.1 进入目录:{httpd_root_path}/httpd-2.4.54
cd {httpd_root_path}/httpd-2.4.54
3.2 执行编译配置:
./configure --prefix=/usr/local/httpd --with-port=9001 --enable-charset-lite --with-included-apr --with-pcre=/usr/local/pcre/bin/pcre2-config
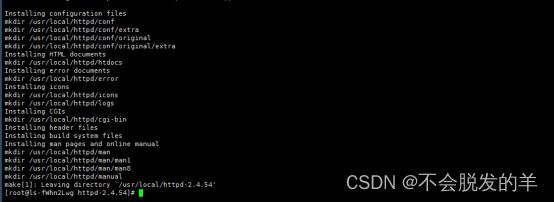
3.3 开始编译:
make && make install
编译完成后示例图:
3.4 注意:若结束后提示错误中含expat相关异常,请按以下步骤进行操作:
3.4.1 进入到{httpd_root_path}目录下,包含expat-2.1.0-14.el7_9.x86_64.rpm以及expat-devel-2.1.0-14.el7_9.x86_64.rpm两个软件包。
3.4.2 执行:
rpm -Uvh expat-2.1.0-14.el7_9.x86_64.rpm
rpm -Uvh expat-devel-2.1.0-14.el7_9.x86_64.rpm
4.4.3 再次执行4.1、4.2、4.3步骤进行编译安装。
四、配置
配置文件为:{httpd_root_path}/httpd/conf目录下的httpd.conf
由于资源文件不能使用root用户,因此需要自行分配一个用户及用户组:
useradd {用户名} -g {用户组名}
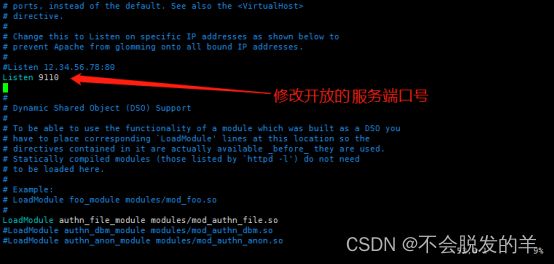
编辑配置文件httpd.conf:
4.1 修改服务端口号,并在防火墙开启该端口
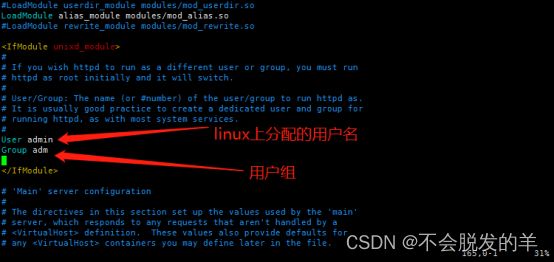
4.2 修改上一步骤增加的用户及用户名
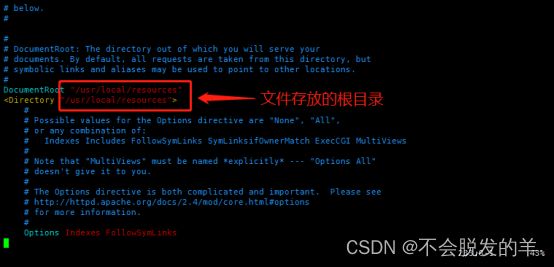
4.3 修改图片文件存放的根目录:
4.4 保存修改
4.5 验证配置:
进入到目录{httpd_root_path}/httpd/bin下,执行:
./apachectl -k start
展示为:

说明配置完成。
4.6.执行:
./apachectl -k stop
展示为:
![]()
至此,服务配置已经完成。
五、启动
进入到目录{httpd_root_path}/httpd/bin下,执行:
./httpd -d {4.3步骤中配置的目录} -f {httpd_root_path}/httpd/conf/httpd.conf -k start
启动后例如:

停止:
进入到目录{httpd_root_path}/httpd/bin下,执行:
./httpd -k stop
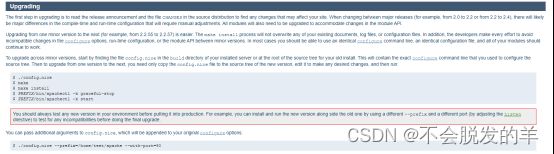
升级:
详见官方文档:https://httpd.apache.org/docs/2.4/install.html
六、验证
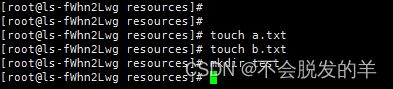
在5.3步骤的根目录下创建几个测试文件:
浏览器访问:http://服务IP地址:4.1步骤中配置的端口号
展示例如:
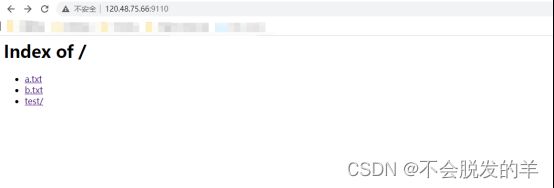
至此,服务部署启动完成。4.3配置目录将为图片文件存放路径,后续将在Nacos系统全局配置中进行设置。
七、附
软件包清理:
进入到目录{httpd_root_path}下,执行:
rm ./expat-*
提示信息输入 y 后回车
执行:
rm ./apr-*
提示信息输入 y 后回车
执行:
rm ./ pcre2-10.40.tar.gz
提示信息输入 y 后回车
执行:
rm -rf ./ httpd-2.4.54
至此,所有安装步骤已经完成。