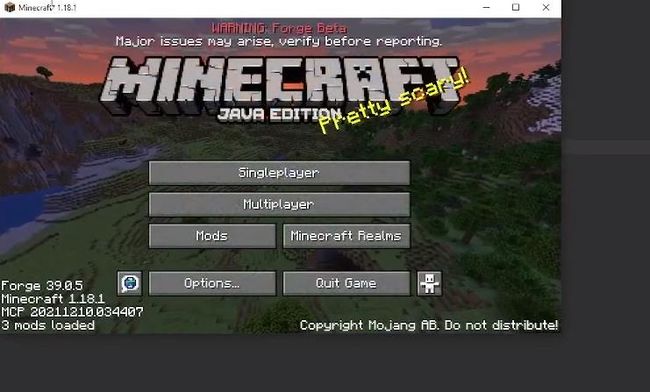
Minecraft 1.18.1、1.18.2模组开发 01.eclipse 开发包构建教程
1.18.2的离线开发包附文末
我们本次来进行Minecraft 1.18.1 模组开发教程的介绍,首先我们需要下载eclipse和openJDK
eclipse下载
eclipse官网下载最新版
openJDK下载
下载最新版JDK 17.02+8
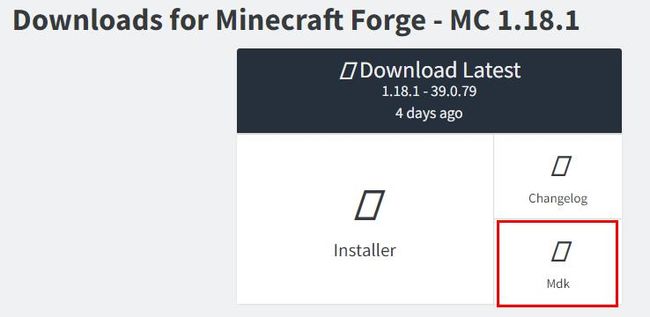
1.18.1 mdk下载
下载1.18.1MDK
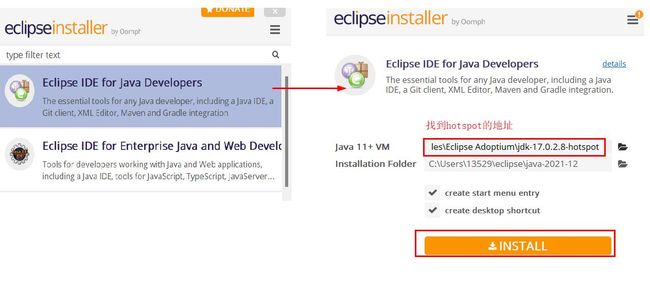
注:1.18.1需要使用Java17进行开发。eclipse中的Java 11+VM需要选择我们上面刚刚下载的hotspot地址
一般下载后的地址:
C:\Program Files\Eclipse Adoptium\jdk-17.0.2.8-hotspot
1.将下载后的MDK解压(可以把文件夹名字改为我们的模组的名字,我改为了re8joymod),打开eclipse -> 导入项目 -> 选择Gradlew -> 选择我们解压后的MDK的文件夹 -> 点击Finish,等待模组包构建(可以挂V..P..N构建,会快一些)
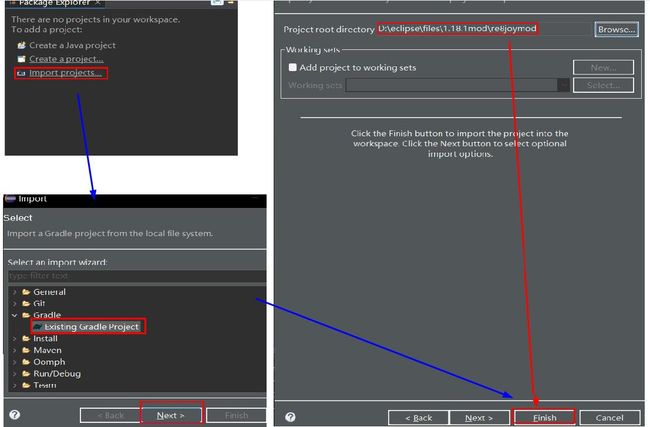
出现这样的画面说明构建成功了

2.构建build.gradle
我们需要对我们的构建gradle文件进行修改,具体内容可见下方
build.gradle脚本(注释中有’改’的字样需要修改,其他不要动)
buildscript {
    repositories {
        // These repositories are only for Gradle plugins, put any other repositories in the repository block further below
        maven { url = 'https://maven.minecraftforge.net' }
        mavenCentral()
    }
    dependencies {
        classpath group: 'net.minecraftforge.gradle', name: 'ForgeGradle', version: '5.1.+', changing: true
    }
}
apply plugin: 'net.minecraftforge.gradle'
// Only edit below this line, the above code adds and enables the necessary things for Forge to be setup.
apply plugin: 'eclipse'
apply plugin: 'maven-publish'

version = '1.0'
group = 'com.joy187.re8joymod' // 改 只能用小写或数字
archivesBaseName = 're8joymod'	//改 与上面modid保持一致

// Mojang ships Java 17 to end users in 1.18+, so your mod should target Java 17.
java.toolchain.languageVersion = JavaLanguageVersion.of(17)

println('Java: ' + System.getProperty('java.version') + ' JVM: ' + System.getProperty('java.vm.version') + '(' + System.getProperty('java.vendor') + ') Arch: ' + System.getProperty('os.arch'))
minecraft {

    mappings channel: 'official', version: '1.18.1'

    // accessTransformer = file('src/main/resources/META-INF/accesstransformer.cfg') // Currently, this location cannot be changed from the default.

    // Default run configurations.
    // These can be tweaked, removed, or duplicated as needed.
    runs {
        client {
            workingDirectory project.file('run')

            // Recommended logging data for a userdev environment
            // The markers can be added/remove as needed separated by commas.
            // "SCAN": For mods scan.
            // "REGISTRIES": For firing of registry events.
            // "REGISTRYDUMP": For getting the contents of all registries.
            property 'forge.logging.markers', 'REGISTRIES'


            property 'forge.logging.console.level', 'debug'

            mods {
                re8joymod {	//改为模组名称modid
                    source sourceSets.main
                }
            }
        }

        server {
            workingDirectory project.file('run')


            property 'forge.logging.markers', 'REGISTRIES'

            // Recommended logging level for the console
            // You can set various levels here.
            // Please read: https://stackoverflow.com/questions/2031163/when-to-use-the-different-log-levels
            property 'forge.logging.console.level', 'debug'

            mods {
                re8joymod {  //改为模组名称
                    source sourceSets.main
                }
            }
        }

        data {
            workingDirectory project.file('run')

            property 'forge.logging.markers', 'REGISTRIES'

            // Recommended logging level for the console
            // You can set various levels here.
            // Please read: https://stackoverflow.com/questions/2031163/when-to-use-the-different-log-levels
            property 'forge.logging.console.level', 'debug'

            // Specify the modid for data generation, where to output the resulting resource, and where to look for existing resources.
            args '--mod', 'examplemod', '--all', '--output', file('src/generated/resources/'), '--existing', file('src/main/resources/')

            mods {
                re8joymod {	//改为模组名称
                    source sourceSets.main
                }
            }
        }
    }
}

// Include resources generated by data generators.
sourceSets.main.resources { srcDir 'src/generated/resources' }

repositories {
    // Put repositories for dependencies here
    // ForgeGradle automatically adds the Forge maven and Maven Central for you

    // If you have mod jar dependencies in ./libs, you can declare them as a repository like so:
    // flatDir {
    //     dir 'libs'
    // }
}

dependencies {
    // Specify the version of Minecraft to use. If this is any group other than 'net.minecraft', it is assumed
    // that the dep is a ForgeGradle 'patcher' dependency, and its patches will be applied.
    // The userdev artifact is a special name and will get all sorts of transformations applied to it.
    minecraft 'net.minecraftforge:forge:1.18.1-39.0.79'


}

// Example for how to get properties into the manifest for reading at runtime.
jar {
    manifest {
        attributes([
                "Specification-Title"     : "re8joymod",	//改为你的模组名称modid
                "Specification-Vendor"    : "joy187",
                "Specification-Version"   : "1", // We are version 1 of ourselves
                "Implementation-Title"    : project.name,
                "Implementation-Version"  : project.jar.archiveVersion,
                "Implementation-Vendor"   : "joy187",
                "Implementation-Timestamp": new Date().format("yyyy-MM-dd'T'HH:mm:ssZ")
        ])
    }
}

// Example configuration to allow publishing using the maven-publish plugin
// This is the preferred method to reobfuscate your jar file
jar.finalizedBy('reobfJar')
// However if you are in a multi-project build, dev time needs unobfed jar files, so you can delay the obfuscation until publishing by doing
// publish.dependsOn('reobfJar')

publishing {
    publications {
        mavenJava(MavenPublication) {
            artifact jar
        }
    }
    repositories {
        maven {
            url "file://${project.projectDir}/mcmodsrepo"
        }
    }
}
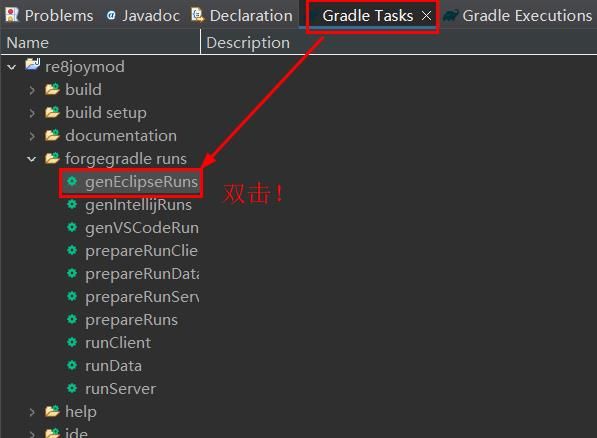
修改了所有信息之后我们要重新构建一下gradle -> 找到genEclipseRuns -> 双击
3.修改mods.toml
该文件路径一般在~\src\main\resources\META-INF下
modLoader="javafml" #mandatory
loaderVersion="[39,)" #mandatory This is typically bumped every Minecraft version by Forge. See our download page for lists of versions.
license="MIT"   #改为MIT
[[mods]] #mandatory
modId="re8joymod" #mandatory 改
version="${file.jarVersion}" #mandatory
displayName="Resident Evil 8 mod" #mandatory 你的模组展示名称
logoFile="examplemod.png" #optional
credits="Thanks for this example mod goes to Java" #optional
authors="Love, Cheese and small house plants" #optional
# The description text for the mod (multi line!) (#mandatory,模组简述)
description='''
Welcome to resident evil world.
'''
# A dependency - use the . to indicate dependency for a specific modid. Dependencies are optional.
[[dependencies.re8joymod]] #optional 改为modid
    modId="forge" #mandatory
    mandatory=true #mandatory
    versionRange="[39,)" #mandatory
    ordering="NONE"
    side="BOTH"
# Here's another dependency
[[dependencies.re8joymod]]  #改为modid
    modId="minecraft"
    mandatory=true
    versionRange="[1.18.1,1.19)"
    ordering="NONE"
    side="BOTH"
4.找到我们java文件夹,然后建一个com文件夹,然后建立一个以你的模组名称的文件夹(re8joymod为例),里面建一个Main.java

在Main.java中编写
package com.joy187.re8joymod;

//这里填上你的模组名称modid
@Mod("re8joymod")
public class Main {


	public static final String MOD_ID = "re8joymod";
	public Main() {

		MinecraftForge.EVENT_BUS.register(this);
	}

}
5.保存所有文件,右键项目进行刷新 -> 点击run,下拉找到run configurations -> 找到 Java Application 中的run Client
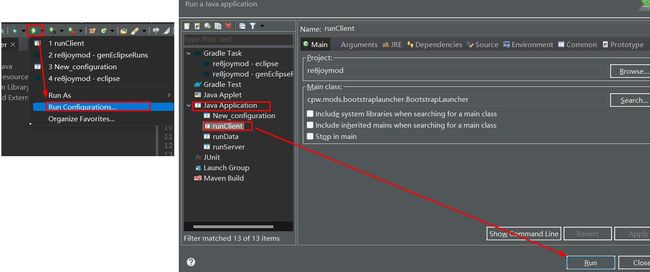
点击Run启动游戏