SpringCloud nacos 集成 gateway ,实现动态路由
作者:Linux猿
简介:CSDN博客专家,华为云享专家,Linux、C/C++、云计算、物联网、面试、刷题、算法尽管咨询我,关注我,有问题私聊!
欢迎小伙伴们点赞、收藏⭐、留言
目录
一、准备工作
1.1 下载代码
1.2 运行代码
二、集成 gateway
2.1 修改 pom.xml
2.2 创建服务 gateway、ServiceOne、ServiceTwo
2.3 在 nacos 配置
三、运行
本篇文章主要介绍集成 gateway 和 nacos,实现动态路由配置,即:通过 nacos 配置动态路由。
一、准备工作
1.1 下载代码
在之前的文章中我们已经集成了 nacos,本篇文章使用之前集成的代码,再集成 gateway 实例,先将之前的代码克隆下来,然后运行测试一下。
$ git clone https://gitee.com/linux-ape/spring-cloud-demo.git上面是通过 git 工具下载代码,然后切换分支到 nacos 上,如下所示。
git checkout -b gateway1.1 remotes/origin/SpringCloudNacos1.2 运行代码
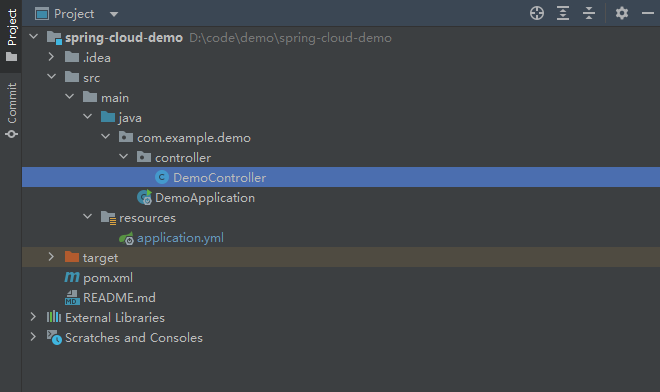
代码结构如下所示。
通过 IDEA 运行,运行结果如下。
二、集成 gateway
2.1 修改 pom.xml
首先修改父模块 pom.xml 文件,文件内容如下所示。
    4.0.0
    com.example
    demo
    0.0.1-SNAPSHOT
    demo
    pom
    demo


        gateway


        1.8


                org.springframework.boot
                spring-boot-dependencies
                2.3.2.RELEASE
                pom
                import


                com.alibaba.cloud
                spring-cloud-alibaba-dependencies
                2.1.0.RELEASE
                pom
                import


                org.springframework.cloud
                spring-cloud-dependencies
                Hoxton.SR8
                pom
                import
重点是添加 dependencyManagement 管理依赖。
2.2 创建服务 gateway、ServiceOne、ServiceTwo
(1)删除 src 目录,保留 pom.xml 文件,pom.xml 文件用于管理依赖,删除后代码结构如下。
(2)创建 gateway 服务
创建 gateway 服务后,修改 pom.xml 文件如下所示。
    4.0.0

        com.example
        demo
        0.0.1-SNAPSHOT


    gateway
    gateway


            com.alibaba.cloud
            spring-cloud-starter-alibaba-nacos-discovery


            com.alibaba.cloud
            spring-cloud-starter-alibaba-nacos-config


            org.springframework.cloud
            spring-cloud-starter-gateway


            org.springframework.boot
            spring-boot-starter-actuator


            org.projectlombok
            lombok
重命名 application.properties 文件为 bootstrap.yml,文件内容如下所示。
server:
  port: 8090
spring:
  application:
    name: gateway
  cloud:
    nacos:
      discovery:
        server-addr: localhost:8848
        locator:
          lower-case-service-id: true
      config:
        # nacos 配置服务的地址,后面的端口不能省,即使是80端口
        server-addr: localhost:8848
        # 加载 dataid 配置文件的后缀,默认是 properties
        file-extension: yml
        # 配置组,默认就是 DEFAULT_GROUP
        group: DEFAULT_GROUP
        # 配置命名空间,此处写的是 命名空间的id 的值,默认是 public 命名空间
        # namespace:
        # data-id 的前缀,默认就是 spring.application.name 的值
        prefix: ${spring.application.name}
同理也按照此方法创建 ServiceOne 和 ServiceTwo 服务,ServiceOne 和 ServiceTwo 用于测试 gateway 的动态路由配置。
2.3 在 nacos 配置
配置管理 -> 配置列表 中点击最右边的 + 号,新建配置,如下所示。
三、运行
在浏览器中输入 localhost:8090/service1/index1,运行如下所示。
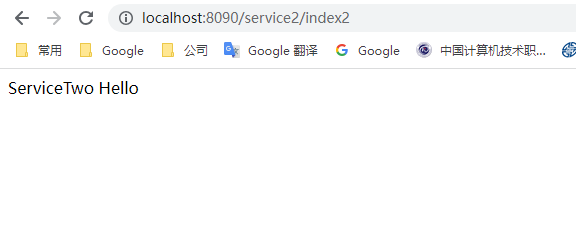
在浏览器中输入 localhost:8090/service2/index2,运行如下所示。
参考链接:
通过Nacos动态刷新Spring Cloud Gateway的路由_51CTO博客_spring cloud gateway nacos动态路由
感觉有帮助记得「一键三连」支持下哦!有问题可在评论区留言,感谢大家的一路支持!猿哥将持续输出「优质文章」回馈大家!


