Visual Studio2019 在Qt环境下使用GDAL读写点Shapefile文件
本教程是为QGIS的插件开发打基础噢!
要求:
环境要求:Visual Studio 2019+>Qt5.9
GDAL:>2.3
关于如何在Visual Studio2019中使用Qt开发,以及如何在Visual Studio中配置GDAL,大家有不知道的可以移步至我的下面两篇博客,有详细的介绍噢!
1、 Visual Studio 2019使用Qt开发
2、 Visual Studio2019配置GDAL
1、Vs中新建Qt项目
(1)在Visual Studio中创建新项目面板,选择Qt Widgets Application,点击下一步;
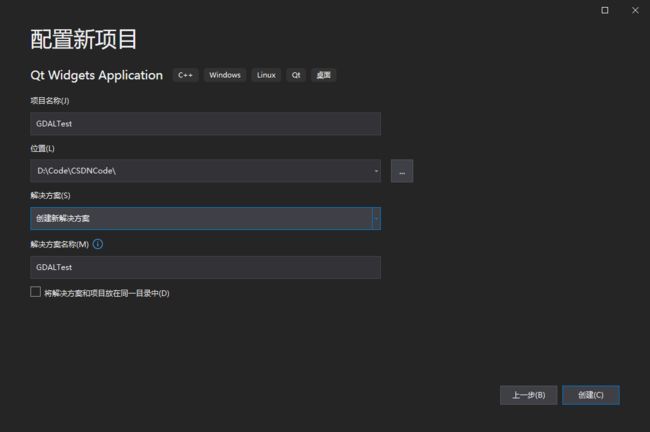
(2)在配置新项目面板,选择存放路径以及项目名称后点击创建;
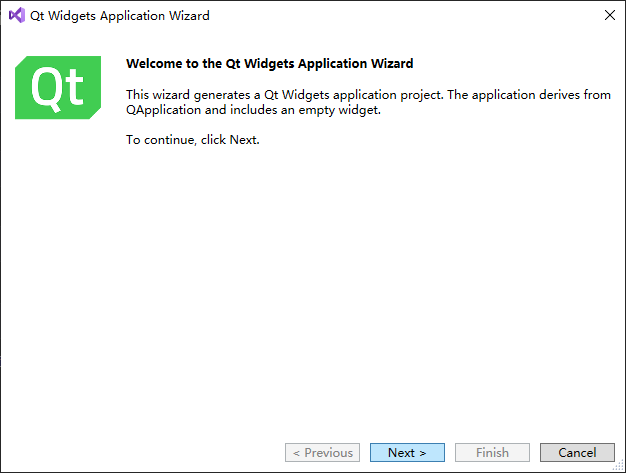
(3)在Qt Widgets项目创建向导面板,点击next
(4)选择Debug版本,点击next;
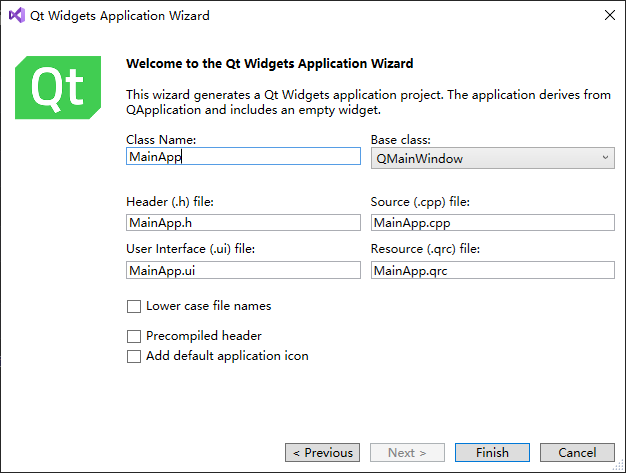
(5)填写自己想要的类名,Base Class选择QMainWindow,点击finish,完成项目的创建
(6)点击运行,如果弹出下面的窗口,说明项目创建成功啦!
2、使用ArcMap创建GDAL读取需要的点图层文件
(1)ArcMap新建点图层的操作就不多说了,大家不会的自行查阅,也可以在文末的云盘分享里面免费获取噢!新建好图层后,我们加上测试属性testIndex(需要开启编辑噢!),如下图所示;
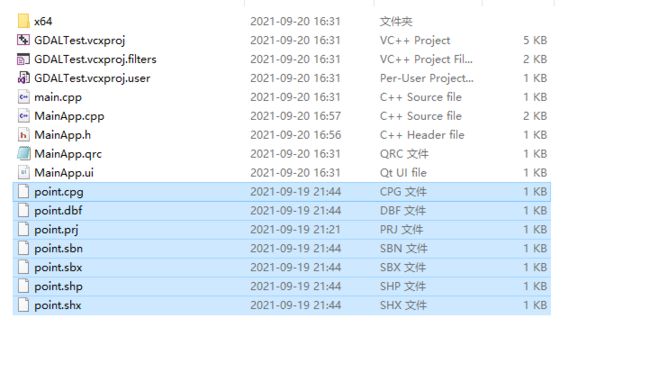
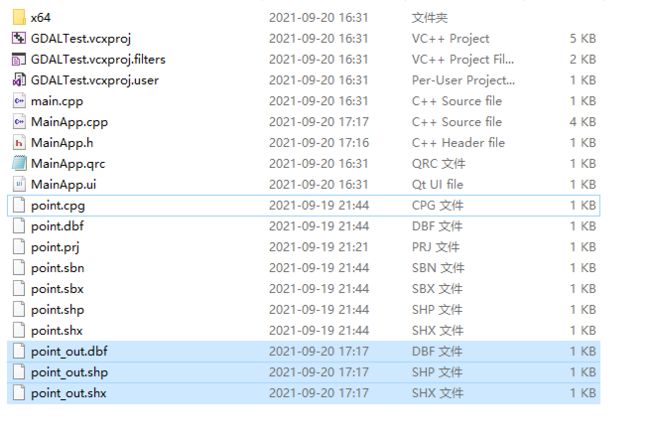
(2)将point图层文件复制到我们刚刚创建的项目文件下,如下图所示,一共有七个文件!
3、使用GDAL读写shpfile文件
(1)GDAL读point.shp文件
1)在MainApp.h中新增以下函数;
bool gdalReadShp(const char* path);2)在MainApp.cpp中完成函数定义;
//头文件在最上面定义
#include "ogrsf_frmts.h"
#include
#include
#include
#include
#include

//......

bool MainApp::gdalReadShp(const char* path) {
	//注册数据驱动
	GDALAllRegister();

	//打开数据文件
	GDALDataset* poDS;
	poDS = (GDALDataset*)GDALOpenEx(path, GDAL_OF_VECTOR, NULL, NULL, NULL);
	if (poDS == NULL)
	{
		qDebug() << "read failed" << endl;
		return false;
	}
	else {
		qDebug() << "read success" << endl;
		//获取图层数量
		qDebug() << "LayerCount:" << poDS->GetLayerCount();

		OGRLayer* poLayer;
		poLayer = poDS->GetLayerByName("point");

		for (auto& poFeature : poLayer)
		{
			for (auto&& oField : *poFeature)
			{
				switch (oField.GetType())
				{
				case OFTInteger:
					qDebug() << oField.GetName() << (oField.GetInteger());
					break;
				case OFTInteger64:
					qDebug() << oField.GetName()<<(oField.GetInteger64());
					break;
				case OFTReal:
					qDebug() << oField.GetName()<<(oField.GetDouble());
					break;
				case OFTString:
					qDebug() << oField.GetName()<<(oField.GetString());
					break;
				default:
					qDebug() << oField.GetName()<<(oField.GetAsString());
					break;
				}
			}
			OGRGeometry* poGeometry;
			poGeometry = poFeature->GetGeometryRef();
			if (poGeometry != NULL
				&& wkbFlatten(poGeometry->getGeometryType()) == wkbPoint)
			{
			#if GDAL_VERSION_NUM >= GDAL_COMPUTE_VERSION(2,3,0)
							OGRPoint* poPoint = poGeometry->toPoint();
			#else
							OGRPoint* poPoint = (OGRPoint*)poGeometry;
			#endif

				qDebug() << "X:" << poPoint->getX() << ",Y:" << poPoint->getY();
			}
			else
			{
				qDebug() << "no point geometry";
			}
			qDebug() << endl;
		}
		//关闭数据链接
		GDALClose(poDS);
		return true;
	}
} 3)在构造函数中调用该读取函数;
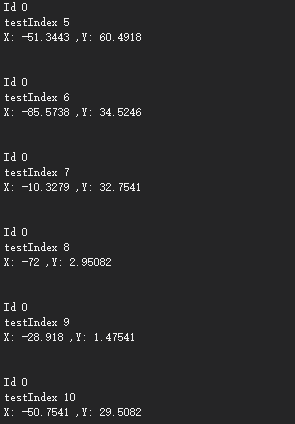
gdalReadShp("point.shp");4)在右下角输出框中就可以看点图层的属性和地理位置啦!
(2)GDAL写point.shp文件
1)在MainApp.h中新增以下函数;
bool gdalWriteShp();2)在MainApp.cpp中完成函数定义,创建包含三个点的shapefile文件,并且我们添加了
一个属性Name;
bool MainApp::gdalWriteShp() {
	//先注册所有驱动程序
	GDALAllRegister();

	//获取shapeFile驱动程序
	const char* pszDriverName = "ESRI Shapefile";
	GDALDriver* poDriver;
	poDriver = GetGDALDriverManager()->GetDriverByName(pszDriverName);
	if (poDriver == NULL)
	{
		qDebug() << "driver not available." << endl;
		return false;
	}

	//通过shapeFile数据驱动创建点shp文件
	GDALDataset* poDS;
	poDS = poDriver->Create("point_out.shp", 0, 0, 0, GDT_Unknown, NULL);
	if (poDS == NULL)
	{
		qDebug() << "Creation of output file failed." << endl;
		return false;
	}
	OGRLayer* poLayer;

	poLayer = poDS->CreateLayer("point_out", NULL, wkbPoint, NULL);
	if (poLayer == NULL)
	{
		qDebug() << "Layer creation failed." << endl;
		return false;
	}

	//为点数据创建属性字段
	OGRFieldDefn oField("Name", OFTString);
	//设置属性字段精度
	oField.SetWidth(32);

	if (poLayer->CreateField(&oField) != OGRERR_NONE)
	{
		qDebug() << "Creating Name field failed." << endl;
		return false;
	}

	//新建要素
	double x = 20, y = 20;
	double xArr[3] = { 20.1,20.2,20.3 };
	double yArr[3] = { 20.1,20.2,20.3 };
	char* szName[3] = { "Name1","Name2","Name3" };
	for (int i = 0; i < 3; i++) {
		OGRFeature* poFeature;

		poFeature = OGRFeature::CreateFeature(poLayer->GetLayerDefn());
		poFeature->SetField("Name", szName[i]);

		OGRPoint pt;

		pt.setX(xArr[i]);
		pt.setY(yArr[i]);

		poFeature->SetGeometry(&pt);

		if (poLayer->CreateFeature(poFeature) != OGRERR_NONE)
		{
			qDebug() << "Failed to create feature in shapefile." << endl;
			return false;
		}
		OGRFeature::DestroyFeature(poFeature);
	}
	GDALClose(poDS);
	return true;
}
3)在构造函数中运行函数
bool temp = gdalWriteShp();4)运行项目,就可以在项目文件夹中看到创建的shapefile啦!
5)在ArcMap中打开创建的点图层,可以看到Name属性也已经添加上去了!
4、文件分享
链接:point图层
提取码:ccyy

