在centos7安装KubeSphere
节点准备
设置hostname
hostnamectl set-hostname ks-m4
关闭防火墙
启动: systemctl start firewalld
关闭: systemctl stop firewalld
查看状态: systemctl status firewalld
开机禁用  : systemctl disable firewalld
开机启用  : systemctl enable firewalld
关闭selinux
查看Selinux状态: getenforce
返回状态如果是enforcing,表明SELinux已开启
返回状态如果是Disabled,表明SELinux已关闭

临时关闭SELinux: setenforce 0

永久关闭SELinux:
vi /etc/selinux/config
找到`SELINUX=disabled`,按i进入编辑模式,通过修改该参数关闭SELinux

 - 强制模式`SELINUX=enforcing`:表示所有违反安全策略的行为都将被禁止
 - 宽容模式`SELINUX=permissive`:表示所有违反安全策略的行为不被禁止,但是会在日志中作记录

关闭swap分区
临时删除Swap分区所有内容:swapoff -a
永久删除Swap挂载:vim /etc/fstab 注释 swap 行
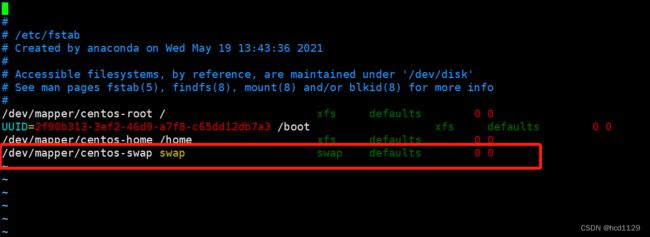
测试,swap 一行应该全部是 0:free -h

时间同步
#安装chrony
yum -y install chrony

# 修改同步服务器地址为阿里云
sed -i.bak '3,6d' /etc/chrony.conf && sed -i '3cserver ntp1.aliyun.com iburst' /etc/chrony.conf

#启动chronyd及加入开机自启
systemctl start chronyd && systemctl enable chronyd

# 查看同步结果
chronyc sources
原始 /etc/chrony.conf
# Use public servers from the pool.ntp.org project.
# Please consider joining the pool (http://www.pool.ntp.org/join.html).
server 0.centos.pool.ntp.org iburst
server 1.centos.pool.ntp.org iburst
server 2.centos.pool.ntp.org iburst
server 3.centos.pool.ntp.org iburst

# Record the rate at which the system clock gains/losses time.
driftfile /var/lib/chrony/drift

# Allow the system clock to be stepped in the first three updates
# if its offset is larger than 1 second.
makestep 1.0 3

# Enable kernel synchronization of the real-time clock (RTC).
rtcsync

# Enable hardware timestamping on all interfaces that support it.
#hwtimestamp *

# Increase the minimum number of selectable sources required to adjust
# the system clock.
#minsources 2

# Allow NTP client access from local network.
#allow 192.168.0.0/16

# Serve time even if not synchronized to a time source.
#local stratum 10

# Specify file containing keys for NTP authentication.
#keyfile /etc/chrony.keys

# Specify directory for log files.
logdir /var/log/chrony

# Select which information is logged.
#log measurements statistics tracking
修改之后的 /etc/chrony.conf
# Use public servers from the pool.ntp.org project.
# Please consider joining the pool (http://www.pool.ntp.org/join.html).
server ntp1.aliyun.com iburst
# Record the rate at which the system clock gains/losses time.
driftfile /var/lib/chrony/drift

# Allow the system clock to be stepped in the first three updates
# if its offset is larger than 1 second.
makestep 1.0 3

# Enable kernel synchronization of the real-time clock (RTC).
rtcsync

# Enable hardware timestamping on all interfaces that support it.
#hwtimestamp *

# Increase the minimum number of selectable sources required to adjust
# the system clock.
#minsources 2

# Allow NTP client access from local network.
#allow 192.168.0.0/16

# Serve time even if not synchronized to a time source.
#local stratum 10

# Specify file containing keys for NTP authentication.
#keyfile /etc/chrony.keys

# Specify directory for log files.
logdir /var/log/chrony

# Select which information is logged.
#log measurements statistics tracking
hosts解析设置
vim /etc/hosts
   ip		  hostname
192.168.1.170 ks-m1
192.168.1.171 ks-m2
192.168.1.172 ks-m3
设置内核
#向内核配置文件中写入以下内容
cat >/etc/sysctl.d/k8s.conf <<EOF
net.bridge.bridge-nf-call-ip6tables = 1
net.bridge.bridge-nf-call-iptables = 1
net.ipv4.ip_forward = 1
EOF

#执行以下命令生效
modprobe br_netfilter && sysctl -p /etc/sysctl.d/k8s.conf
检查DNS设置
cat /etc/resolv.conf
安装ipvs
# 向文件中写入以下内容
cat > /etc/sysconfig/modules/ipvs.modules <<EOF
#!/bin/bash
modprobe -- ip_vs
modprobe -- ip_vs_rr
modprobe -- ip_vs_wrr
modprobe -- ip_vs_sh
modprobe -- nf_conntrack_ipv4
EOF

# 修改权限以及查看是否已经正确加载所需的内核模块
chmod 755 /etc/sysconfig/modules/ipvs.modules && bash /etc/sysconfig/modules/ipvs.modules && lsmod | grep -e ip_vs -e nf_connt

# 安装ipvsadm
yum -y install ipset ipvsadm

### 安装依赖组件### 安装依赖组件
yum install -y ebtables socat ipset conntrack
安装docker
详见: centos7安装docker
设置kubernetes仓库
# 设置kubernetes仓库
cat >/etc/yum.repos.d/kubernetes.repo <<EOF
[kubernetes]
name=Kubernetes
baseurl=http://mirrors.aliyun.com/kubernetes/yum/repos/kubernetes-el7-x86_64
enabled=1
gpgcheck=0
repo_gpgcheck=0
gpgkey=http://mirrors.aliyun.com/kubernetes/yum/doc/yum-key.gpg
       http://mirrors.aliyun.com/kubernetes/yum/doc/rpm-package-key.gpg
EOF

yum makecache fast
下载KubeKey
从 GitHub 发布页面下载 KubeKey 或直接使用以下命令。
# 如果gitHub访问受限,先设置环境变量
export KKZONE=cn

#下载 KubeKey
curl -sfL https://get-kk.kubesphere.io | VERSION=v3.0.2 sh -

#为 kk 添加可执行权限
chmod +x kk
创建集群
详见kubesphere 官方文档
创建示例配置文件
#命令如下
./kk create config [--with-kubernetes version] [--with-kubesphere version] [(-f | --file) path]
备注:
-
安装 KubeSphere 3.3 的建议 Kubernetes 版本:v1.19.x、v1.20.x、v1.21.x、*
v1.22.x、* v1.23.x 和 *
v1.24.x。带星号的版本可能出现边缘节点部分功能不可用的情况。因此,如需使用边缘节点,推荐安装 v1.21.x
及之前的版本。如果不指定 Kubernetes 版本,KubeKey 将默认安装 Kubernetes v1.23.10。有关受支持的
Kubernetes 版本的更多信息,请参见支持矩阵。 -
如果您在此步骤的命令中不添加标志 --with-kubesphere,则不会部署 KubeSphere,只能使用配置文件中的 addons
字段安装,或者在您后续使用 ./kk create cluster 命令时再次添加这个标志。 -
如果您添加标志 --with-kubesphere 时不指定 KubeSphere 版本,则会安装最新版本的 KubeSphere。
以下是一些示例,供您参考:
- 您可以使用默认配置创建示例配置文件,也可以为该文件指定其他文件名或其他文件夹。
./kk create config [-f ~/myfolder/abc.yaml]
- 您可以指定要安装的 KubeSphere 版本(例如
--with-kubesphere v3.3.1)。
./kk create config --with-kubesphere [version]
编辑配置文件
如果您不更改名称,那么将创建默认文件 config-sample.yaml。编辑文件,以下是多节点集群(具有一个主节点)配置文件的示例。
备注:
若要自定义 Kubernetes 相关参数,请参考 Kubernetes 集群配置
spec:

  hosts:

  - {name: master, address: 192.168.0.2, internalAddress: 192.168.0.2, user: ubuntu, password: Testing123}

  - {name: node1, address: 192.168.0.3, internalAddress: 192.168.0.3, user: ubuntu, password: Testing123}

  - {name: node2, address: 192.168.0.4, internalAddress: 192.168.0.4, user: ubuntu, password: Testing123}

  roleGroups:

    etcd:

    - master

    control-plane:

    - master

    worker:

    - node1

    - node2

  controlPlaneEndpoint:

    domain: lb.kubesphere.local

    address: ""

    port: 6443