docker-compose+gitlab部署CICD
目录
1.概念
2.需要准备环境
3.部署过程
清理Centos7环境
部署docker
部署docker-compose
部署gitlab
安装gitlab-runner
结束语
1.概念
CICD,顾名思义就是持续集成(Continuous Integration)和持续部署(Continuous Deployment)简称,指在开发过程中自动执行一系列脚本来减低开发引入 bug 的概率,在新代码从开发到部署的过程中,尽量减少人工的介入。
CICD,其实可以使用jenkinsfile,就象gitlab的 .gitlab-ci.yaml文件,把CICD的流程控制和步骤也作为开发的一部分,由开发去维护。并且可以很快的部署到多个环境。
持续集成
持续集成指在和向远程仓库 push 代码后,在这次提交合并入主分支前进行一系列测试,构建等流程。
持续部署
持续部署在持续集成的基础上更进一步,指将推送指仓库默认分支的部署至产品环境。如果这部分需要手动触发,这就是一个持续交付(Continuous Delivery)环节。
2.需要准备环境
192.168.78.129:docker、docker-compose、gitlab
192.168.78.130:docker、docker-compoe、gitrunner
每台服务器的CPU至少要4G及以上
3.部署过程
两台机器都要执行的脚本:stop_safe.sh,docker_install.sh
两台机器都要部署 docker-compose
清理Centos7环境
[root@gitlab ~]# mkdir /data/
[root@gitlab data]# vim stop_safe.sh
#!/bin/bash
curl -o /etc/yum.repos.d/CentOS-Base.repo https://mirrors.aliyun.com/repo/Centos-7.repo

rpm -qa | grep ntpdate &>/dev/null || yum install ntpdate -y
ntpdate ntp1.aliyun.com   #同步时间

systemctl stop  NetworkManager && systemctl disable  NetworkManager
systemctl stop firewalld && systemctl disable firewalld  #关闭防火墙
grep -x "SELINUX=disabled"  /etc/selinux/config &>/dev/null
if [[  $? != 0 ]];then
        sed -i 's/=enforcing/=disabled/' /etc/selinux/config && setenforce 0
fi

grep swap /etc/fstab | grep ^# &>/dev/null
if [[ $? != 0  ]];then
        sed -i '/swap/s/^/#/g' /etc/fstab &&  swapoff -a
fi

sed -i 's/^GSSAPIAuthentication/#GSSAPIAuthentication/g' /etc/ssh/sshd_config
echo 'GSSAPIAuthentication no' >> /etc/ssh/sshd_config
grep "UseDNS *no"  /etc/ssh/sshd_config &>/dev/null || echo 'UseDNS no' >> /etc/ssh/sshd_config
systemctl restart sshd

yum install -y wget epel-release bash-completion.noarch net-tools
yum install -y python3-3.6.8-18.el7.x86_64
[root@gitlab data]# bash  stop_safe.sh
部署docker
[root@gitlab data]# cat docker_install.sh
#!/bin/bash
mkdir -p /etc/docker
tee /etc/docker/daemon.json <<-'ABC'
{
  "registry-mirrors": ["https://hiz48418.mirror.aliyuncs.com"]
}
ABC

# 获取本机IP
ETH_NAME=`route -n  | awk '($1 ~ "0.0.0.0"){print $NF}'`
IP=`ifconfig $ETH_NAME |  awk 'NR==2{print $2}'`

# 清空yum环境
rm -f /var/lib/rpm/__*
rpm --rebuilddb -v -v  &>/dev/null

yum clean dbcache
yum clean metadata
yum clean rpmdb
yum clean headers
yum clean all

rm -rf /var/cache/yum/timedhosts.txt
rm -rf /var/cache/yum/*


install_docker() {
        yum install -y yum-utils
       #使用阿里的下载地址
        yum-config-manager --add-repo http://mirrors.aliyun.com/docker-ce/linux/centos/docker-ce.repo
	sed -i 's/gpgcheck=1/gpgcheck=0/g' /etc/yum.repos.d/docker-ce.repo
	yum --enablerepo=docker-ce-stable clean metadata
	yum makecache
        yum install -y docker-ce docker-ce-cli containerd.io
        systemctl start docker
        systemctl enable docker
        echo -e "\033[32m######## docker version ########\033[0m"
	echo -n "$IP"
        docker --version
        echo -e "\033[32m############# END ##############\033[0m"
}
rpm -qa | grep docker-ce &>/dev/null && echo -e "\033[32m$IP docker already installed......\033[0m" || install_docker

[root@gitlab data]# bash docker_install.sh

[root@gitlab data]# systemctl status docker
部署docker-compose
[root@gitlab ~]# pip3 install docker-compose   #Centos7默认的python版本是2.7,本次部署需要python3以上的
#出现以下错误
 =============================DEBUG ASSISTANCE==========================
            If you are seeing an error here please try the following to
            successfully install cryptography:

            Upgrade to the latest pip and try again. This will fix errors for most
            users. See: https://pip.pypa.io/en/stable/installing/#upgrading-pip
            =============================DEBUG ASSISTANCE==========================

    Traceback (most recent call last):
      File "", line 1, in
      File "/tmp/pip-build-cfg40vu0/cryptography/setup.py", line 14, in
        from setuptools_rust import RustExtension
    ModuleNotFoundError: No module named 'setuptools_rust'

    ----------------------------------------
Command "python setup.py egg_info" failed with error code 1 in /tmp/pip-build-cfg40vu0/cryptography/

#以上错误的解决方法
[root@gitlab ~]# python3 -m pip install --upgrade --force pip
[root@gitlab ~]# pip3 install docker-compose
[root@gitlab ~]# docker-compose --version
docker-compose version 1.29.2, build unknown
部署gitlab
在192.168.78.129主机上使用docker 创建docker-compose.yml文件
[root@gitlab data]# cat docker-compose.yml
version: '3'
services:
 gitlab:
  image: 'gitlab/gitlab-ce:latest'
  restart: always
  container_name: "gitlab"
  privileged: true
  hostname: "192.168.78.129"
  environment:
    GITLAB_OMNIBUS_CONFIG: |
      external_url 'http://192.168.78.129'  #切记要改成自己主机的IP
      gitlab_rails["time_zone"] = "Asia/Shanghai"
      gitlab_rails["gitlab_shell_ssh_port"] = 1222
      nginx["listen_port"] = 80

  ports:
    - "80:80"
    - "8443:443"
    - "1222:22"

  volumes:
    - /data/gitlab/config:/etc/gitlab
    - /data/gitlab/data:/var/opt/gitlab
    - /data/gitlab/logs:/var/log/gitlab
    - "/etc/localtime:/etc/localtime:ro"

[root@gitlab data]# docker-compose up -d  #创建并后台运行所有容器
[root@gitlab data]# docker ps
CONTAINER ID   IMAGE                     COMMAND             CREATED       STATUS                 PORTS                                                                                                               NAMES
d3049dd0a779   gitlab/gitlab-ce:latest   "/assets/wrapper"   2 hours ago   Up 2 hours (healthy)   0.0.0.0:80->80/tcp, :::80->80/tcp, 0.0.0.0:1222->22/tcp, :::1222->22/tcp, 0.0.0.0:8443->443/tcp, :::8443->443/tcp   gitlab
等待gitab加载完成,就可以在浏览器上输入IP 访问
[root@gitlab data]# docker logs -f gitlab #查看gitlab的日志
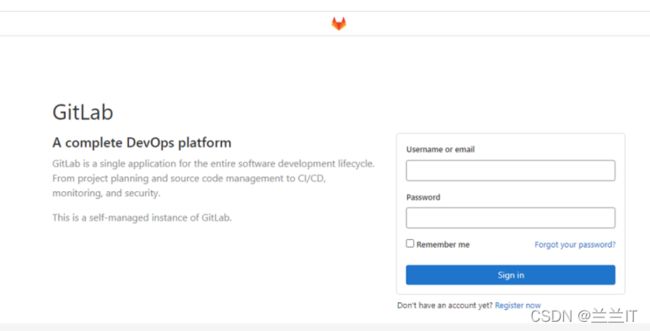
首次访问如下,需要设置密码即可登入gitlab管理界面
地址:http://IP
账号:root
密码:首次登入设置
非首次登入,忘记密码的,需要修改用户、密码方法如下:
[root@localhost ~]# docker exec -it gitlab bash
root@192:/# cd /opt/gitlab/bin/
root@192:/opt/gitlab/bin# gitlab-rails console -e production
--------------------------------------------------------------------------------
 Ruby:         ruby 2.7.5p203 (2021-11-24 revision f69aeb8314) [x86_64-linux]
 GitLab:       14.6.1 (661d663ab2b) FOSS
 GitLab Shell: 13.22.1
 PostgreSQL:   12.7
--------------------------------------------------------------------------------
Loading production environment (Rails 6.1.4.1)
irb(main):001:0> u=User.where(id:1).first
=> #
irb(main):002:0> u.password='12345678'
=> "12345678"
irb(main):003:0> u.password_confirmation='12345678'
=> "12345678"
irb(main):004:0> u.save
=> true
irb(main):005:0> exit
安装gitlab-runner
在192.168.78.130主机上创建docker-compose.yml

[root@runner data]# cat docker-compose.yml
version: '3'
services:
  gitlab-runner:

    container_name: gitlab-runner
    restart: always
    privileged: true
    image: 'gitlab/gitlab-runner'
    volumes:
      - "/var/run/docker.sock:/var/run/docker.sock"
      - "/data/gitlab-runner/config:/etc/gitlab-runner"
      - "/etc/localtime:/etc/localtime:ro"
[root@runner data]# docker-compose up -d
[root@runner data]# docker ps
CONTAINER ID   IMAGE                  COMMAND                  CREATED             STATUS             PORTS     NAMES
462973a1c654   gitlab/gitlab-runner   "/usr/bin/dumb-init …"   About an hour ago   Up About an hour             gitlab-runner
获取注册token
在项目的
settings-CI/CD-RUNNER中找到token
注册gitlab-runner
[root@runner data]# docker run --rm -t -i -v /data/gitlab-runner/config:/etc/gitlab-runner gitlab/gitlab-runner register
Runtime platform arch=amd64 os=linux pid=8 revision=5316d4ac version=14.6.0
Running in system-mode.
Enter the GitLab instance URL (for example, https://gitlab.com/):
http://192.168.78.129/
Enter the registration token:
9jT_yH5aK_HTBGgTyQX-
Enter a description for the runner:
[3f4049807752]:
Enter tags for the runner (comma-separated):
docker
Registering runner... succeeded runner=9jT_yH5a
Enter an executor: docker, docker-ssh, parallels, ssh, docker+machine, docker-ssh+machine, custom, shell, virtualbox, kubernetes:
shell
Runner registered successfully. Feel free to start it, but if it's running already the config should be automatically reloaded!
查看注册信息
docker exec gitlab-runner cat /etc/gitlab-runner/config.toml
结束语
革命尚未的成功,后续将会不断更新!!
若有不妥,望大家指出和见谅,加油!!

