vue-element-admin总结(全程复制不会剁手吧你!)
vue-element-admin总结(前端讲解)
- 注意
- 下载项目
- 进入项目目录
- 安装依赖
- 启动服务
- 开始做二次开发连接自己的后端接口
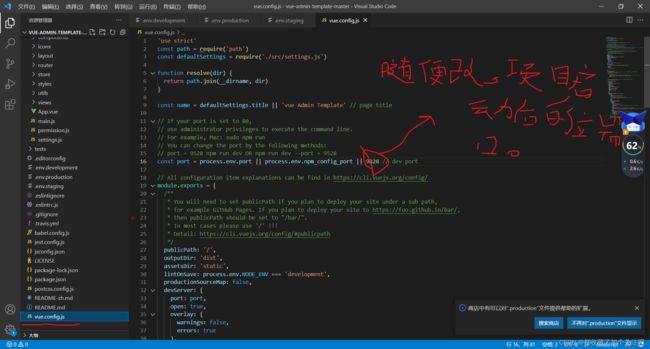
- 一,修改配置与后端接口做关联
- 二,修改 登录页面以及登陆相关的文件及定义连接后端接口的axios方法(如图所示login/index中)
- 最后解决一下跨域问题
注意
建议后端是用springSecurity安全框架不会的先去学,会了再回来看。
下载项目
git clone https://github.com/PanJiaChen/vue-admin-template.git
进入项目目录
cd vue-admin-template
安装依赖
npm install
启动服务
npm run dev
浏览器访问 http://localhost:9528
到此就可以连接自己的后端接口了
开始做二次开发连接自己的后端接口
一,修改配置与后端接口做关联
.env.development文件
# just a flag
ENV = 'development'

# base api对应的是你后端的接口地址getway网关地址
VUE_APP_BASE_API = 'http://192.168.1.132:5555'

# vue-cli uses the VUE_CLI_BABEL_TRANSPILE_MODULES environment variable,
# to control whether the babel-plugin-dynamic-import-node plugin is enabled.
# It only does one thing by converting all import() to require().
# This configuration can significantly increase the speed of hot updates,
# when you have a large number of pages.
# Detail:  https://github.com/vuejs/vue-cli/blob/dev/packages/@vue/babel-preset-app/index.js

VUE_CLI_BABEL_TRANSPILE_MODULES = true
.env.production文件
# just a flag
ENV = 'production'

# base api
VUE_APP_BASE_API = 'http://192.168.1.132:5555'
.env.staging文件
NODE_ENV = production

# just a flag
ENV = 'staging'

# base api
# VUE_APP_BASE_API = '/stage-api'
VUE_APP_BASE_API = 'http://192.168.1.132:5555'
二,修改 登录页面以及登陆相关的文件及定义连接后端接口的axios方法(如图所示login/index中)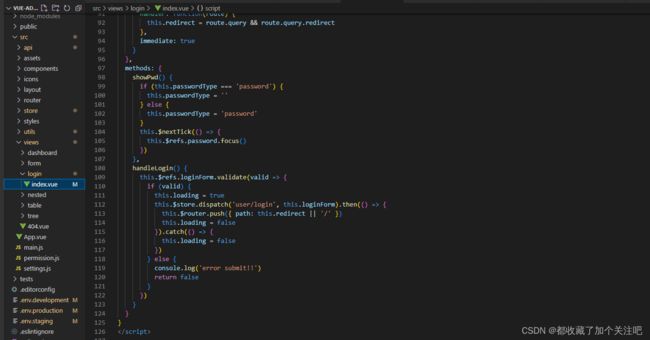
改成你自己想要的样子,也可以不改,接下来在methods中有个handleLogin方法如图所示
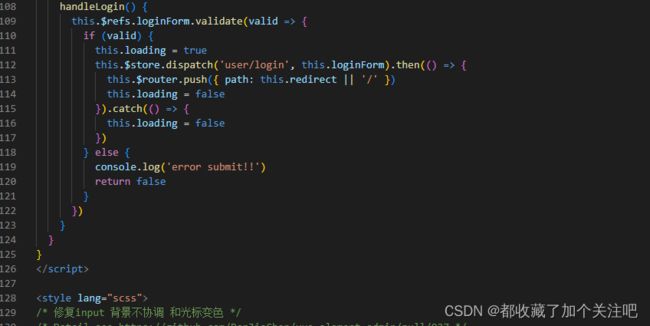
其中 this. r e f s . l o g i n F o r m . v a l i d a t e ()做的表单规则校验,其中 t h i s . refs.loginForm.validate()做的表单规则校验,其中this. refs.loginForm.validate()做的表单规则校验,其中this.store.dispatch(‘user/login’, this.loginForm)做了调用了store中的login方法,接下来补充一个更改
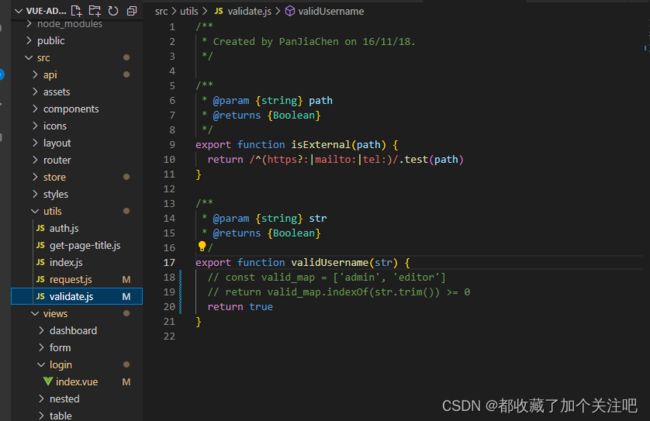
如图中src/utils/validate.js目录中validUsername方法直接返回true,你也可以改成你自己的想法,因为账号不能写死你说是不。
好接下来我们接着上一个话题去改src/store/modules/user.js文件

this.$store.dispatch(‘user/login’, this.loginForm)触发的是下图的方法
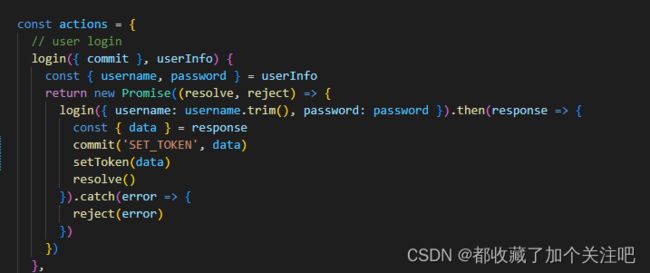
其实当我们点击了登录按钮后触发两个方法一个是上图中的方法
一个是下图的方法我们都要按着自己后端接口的权限设计重写他们

在这里我将这个文件中的代码分享给大家(直接复制不会的剁手)
import { login, getInfo } from '@/api/user'
import { getToken, setToken, removeToken } from '@/utils/auth'
import { resetRouter } from '@/router'

const getDefaultState = () => {
  return {
    token: getToken(),
    name: '',
    avatar: '',
    roles: []
  }
}

const state = getDefaultState()

const mutations = {
  RESET_STATE: (state) => {
    Object.assign(state, getDefaultState())
  },
  SET_TOKEN: (state, token) => {
    state.token = token
  },
  SET_NAME: (state, name) => {
    state.name = name
  },
  SET_AVATAR: (state, avatar) => {
    state.avatar = avatar
  },
  SET_ROLES: (state, roles) => {
    state.roles = roles
  },
  SET_ROLEIDSTRING: (state, roleIDString) => {
    state.roleIDString = roleIDString
  }
}

const actions = {
  // user login
  login({ commit }, userInfo) {
    const { username, password } = userInfo
    return new Promise((resolve, reject) => {
      login({ username: username.trim(), password: password }).then(response => {
        const { data } = response
        commit('SET_TOKEN', data)
        setToken(data)
        resolve()
      }).catch(error => {
        reject(error)
      })
    })
  },

  // get user info
  getInfo({ commit, state }) {
    return new Promise((resolve, reject) => {
      getInfo(state.token).then(response => {
        const { data } = response
        if (!data) {
          reject('验证失败,请重新登录.')
        }
        const { roles, name, avatar, roleIDString } = data
        // roles must be a non-empty array
        if (!roles || roles.length <= 0) {
          reject('角色必须是非空数组!')
        }
        commit('SET_ROLES', roles)
        commit('SET_NAME', name)
        commit('SET_AVATAR', avatar)
        commit('SET_ROLEIDSTRING', roleIDString)
        resolve(data)
      }).catch(error => {
        reject(error)
      })
    })
  },

  // user logout
  logout({ commit, state }) {
    return new Promise((resolve, reject) => {
      // logout(state.token).then(() => {
      removeToken() // must remove  token  first
      resetRouter()
      commit('SET_TOKEN', '')
      commit('RESET_STATE')
      commit('SET_ROLES', '')
      commit('SET_NAME', '')
      commit('SET_AVATAR', '')
      commit('SET_ROLEIDSTRING', '')
      resolve()
    // }).catch(error => {
    //   reject(error)
    // })
    })
  },

  // remove token
  resetToken({ commit }) {
    return new Promise(resolve => {
      removeToken() // must remove  token  first
      commit('RESET_STATE')
      resolve()
    })
  }
}

export default {
  namespaced: true,
  state,
  mutations,
  actions
}
在当前文件中引入了文件import { login, getInfo } from ‘@/api/user’
@/api/use文件是调用后台登录登出等axios文件(如下代码)
import request from '@/utils/request'

export function login(data) {
  return request({
   // 咱后端的登录接口
    url: 'authenticate',
    method: 'post',
    params: data
  })
}

export function getInfo(token) {
// 咱后端的得到用户信息的接口
  return request({
    url: 'userservice/userInfo/info', // userservice/role/query/getpowerByRoleId
    method: 'get'
  })
}

export function logout() {
// 咱后端的登出接口
  return request({
    url: 'userservice/account/logout',
    method: 'post'
  })
}
下图配置请求时携带token,响应时响应体数据的处理:
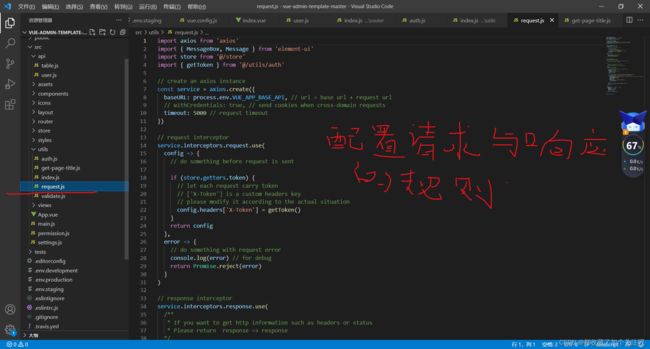
这里看你的后台返回结果是咋封装的了下面这是我的配置(你们也可以用):
import axios from 'axios'
import { MessageBox, Message } from 'element-ui'
import store from '@/store'
import { getToken } from '@/utils/auth'

// create an axios instance
const service = axios.create({
  // baseURL: process.env.VUE_APP_BASE_API, // url = base url + request url
  baseURL: process.env.VUE_APP_BASE_API, // http://192.168.1.108:3381
  // withCredentials: true, // send cookies when cross-domain requests
  timeout: 5000 // request timeout
})

// request interceptor
service.interceptors.request.use(
  config => {
    // do something before request is sent

    if (getToken()) {
      // let each request carry token
      // ['X-Token'] is a custom headers key
      // please modify it according to the actual situation
      config.headers['Authorization'] = 'Bearer ' + getToken()
    }
    return config
  },
  error => {
    // do something with request error
    console.log(error) // for debug
    return Promise.reject(error)
  }
)

// response interceptor
service.interceptors.response.use(
  /**
   * If you want to get http information such as headers or status
   * Please return  response => response
  */

  /**
   * Determine the request status by custom code
   * Here is just an example
   * You can also judge the status by HTTP Status Code
   */
  response => {
    const res = response.data

    // if the custom code is not 20000, it is judged as an error.
    if (res.code !== 20000) {
      Message({
        message: res.message || 'Error',
        type: 'error',
        duration: 5 * 1000
      })

      // 50008: Illegal token; 50012: Other clients logged in; 50014: Token expired;
      if (res.code === 50008 || res.code === 50012 || res.code === 50014) {
        // to re-login
        MessageBox.confirm('您已注销,您可以取消停留在该页上,或再次登录', '确认注销', {
          confirmButtonText: 'Re-Login',
          cancelButtonText: 'Cancel',
          type: 'warning'
        }).then(() => {
          store.dispatch('user/resetToken').then(() => {
            location.reload()
          })
        })
      }

      return Promise.reject(new Error(res.message || 'Error'))
    } else {
      if (!res.success) {
        Message({
          message: res.msg || 'Error',
          type: 'error',
          duration: 5 * 1000
        })
        return Promise.reject(new Error(res.message || 'Error'))
      } else {
        return res
      }
    }
  },
  error => {
    console.log('err' + error) // for debug

    Message({
      message: error.response.data.msg,
      type: 'error',
      duration: 5 * 1000
    })
    return Promise.reject(error)
  }
)

export default service
这是我后台拦截上面请求配置的token的代码(就是在springSecurity配置文件中configure(HttpSecurity http)中自定义一个request过滤器)如下:
package com.zgy.handle.gateway.config.security;

import org.springframework.beans.factory.annotation.Autowired;
import org.springframework.context.annotation.Bean;
import org.springframework.context.annotation.Configuration;
import org.springframework.security.authentication.AuthenticationManager;
import org.springframework.security.config.annotation.authentication.builders.AuthenticationManagerBuilder;
import org.springframework.security.config.annotation.method.configuration.EnableGlobalMethodSecurity;
import org.springframework.security.config.annotation.web.builders.HttpSecurity;
import org.springframework.security.config.annotation.web.configuration.EnableWebSecurity;
import org.springframework.security.config.annotation.web.configuration.WebSecurityConfigurerAdapter;
import org.springframework.security.config.http.SessionCreationPolicy;
import org.springframework.security.core.userdetails.UserDetailsService;
import org.springframework.security.crypto.bcrypt.BCryptPasswordEncoder;
import org.springframework.security.crypto.password.PasswordEncoder;
import org.springframework.security.web.authentication.UsernamePasswordAuthenticationFilter;

@Configuration
@EnableWebSecurity
@EnableGlobalMethodSecurity(prePostEnabled = true)
public class WebSecurityConfig extends WebSecurityConfigurerAdapter {
    @Autowired
    private JwtAuthenticationEntryPoint jwtAuthenticationEntryPoint;
    @Autowired
    private UserDetailsService jwtUserDetailsService;
    @Autowired
    private JwtRequestFilter jwtRequestFilter;

    @Autowired
    public void configureGlobal(AuthenticationManagerBuilder auth) throws Exception {
        auth.userDetailsService(jwtUserDetailsService).passwordEncoder(passwordEncoder());
    }
    @Bean
    public PasswordEncoder passwordEncoder() {
        return new BCryptPasswordEncoder();
    }
    @Bean
    @Override
    public AuthenticationManager authenticationManagerBean() throws Exception {
        return super.authenticationManagerBean();
    }

    @Override
    protected void configure(HttpSecurity http) throws Exception {
        http.csrf().disable()
                .authorizeRequests().antMatchers("/authenticate").permitAll()
                .anyRequest().authenticated()
                .and().exceptionHandling().authenticationEntryPoint(jwtAuthenticationEntryPoint)
                .and().sessionManagement().sessionCreationPolicy(SessionCreationPolicy.STATELESS).maximumSessions(1);
             //   .and().sessionManagement().maximumSessions(1).maxSessionsPreventsLogin(false);

        http.sessionManagement().maximumSessions(1).expiredUrl("/authenticate");
        http.addFilterBefore(jwtRequestFilter, UsernamePasswordAuthenticationFilter.class);
    }
}
上面是springsecurity主配置类的代码,其中“ http.addFilterBefore(jwtRequestFilter, UsernamePasswordAuthenticationFilter.class);”就是请求过滤器配置。
jwtRequestFilter文件代码如下:
package com.zgy.handle.gateway.config.security;

import io.jsonwebtoken.ExpiredJwtException;
import lombok.extern.slf4j.Slf4j;
import org.springframework.beans.factory.annotation.Autowired;
import org.springframework.security.authentication.UsernamePasswordAuthenticationToken;
import org.springframework.security.core.context.SecurityContextHolder;
import org.springframework.security.core.userdetails.UserDetails;
import org.springframework.security.web.authentication.WebAuthenticationDetailsSource;
import org.springframework.stereotype.Component;
import org.springframework.web.filter.OncePerRequestFilter;

import javax.servlet.FilterChain;
import javax.servlet.ServletException;
import javax.servlet.http.HttpServletRequest;
import javax.servlet.http.HttpServletResponse;
import java.io.IOException;

@Component
@Slf4j
//用于继承实现并在每次请求时只执行一次过滤
public class JwtRequestFilter extends OncePerRequestFilter {
    @Autowired
    private JwtUserDetailsService jwtUserDetailsService;
    @Autowired
    private JwtTokenUtil jwtTokenUtil;

    @Override
    protected void doFilterInternal(HttpServletRequest httpServletRequest, HttpServletResponse httpServletResponse, FilterChain filterChain) throws ServletException, IOException {
        String requestTokenHeader = httpServletRequest.getHeader("Authorization");

        String username = null;
        String jwtToken = null;

        if (requestTokenHeader != null && requestTokenHeader.startsWith("Bearer ")){
            jwtToken = requestTokenHeader.substring(7);
            try {
                username = jwtTokenUtil.getUsernameFromToken(jwtToken);
            }catch (IllegalArgumentException e){
                log.error("Unable to get JWT Token");
            }catch (ExpiredJwtException ex){
                log.error("JWT Token has expired");
            }
        }else {
            log.error("JWT Token does not begin with Bearer String" + requestTokenHeader);
        }

        // Once we get the token validate it
        if (username != null && SecurityContextHolder.getContext().getAuthentication() == null){
            UserDetails userDetails = this.jwtUserDetailsService.loadUserByUsername(username);

            // if token is vali configure spring security to mannually set authentication
            if (jwtTokenUtil.validateToken(jwtToken, userDetails)){
                UsernamePasswordAuthenticationToken usernamePasswordAuthenticationToken =
                        new UsernamePasswordAuthenticationToken(userDetails,null,userDetails.getAuthorities());
                usernamePasswordAuthenticationToken.setDetails(new WebAuthenticationDetailsSource()
                        .buildDetails(httpServletRequest));
                // After setting the Authentication in the context, we specify that the current user is authenticated.
                // So it passes the Spring Security Configurations successfully
                SecurityContextHolder.getContext().setAuthentication(usernamePasswordAuthenticationToken);
            }
        }
        filterChain.doFilter(httpServletRequest,httpServletResponse);
    }

}
后端对应上面的repsonse响应的监听配置后端是有一个接口返回结果的封装类的代码如下(主要是后端接口执行成功返回体中的code==20000):
package com.zgy.handle.common.response;

import com.fasterxml.jackson.annotation.JsonIgnore;
import com.fasterxml.jackson.annotation.JsonIgnoreProperties;

import lombok.Data;
import org.springframework.data.domain.Page;

/**
 * 消息的响应体
 * @param
 */
@Data
@JsonIgnoreProperties({"hibernateLazyInitializer","handler"})
public class ResponseCode {
    private boolean success; // 是否成功
    private Integer code; // 代码
    private String msg;
    private T data; // 响应数据

    /*    private int pageSize; // 页面大小
        private int pageNumer; // 页码*/
    private long totalElements; // 总数量
    private int totalPage; // 总页数


    public static ResponseCode sucess() {
        ResponseCode responseCode = new ResponseCode<>();
        responseCode.setCode(20000);
        responseCode.setSuccess(true);
        return responseCode;
    }

    public void setSuccess(boolean b) {
        this.success=b;
    }


    public static ResponseCode error(String msg){
        ResponseCode responseCode = new ResponseCode();
        responseCode.setSuccess(false);
        responseCode.setMsg(msg);
        return responseCode;
    }


    public static ResponseCode error(String msg,Integer code){
        ResponseCode responseCode = new ResponseCode();
        responseCode.setSuccess(false);
        responseCode.setCode(code);
        responseCode.setMsg(msg);
        return responseCode;
    }

    public ResponseCode setPageInfo(Page pageInfo){
        this.totalElements = pageInfo.getTotalElements();
        this.totalPage= pageInfo.getTotalPages();
        return this;
    }

    @JsonIgnore
    public ResponseCode setDataInfo(Page page){
        this.totalPage = page.getTotalPages();
        this.totalElements = page.getTotalElements();
        this.data = (T) page.getContent();
        return this;
    }

    public ResponseCode(){

    }
    @JsonIgnore
    public ResponseCode(T data){
        this.data = data;
    }

    public void setData(T sumMoney) {
        this.data=sumMoney;
    }
}
对上面的返回结果类的使用:
   @GetMapping(value = "mohu", produces = { "application/json;charset=UTF-8"})
    public ResponseCode> getlistlikename(String gradeName, int page, int size){
        ResponseCode> responseCode = ResponseCode.sucess();
        responseCode.setDataInfo(gradequeryService.getList(gradeName,page,size));
        return responseCode;
    }
最后解决一下跨域问题
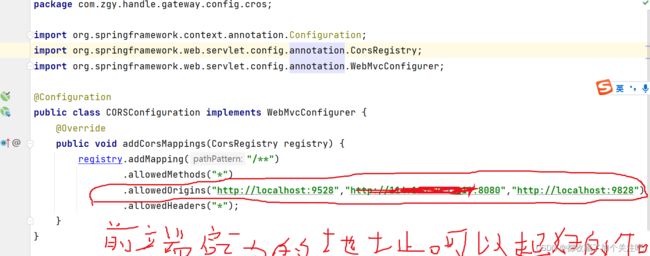
我是在后端通过这个配置解决的,多个地址之前逗号分割(不会的去上网搜)
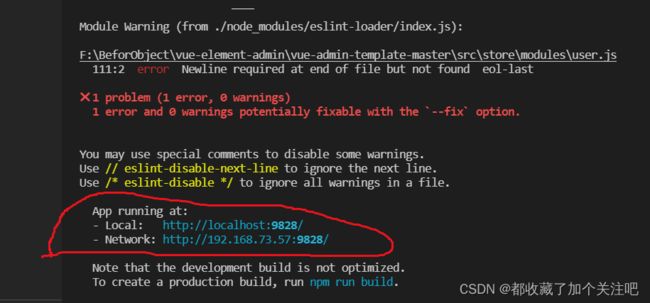
上面这两个都要配到下图中(必须的奥!!!)
到此为止项目二次开发基础就整好了接下来上结果
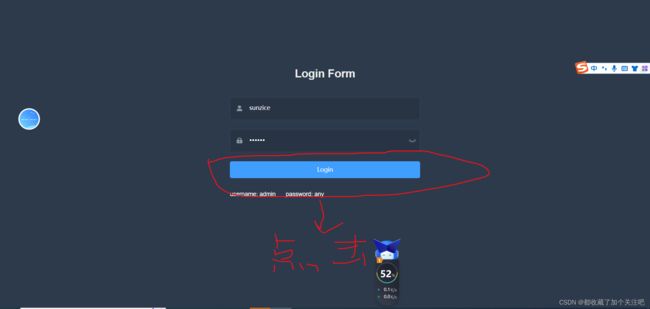
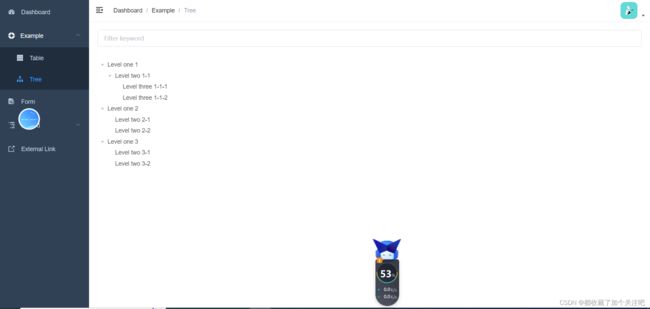
如果想用自己的后端那上方的axios文件改成你的接口,请求与响应按照你的后端来写,下个文章中再见。
撒花完结!!!
作者很帅的
作者:张豪杰
vx:18233243643

