Python工具下载、环境配置(超详细)
Python工具下载、环境配置
- 一、pycharm下载、安装
- 二、Python下载、安装
- 三、在pycharm上配置python
- 四、配置镜像源
- 五、安装插件
-
-
- (1)自动补码神器 ——TabNine
- (2)汉化
-
- 六、VSCode的Python环境配置
- 参考文章:
一、pycharm下载、安装
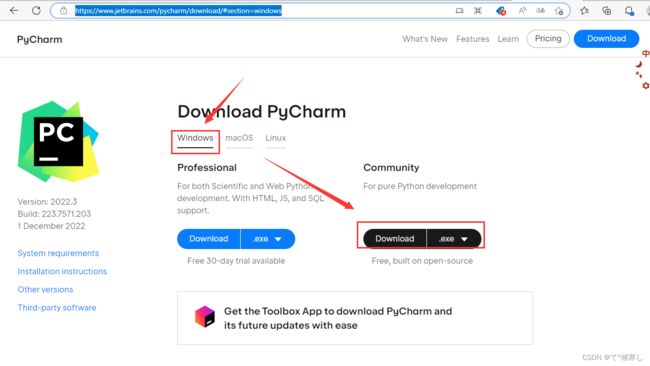
1、下载地址: 点击跳转
官网:https://www.jetbrains.com/pycharm/download/#section=windows
2、下载:
3、安装:
双击打开 —> next

选中 —> 【next】;
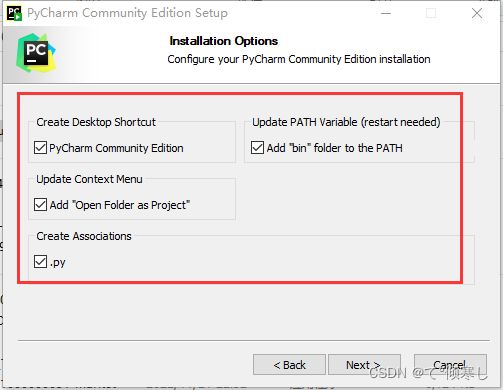
【next】—> 【finish】
桌面上就会出现pycharm图标;
·
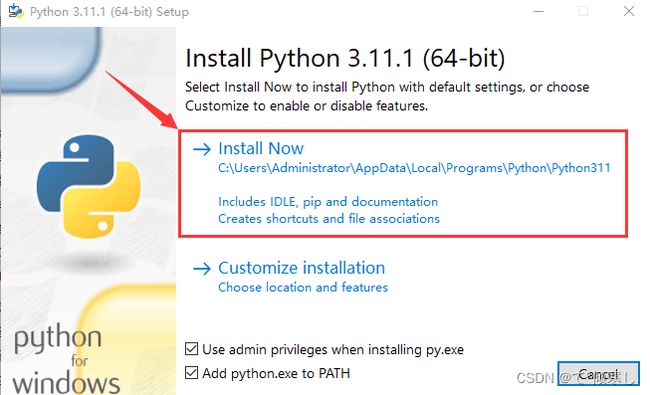
二、Python下载、安装
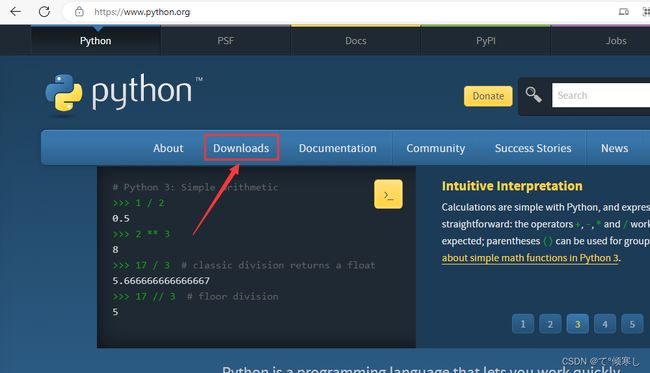
1、下载地址: 点击进入
2、进入官网后,点击下载;
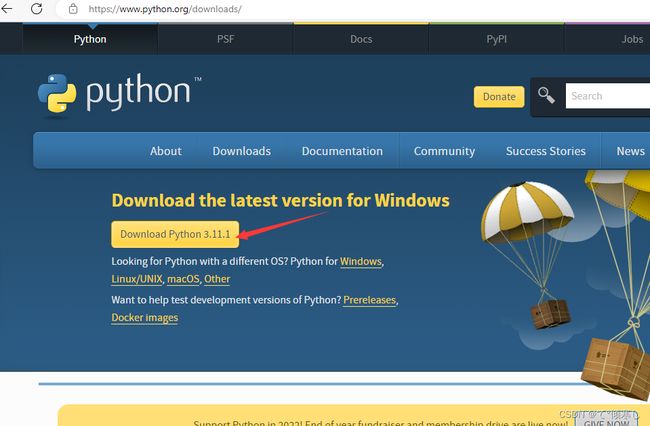
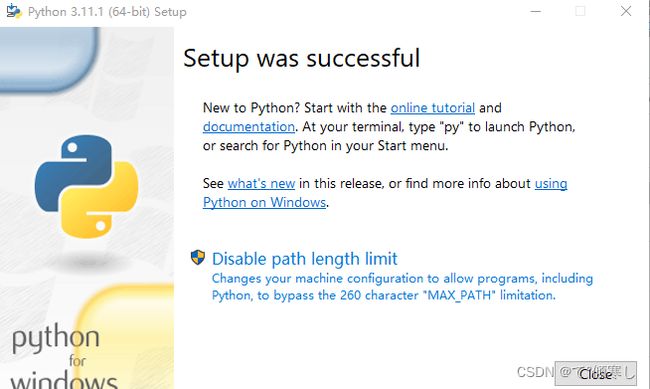
3、下载好后,配置环境变量;
(1)复制路径
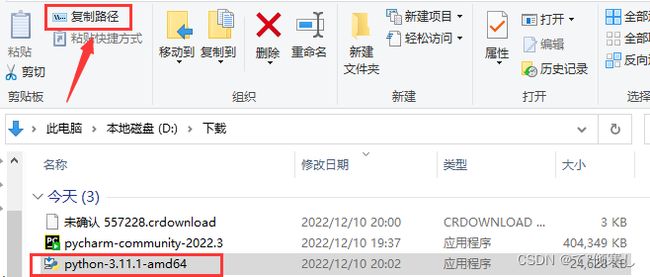
(2)打开高级系统设置;
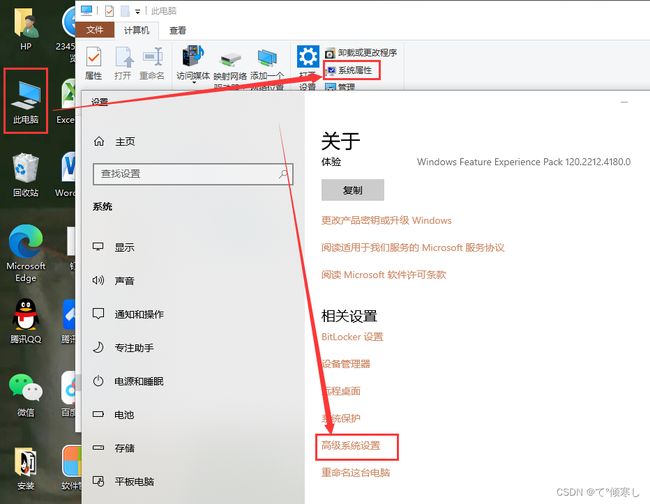
(3)【环境变量】— 双击【path】
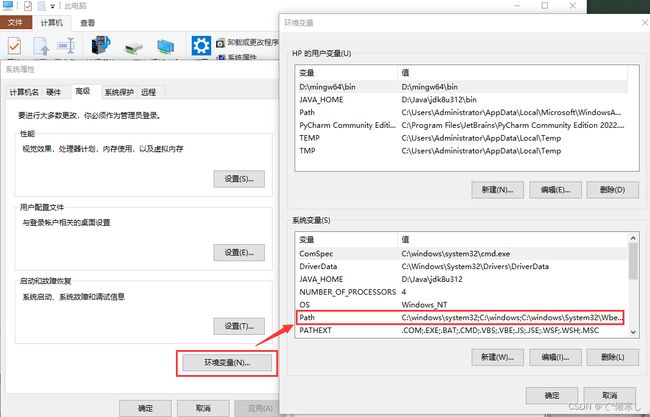
(4)点击【新建】,将刚才复制的路径粘贴进去;
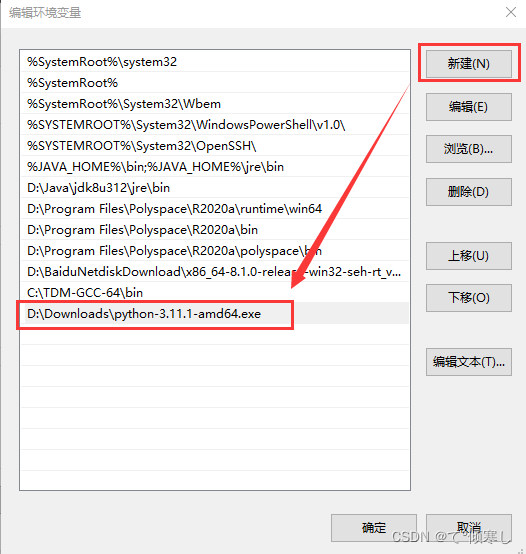
(5)一直点【确定】;
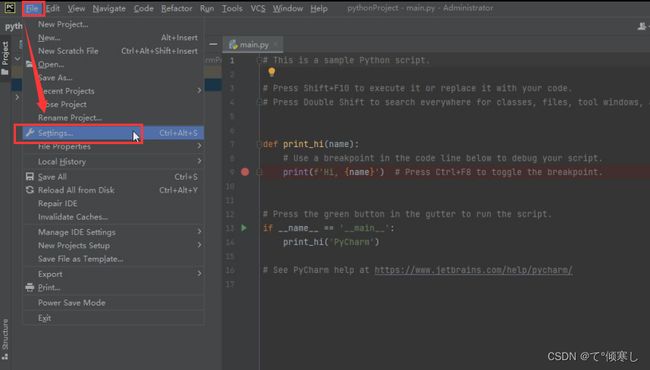
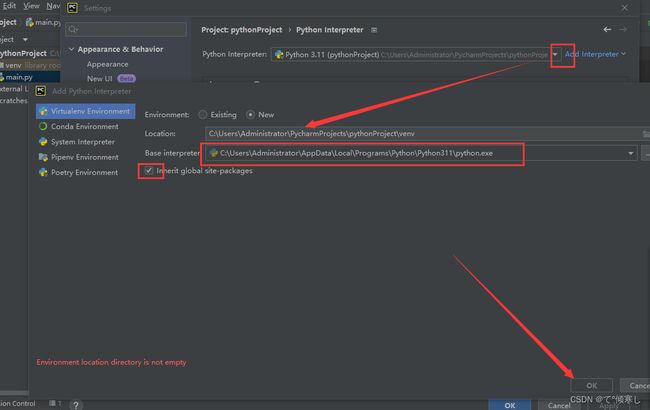
三、在pycharm上配置python
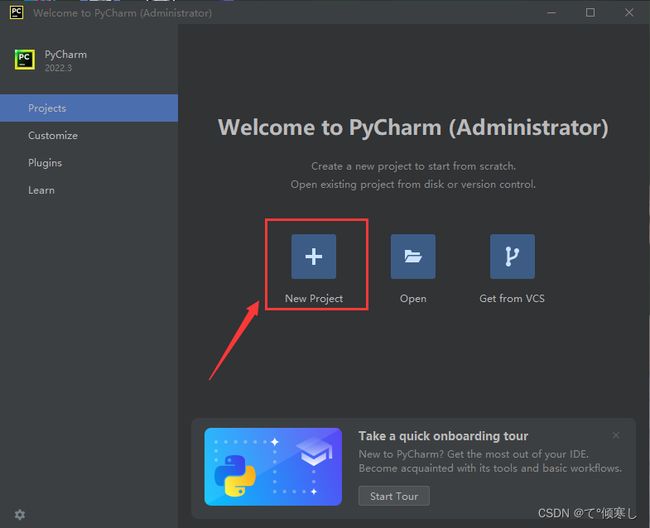
1、双击打开pycharm;
2、新建项目文件;
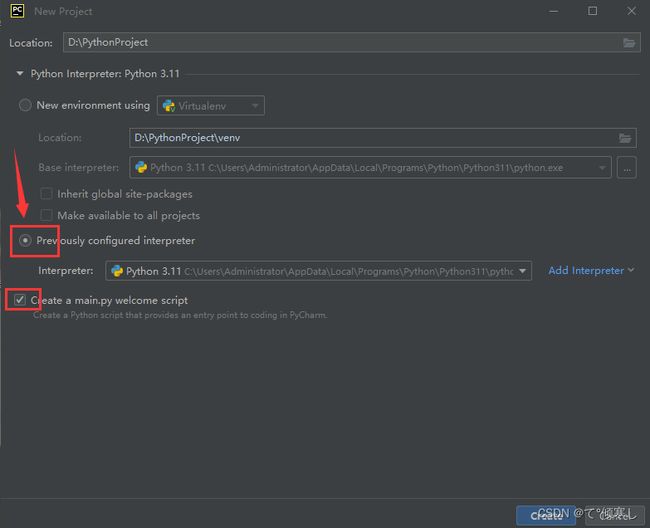
弹出这个,直接关闭;
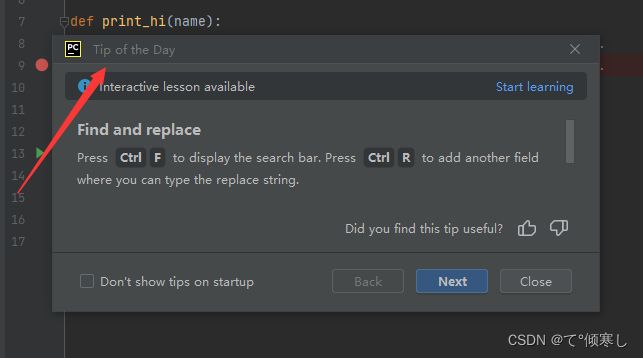
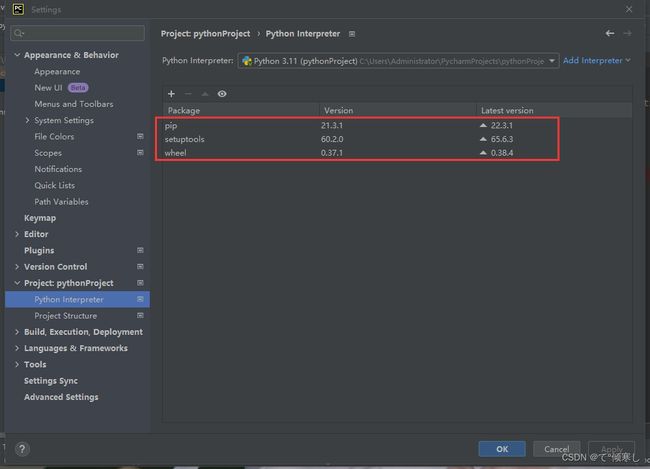
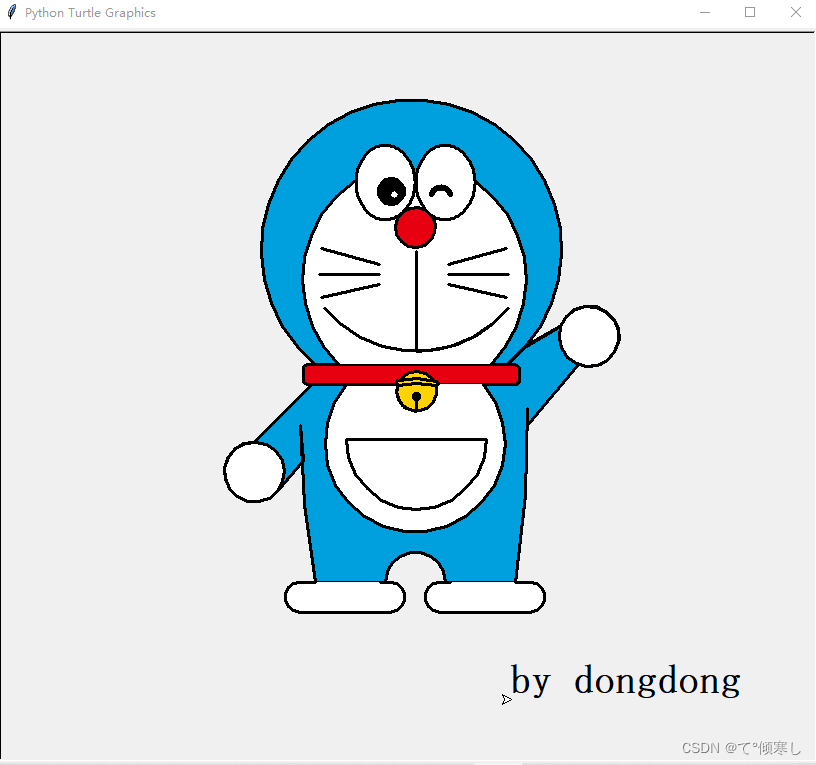
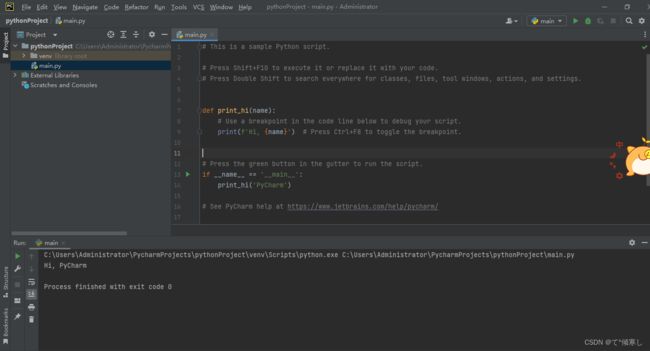
4、打印成功:标志配置完成
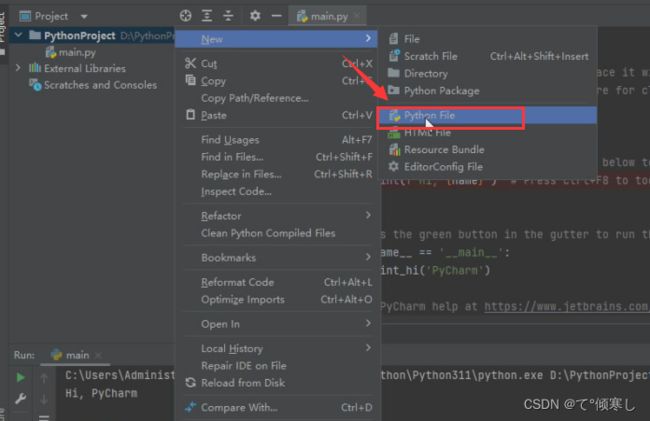
5、新建一个python file 文件:
将以下代码粘贴过去:
#!/usr/bin/env python3
#-*- coding: utf-8 -*-
#@Author: dong
#@Date: 2018-07-05 19:37:42
#@Env: python 3.6
#@Github: https://github.com/PerpetualSmile

from turtle import *


#无轨迹跳跃
def my_goto(x, y):
    penup()
    goto(x, y)
    pendown()

#眼睛
def eyes():
    fillcolor("#ffffff")
    begin_fill()

    tracer(False)
    a = 2.5
    for i in range(120):
        if 0 <= i < 30 or 60 <= i < 90:
            a -= 0.05
            lt(3)
            fd(a)
        else:
            a += 0.05
            lt(3)
            fd(a)
    tracer(True)
    end_fill()


#胡须
def beard():
    my_goto(-32, 135)
    seth(165)
    fd(60)

    my_goto(-32, 125)
    seth(180)
    fd(60)

    my_goto(-32, 115)
    seth(193)
    fd(60)

    my_goto(37, 135)
    seth(15)
    fd(60)

    my_goto(37, 125)
    seth(0)
    fd(60)

    my_goto(37, 115)
    seth(-13)
    fd(60)

#嘴巴
def mouth():
    my_goto(5, 148)
    seth(270)
    fd(100)
    seth(0)
    circle(120, 50)
    seth(230)
    circle(-120, 100)

#围巾
def scarf():
    fillcolor('#e70010')
    begin_fill()
    seth(0)
    fd(200)
    circle(-5, 90)
    fd(10)
    circle(-5, 90)
    fd(207)
    circle(-5, 90)
    fd(10)
    circle(-5, 90)
    end_fill()

#鼻子
def nose():
    my_goto(-10, 158)
    seth(315)
    fillcolor('#e70010')
    begin_fill()
    circle(20)
    end_fill()

#黑眼睛
def black_eyes():
    seth(0)
    my_goto(-20, 195)
    fillcolor('#000000')
    begin_fill()
    circle(13)
    end_fill()

    pensize(6)
    my_goto(20, 205)
    seth(75)
    circle(-10, 150)
    pensize(3)

    my_goto(-17, 200)
    seth(0)
    fillcolor('#ffffff')
    begin_fill()
    circle(5)
    end_fill()
    my_goto(0, 0)


#脸
def face():

    fd(183)
    lt(45)
    fillcolor('#ffffff')
    begin_fill()
    circle(120, 100)
    seth(180)
    # print(pos())
    fd(121)
    pendown()
    seth(215)
    circle(120, 100)
    end_fill()
    my_goto(63.56,218.24)
    seth(90)
    eyes()
    seth(180)
    penup()
    fd(60)
    pendown()
    seth(90)
    eyes()
    penup()
    seth(180)
    fd(64)

#头型
def head():
    penup()
    circle(150, 40)
    pendown()
    fillcolor('#00a0de')
    begin_fill()
    circle(150, 280)
    end_fill()

#画哆啦A梦
def Doraemon():
    # 头部
    head()

    # 围脖
    scarf()

    # 脸
    face()

    # 红鼻子
    nose()

    # 嘴巴
    mouth()

    # 胡须
    beard()

    # 身体
    my_goto(0, 0)
    seth(0)
    penup()
    circle(150, 50)
    pendown()
    seth(30)
    fd(40)
    seth(70)
    circle(-30, 270)


    fillcolor('#00a0de')
    begin_fill()

    seth(230)
    fd(80)
    seth(90)
    circle(1000, 1)
    seth(-89)
    circle(-1000, 10)

    # print(pos())

    seth(180)
    fd(70)
    seth(90)
    circle(30, 180)
    seth(180)
    fd(70)

    # print(pos())
    seth(100)
    circle(-1000, 9)

    seth(-86)
    circle(1000, 2)
    seth(230)
    fd(40)

    # print(pos())


    circle(-30, 230)
    seth(45)
    fd(81)
    seth(0)
    fd(203)
    circle(5, 90)
    fd(10)
    circle(5, 90)
    fd(7)
    seth(40)
    circle(150, 10)
    seth(30)
    fd(40)
    end_fill()

    # 左手
    seth(70)
    fillcolor('#ffffff')
    begin_fill()
    circle(-30)
    end_fill()

    # 脚
    my_goto(103.74, -182.59)
    seth(0)
    fillcolor('#ffffff')
    begin_fill()
    fd(15)
    circle(-15, 180)
    fd(90)
    circle(-15, 180)
    fd(10)
    end_fill()

    my_goto(-96.26, -182.59)
    seth(180)
    fillcolor('#ffffff')
    begin_fill()
    fd(15)
    circle(15, 180)
    fd(90)
    circle(15, 180)
    fd(10)
    end_fill()

    # 右手
    my_goto(-133.97, -91.81)
    seth(50)
    fillcolor('#ffffff')
    begin_fill()
    circle(30)
    end_fill()

    # 口袋
    my_goto(-103.42, 15.09)
    seth(0)
    fd(38)
    seth(230)
    begin_fill()
    circle(90, 260)
    end_fill()

    my_goto(5, -40)
    seth(0)
    fd(70)
    seth(-90)
    circle(-70, 180)
    seth(0)
    fd(70)

    #铃铛
    my_goto(-103.42, 15.09)
    fd(90)
    seth(70)
    fillcolor('#ffd200')
    # print(pos())
    begin_fill()
    circle(-20)
    end_fill()
    seth(170)
    fillcolor('#ffd200')
    begin_fill()
    circle(-2, 180)
    seth(10)
    circle(-100, 22)
    circle(-2, 180)
    seth(180-10)
    circle(100, 22)
    end_fill()
    goto(-13.42, 15.09)
    seth(250)
    circle(20, 110)
    seth(90)
    fd(15)
    dot(10)
    my_goto(0, -150)

    # 画眼睛
    black_eyes()

if __name__ == '__main__':
    screensize(800,600, "#f0f0f0")
    pensize(3)  # 画笔宽度
    speed(9)    # 画笔速度
    Doraemon()
    my_goto(100, -300)
    write('by dongdong', font=("Bradley Hand ITC", 30, "bold"))
    mainloop()
·
四、配置镜像源
1、这里是一些比较好用的镜像源:
清华:点击跳转
https://pypi.tuna.tsinghua.edu.cn/simple
阿里云:点击跳转
http://mirrors.aliyun.com/pypi/simple/
中国科技大学: 点击跳转
https://pypi.mirrors.ustc.edu.cn/simple/
2、手动配置:
pip install 下载的模块名 -i https://pypi.tuna.tsinghua.edu.cn/simple
eg. 要下载numpy这个模块,执行以下命令:
pip install numpy -i https://pypi.tuna.tsinghua.edu.cn/simple
3、永久配置镜像源:
这个配置一定要添加!
(1)方法一:
到cmd执行如下命令创建pip.ini:
pip config set global.index-url https://pypi.tuna.tsinghua.edu.cn/simple
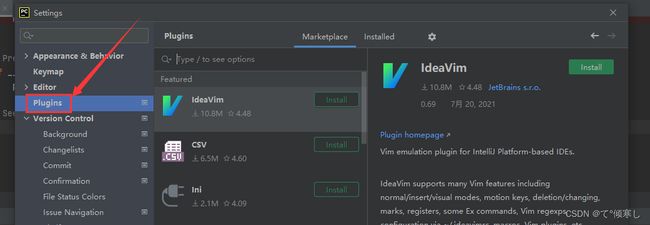
五、安装插件
(1)自动补码神器 ——TabNine
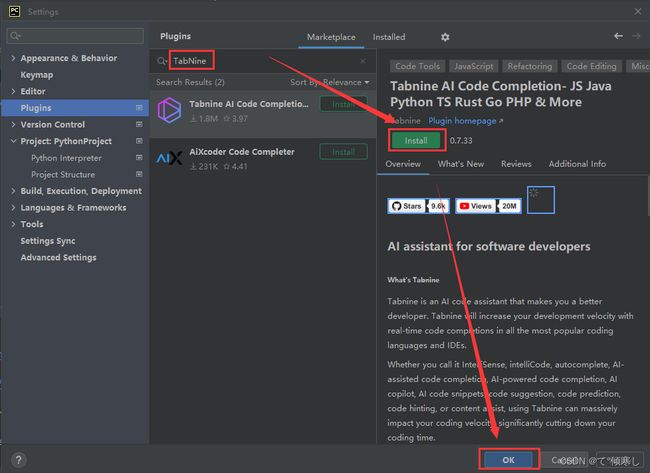
安装完成后:
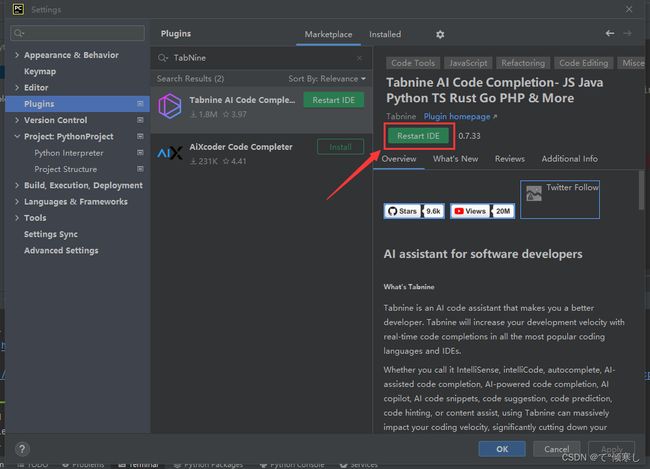
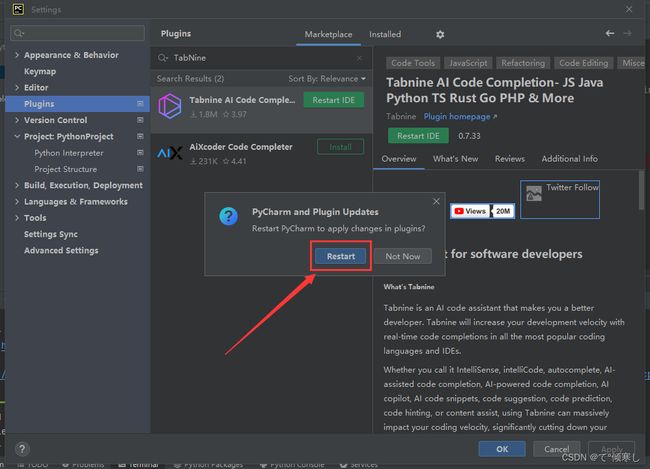
重启后,有这个标志,说明成功;

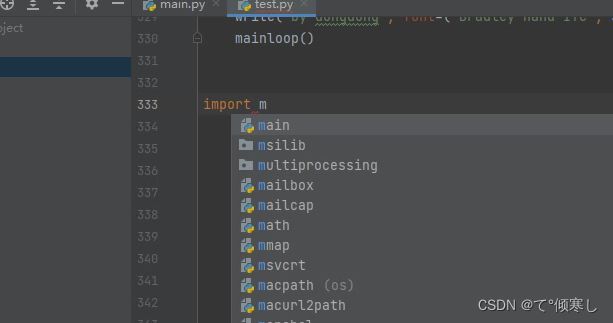
测试一下,已经开始有提示了~
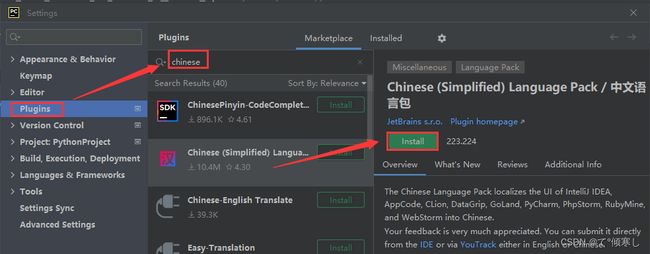
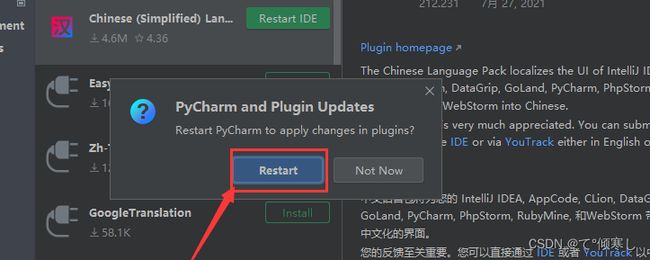
(2)汉化
·
六、VSCode的Python环境配置
1、下载安装VSCode
详细步骤见链接: 点击查看
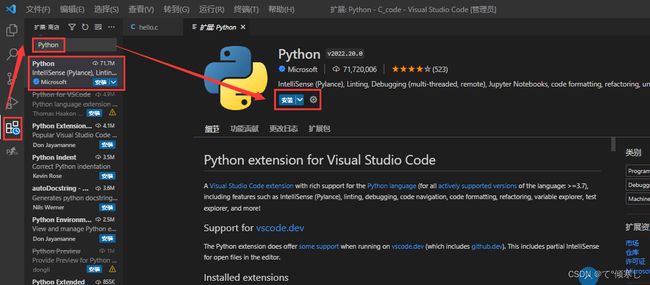
2、安装完成后,搜索 Python ;
选择第一个,点击【安装】;
3、添加配置:
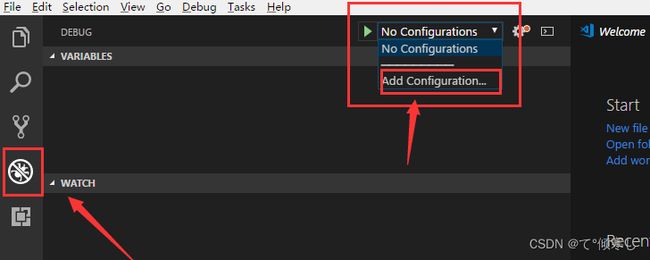
如下图,选择左边的第三个图标,在点击“Add Configuration”添加配置文件,并选择Python选项。
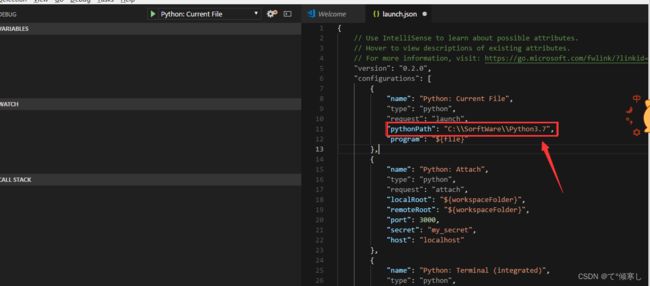
选择Python后会生成Python的配置文件launch.json,加入Python的安装目录:<“pythonPath”: “C:\SorftWare\Python3.7”,>,记得是双斜杆,否则会报错。
4、添加用户设置
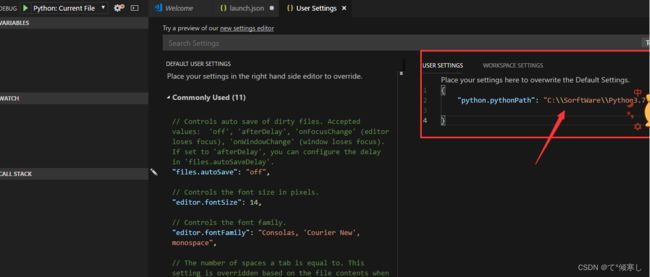
点击File->Prefrences->Settings,生成一个“User Settings”文件,填入Python安装目录:<“python.pythonPath”: “C:\SorftWare\Python3.7”,>,如下图所示
5、新建hello.py
输入print(“hello”),点击运行,在下面的调试窗口会输出hello,没有报错就说明已经配置成功了,接下来就可以进行Python的开发~
·
参考文章:
1、python从入门到精通
2、pycharm安装教程
3、VSCode配置Python开发环境

