分布式任务调度平台XXL-JOB(超详细喂嘴版)
1.XXL-JOB框架
1.0 环境
Maven3+
Jdk1.8+
Mysql5.7+
1.1 下载源码
https://github.com/xuxueli/xxl-job
1.2 中文文档
https://www.xuxueli.com/xxl-job/
1.3 初始化 调度数据库
“调度数据库初始化SQL脚本” 位置为:
/xxl-job/doc/db/tables_xxl_job.sql
1.3.1 tables_xxl_job.sql文件
#
# XXL-JOB v2.2.0
# Copyright (c) 2015-present, xuxueli.

CREATE database if NOT EXISTS `xxl_job` default character set utf8mb4 collate utf8mb4_unicode_ci;
use `xxl_job`;

SET NAMES utf8mb4;

CREATE TABLE `xxl_job_info` (
  `id` int(11) NOT NULL AUTO_INCREMENT,
  `job_group` int(11) NOT NULL COMMENT '执行器主键ID',
  `job_cron` varchar(128) NOT NULL COMMENT '任务执行CRON',
  `job_desc` varchar(255) NOT NULL,
  `add_time` datetime DEFAULT NULL,
  `update_time` datetime DEFAULT NULL,
  `author` varchar(64) DEFAULT NULL COMMENT '作者',
  `alarm_email` varchar(255) DEFAULT NULL COMMENT '报警邮件',
  `executor_route_strategy` varchar(50) DEFAULT NULL COMMENT '执行器路由策略',
  `executor_handler` varchar(255) DEFAULT NULL COMMENT '执行器任务handler',
  `executor_param` varchar(512) DEFAULT NULL COMMENT '执行器任务参数',
  `executor_block_strategy` varchar(50) DEFAULT NULL COMMENT '阻塞处理策略',
  `executor_timeout` int(11) NOT NULL DEFAULT '0' COMMENT '任务执行超时时间,单位秒',
  `executor_fail_retry_count` int(11) NOT NULL DEFAULT '0' COMMENT '失败重试次数',
  `glue_type` varchar(50) NOT NULL COMMENT 'GLUE类型',
  `glue_source` mediumtext COMMENT 'GLUE源代码',
  `glue_remark` varchar(128) DEFAULT NULL COMMENT 'GLUE备注',
  `glue_updatetime` datetime DEFAULT NULL COMMENT 'GLUE更新时间',
  `child_jobid` varchar(255) DEFAULT NULL COMMENT '子任务ID,多个逗号分隔',
  `trigger_status` tinyint(4) NOT NULL DEFAULT '0' COMMENT '调度状态:0-停止,1-运行',
  `trigger_last_time` bigint(13) NOT NULL DEFAULT '0' COMMENT '上次调度时间',
  `trigger_next_time` bigint(13) NOT NULL DEFAULT '0' COMMENT '下次调度时间',
  PRIMARY KEY (`id`)
) ENGINE=InnoDB DEFAULT CHARSET=utf8mb4;

CREATE TABLE `xxl_job_log` (
  `id` bigint(20) NOT NULL AUTO_INCREMENT,
  `job_group` int(11) NOT NULL COMMENT '执行器主键ID',
  `job_id` int(11) NOT NULL COMMENT '任务,主键ID',
  `executor_address` varchar(255) DEFAULT NULL COMMENT '执行器地址,本次执行的地址',
  `executor_handler` varchar(255) DEFAULT NULL COMMENT '执行器任务handler',
  `executor_param` varchar(512) DEFAULT NULL COMMENT '执行器任务参数',
  `executor_sharding_param` varchar(20) DEFAULT NULL COMMENT '执行器任务分片参数,格式如 1/2',
  `executor_fail_retry_count` int(11) NOT NULL DEFAULT '0' COMMENT '失败重试次数',
  `trigger_time` datetime DEFAULT NULL COMMENT '调度-时间',
  `trigger_code` int(11) NOT NULL COMMENT '调度-结果',
  `trigger_msg` text COMMENT '调度-日志',
  `handle_time` datetime DEFAULT NULL COMMENT '执行-时间',
  `handle_code` int(11) NOT NULL COMMENT '执行-状态',
  `handle_msg` text COMMENT '执行-日志',
  `alarm_status` tinyint(4) NOT NULL DEFAULT '0' COMMENT '告警状态:0-默认、1-无需告警、2-告警成功、3-告警失败',
  PRIMARY KEY (`id`),
  KEY `I_trigger_time` (`trigger_time`),
  KEY `I_handle_code` (`handle_code`)
) ENGINE=InnoDB DEFAULT CHARSET=utf8mb4;

CREATE TABLE `xxl_job_log_report` (
  `id` int(11) NOT NULL AUTO_INCREMENT,
  `trigger_day` datetime DEFAULT NULL COMMENT '调度-时间',
  `running_count` int(11) NOT NULL DEFAULT '0' COMMENT '运行中-日志数量',
  `suc_count` int(11) NOT NULL DEFAULT '0' COMMENT '执行成功-日志数量',
  `fail_count` int(11) NOT NULL DEFAULT '0' COMMENT '执行失败-日志数量',
  PRIMARY KEY (`id`),
  UNIQUE KEY `i_trigger_day` (`trigger_day`) USING BTREE
) ENGINE=InnoDB DEFAULT CHARSET=utf8mb4;

CREATE TABLE `xxl_job_logglue` (
  `id` int(11) NOT NULL AUTO_INCREMENT,
  `job_id` int(11) NOT NULL COMMENT '任务,主键ID',
  `glue_type` varchar(50) DEFAULT NULL COMMENT 'GLUE类型',
  `glue_source` mediumtext COMMENT 'GLUE源代码',
  `glue_remark` varchar(128) NOT NULL COMMENT 'GLUE备注',
  `add_time` datetime DEFAULT NULL,
  `update_time` datetime DEFAULT NULL,
  PRIMARY KEY (`id`)
) ENGINE=InnoDB DEFAULT CHARSET=utf8mb4;

CREATE TABLE `xxl_job_registry` (
  `id` int(11) NOT NULL AUTO_INCREMENT,
  `registry_group` varchar(50) NOT NULL,
  `registry_key` varchar(255) NOT NULL,
  `registry_value` varchar(255) NOT NULL,
  `update_time` datetime DEFAULT NULL,
  PRIMARY KEY (`id`),
  KEY `i_g_k_v` (`registry_group`,`registry_key`,`registry_value`)
) ENGINE=InnoDB DEFAULT CHARSET=utf8mb4;

CREATE TABLE `xxl_job_group` (
  `id` int(11) NOT NULL AUTO_INCREMENT,
  `app_name` varchar(64) NOT NULL COMMENT '执行器AppName',
  `title` varchar(12) NOT NULL COMMENT '执行器名称',
  `address_type` tinyint(4) NOT NULL DEFAULT '0' COMMENT '执行器地址类型:0=自动注册、1=手动录入',
  `address_list` varchar(512) DEFAULT NULL COMMENT '执行器地址列表,多地址逗号分隔',
  PRIMARY KEY (`id`)
) ENGINE=InnoDB DEFAULT CHARSET=utf8mb4;

CREATE TABLE `xxl_job_user` (
  `id` int(11) NOT NULL AUTO_INCREMENT,
  `username` varchar(50) NOT NULL COMMENT '账号',
  `password` varchar(50) NOT NULL COMMENT '密码',
  `role` tinyint(4) NOT NULL COMMENT '角色:0-普通用户、1-管理员',
  `permission` varchar(255) DEFAULT NULL COMMENT '权限:执行器ID列表,多个逗号分割',
  PRIMARY KEY (`id`),
  UNIQUE KEY `i_username` (`username`) USING BTREE
) ENGINE=InnoDB DEFAULT CHARSET=utf8mb4;

CREATE TABLE `xxl_job_lock` (
  `lock_name` varchar(50) NOT NULL COMMENT '锁名称',
  PRIMARY KEY (`lock_name`)
) ENGINE=InnoDB DEFAULT CHARSET=utf8mb4;


INSERT INTO `xxl_job_group`(`id`, `app_name`, `title`, `address_type`, `address_list`) VALUES (1, 'xxl-job-executor-sample', '示例执行器', 0, NULL);
INSERT INTO `xxl_job_info`(`id`, `job_group`, `job_cron`, `job_desc`, `add_time`, `update_time`, `author`, `alarm_email`, `executor_route_strategy`, `executor_handler`, `executor_param`, `executor_block_strategy`, `executor_timeout`, `executor_fail_retry_count`, `glue_type`, `glue_source`, `glue_remark`, `glue_updatetime`, `child_jobid`) VALUES (1, 1, '0 0 0 * * ? *', '测试任务1', '2018-11-03 22:21:31', '2018-11-03 22:21:31', 'XXL', '', 'FIRST', 'demoJobHandler', '', 'SERIAL_EXECUTION', 0, 0, 'BEAN', '', 'GLUE代码初始化', '2018-11-03 22:21:31', '');
INSERT INTO `xxl_job_user`(`id`, `username`, `password`, `role`, `permission`) VALUES (1, 'admin', 'e10adc3949ba59abbe56e057f20f883e', 1, NULL);
INSERT INTO `xxl_job_lock` ( `lock_name`) VALUES ( 'schedule_lock');

commit;
调度中心支持集群部署,集群情况下各节点务必连接同一个mysql实例;
如果mysql做主从,调度中心集群节点务必强制走主库;
2.快速入门
2.1 配置部署“调度中心”作为管理平台
创建一个新的微服务,作为调度中心平台
2.2 将源码xxl-job-admin复制到新建的微服务中
将源码xxl-job-2.2.0\xxl-job-2.2.0\xxl-job-admin\src\main下的所有内容
复制到,你自己创建的微服务main文件夹中
2.2 修改application.properties文件
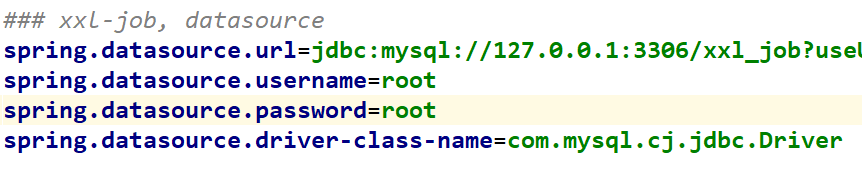
2.2.1 修改数据库的相关配置
修改账号密码,其他配置不需要修改
注意:这里数据库驱动使用的是8.0以上版本
2.3 导入依赖
        <dependency>
            <groupId>org.springframework.bootgroupId>
            <artifactId>spring-boot-starter-webartifactId>
        dependency>

        <dependency>
            <groupId>org.springframework.bootgroupId>
            <artifactId>spring-boot-starter-testartifactId>
            <scope>testscope>
        dependency>


        <dependency>
            <groupId>org.springframework.bootgroupId>
            <artifactId>spring-boot-starter-freemarkerartifactId>
        dependency>


        <dependency>
            <groupId>org.springframework.bootgroupId>
            <artifactId>spring-boot-starter-mailartifactId>
        dependency>


        <dependency>
            <groupId>org.springframework.bootgroupId>
            <artifactId>spring-boot-starter-actuatorartifactId>
        dependency>


        <dependency>
            <groupId>org.mybatis.spring.bootgroupId>
            <artifactId>mybatis-spring-boot-starterartifactId>
            <version>1.3.2version>
        dependency>

        <dependency>
            <groupId>mysqlgroupId>
            <artifactId>mysql-connector-javaartifactId>
            <version>8.0.16version>
        dependency>


        <dependency>
            <groupId>com.xuxueligroupId>
            <artifactId>xxl-job-coreartifactId>
            <version>2.2.0version>
        dependency>
2.4 启动微服务
访问任务调度中心:http://localhost:8080/xxl-job-admin
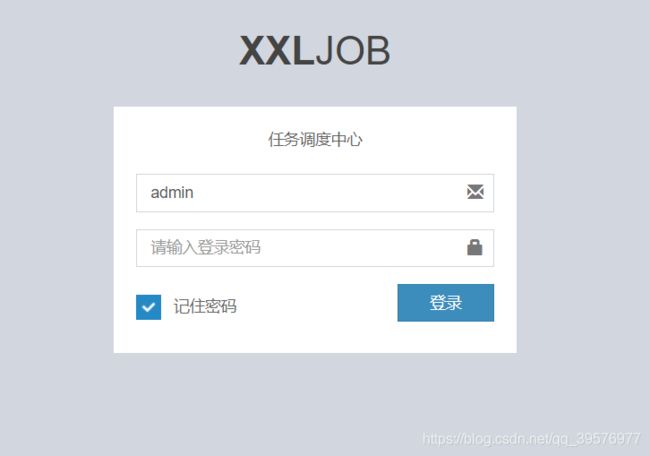
注意:默认的账号/密码:
admin/123456
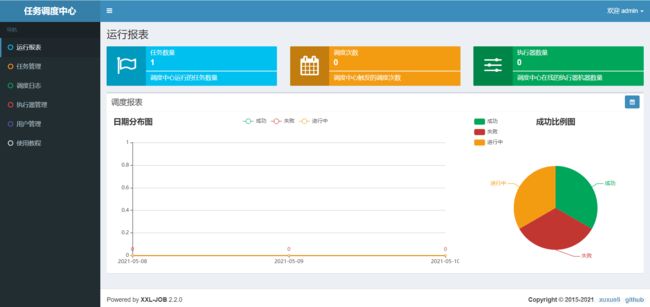
如下图所示:登录成功
3.1 调度中心集群(可选):
调度中心支持集群部署,提升调度系统容灾和可用性。
调度中心集群部署时,几点要求和建议:
- DB配置保持一致;
- 集群机器时钟保持一致(单机集群忽视);
- 建议:推荐通过nginx为调度中心集群做负载均衡,分配域名。调度中心访问、执行器回调配置、调用API服务等操作均通过该域名进行。
3.2.1 Docker 镜像方式搭建调度中心:(可选)
请访问官方文档:
https://www.xuxueli.com/xxl-job/
至此调度中心搭建完毕,接下我们来搭建执行器项目环境
4.搭建执行器项目环境
执行器相当于我们的各个微服务
4.1 在需要编写分布式任务的微服务中导入依赖
确认pom文件中引入了 “xxl-job-core” 的maven依赖;
        <dependency>
            <groupId>com.xuxueligroupId>
            <artifactId>xxl-job-coreartifactId>
            <version>2.2.0version>
        dependency>
4.2 执行器配置
执行器配置,配置文件地址(源码中):
/xxl-job/xxl-job-executor-samples/xxl-job-executor-sample-springboot/src/main/resources/application.properties
配置内容说明:(官方文档配置)
### 调度中心部署跟地址 [选填]:如调度中心集群部署存在多个地址则用逗号分隔。执行器将会使用该地址进行"执行器心跳注册"和"任务结果回调";为空则关闭自动注册;
xxl.job.admin.addresses=http://127.0.0.1:8080/xxl-job-admin
### 执行器通讯TOKEN [选填]:非空时启用;
xxl.job.accessToken=
### 执行器AppName [选填]:执行器心跳注册分组依据;为空则关闭自动注册
xxl.job.executor.appname=xxl-job-executor-sample
### 执行器注册 [选填]:优先使用该配置作为注册地址,为空时使用内嵌服务 ”IP:PORT“ 作为注册地址。从而更灵活的支持容器类型执行器动态IP和动态映射端口问题。
xxl.job.executor.address=
### 执行器IP [选填]:默认为空表示自动获取IP,多网卡时可手动设置指定IP,该IP不会绑定Host仅作为通讯实用;地址信息用于 "执行器注册" 和 "调度中心请求并触发任务";
xxl.job.executor.ip=
### 执行器端口号 [选填]:小于等于0则自动获取;默认端口为9999,单机部署多个执行器时,注意要配置不同执行器端口;
xxl.job.executor.port=9999
### 执行器运行日志文件存储磁盘路径 [选填] :需要对该路径拥有读写权限;为空则使用默认路径;
xxl.job.executor.logpath=/data/applogs/xxl-job/jobhandler
### 执行器日志文件保存天数 [选填] : 过期日志自动清理, 限制值大于等于3时生效; 否则, 如-1, 关闭自动清理功能;
xxl.job.executor.logretentiondays=30
开发中,一般将微服务的公共配置文件,放在Git/Nacos中,所以我们需要对上述配置文件,进行修改
删除,下列配置
### 执行器AppName [选填]:执行器心跳注册分组依据;为空则关闭自动注册
xxl.job.executor.appname=xxl-job-executor-sample
### 执行器端口号 [选填]:小于等于0则自动获取;默认端口为9999,单机部署多个执行器时,注意要配置不同执行器端口;
xxl.job.executor.port=9999
删除后,如下所示,将一下配置文件配置在
git或者nacos上
### 调度中心部署跟地址 [选填]:如调度中心集群部署存在多个地址则用逗号分隔。执行器将会使用该地址进行"执行器心跳注册"和"任务结果回调";为空则关闭自动注册;
xxl.job.admin.addresses=http://127.0.0.1:8080/xxl-job-admin
### 执行器通讯TOKEN [选填]:非空时启用;
xxl.job.accessToken=
### 执行器注册 [选填]:优先使用该配置作为注册地址,为空时使用内嵌服务 ”IP:PORT“ 作为注册地址。从而更灵活的支持容器类型执行器动态IP和动态映射端口问题。
xxl.job.executor.address=
### 执行器IP [选填]:默认为空表示自动获取IP,多网卡时可手动设置指定IP,该IP不会绑定Host仅作为通讯实用;地址信息用于 "执行器注册" 和 "调度中心请求并触发任务";
xxl.job.executor.ip=
### 执行器运行日志文件存储磁盘路径 [选填] :需要对该路径拥有读写权限;为空则使用默认路径;
xxl.job.executor.logpath=/data/applogs/xxl-job/jobhandler
### 执行器日志文件保存天数 [选填] : 过期日志自动清理, 限制值大于等于3时生效; 否则, 如-1, 关闭自动清理功能;
xxl.job.executor.logretentiondays=30
4.3 在执行器所在的微服务中配置
xxl:
  job:
    executor:
      appname: shop-goods # 执行器AppName [选填]:执行器心跳注册分组依据;为空则关闭自动注册
      port: 9999 # 执行器端口号 [选填]:小于等于0则自动获取;默认端口为9999,单机部署多个执行器时,注意要配置不同执行器端口;
4.4 执行器组件配置
也就是执行器的配置类
XxlJobConfig .java
@Configuration
public class XxlJobConfig {

    @Value("${xxl.job.admin.addresses}")
    private String adminAddresses;

    @Value("${xxl.job.accessToken}")
    private String accessToken;

    @Value("${xxl.job.executor.appname}")
    private String appname;

    @Value("${xxl.job.executor.address}")
    private String address;

    @Value("${xxl.job.executor.ip}")
    private String ip;

    @Value("${xxl.job.executor.port}")
    private int port;

    @Value("${xxl.job.executor.logpath}")
    private String logPath;

    @Value("${xxl.job.executor.logretentiondays}")
    private int logRetentionDays;


    /**
     * 启动的时候会帮我们创建 Xxl Job Spring执行器
     * @return
     */
    @Bean
    public XxlJobSpringExecutor xxlJobExecutor() {
        XxlJobSpringExecutor xxlJobSpringExecutor = new XxlJobSpringExecutor();
        xxlJobSpringExecutor.setAdminAddresses(adminAddresses);
        xxlJobSpringExecutor.setAppname(appname);
        xxlJobSpringExecutor.setIp(ip);
        xxlJobSpringExecutor.setPort(port);
        xxlJobSpringExecutor.setAccessToken(accessToken);
        xxlJobSpringExecutor.setLogPath(logPath);
        xxlJobSpringExecutor.setLogRetentionDays(logRetentionDays);
        return xxlJobSpringExecutor;
    }
}
4.5 执行器集群(可选):
执行器支持集群部署,提升调度系统可用性,同时提升任务处理能力。
执行器集群部署时,几点要求和建议:
- 执行器回调地址(xxl.job.admin.addresses)需要保持一致;执行器根据该配置进行执行器自动注册等操作。
- 同一个执行器集群内AppName(xxl.job.executor.appname)需要保持一致;调度中心根据该配置动态发现不同集群的在线执行器列表。
4.6 配置结束
至此“执行器”配置结束,接下来就可以创建分布式任务了
5. 创建任务
以下是官方例子
import com.xxl.job.core.biz.model.ReturnT;
import com.xxl.job.core.handler.IJobHandler;
import com.xxl.job.core.handler.annotation.XxlJob;
import com.xxl.job.core.log.XxlJobLogger;
import com.xxl.job.core.util.ShardingUtil;
import org.slf4j.Logger;
import org.slf4j.LoggerFactory;
import org.springframework.stereotype.Component;

import java.io.BufferedInputStream;
import java.io.BufferedReader;
import java.io.DataOutputStream;
import java.io.InputStreamReader;
import java.net.HttpURLConnection;
import java.net.URL;
import java.util.Arrays;

/**
 * XxlJob开发示例(Bean模式)
 *
 * 开发步骤:
 * 1、在Spring Bean实例中,开发Job方法,方式格式要求为 "public ReturnT execute(String param)"
 * 2、为Job方法添加注解 "@XxlJob(value="自定义jobhandler名称", init = "JobHandler初始化方法", destroy = "JobHandler销毁方法")",注解value值对应的是调度中心新建任务的JobHandler属性的值。
 * 3、执行日志:需要通过 "XxlJobLogger.log" 打印执行日志;
 *
 * @author xuxueli 2019-12-11 21:52:51
 */
@Component
public class SampleXxlJob {
    private static Logger logger = LoggerFactory.getLogger(SampleXxlJob.class);


    /**
     * 1、简单任务示例(Bean模式)
     */
    @XxlJob("demoJobHandler")
    public ReturnT<String> demoJobHandler(String param) throws Exception {
        XxlJobLogger.log("XXL-JOB, Hello World.");
        System.out.println("XXL-JOB, Hello World.");
    /*    for (int i = 0; i < 5; i++) {
            XxlJobLogger.log("beat at:" + i);
            TimeUnit.SECONDS.sleep(2);
        }*/
        return ReturnT.SUCCESS;
    }


    /**
     * 2、分片广播任务
     */
    @XxlJob("shardingJobHandler")
    public ReturnT<String> shardingJobHandler(String param) throws Exception {

        // 分片参数
        ShardingUtil.ShardingVO shardingVO = ShardingUtil.getShardingVo();
        XxlJobLogger.log("分片参数:当前分片序号 = {}, 总分片数 = {}", shardingVO.getIndex(), shardingVO.getTotal());

        // 业务逻辑
        for (int i = 0; i < shardingVO.getTotal(); i++) {
            if (i == shardingVO.getIndex()) {
                XxlJobLogger.log("第 {} 片, 命中分片开始处理", i);
            } else {
                XxlJobLogger.log("第 {} 片, 忽略", i);
            }
        }

        return ReturnT.SUCCESS;
    }


    /**
     * 3、命令行任务
     */
    @XxlJob("commandJobHandler")
    public ReturnT<String> commandJobHandler(String param) throws Exception {
        String command = param;
        int exitValue = -1;

        BufferedReader bufferedReader = null;
        try {
            // command process
            Process process = Runtime.getRuntime().exec(command);
            BufferedInputStream bufferedInputStream = new BufferedInputStream(process.getInputStream());
            bufferedReader = new BufferedReader(new InputStreamReader(bufferedInputStream));

            // command log
            String line;
            while ((line = bufferedReader.readLine()) != null) {
                XxlJobLogger.log(line);
            }

            // command exit
            process.waitFor();
            exitValue = process.exitValue();
        } catch (Exception e) {
            XxlJobLogger.log(e);
        } finally {
            if (bufferedReader != null) {
                bufferedReader.close();
            }
        }

        if (exitValue == 0) {
            return IJobHandler.SUCCESS;
        } else {
            return new ReturnT<String>(IJobHandler.FAIL.getCode(), "command exit value("+exitValue+") is failed");
        }
    }


    /**
     * 4、跨平台Http任务
     *  参数示例:
     *      "url: http://www.baidu.com\n" +
     *      "method: get\n" +
     *      "data: content\n";
     */
    @XxlJob("httpJobHandler")
    public ReturnT<String> httpJobHandler(String param) throws Exception {

        // param parse
        if (param==null || param.trim().length()==0) {
            XxlJobLogger.log("param["+ param +"] invalid.");
            return ReturnT.FAIL;
        }
        String[] httpParams = param.split("\n");
        String url = null;
        String method = null;
        String data = null;
        for (String httpParam: httpParams) {
            if (httpParam.startsWith("url:")) {
                url = httpParam.substring(httpParam.indexOf("url:") + 4).trim();
            }
            if (httpParam.startsWith("method:")) {
                method = httpParam.substring(httpParam.indexOf("method:") + 7).trim().toUpperCase();
            }
            if (httpParam.startsWith("data:")) {
                data = httpParam.substring(httpParam.indexOf("data:") + 5).trim();
            }
        }

        // param valid
        if (url==null || url.trim().length()==0) {
            XxlJobLogger.log("url["+ url +"] invalid.");
            return ReturnT.FAIL;
        }
        if (method==null || !Arrays.asList("GET", "POST").contains(method)) {
            XxlJobLogger.log("method["+ method +"] invalid.");
            return ReturnT.FAIL;
        }

        // request
        HttpURLConnection connection = null;
        BufferedReader bufferedReader = null;
        try {
            // connection
            URL realUrl = new URL(url);
            connection = (HttpURLConnection) realUrl.openConnection();

            // connection setting
            connection.setRequestMethod(method);
            connection.setDoOutput(true);
            connection.setDoInput(true);
            connection.setUseCaches(false);
            connection.setReadTimeout(5 * 1000);
            connection.setConnectTimeout(3 * 1000);
            connection.setRequestProperty("connection", "Keep-Alive");
            connection.setRequestProperty("Content-Type", "application/json;charset=UTF-8");
            connection.setRequestProperty("Accept-Charset", "application/json;charset=UTF-8");

            // do connection
            connection.connect();

            // data
            if (data!=null && data.trim().length()>0) {
                DataOutputStream dataOutputStream = new DataOutputStream(connection.getOutputStream());
                dataOutputStream.write(data.getBytes("UTF-8"));
                dataOutputStream.flush();
                dataOutputStream.close();
            }

            // valid StatusCode
            int statusCode = connection.getResponseCode();
            if (statusCode != 200) {
                throw new RuntimeException("Http Request StatusCode(" + statusCode + ") Invalid.");
            }

            // result
            bufferedReader = new BufferedReader(new InputStreamReader(connection.getInputStream(), "UTF-8"));
            StringBuilder result = new StringBuilder();
            String line;
            while ((line = bufferedReader.readLine()) != null) {
                result.append(line);
            }
            String responseMsg = result.toString();

            XxlJobLogger.log(responseMsg);
            return ReturnT.SUCCESS;
        } catch (Exception e) {
            XxlJobLogger.log(e);
            return ReturnT.FAIL;
        } finally {
            try {
                if (bufferedReader != null) {
                    bufferedReader.close();
                }
                if (connection != null) {
                    connection.disconnect();
                }
            } catch (Exception e2) {
                XxlJobLogger.log(e2);
            }
        }

    }

    /**
     * 5、生命周期任务示例:任务初始化与销毁时,支持自定义相关逻辑;
     */
    @XxlJob(value = "demoJobHandler2", init = "init", destroy = "destroy")
    public ReturnT<String> demoJobHandler2(String param) throws Exception {
        XxlJobLogger.log("XXL-JOB, Hello World.");
        return ReturnT.SUCCESS;
    }
    public void init(){
        logger.info("init");
    }
    public void destroy(){
        logger.info("destory");
    }


}
6.自己写一个简单任务
其实就是复制粘贴上面,官方写的例子…
6.1 启动类添加注解
@SpringBootApplication
@EnableDiscoveryClient
//开启定时任务
@EnableScheduling
public class ShopGoodsApplication {

    public static void main(String[] args) {

        SpringApplication.run(ShopGoodsApplication.class);
    }
}
6.2 创建简单任务
@Component
public class TaskTest {

    /**
     * 1、简单任务示例(Bean模式)
     *  JobHandler:demoJobHandler 需要在任务调度中心的任务管理配置
     */
    @XxlJob("demoJobHandler")
    public ReturnT<String> demoJobHandler(String param) throws Exception {
        XxlJobLogger.log("XXL-JOB, Hello World.");
        System.out.println("传入的参数为:============="+param);
        System.out.println("XXL-JOB, Hello World.");
    /*    for (int i = 0; i < 5; i++) {
            XxlJobLogger.log("beat at:" + i);
            TimeUnit.SECONDS.sleep(2);
        }*/
        return ReturnT.SUCCESS;
    }

}
6.3 启动
启动的时候,任务不会自动注册到任务调度中心中,需要我们配置手动的一个发现
6.3.1 在任务调度中心中,执行器管理中,新增执行器
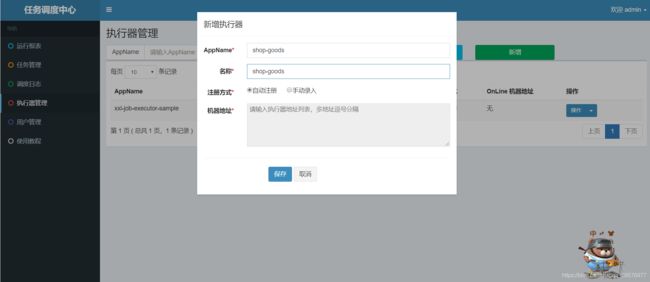
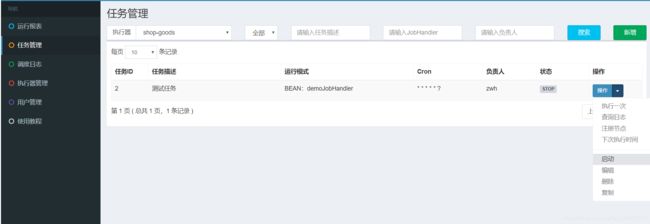
6.3.2 在任务管理中,向创建好的执行器中,添加任务信息

点击保存,添加成功,如下图所示

6.4 执行任务
我们执行一次看看

点击调度日志,很明显.执行成功
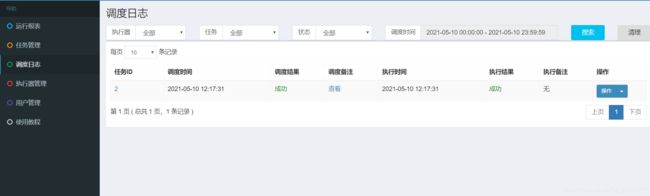
在控制台中打印:
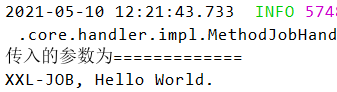
我们这里是没有传参的,下来我们配置以下传入的参数

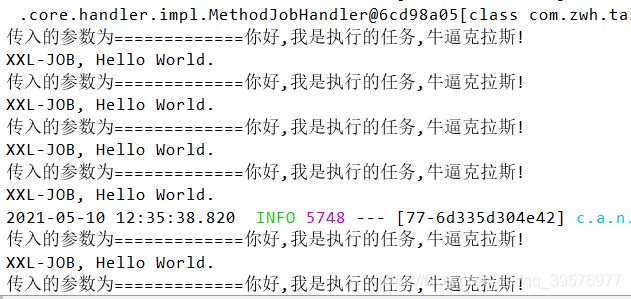
然后执行一次
我们发现,参数传入成功,并打印出来了

6.5 执行定时任务
点击启动
我们发现控制台中,按照Cron表达式(每秒执行一次),在执行
6.6 停止定时任务(点停止,就完事了)
7. 定时任务集群
7.1 修改执行器端口,启动,略
7.2 更改执行器执行策略
将执行策略 修改为轮训,启动任务执行.
我们发现,启动的2个微服务,按照轮训的规则,执行,并且控制台中能观察到.
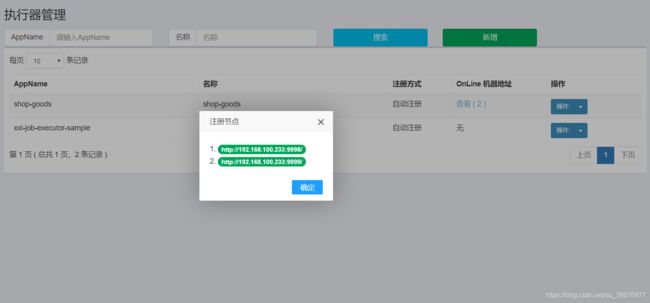
7.3 查看执行器管理
执行器有2个注册节点
7.4 结束语
到这里,XXL-JOB的一个简单应用就结束了,如果说在工作中使用到了,可以去看中文文档,它写的非常的详细
最后我想说,写博客好累啊!!!