Eclipse/Idea 搭建 SpringBoot+Mybatis整合html、jsp、easyui(在线STS方式)
- eclipse搭建springBoot不通数据库
- 代码的自动生成类Eclipse,见[参考文档1]
- 代码的自动生成类idea,见[参考文档2]
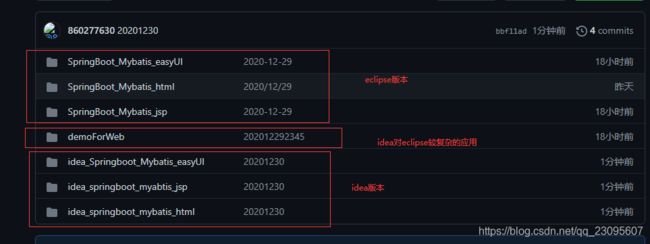
- 参考demo
- 当https://start.spring.io/特别卡时,custom选项使用 阿里云构建:https://start.aliyun.com/
https://github.com/860277630/SpringBoot_HelloWorld.git
-
重要的事情:★★★★★★★★★★★★★★★
-
①idea社区版是无论如何都不支持jsp的,可以考虑使用eclipse或者使用idea收费版
-
②jsp在到了新的浏览器中运行,如果jsp失效,可以考虑清理一下缓存,因为浏览器缓存经常会导致jsp失效
-
③eclipse推荐使用

-
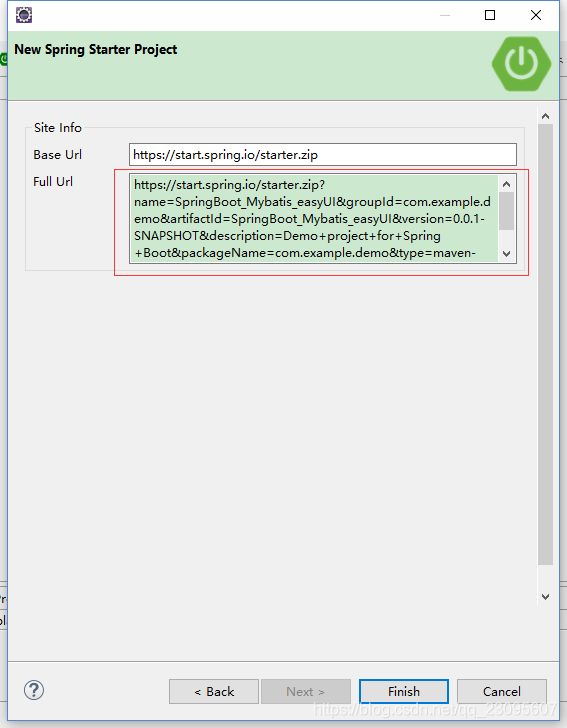
④关于eclipse修改springboot及其组建的版本在STS创建的最后一步
-
eclipse : SpringBoot+Mybatis + html
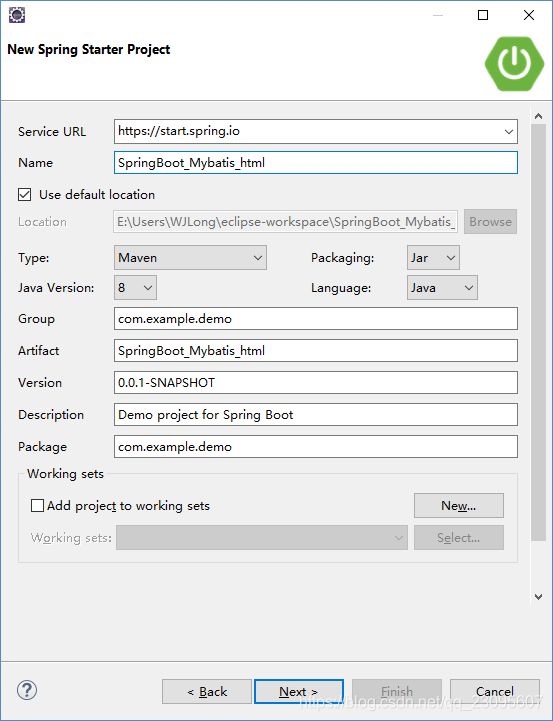
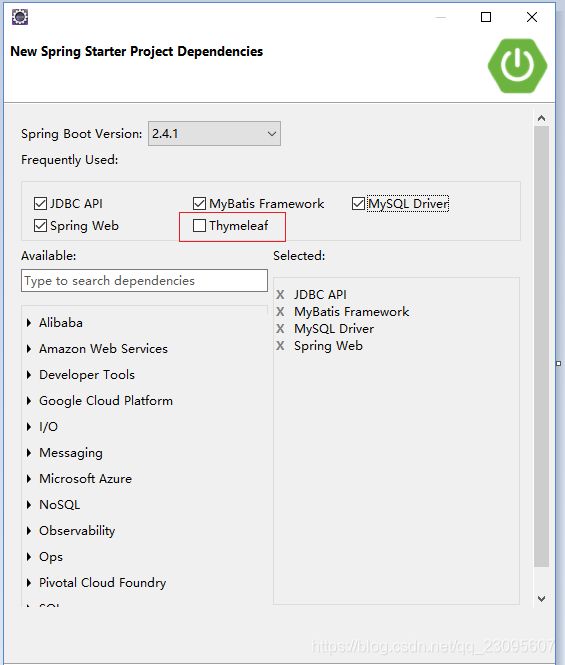
1.新建spring boot项目


-
完成后进行相应的配置文件修改,本人用mysql来做例子,要更改jar包版本,不然会报错
CLIENT_PLUGIN_AUTH is required,打开pom文件,并修改版本号,匹配自己的数组库版本(一般是5.1.18)
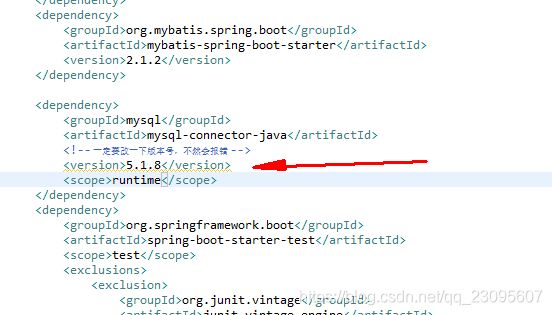
		<dependency>
			<groupId>mysql</groupId>
			<artifactId>mysql-connector-java</artifactId>
			<!-- 一定要改一下版本号,不然会报错 -->
			<version>5.1.8</version>
			<scope>runtime</scope>
		</dependency>
- 然后创建表
数据库:
CREATE TABLE `user` (
  `id` int(32) NOT NULL AUTO_INCREMENT,
  `userName` varchar(32) NOT NULL,
  `passWord` varchar(50) NOT NULL,
  `realName` varchar(32) DEFAULT NULL,
  PRIMARY KEY (`id`)
) ENGINE=InnoDB AUTO_INCREMENT=3 DEFAULT CHARSET=utf8;
User.java
package com.example.demo.model;

public class User {
    private Integer id;
    private String userName;
    private String passWord;
    private String realName;

    public Integer getId() {
        return id;
    }

    public void setId(Integer id) {
        this.id = id;
    }

    public String getUserName() {
        return userName;
    }

    public void setUserName(String userName) {
        this.userName = userName;
    }

    public String getPassWord() {
        return passWord;
    }

    public void setPassWord(String passWord) {
        this.passWord = passWord;
    }

    public String getRealName() {
        return realName;
    }

    public void setRealName(String realName) {
        this.realName = realName;
    }

    @Override
    public String toString() {
        return "User{" +
                "id=" + id +
                ", userName='" + userName + '\'' +
                ", passWord='" + passWord + '\'' +
                ", realName='" + realName + '\'' +
                '}';
    }
}
UserMapping.xml
UserMapper.java
package com.example.demo.dao;

import org.apache.ibatis.annotations.Mapper;

import com.example.demo.model.User;

@Mapper
public interface UserMapper {

    User Sel(int id);
}
UserService.java
package com.example.demo.service;

import org.springframework.beans.factory.annotation.Autowired;
import org.springframework.stereotype.Service;

import com.example.demo.dao.UserMapper;
import com.example.demo.model.User;

@Service
public class UserService {
    @Autowired
    UserMapper userMapper;
    public User Sel(int id){
        return userMapper.Sel(id);
    }
}
UserController.java
package com.example.demo.controller;

import org.springframework.beans.factory.annotation.Autowired;
import org.springframework.stereotype.Controller;
import org.springframework.ui.Model;
import org.springframework.web.bind.annotation.PathVariable;
import org.springframework.web.bind.annotation.RequestMapping;

import com.example.demo.model.User;
import com.example.demo.service.UserService;

/**
 * @Author:wjup
 * @Date: 2018/9/26 0026
 * @Time: 14:42
 */

@Controller
@RequestMapping("/testBoot")
public class UserController {


    @Autowired
    private UserService userService;

    @RequestMapping("getUser/{id}")
    public String GetUser(@PathVariable int id,Model model){

    	User user =  userService.Sel(id);
    	model.addAttribute("user", user);
        System.out.println("xxxxxxxxxxxxxxxxxx"+user.toString());
        return "index";
    }
}
注意:启动类必须在执行类的同级甚至上面!!!
4. 完成相应配置文件的修改
将/src/main/resources/application.properties 下的配置文件改为application.yml文件,添加配置
server:
  port: 8080
spring:
  datasource:
    url: jdbc:mysql://localhost:3306/test?useUnicode=true&characterEncoding=utf-8&useSSL=true&serverTimezone=UTC
    username: root
    password: 123888
    driver-class-name: com.mysql.jdbc.Driver
mybatis:
#记住包名一定要这样写,而不要用点,直接拷贝路径复制过来就行
  mapper-locations: classpath:com/example/demo/mapper/*.xml
  type-aliases-package: com.example.demo.model

#日志打印配置  --新添加的,demo里面没有
logging:
  level:
    com.example.demo.dao: debug
启动类里面增加扫描:
@MapperScan("com.example.demo.dao")//是mapper接口,而不是映射文件
pom文件里面增加xml文件的位置,因为默认是resource文件夹下的,我们把它放在了src文件夹下
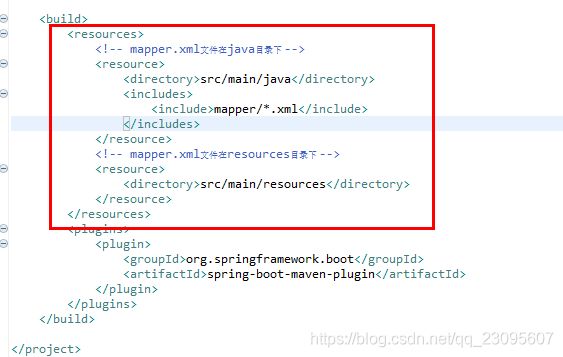
				src/main/java

					mapper/*.xml


				src/main/resources
在resources/templates文件夹下增加index.html文件
<!DOCTYPE html>
<html>
<head>
<meta charset="UTF-8">
<title>Insert title here</title>
</head>
<body>
<table  style = "border:2px solid #000000">
<tr><td>ID:</td><td th:text="${user.id}"></td></tr>
<tr><td>userName:</td><td th:text="${user.userName}"></td></tr>
<tr><td>passWord:</td><td th:text="${user.passWord}"></td></tr>
<tr><td>realName:</td><td th:text="${user.realName}"></td></tr>
</table>
</body>
</html>
- 配置好布局为:

6.访问:http://localhost:8080/testBoot/getUser/1,可以看到页面

- eclipse : SpringBoot+Mybatis + jsp
1.新建spring boot项目

- 完成后进行相应的配置文件修改,本人用mysql来做例子,要更改jar包版本,不然会报错
CLIENT_PLUGIN_AUTH is required,打开pom文件,并修改版本号,匹配自己的数组库版本(一般是5.1.18)
		<dependency>
			<groupId>mysql</groupId>
			<artifactId>mysql-connector-java</artifactId>
			<!-- 一定要改一下版本号,不然会报错 -->
			<version>5.1.8</version>
			<scope>runtime</scope>
		</dependency>
- 然后创建表
数据库:
CREATE TABLE `user` (
  `id` int(32) NOT NULL AUTO_INCREMENT,
  `userName` varchar(32) NOT NULL,
  `passWord` varchar(50) NOT NULL,
  `realName` varchar(32) DEFAULT NULL,
  PRIMARY KEY (`id`)
) ENGINE=InnoDB AUTO_INCREMENT=3 DEFAULT CHARSET=utf8;
User.java
package com.example.demo.model;

public class User {
    private Integer id;
    private String userName;
    private String passWord;
    private String realName;

    public Integer getId() {
        return id;
    }

    public void setId(Integer id) {
        this.id = id;
    }

    public String getUserName() {
        return userName;
    }

    public void setUserName(String userName) {
        this.userName = userName;
    }

    public String getPassWord() {
        return passWord;
    }

    public void setPassWord(String passWord) {
        this.passWord = passWord;
    }

    public String getRealName() {
        return realName;
    }

    public void setRealName(String realName) {
        this.realName = realName;
    }

    @Override
    public String toString() {
        return "User{" +
                "id=" + id +
                ", userName='" + userName + '\'' +
                ", passWord='" + passWord + '\'' +
                ", realName='" + realName + '\'' +
                '}';
    }
}
UserMapping.xml
UserMapper.java
package com.example.demo.dao;

import org.apache.ibatis.annotations.Mapper;

import com.example.demo.model.User;

@Mapper
public interface UserMapper {

    User Sel(int id);
}
UserService.java
package com.example.demo.service;

import org.springframework.beans.factory.annotation.Autowired;
import org.springframework.stereotype.Service;

import com.example.demo.dao.UserMapper;
import com.example.demo.model.User;

@Service
public class UserService {
    @Autowired
    UserMapper userMapper;
    public User Sel(int id){
        return userMapper.Sel(id);
    }
}
UserController.java
package com.example.demo.controller;

import org.springframework.beans.factory.annotation.Autowired;
import org.springframework.stereotype.Controller;
import org.