Linux安装Jenkins,Jenkins自动化部署Maven,Vue项目
Linux安装Jenkins,Jenkins自动化部署Maven,Vue项目
1.下载Jenkins安装包
1.1 推荐大家直接下载我的
链接: https://pan.baidu.com/s/14R4sZaIfFfabBemhrhDnVA 提取码: vuq8
1.2 上传jenkins-2.346-1.1.noarch.rpm到/usr/local路径下
[root@VM-12-10-centos ~]# cd /usr/local/
[root@VM-12-10-centos local]# ls
bin  games    jdk1.8                      jenkins-2.346-1.1.noarch.rpm  lib64    mysql                                       qcloud    sbin   src
etc  include  jdk-8u291-linux-x64.tar.gz  lib                           libexec  mysql-5.7.36-linux-glibc2.12-x86_64.tar.gz  rabbitmq  share
1.3 安装jenkins-2.346-1.1.noarch.rpm
[root@VM-12-10-centos local]# rpm -ivh jenkins-2.346-1.1.noarch.rpm
1.3 安装成功后修改配置文件
[root@VM-12-10-centos local]# vim /etc/sysconfig/jenkins
修改内容
# 修改权限
JENKINS_USER = "root"
# 可选  修改端口号
JENKINS_PORT = "8888"(默认8080)
1.4 添加文件权限
[root@VM-12-10-centos local]# chown -R root:root /var/lib/jenkins
[root@VM-12-10-centos local]# chown -R root:root /var/cache/jenkins
[root@VM-12-10-centos local]# chown -R root:root /var/log/jenkins
1.5 修改jdk(安装Jenkins的前提条件是安装jdk)
`找到对应的jdk下目录`
[root@VM-12-10-centos ~]# cd /usr/local/jdk1.8/bin/
[root@VM-12-10-centos bin]# pwd
/usr/local/jdk1.8/bin
`修改jdk`
[root@VM-12-10-centos bin]# vim /etc/rc.d/init.d/jenkins
修改内容
`在candidates=里加jdk`
/usr/local/jdk1.8/bin/java  #这里的java别忘记
1.6 修改以后必须使用此命令才能生效
[root@VM-12-10-centos bin]# systemctl daemon-reload
1.7 启动Jenkins
`记得打开防火墙及服务器安全组 客户端为8888`
[root@VM-12-10-centos bin]# cd /etc/init.d
`启动`
[root@VM-12-10-centos init.d]# ./jenkins start
`停止`
[root@VM-12-10-centos init.d]# ./jenkins stop
`状态`
[root@VM-12-10-centos init.d]# ./jenkins status
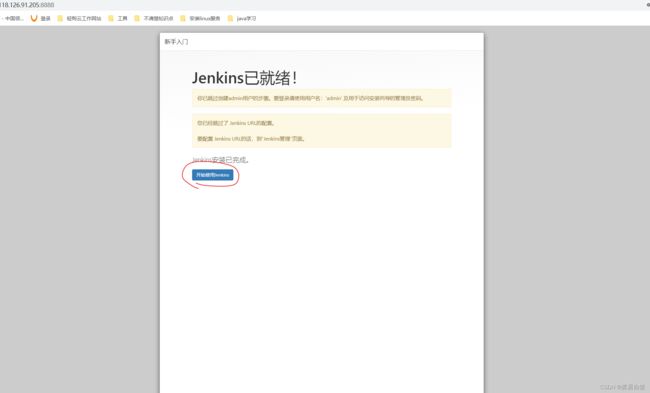
1.8 进入Jenkins网站
1.9 查询密码
`在服务器上输入以下命令`
cat /var/lib/jenkins/secrets/initialAdminPassword

在网站上输入密码 登录成功 登录成功后 别瞎点 按我下面的配置来
2.配置Jenkins
2.1 登录成功进入网站
2.1 进行配置
进入Jenkins后进行以下配置,否则下载插件很慢!
进入 Manage Jenkins -》 Manage Plugin -> Advanced 最下面有 Update Site 设置为:http://mirrors.tuna.tsinghua.edu.cn/jenkins/updates/update-center.json
修改服务器配置,进入 jenkins安装目录 ,默认是var/lib/jenkins/
找到 updates/default.json ,将其中的 updates.jenkins.io/download 替换为 mirrors.tuna.tsinghua.edu.cn/jenkins ,然后把www.google.com 修改为 www.baidu.com
这里推荐使用linux命令 因为var/lib/jenkins/文件太大 电脑很容易卡
#linux可直接运行下面命令
cd /var/lib/jenkins/updates
sed -i 's/https:\/\/updates.jenkins.io\/download/http:\/\/mirrors.tuna.tsinghua.edu.cn\/jenkins/g' default.json
sed -i 's/www.google.com/www.baidu.com/g' default.json
2.2 重新加载配置并重启
[root@VM-12-10-centos init.d]# systemctl daemon-reload
#重启Jenkins服务 这里最好的办法是杀死Jenkins进程 重新启动
[root@VM-12-10-centos init.d]# ps -ef | grep jenkins
root     17221     1 25 19:49 pts/0    00:00:30 /usr/local/jdk1.8/bin/java -Djava.awt.headless=true -DJENKINS_HOME=/var/lib/jenkins -jar /usr/share/java/jenkins.war --logfile=/var/log/jenkins/jenkins.log --webroot=/var/cache/jenkins/war --httpPort=8888 --debug=5 --handlerCountMax=100 --handlerCountMaxIdle=20
root     20806  8279  0 19:51 pts/0    00:00:00 grep --color=auto jenkins
[root@VM-12-10-centos init.d]# kill -9 17221
[root@VM-12-10-centos init.d]# ./jenkins start
3.安装Jdk,Git,Maven,Node.js
3.1 安装Jdk
找到自己jdk的安装目录
[root@VM-12-10-centos ~]# cd /usr/local/jdk1.8/bin/
[root@VM-12-10-centos bin]# pwd
/usr/local/jdk1.8/bin
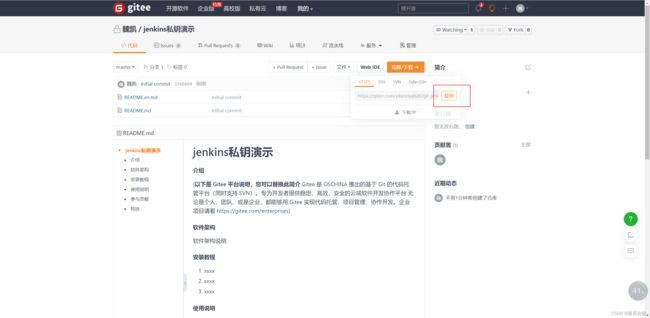
3.2 安装Git(公钥)
`在服务器上输入以下代码 安装Git`
[root@VM-12-10-centos /]# yum install git -y
`查看版本`
[root@VM-12-10-centos /]# git --version
现在我们服务器已经安装Git了 在Jenkins里安装Git插件

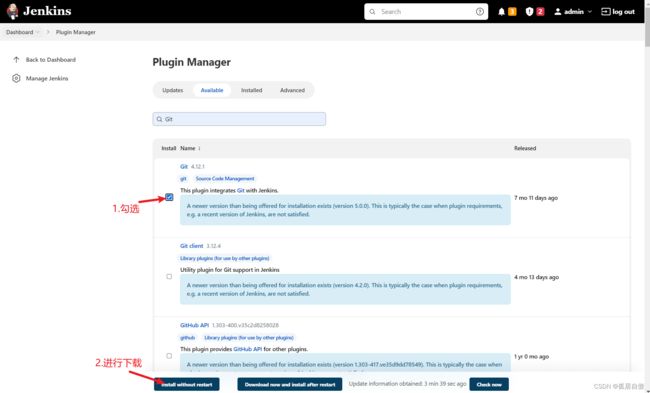


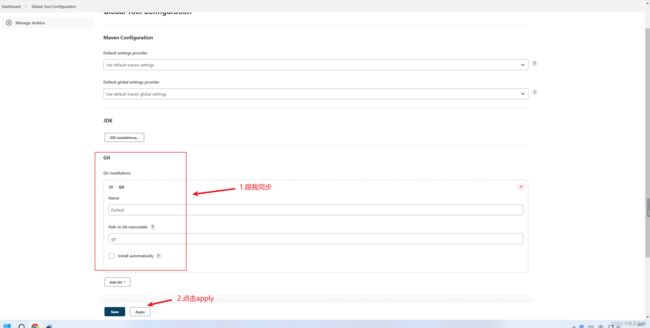
演示
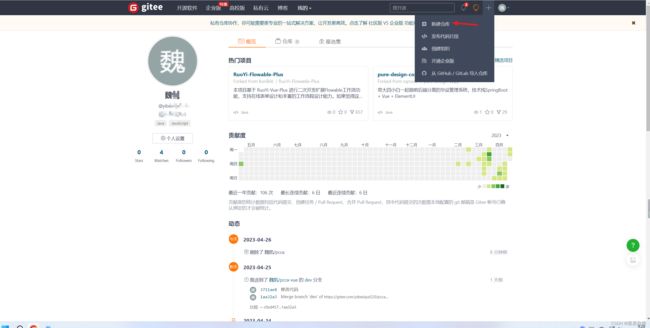


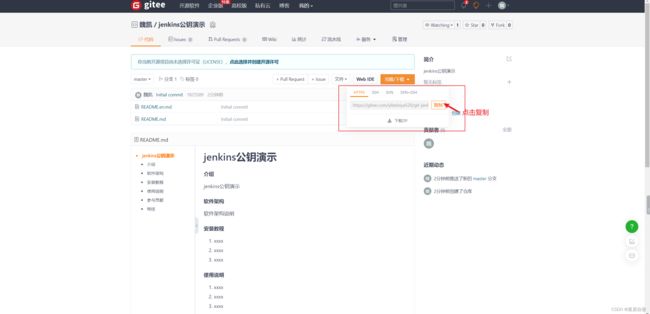
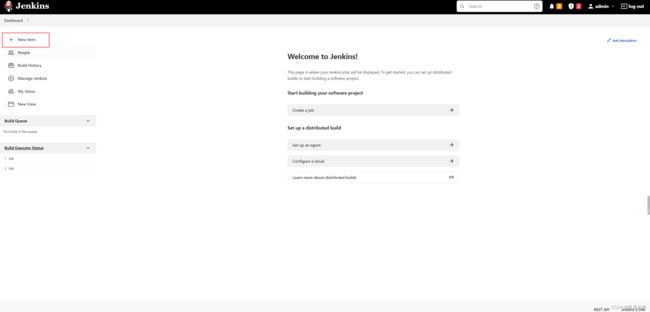
![]()

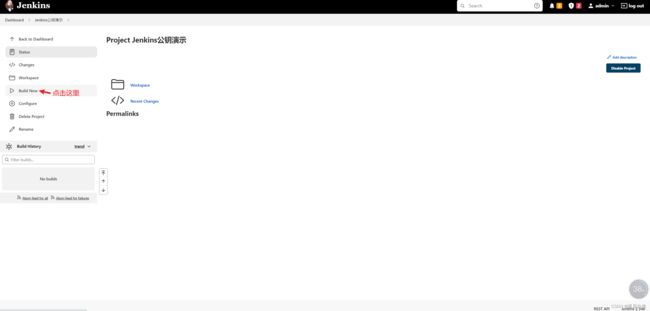


进入Jenkins的工作空间查看文件是否拉取下来,所有拉取的文件都会存放在Jenkins工作空间中
[root@VM-12-10-centos ~]# cd /var/lib/jenkins/workspace/
[root@VM-12-10-centos workspace]# ls
Jenkins公钥演示
我们修改Git是文档内容 然后在Jenkins拉取 看看是否更新


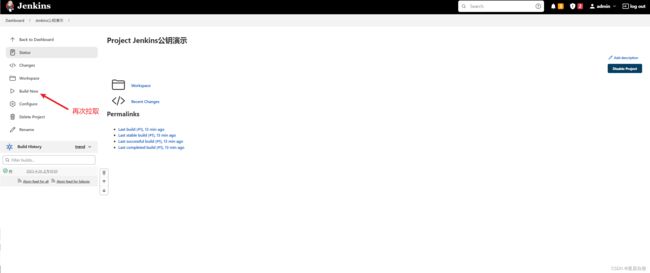
进入服务器查看结果
[root@VM-12-10-centos /]# cd /var/lib/jenkins/workspace/
[root@VM-12-10-centos workspace]# cd Jenkins公钥演示/
[root@VM-12-10-centos Jenkins公钥演示]# cat README.en.md
# jenkins公钥演示
#### Description
业精于勤荒于嬉,行成于思毁于随。
jenkins公钥演示
3.3 安装Git(私钥)
`在服务器上输入以下代码 安装Git`
[root@VM-12-10-centos /]# yum install git -y
`查看版本`
[root@VM-12-10-centos /]# git --version
现在我们服务器已经安装Git了 在Jenkins里安装Git插件


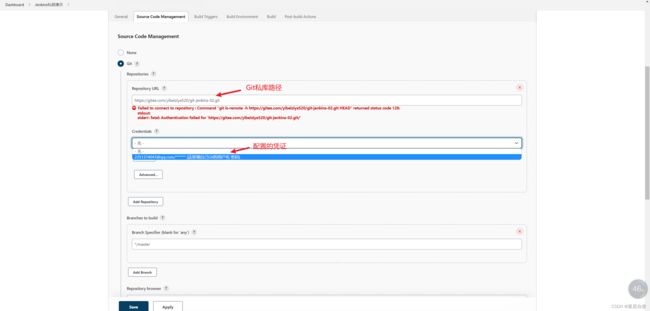
前面安装Git插件 配置Git是一致的 这里需要配置凭证
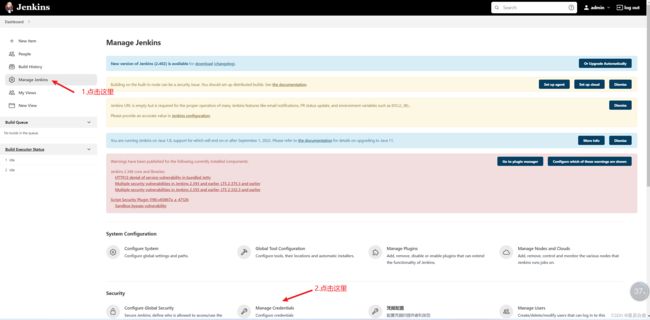


[root@VM-12-10-centos ~]# cd  /var/lib/jenkins/workspace/
[root@VM-12-10-centos workspace]# ls
Jenkins公钥演示  Jenkins私钥演示  Jenkins私钥演示@tmp
3.4 安装Maven
在linux输入如下命令
[root@VM-12-10-centos ~]# cd /usr/local/
[root@VM-12-10-centos local]# mkdir maven
[root@VM-12-10-centos local]# cd maven/
[root@VM-12-10-centos maven]# wget https://mirrors.aliyun.com/apache/maven/maven-3/3.6.3/binaries/apache-maven-3.6.3-bin.tar.gz
[root@VM-12-10-centos maven]# tar -zxvf apache-maven-3.6.3-bin.tar.gz
`修改配置文件`
[root@VM-12-10-centos ~]# vi /etc/profile
修改配置文件内容 在之前内容的unset -f pahmunge下加入以下代码
unset i
unset -f pathmunge
export JAVA_HOME=/usr/local/jdk1.8 #之前配置过jdk
export MAVEN_HOME=/usr/local/maven/apache-maven-3.6.3 #配置maven
export CLASSPATH=$:CLASSPATH:$JAVA_HOME/lib/
export PATH=$PATH:$JAVA_HOME/bin:$MAVEN_HOME/bin #配置maven路径$MAVEN_HOME/bin 加在jdk路径后面即可
使配置生效和查看版本
[root@VM-12-10-centos ~]# source /etc/profile
[root@VM-12-10-centos ~]# mvn -version
在/usr/local/maven/apache-maven-3.6.3/目录下新建一个repository文件夹,用来作为maven的仓库
[root@VM-12-10-centos ~]# cd /usr/local/maven/apache-maven-3.6.3
[root@VM-12-10-centos apache-maven-3.6.3]# mkdir repository
[root@VM-12-10-centos apache-maven-3.6.3]# ls
bin  boot  conf  lib  LICENSE  NOTICE  README.txt  repository
[root@VM-12-10-centos apache-maven-3.6.3]# cd repository/
[root@VM-12-10-centos repository]# pwd
/usr/local/maven/apache-maven-3.6.3/repository
在/usr/local/maven/apache-maven-3.6.3/conf目录下修改settings.xml文件 在55行加入以下代码 指定仓库位置
 <!-- localRepository
   | The path to the local repository maven will use to store artifacts.
   |
   | Default: ${user.home}/.m2/repository
  <localRepository>/path/to/local/repo</localRepository>
  -->

   <!--本地仓库-->
 	<localRepository>/usr/local/maven/apache-maven-3.6.3/repository</localRepository>

  <!-- interactiveMode
   | This will determine whether maven prompts you when it needs input. If set to false,
   | maven will use a sensible default value, perhaps based on some other setting, for
   | the parameter in question.
   |
   | Default: true
  <interactiveMode>true</interactiveMode>
  -->
在/usr/local/maven/apache-maven-3.6.3/conf目录下修改settings.xml文件 在161行加入以下代码 更换阿里云镜像
 <mirrors>
    <!-- mirror
     | Specifies a repository mirror site to use instead of a given repository. The repository that
     | this mirror serves has an ID that matches the mirrorOf element of this mirror. IDs are used
     | for inheritance and direct lookup purposes, and must be unique across the set of mirrors.
     |
    <mirror>
      <id>mirrorId</id>
      <mirrorOf>repositoryId</mirrorOf>
      <name>Human Readable Name for this Mirror.</name>
      <url>http://my.repository.com/repo/path</url>
    </mirror>
     -->
	  <!--阿里云镜像-->
	   <mirror>
	     <id>aliyun-maven</id>
	     <mirrorOf>central</mirrorOf>
	     <name>aliyun maven mirror</name>
	     <url>http://maven.aliyun.com/nexus/content/groups/public/</url>
	   </mirror>
  </mirrors>
Jenkins配置Maven


创建Maven项目 并上传到Git仓库中 通过Jenkins拉取到服务器 在工作目录下运行jar启动命令
先创建一个Springboot项目

上传Springboot项目到Git 这里如何上传本地代码到Git上 大家可以自行百度
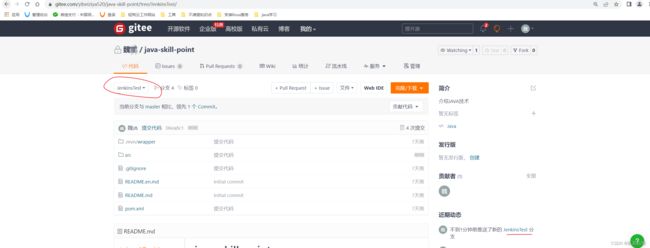
复制Git路径 到Jenkins网站进行拉取代码
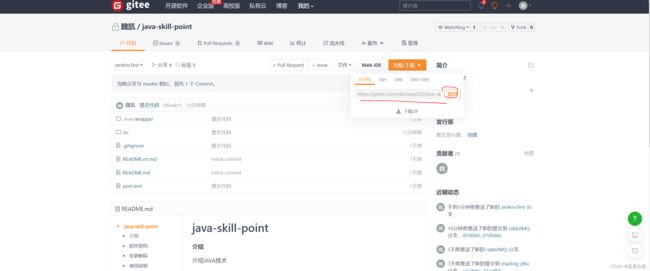
安装拉取Maven项目的插件Maven Integration 同时安装Jenkins中文插件Localization: Chinese (Simplified)

安装完插件后重启Jenkins http://118.126.91.205:8888/restart 网址后面加/restart即可
重启完成后 创建Maven项目 拉取代码


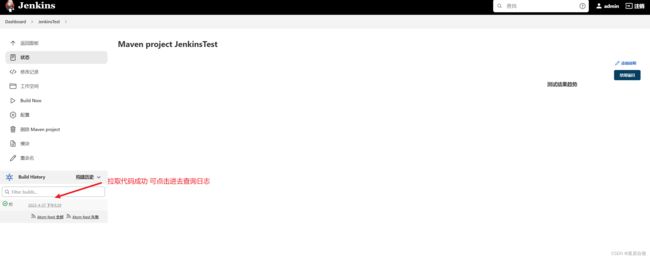
去Jenkins工作目录查询该项目 并启动该jar包 在网址上请求118.126.91.205:8080/test/v1
[root@VM-12-12-centos workspace]# cd ~
[root@VM-12-12-centos ~]# cd  /var/lib/jenkins/workspace/
[root@VM-12-12-centos workspace]# ls
JenkinsTest
[root@VM-12-12-centos workspace]# cd JenkinsTest
[root@VM-12-12-centos JenkinsTest]# ls
pom.xml  README.en.md  README.md  src  target
[root@VM-12-12-centos JenkinsTest]# cd target/
[root@VM-12-12-centos target]# ls
classes            generated-test-sources               java-skill-point-0.0.1-SNAPSHOT.jar.original  maven-status      test-classes
generated-sources  java-skill-point-0.0.1-SNAPSHOT.jar  maven-archiver                                surefire-reports
后台启动java-skill-point-0.0.1-SNAPSHOT.jar
[root@VM-12-12-centos target]# nohup java -jar java-skill-point-0.0.1-SNAPSHOT.jar > log.out &
请求http://118.126.91.205:8080/test/v1

Maven实现自动化部署


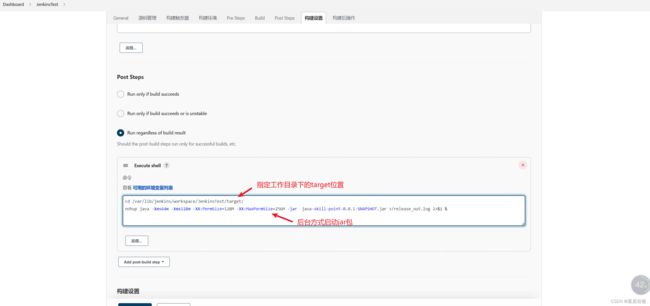

3.4 Jenkins安装Node.js
链接: https://pan.baidu.com/s/1uQYCDKiQ8-rhB1yS-mK8cg 提取码: iweh
在linux上输入以下命令
`上传node-v15.14.0-linux-x64.tar.gz到/usr/local目录下`
[root@VM-12-10-centos local]# tar -xvf node-v15.14.0-linux-x64.tar.gz
[root@VM-12-10-centos local]# vi /etc/profile
修改内容
unset i
unset -f pathmunge
export JAVA_HOME=/usr/local/jdk1.8
export MAVEN_HOME=/usr/local/maven/apache-maven-3.6.3
export NODE_HOME=/usr/local/node-v15.14.0-linux-x64
export CLASSPATH=$:CLASSPATH:$JAVA_HOME/lib/
export PATH=$PATH:$JAVA_HOME/bin:$MAVEN_HOME/bin:$NODE_HOME/bin
export NODE_PATH=$NODE_HOME/lib/node_modules
Jenkins安装NodeJs插件

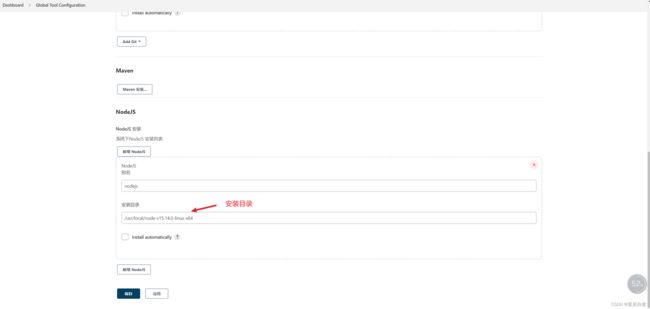
Jenkins拉取vue项目 进行自动化部署

大家如果想根据不同的分支进行自动化部署 下载Git Parameter插件

拉取项目时 配置下图6点 即可在不同的分支进行打包


愿你看此文章 有所收获


