【1.1环境搭配】学生管理系统 html版本
目录
1.【 环境搭建】
1.1 【数据库】
❤️1.2 【后端】
【1.2.1 创建项目】
【1.2.2 基本项】
【1.2.3 启动项目】
❤️1.3 【前端】
目标:
-
前端:vue.js 、axios
-
后端:maven + spring boot + spring mvc / spring / mybatis ,基于RESTFul (lombok、swagger)
1. 环境搭建
1.1 数据库
create database ssm_db3;
use ssm_db3;

-- 班级表
create table tb_class(
  `c_id` varchar(32) primary key comment '班级ID',
  `c_name` varchar(50) comment '班级名称',
  `desc` varchar(200) comment '班级描述'
);
insert into tb_class(`c_id`,`c_name`,`desc`) values('c001','Java12班','。。。。');
insert into tb_class(`c_id`,`c_name`,`desc`) values('c002','Java34班','。。。。');

# 学生表
create table tb_student(
  s_id varchar(32) primary key comment '学生ID',
  sname varchar(50) comment '姓名',
  age int comment '年龄',
  birthday datetime comment '生日',
  gender char(1) comment '性别',
  c_id varchar(32)
);
alter table tb_student add constraint foreign key (c_id) references tb_class (c_id);

insert into tb_student(`s_id`,`sname`,`age`,`birthday`,`gender`,`c_id`) values('s001','赵三',19,'2001-01-17','1','c001');
insert into tb_student(`s_id`,`sname`,`age`,`birthday`,`gender`,`c_id`) values('s002','钱四',19,'2001-05-16','1','c001');
insert into tb_student(`s_id`,`sname`,`age`,`birthday`,`gender`,`c_id`) values('s003','孙五',18,'2002-03-15','1','c001');
insert into tb_student(`s_id`,`sname`,`age`,`birthday`,`gender`,`c_id`) values('s004','李三',19,'2001-04-14','0','c002');
insert into tb_student(`s_id`,`sname`,`age`,`birthday`,`gender`,`c_id`) values('s005','周四',19,'2001-02-13','0','c002');
insert into tb_student(`s_id`,`sname`,`age`,`birthday`,`gender`,`c_id`) values('s006','王五',18,'2002-06-12','1','c002');
1.2 后端
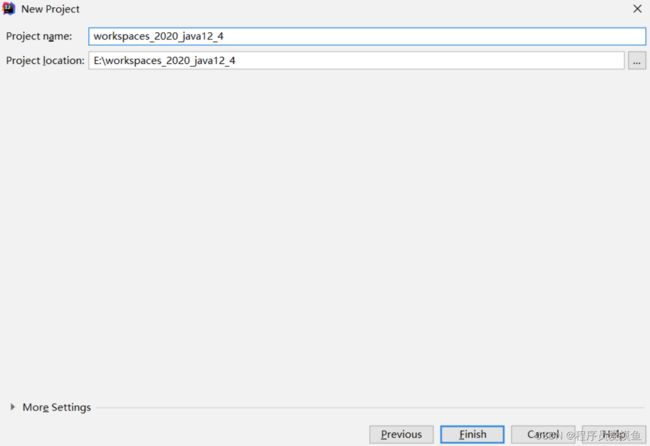
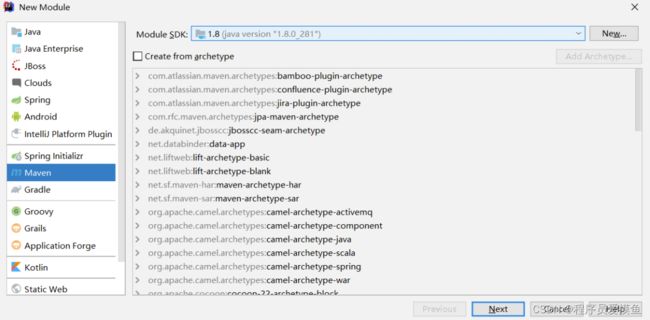
1.2.1 创建项目
- 步骤2:创建模块项目--maven项目
- 步骤3:填写项目详情
- 步骤4:idea2019操作--auto
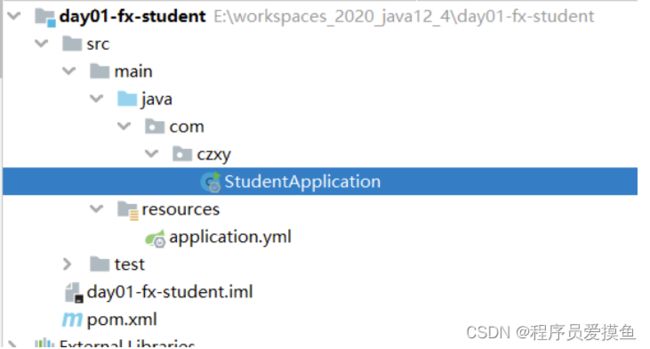
1.2.2 基本项
-
步骤1:添加坐标,修改pom.xml添加需要的坐标。
        org.springframework.boot
        spring-boot-starter-parent
        2.2.5.RELEASE


        UTF-8
        1.8
        Hoxton.SR3
        1.1.0
        2.2.1.RELEASE
        1.3.2
        2.0.2
        1.2.5
        5.1.32
        1.1.10
        3.4.0
        2.7.0
        0.9.0
        2.9.7
        1.9.3


            org.springframework.boot
            spring-boot-starter-web


            org.springframework.boot
            spring-boot-starter-test


            org.mybatis.spring.boot
            mybatis-spring-boot-starter
            ${mybatis.starter.version}


            tk.mybatis
            mapper-spring-boot-starter
            ${mapper.starter.version}


            com.github.pagehelper
            pagehelper-spring-boot-starter
            ${pageHelper.starter.version}


            mysql
            mysql-connector-java
            ${mysql.version}


            com.alibaba
            druid-spring-boot-starter
            ${durid.starter.version}


            io.springfox
            springfox-swagger2
            ${swagger.version}


            io.springfox
            springfox-swagger-ui
            ${swagger.version}


            org.projectlombok
            lombok


            org.apache.commons
            commons-lang3
            3.11
- 步骤2:编写yml,创建application.yml文件,进行基本信息配置(端口号、数据库相关)
#端口号
server:
  port: 8080
#服务名
spring:
  datasource:
    driverClassName: com.mysql.jdbc.Driver
    url: jdbc:mysql://localhost:3306/ssm_db3?useUnicode=true&characterEncoding=utf8
    username: root
    password: '1234'
    druid:    #druid 连接池配置
      initial-size: 1       #初始化连接池大小
      min-idle: 1           #最小连接数
      max-active: 20        #最大连接数
test-on-borrow: true #获取连接时候验证,会影响性能- 步骤3:编写启动类
package com.czxy;

import org.springframework.boot.SpringApplication;
import org.springframework.boot.autoconfigure.SpringBootApplication;


@SpringBootApplication
public class StudentApplication {
    public static void main(String[] args) {
        SpringApplication.run(StudentApplication.class, args);
    }
}- 步骤4:拷贝配置类(Swagger配置类、响应数据封装BaseResult)
-
配置类
-
package com.czxy.config;

import org.springframework.context.annotation.Bean;
import org.springframework.context.annotation.Configuration;
import springfox.documentation.builders.ApiInfoBuilder;
import springfox.documentation.builders.PathSelectors;
import springfox.documentation.builders.RequestHandlerSelectors;
import springfox.documentation.service.*;
import springfox.documentation.spi.DocumentationType;
import springfox.documentation.spi.service.contexts.SecurityContext;
import springfox.documentation.spring.web.plugins.Docket;
import springfox.documentation.swagger2.annotations.EnableSwagger2;

import java.util.ArrayList;
import java.util.List;

/**
 * Swagger2 配置类,
 * 访问路径:swagger-ui.html
 * 自动注册:
 *     位置:resources/META-INF/spring.factories
 *     内容:
 *        org.springframework.boot.autoconfigure.EnableAutoConfiguration=\
 *          com.czxy.config.Swagger2Configuration
 */
@Configuration
@EnableSwagger2
public class Swagger2ConfigurationV3 {

    @Bean
    public Docket createRestApi() {
        // 1 确定文档Swagger版本
        Docket docket = new Docket(DocumentationType.SWAGGER_2);
        // 2 设置 api基本信息
        docket.apiInfo(apiInfo());
        // 3 设置自定义加载路径
        docket = docket.select()
                .apis(RequestHandlerSelectors.basePackage("com.czxy"))
                .paths(PathSelectors.any())
                .build();
        //4 设置权限
        docket.securitySchemes(securitySchemes());
        docket.securityContexts(securityContexts());

        return docket;
    }

    private ApiInfo apiInfo() {
        return new ApiInfoBuilder()
                .title("API")
                .description("基于swagger接口文档")
                .contact(new Contact("lisir","http://www.javalisir.com","lisir.icon"))
                .version("1.0")
                .build();
    }

    private List securitySchemes() {
        List list = new ArrayList<>();
        // name 为参数名  keyname是页面传值显示的 keyname, name在swagger鉴权中使用
        list.add(new ApiKey("Authorization", "Authorization", "header"));
        return list;
    }

    private List securityContexts() {
        List list = new ArrayList<>();
        list.add(SecurityContext.builder()
                .securityReferences(defaultAuth())
                .forPaths(PathSelectors.regex("^(?!auth).*$"))
                .build());
        return list;
    }

    private List defaultAuth() {
        AuthorizationScope authorizationScope = new AuthorizationScope("global", "accessEverything");
        AuthorizationScope[] authorizationScopes = new AuthorizationScope[1];
        authorizationScopes[0] = authorizationScope;
        List list = new ArrayList();
        list.add(new SecurityReference("Authorization", authorizationScopes));
        return list;
    }

} - 封装类
package com.czxy.vo;


import java.util.HashMap;
import java.util.Map;


public class BaseResult {

    //成功状态码
    public static final int OK = 20000;
    //失败状态码
    public static final int ERROR = 0;

    //返回码
    private Integer code;
    //返回消息
    private String message;

    //存放数据
    private T data;
    //其他数据
    private Map other = new HashMap<>();

    public BaseResult() {

    }

    public BaseResult(Integer code, String message) {
        this.code = code;
        this.message = message;
    }
    public BaseResult(Integer code, String message, T data) {
        this.code = code;
        this.message = message;
        this.data = data;
    }

    /**
     * 快捷成功BaseResult对象
     * @param message
     * @return
     */
    public static BaseResult ok(String message){
        return new BaseResult<>(BaseResult.OK , message);
    }

    public static BaseResult ok(String message, Object data){
        return new BaseResult<>(BaseResult.OK , message, data );
    }

    /**
     * 快捷失败BaseResult对象
     * @param message
     * @return
     */
    public static BaseResult error(String message){
        return new BaseResult(BaseResult.ERROR , message);
    }

    /**
     * 自定义数据区域
     * @param key
     * @param msg
     * @return
     */
    public BaseResult append(String key , Object msg){
        other.put(key , msg);
        return this;
    }

    public Integer getCode() {
        return code;
    }

    public String getMessage() {
        return message;
    }

    public T getData() {
        return data;
    }

    public Map getOther() {
        return other;
    }
}
1.2.3 启动项目
-
配置启动类
- 将spring boot 配置成服务
1.3 前端
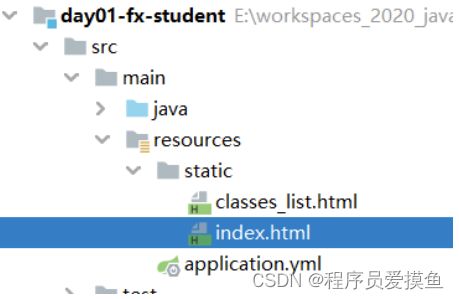
-
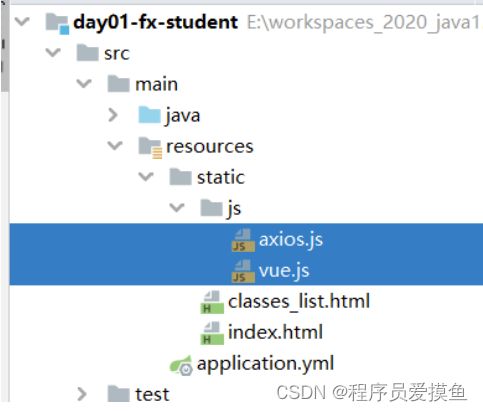
步骤1:创建首页
resources/static/index.html
    首页


    班级管理
-
步骤2:创建班级列表页面
    班级列表


    班级列表
-
步骤3:拷贝vue/axios的类库
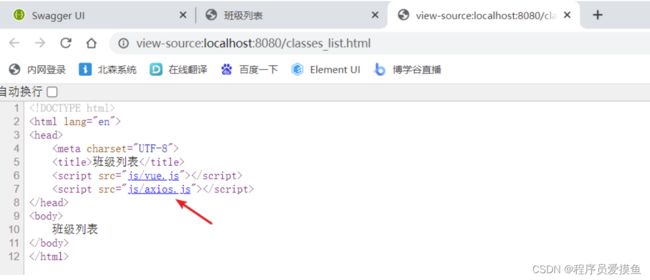
- 步骤4:修改classes_list.html页面,引入2个js文件
    班级列表


    班级列表
- 步骤5:测试-访问html页面,查看源代码,点击访问js文件
希望大家多多支持一起进步呀!~❤️
若有帮助,还请【关注➕点赞➕收藏】,不行的话我再努力努力呀!
⚡版权声明:本文由【程序员爱摸鱼】原创、在CSDN首发、需要转载请联系博主。

